


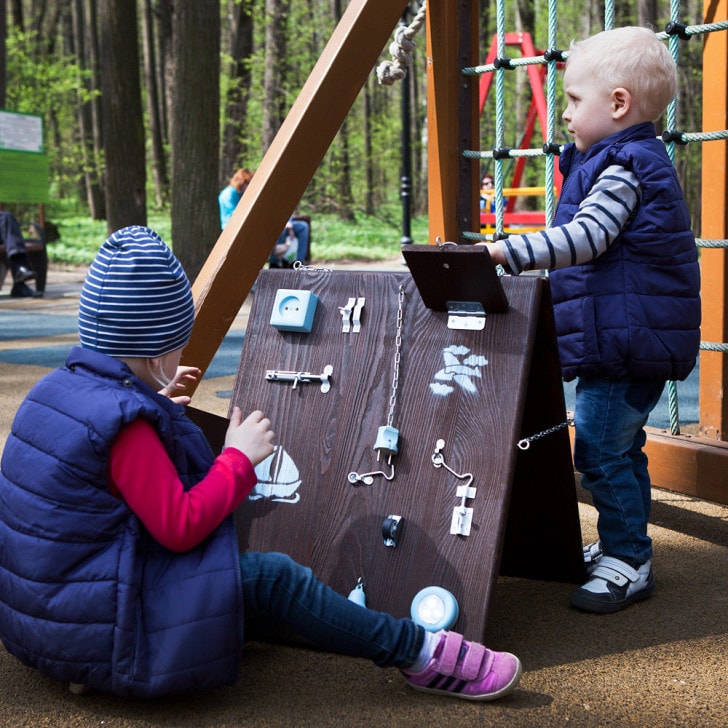
Every year more and more parents pay attention to the early development of the child. For example, an unusual design bizybord - a real find. Unlike many other toys, such a thing helps to develop imagination, motor skills and intelligence in general. Of course, the cost of bizybord can be quite high, so we offer to do it yourself.


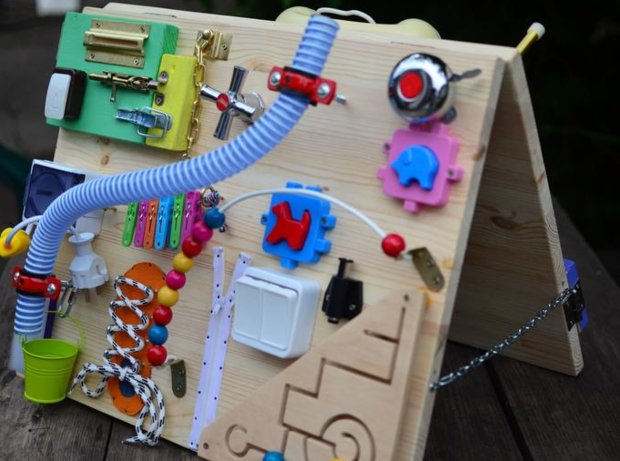
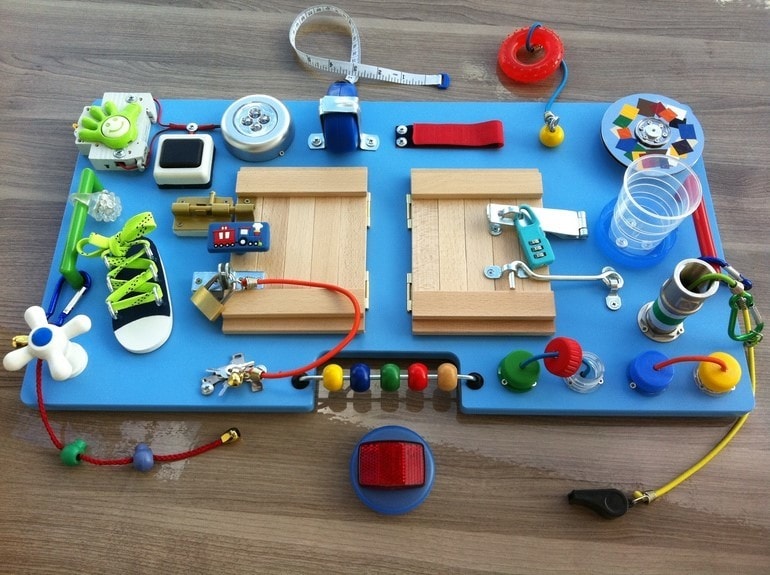
Bizibord with door handles and chains
Almost all kids love to close and open various items, boxes and doors. Therefore, a business board with such elements is an excellent solution.
For this we will prepare the following materials:
- board of any shape;
- pencil;
- door handles, chains, knockers, hinges;
- paint in three shades;
- brush;
- drill;
- masking tape;
- screwdriver.

In order to get a really good thing as a result, we recommend first arranging all the details on the board and marking them with a pencil. The result is a peculiar sketch that will greatly simplify the work. 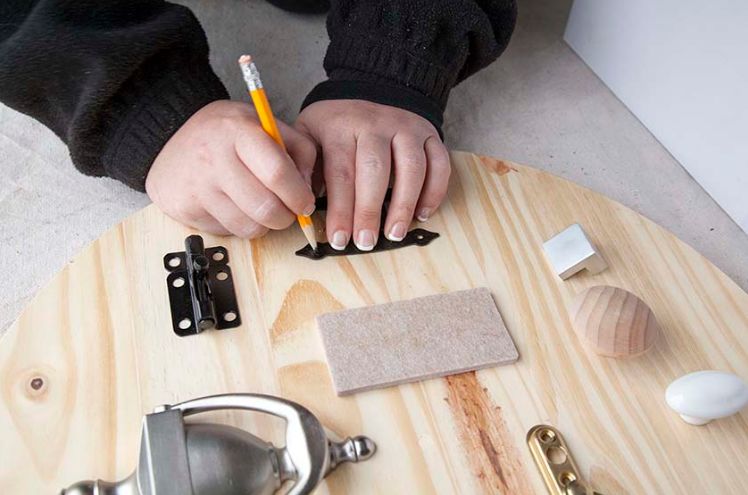
We make holes in the designated places with a drill. 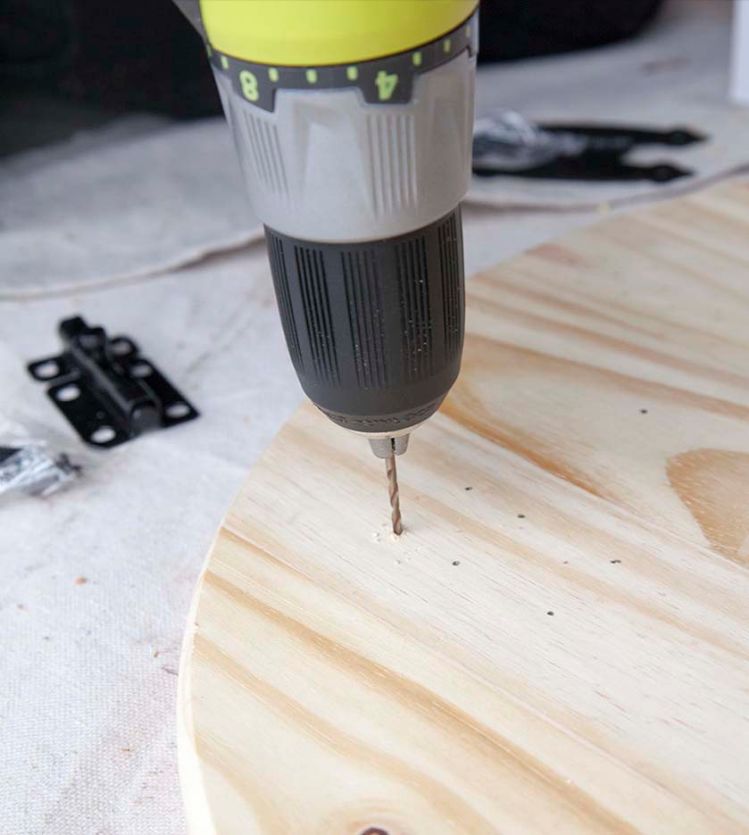
In this example, the bizybord will have a geometric pattern. Therefore, glue the masking tape and paint the first part. In the same way we put orange and white paint. Leave to dry completely. 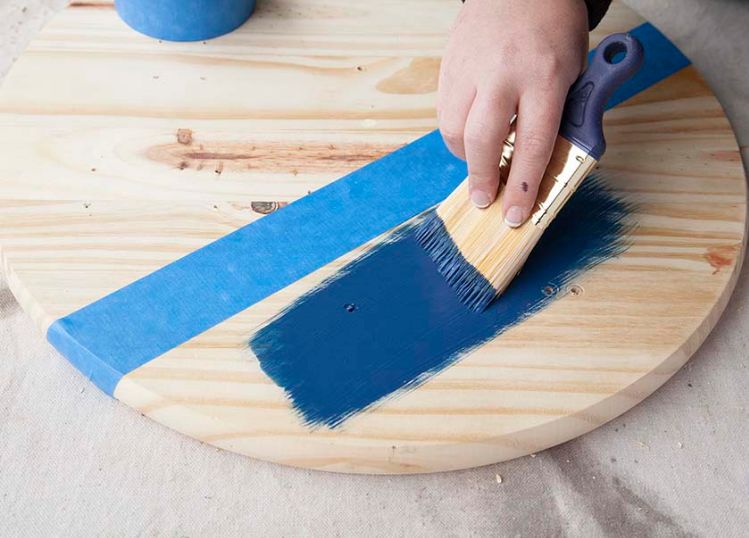
If desired, you can decorate the design with various drawings, pictures or the image of your favorite cartoon characters. Then fasten all the parts with a screwdriver. This should be done as qualitatively as possible. 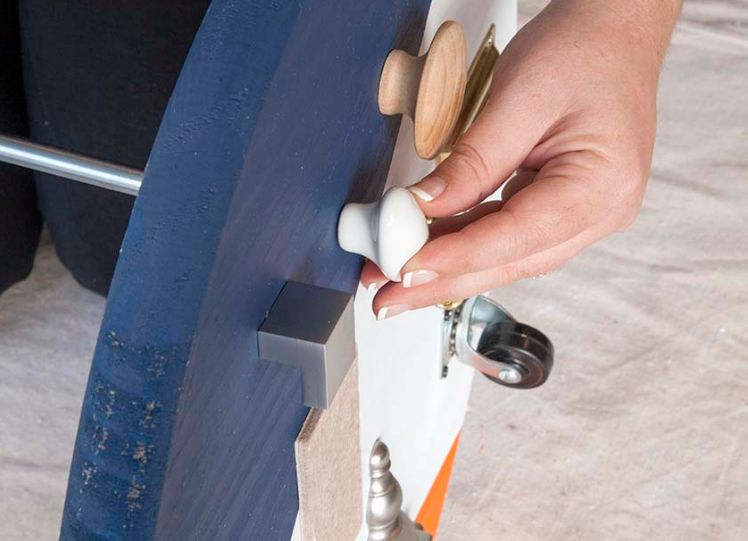
Bright, beautiful board for your baby is ready!
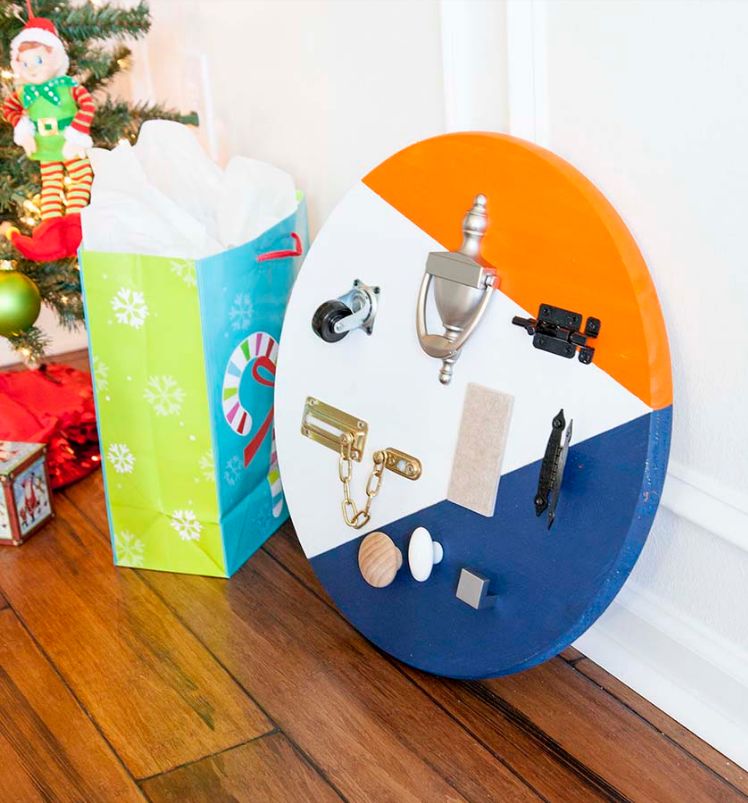
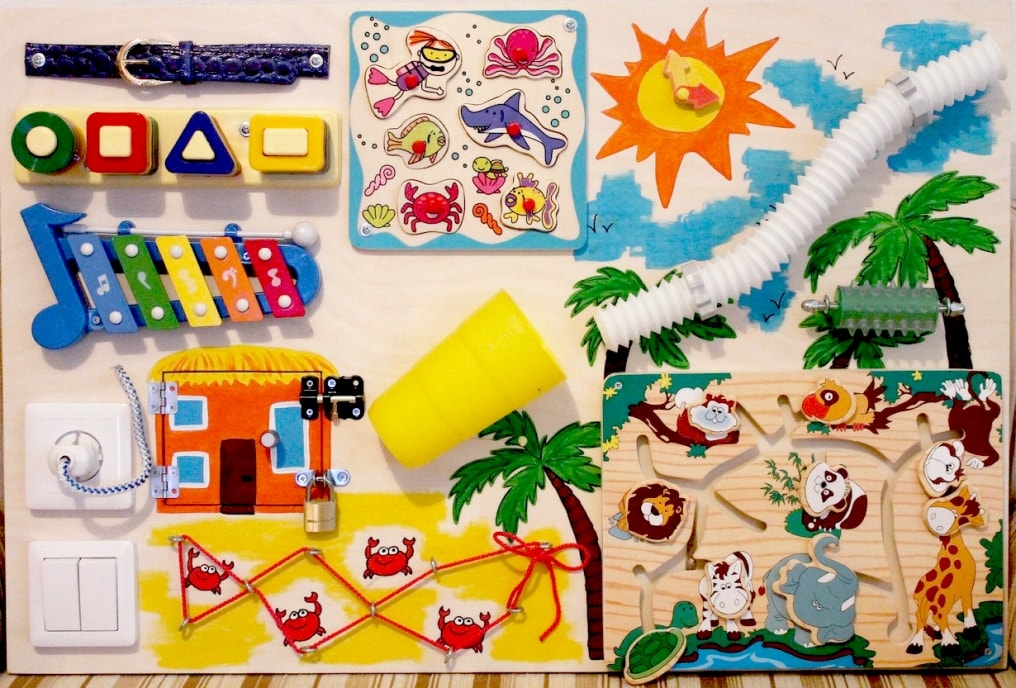
Unusual bizybord
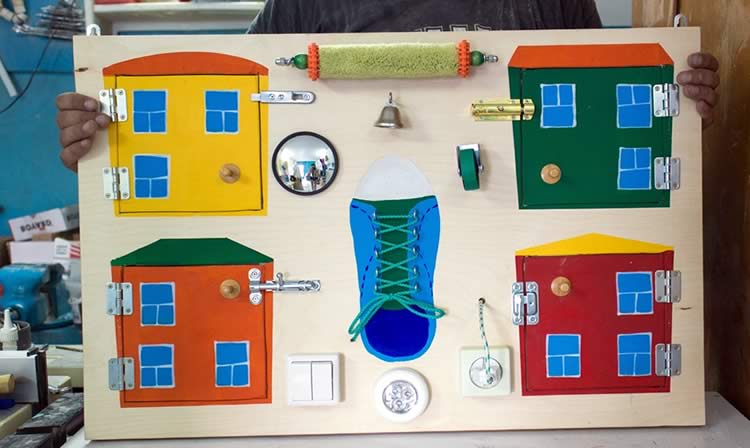
For this board with houses we need:
- board;
- any elements (switches, rollers, wheels, etc.);
- wooden bars;
- sandpaper;
- pencil;
- jigsaw;
- glue;
- acrylic paints;
- brush;
- hooks;
- lace.

Getting to work on the surface of the structure. To do this, strengthen the dock with wooden bars. Using sandpaper, we thoroughly treat the entire surface. This must be done to make the product safe for the child. 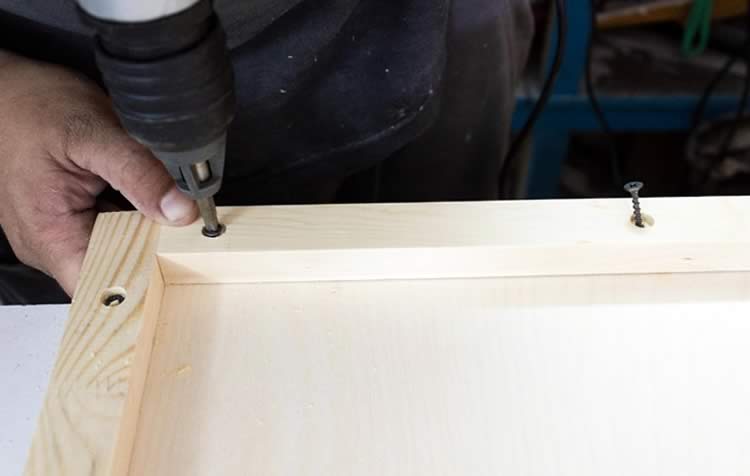
Since it is assumed that the bizybord will have a window in the form of houses, we carefully draw them with a pencil. Cut out the lines using a jigsaw. We process the inside of sandpaper. 
We paint the future doors of the houses and additional elements, as shown in the photo. 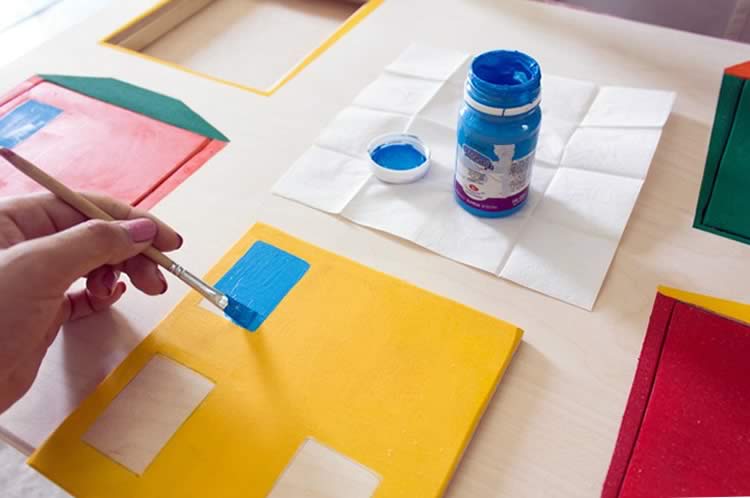
We attach the doors to the hinges and add switches. We draw one shoe with acrylic paints, and also make lacing. 
Attach the roller to the board with hooks. For additional protection fix the glue. 
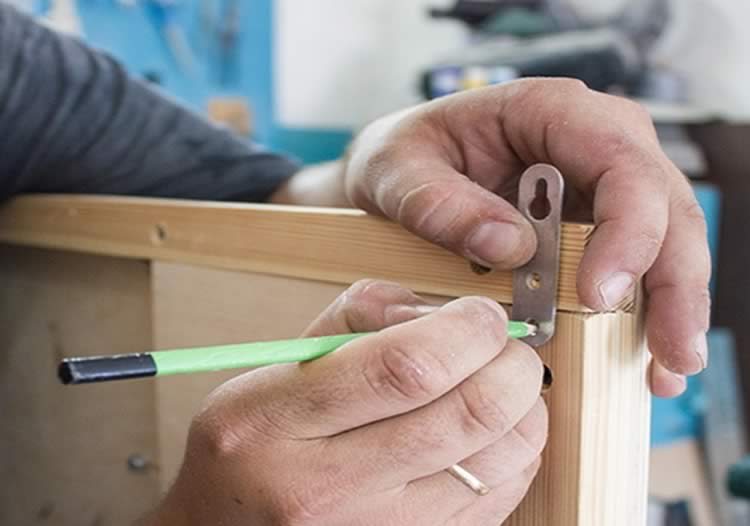
On the inside of the structure we make fixtures so that it can be hung on the wall.
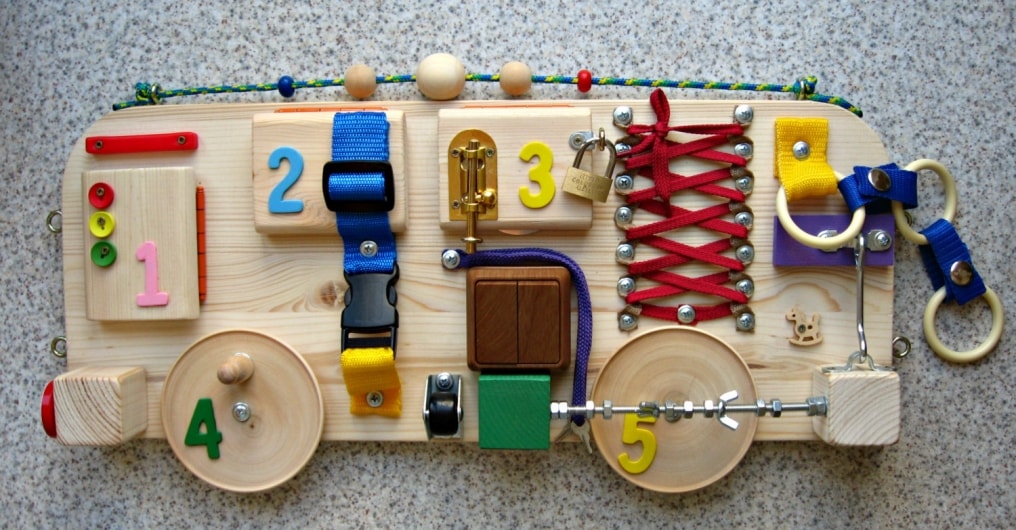
 Bizibord "Three Little Pigs"
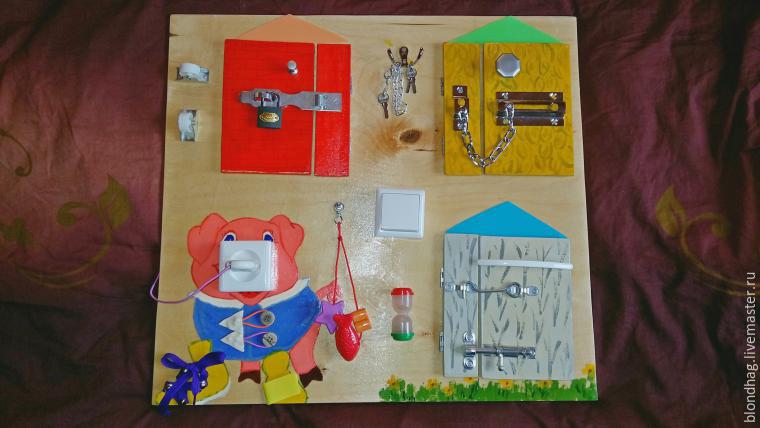
We will need:
- board of any size;
- saw or jigsaw;
- sandpaper;
- pencil;
- ruler;
- stationery knife;
- manual plane;
- hacksaw;
- paints;
- brush;
- clear varnish for wood;
- hinges;
- screwdriver;
- hooks;
- additional items (optional).
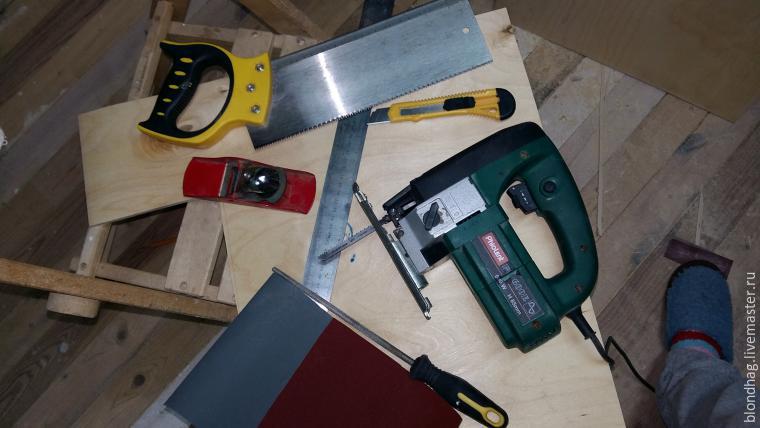
To begin, we recommend you to think over all the details of the board and, if you wish, make a sketch on paper. Then proceed to the surface treatment using a plane, a hacksaw and sandpaper. This should be done very carefully so that the child does not hurt himself.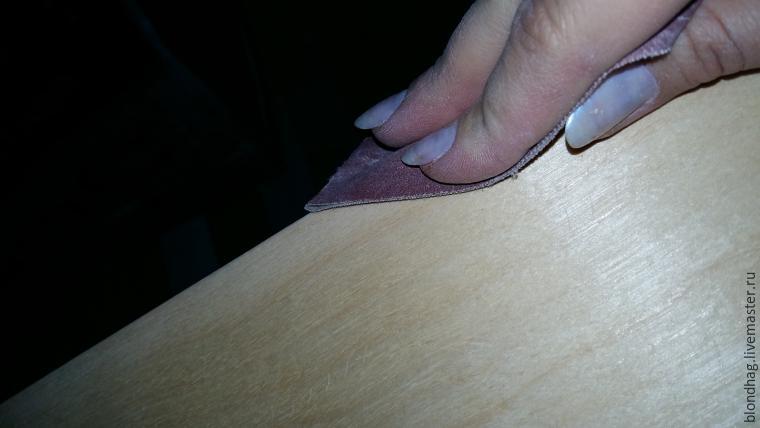
As a result, the surface will be very smooth, without any splinters.

We cut out additional elements for the future business board and also process.
Gently draw one pig and leave until the paints dry.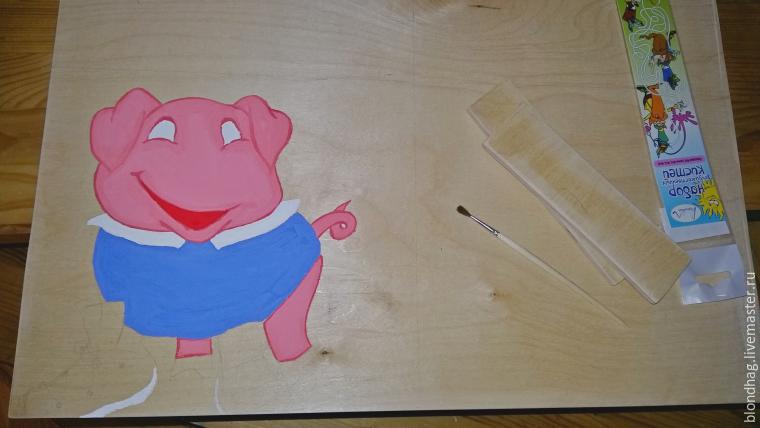
We apply a transparent varnish on the entire surface of the board so that it retains its appearance longer.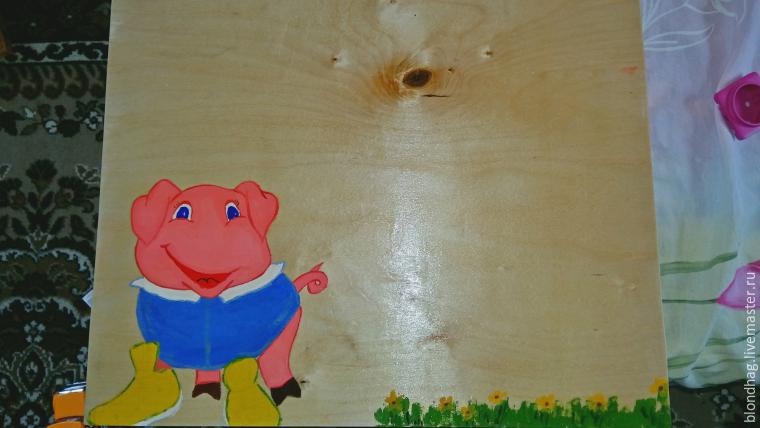
We paint the door of the house and after drying we coat it with varnish. Attach them to the main board with eyelets and a screwdriver.

Attach the remaining doors. If desired, you can add additional items, such as eyelets, socket, etc.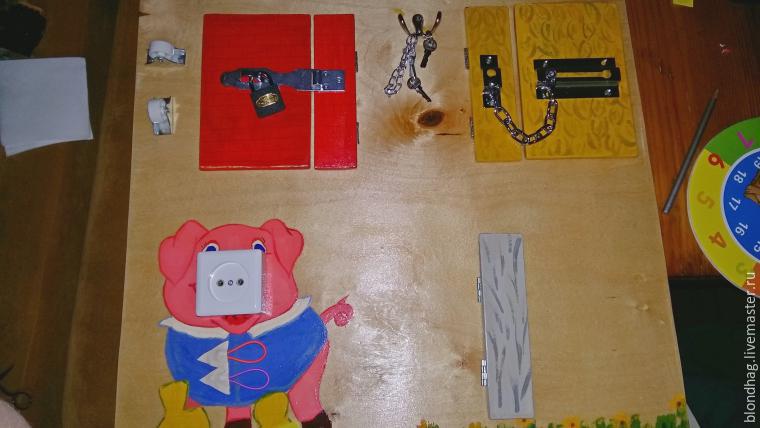
The rest of the pigs can be drawn independently or simply printed out on the printer and pasted.

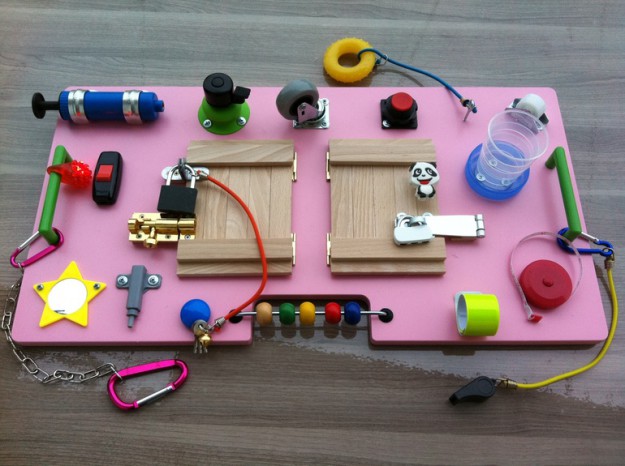
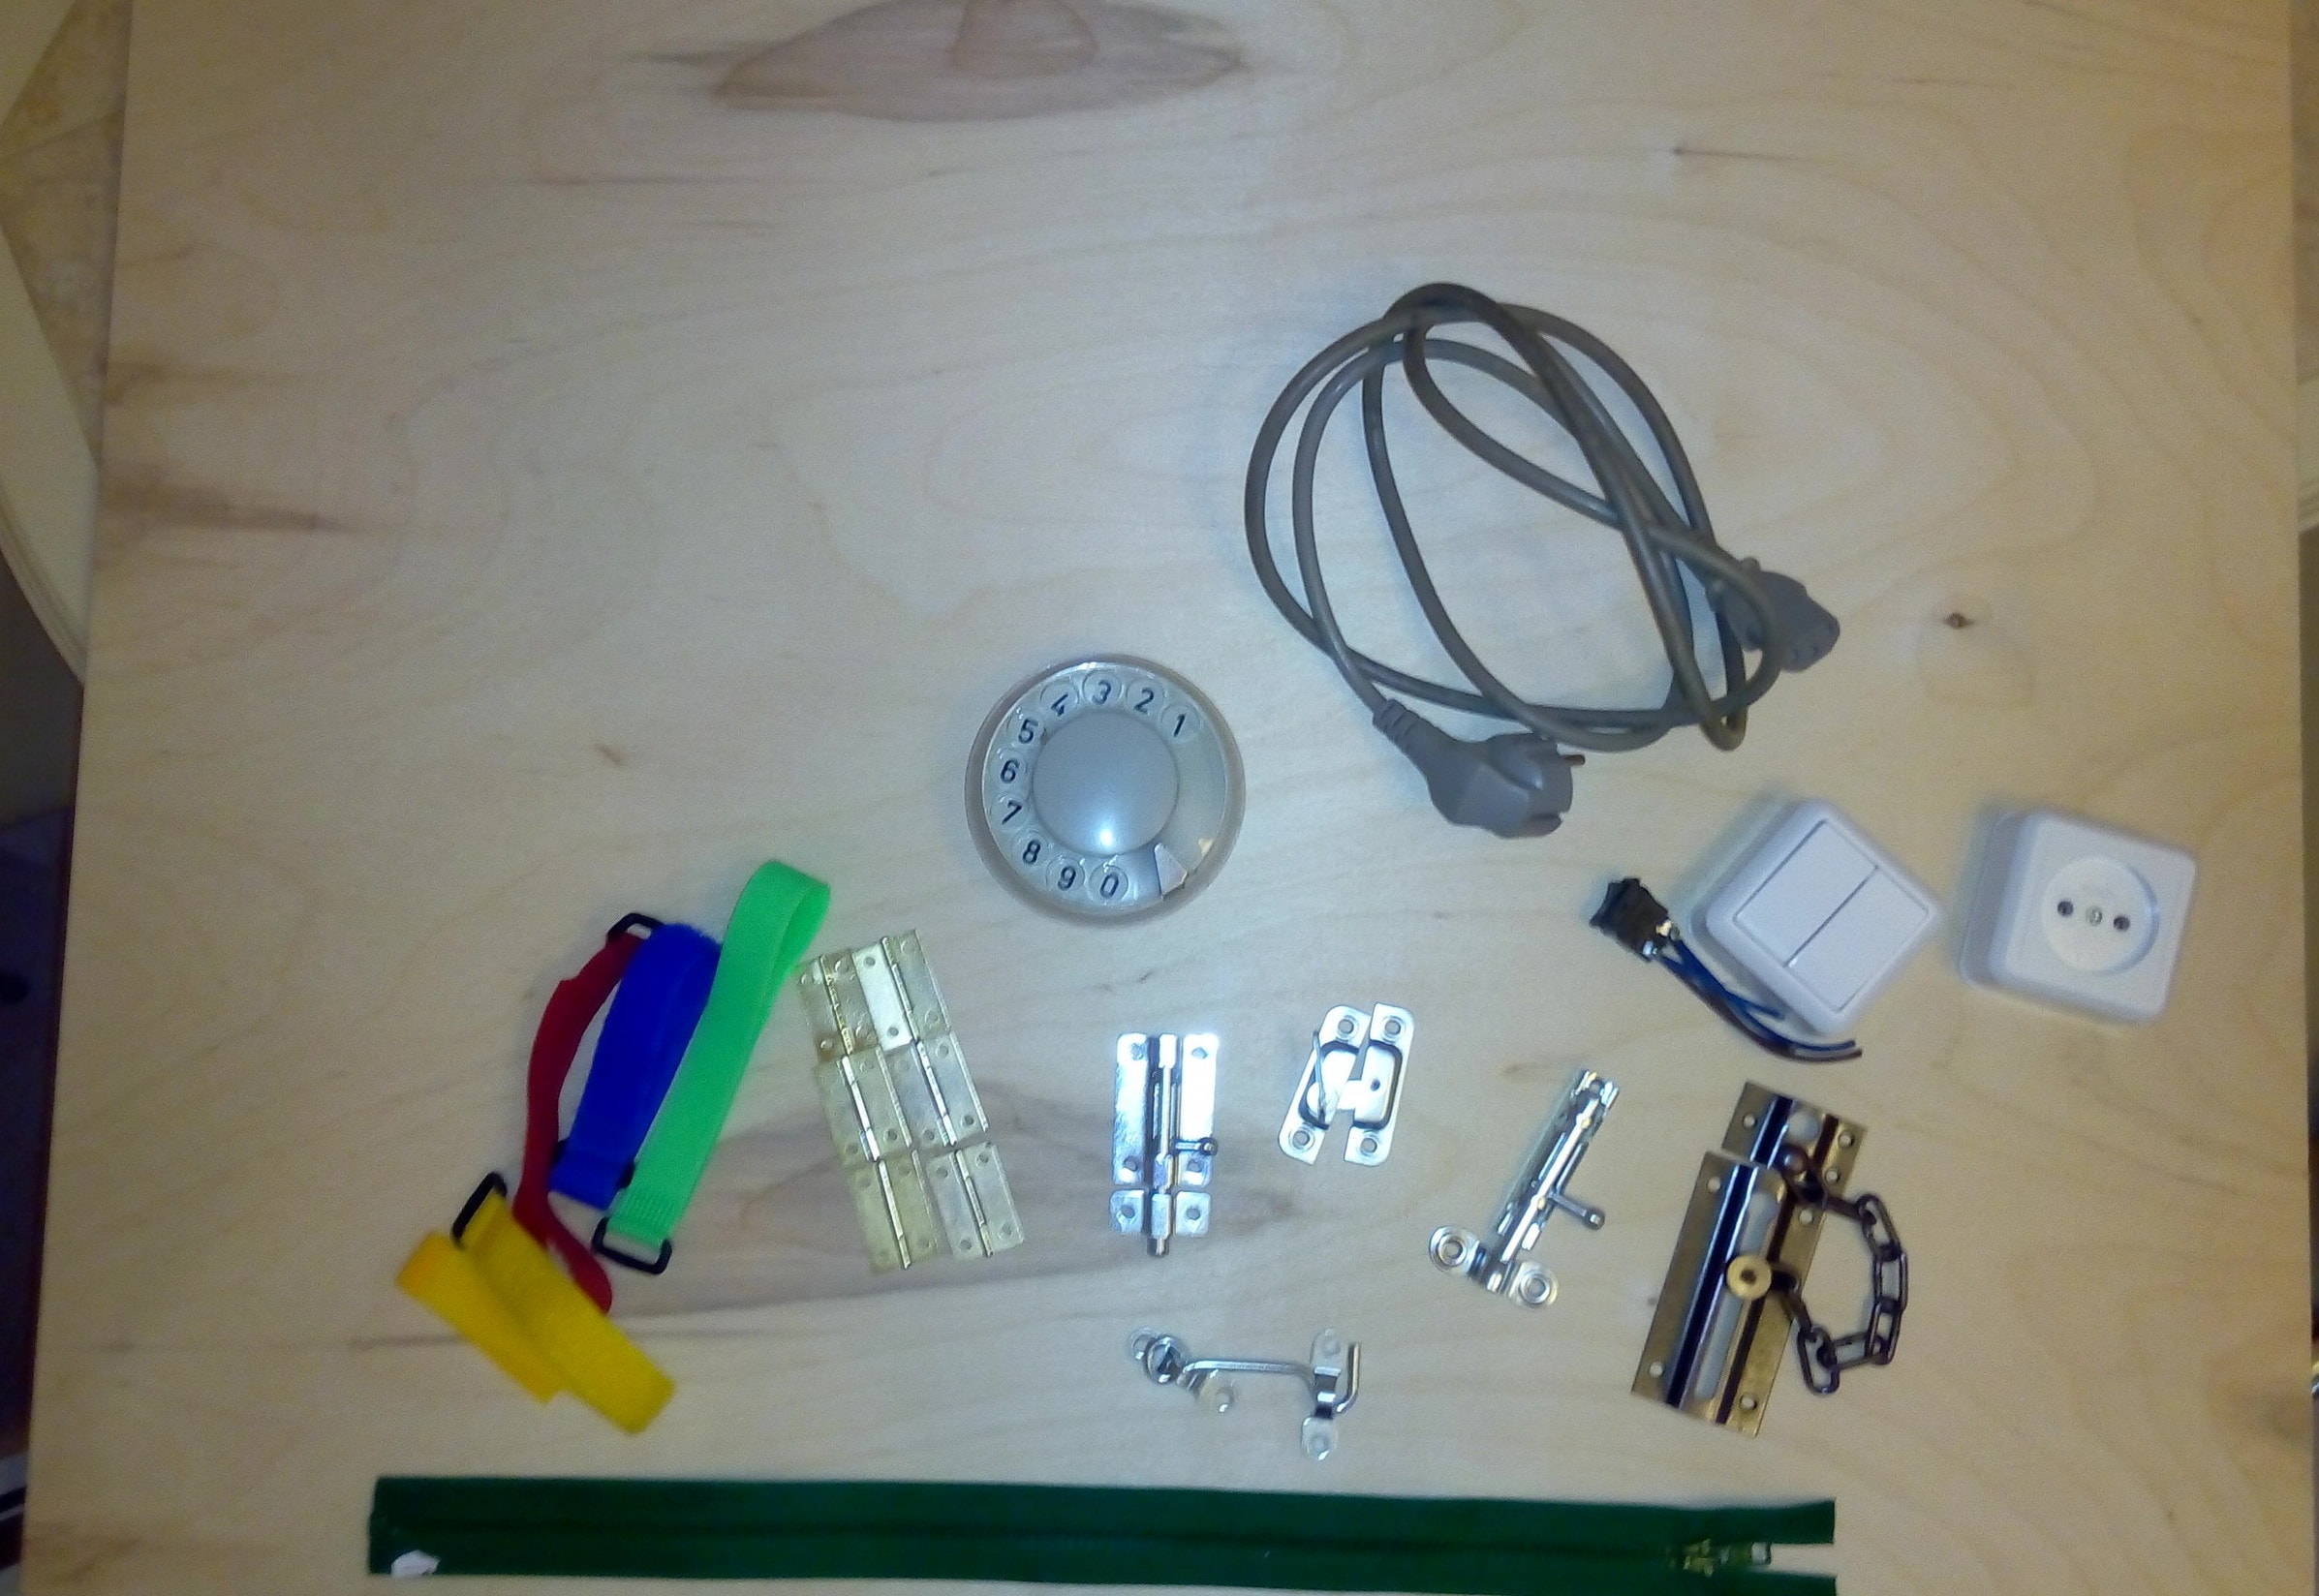
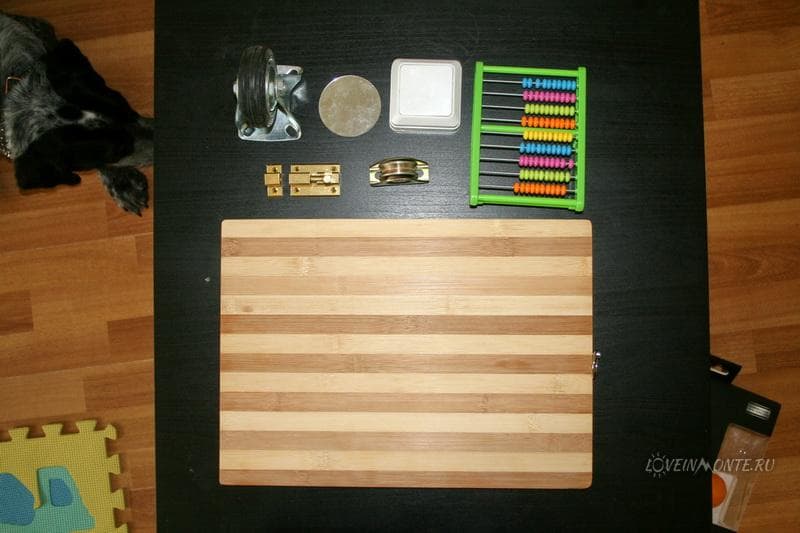
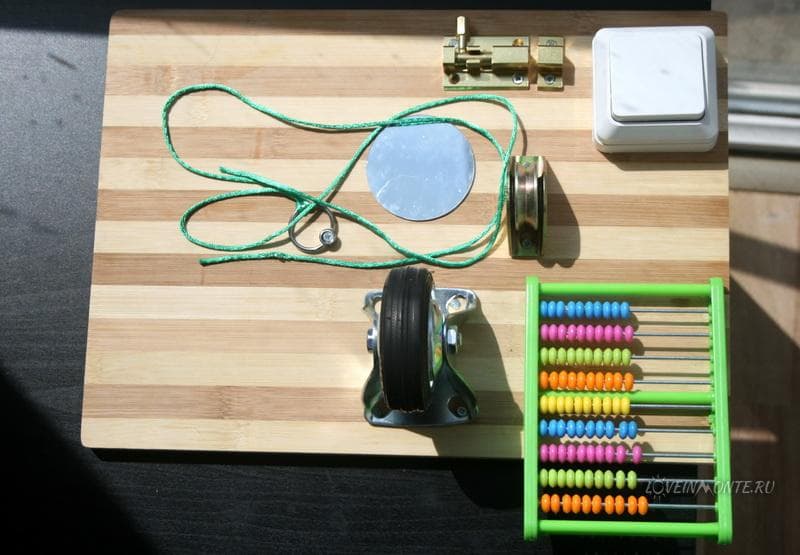
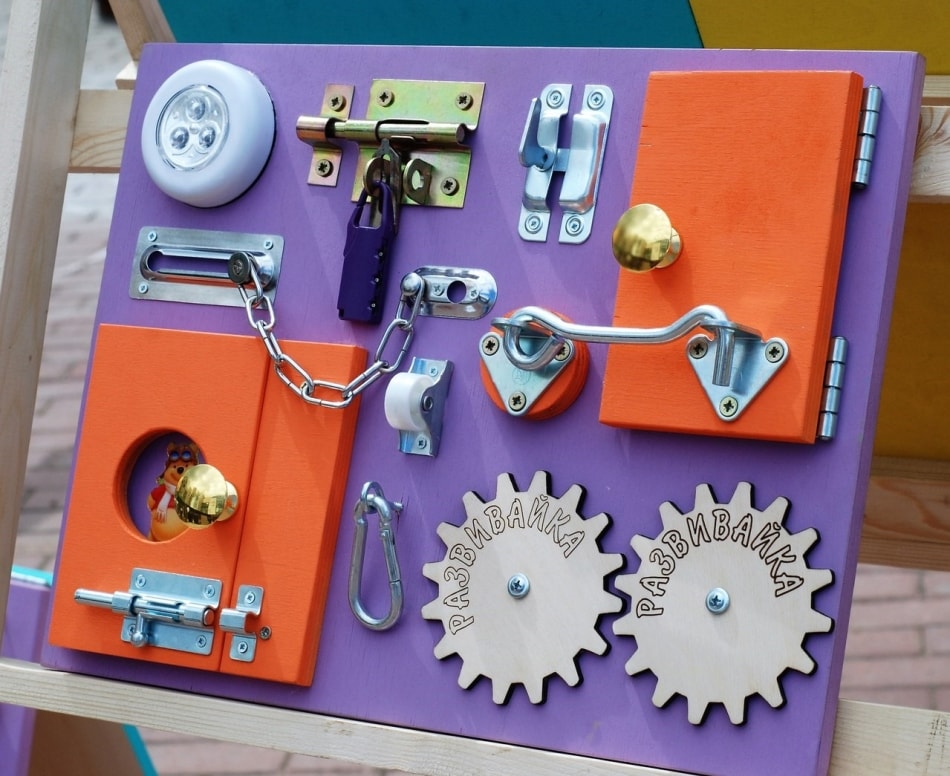
Original bizybord do it yourself
Prepare the following:
- plywood sheet;
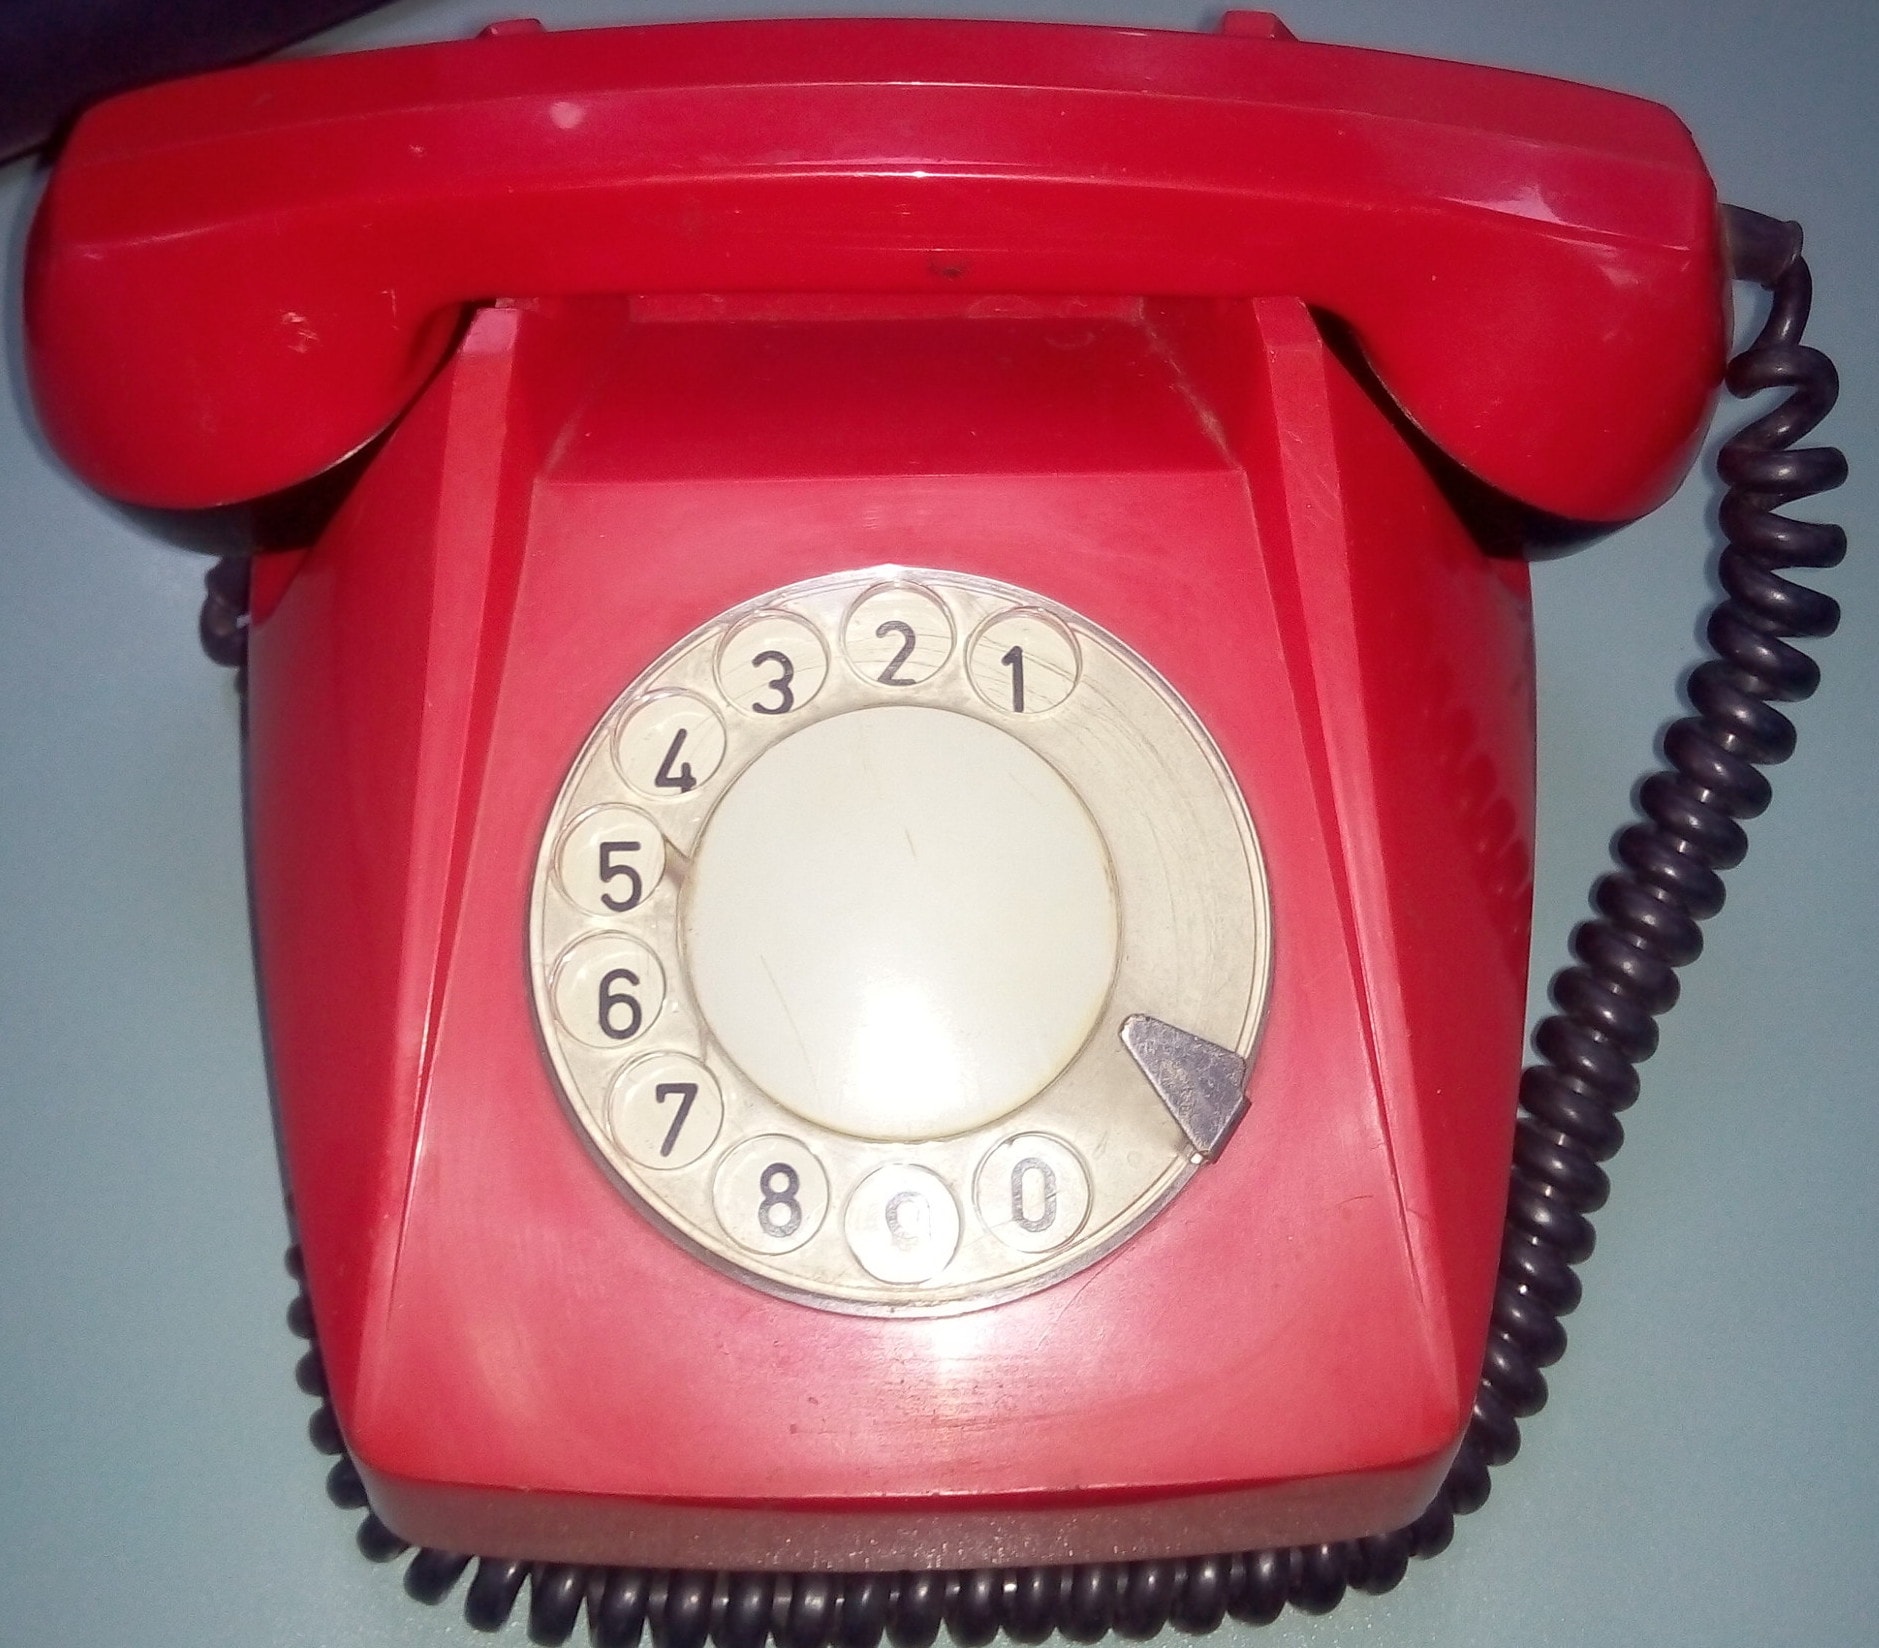
- additional elements (call, old phone; socket, velcro, loop, zipper, etc.)
- jigsaw or saw;
- paints;
- clear nail polish;
- brush;
- screwdriver.

Carefully cut out two doors and blocks for fixing parts. We apply on them a transparent varnish and leave to dry completely.

Cut a hole on the board to make it convenient to move it. We attach the doors and strips of plywood to the structure. 
Attach the main elements and fixtures. 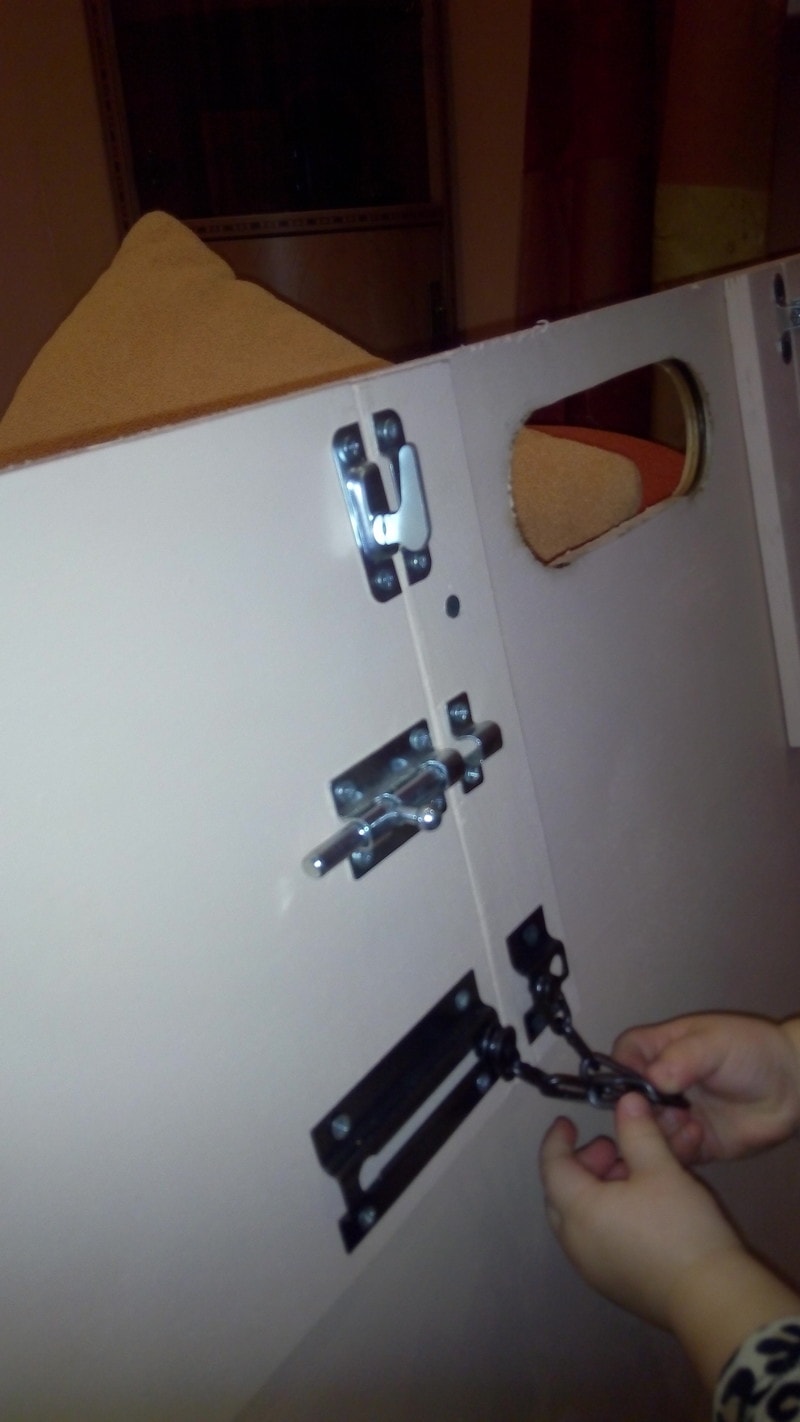
Cut out the elements of a round shape from the remnants of the board and paint them with multi-colored paints. 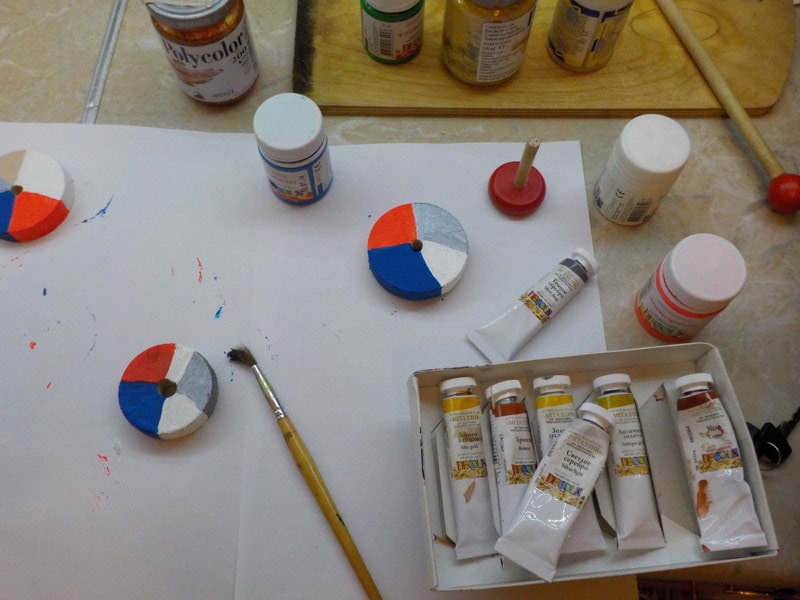 Alternately attach all remaining items.
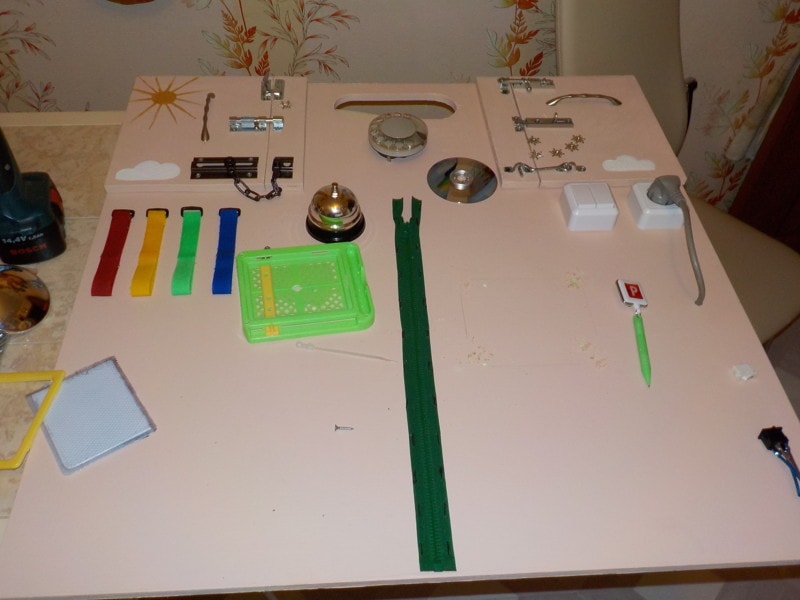
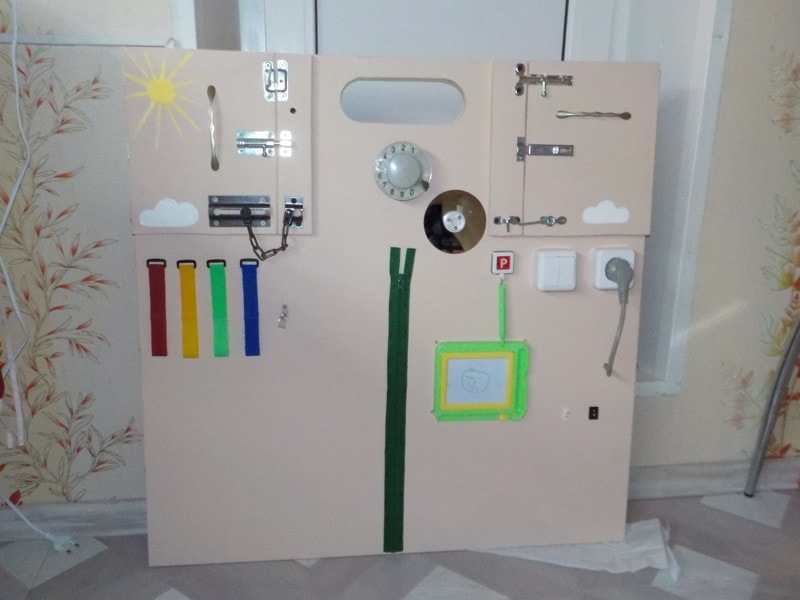
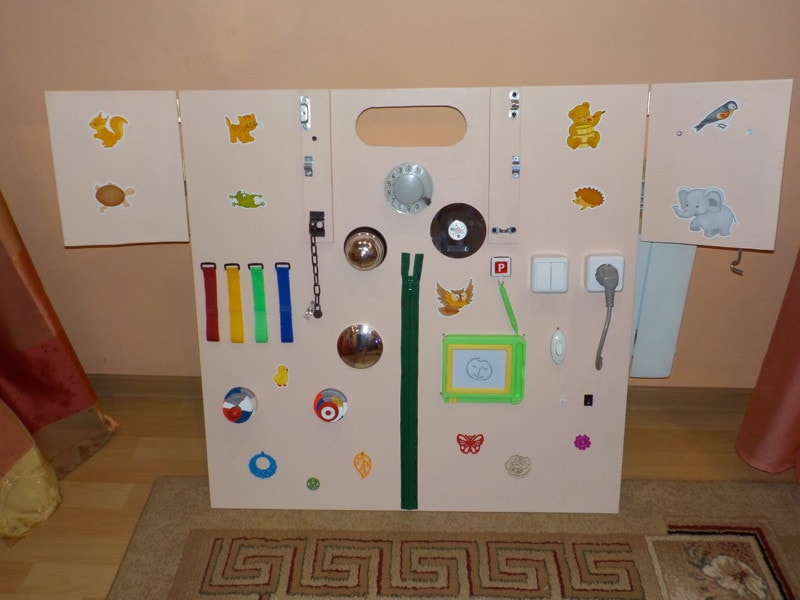
If desired, you can decorate the board with various stickers.

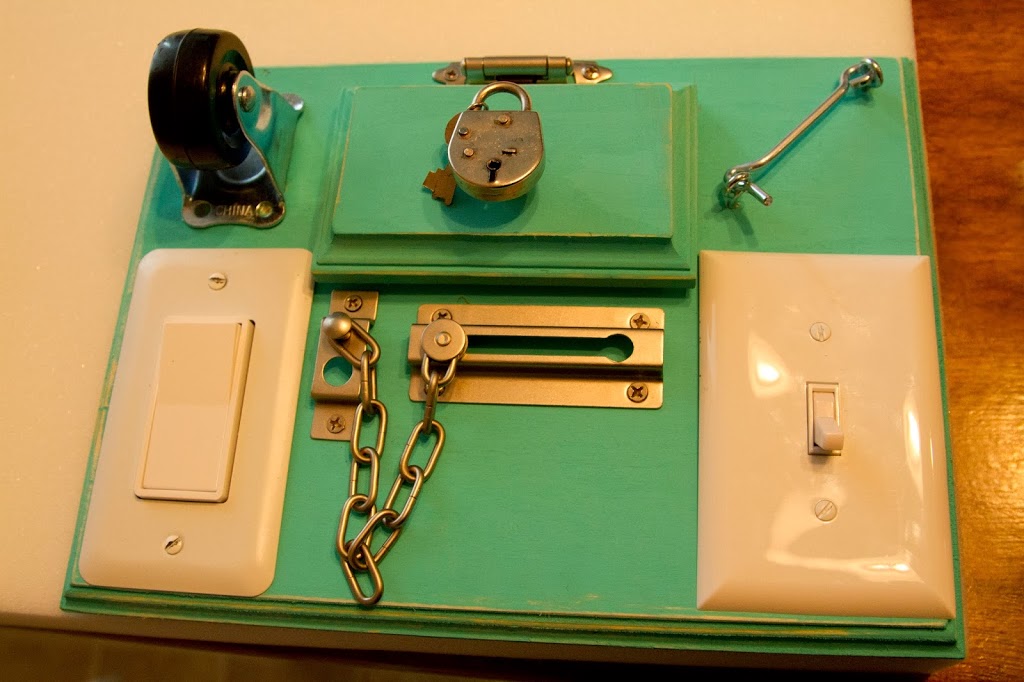
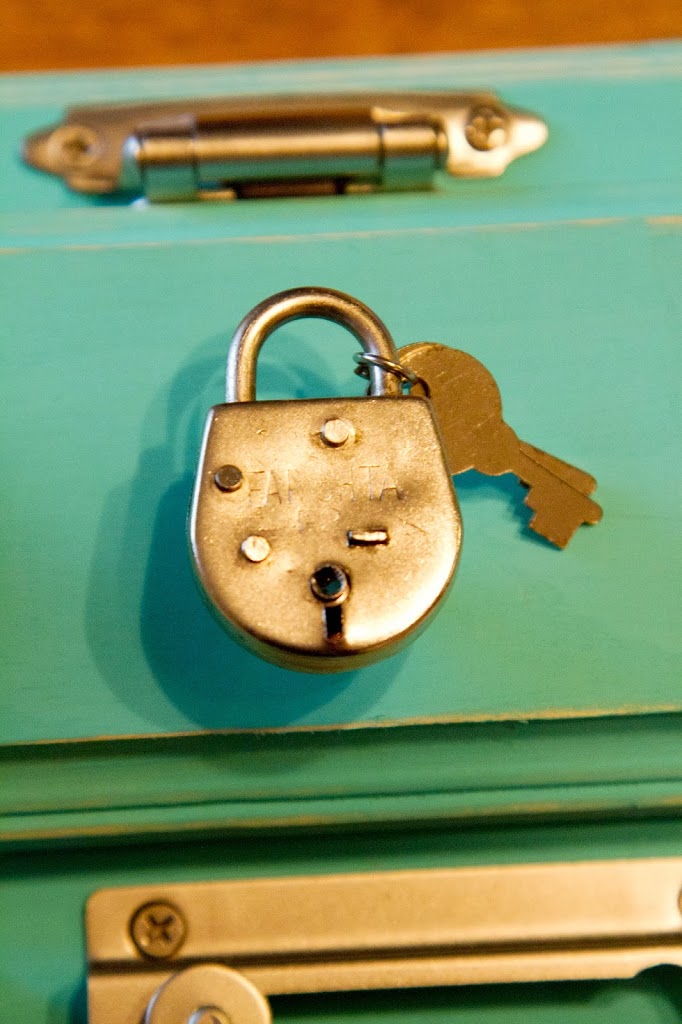
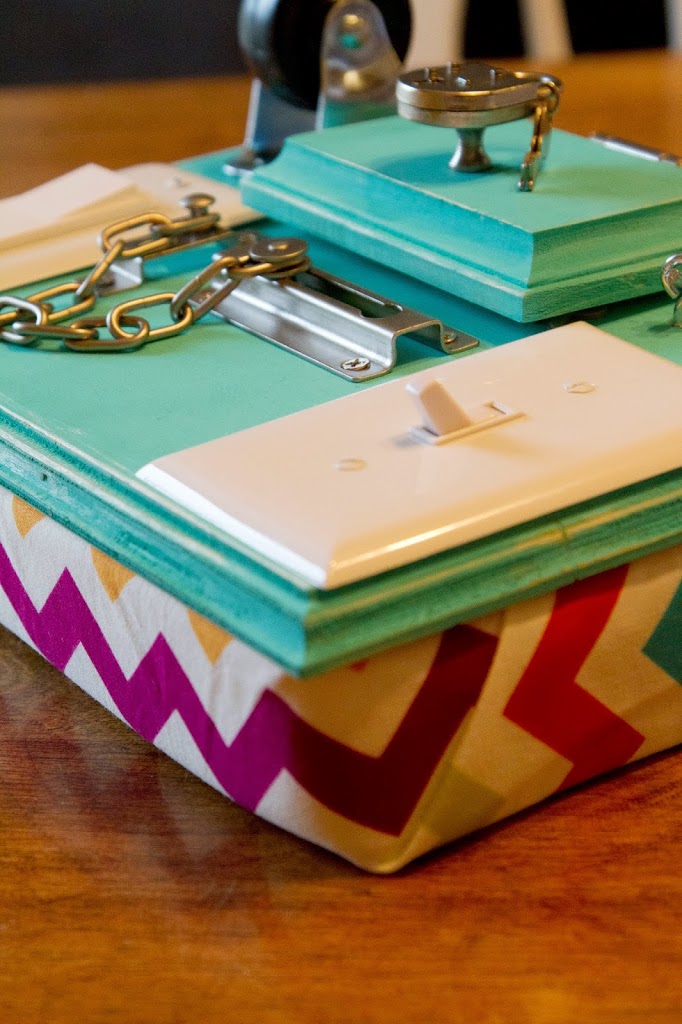
Bizybord for girls
To create this development board we will prepare:
- wooden plank;
- additional elements (switches, roller, chains, loops, handles, hooks);
- paint for wood;
- foam rubber;
- the cloth;
- glue for textiles;
- pencil;
- saw;
- screwdriver.

To begin, we recommend that you expand all the elements and mark them with a pencil on the board.
Using a saw cut holes for switches. Paint the board paint for wood. 
 We attach all the details to the board. Put it on top of foam rubber and mark the size of the segment.
Cut a piece of cloth, leaving a few centimeters around the edges to fix it. 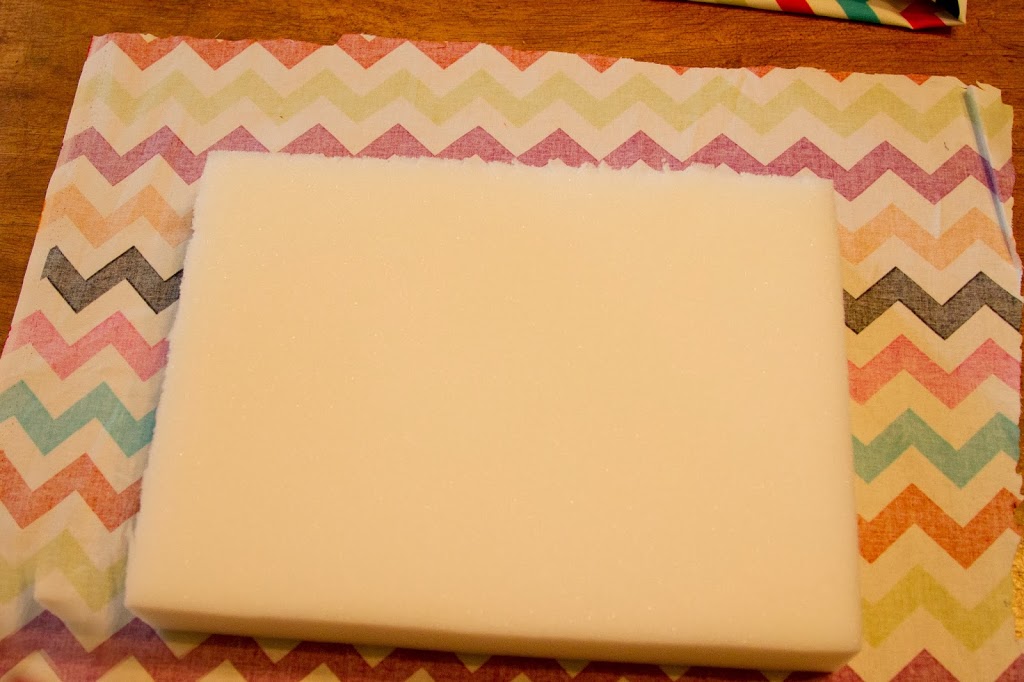
Carefully fold the two edges and fix the fabric on the foam with glue. 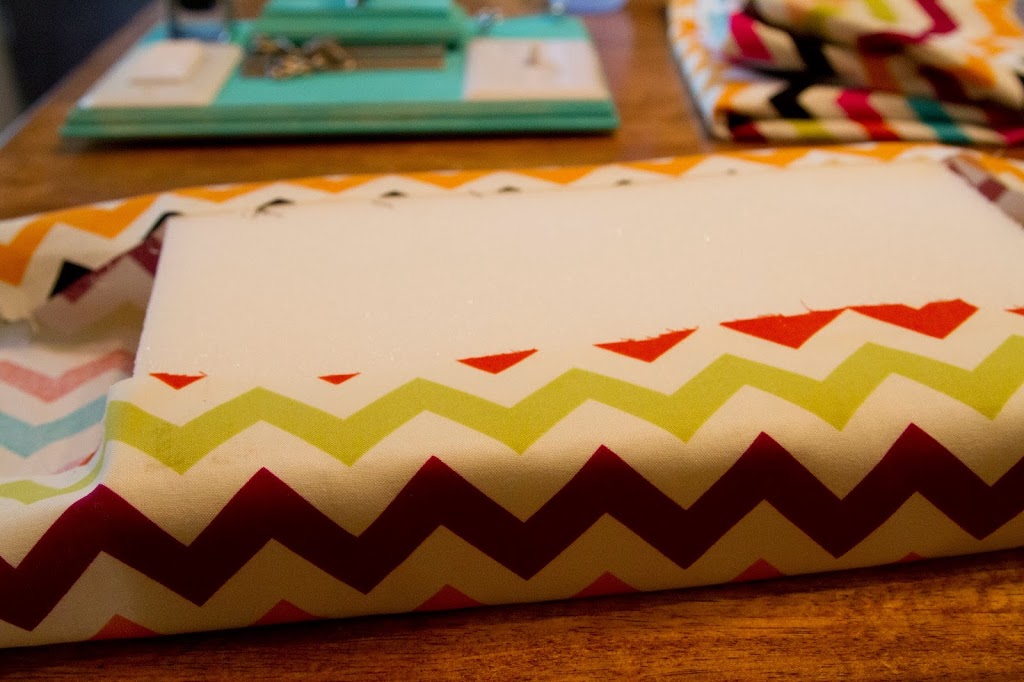
The same is repeated with other edges. 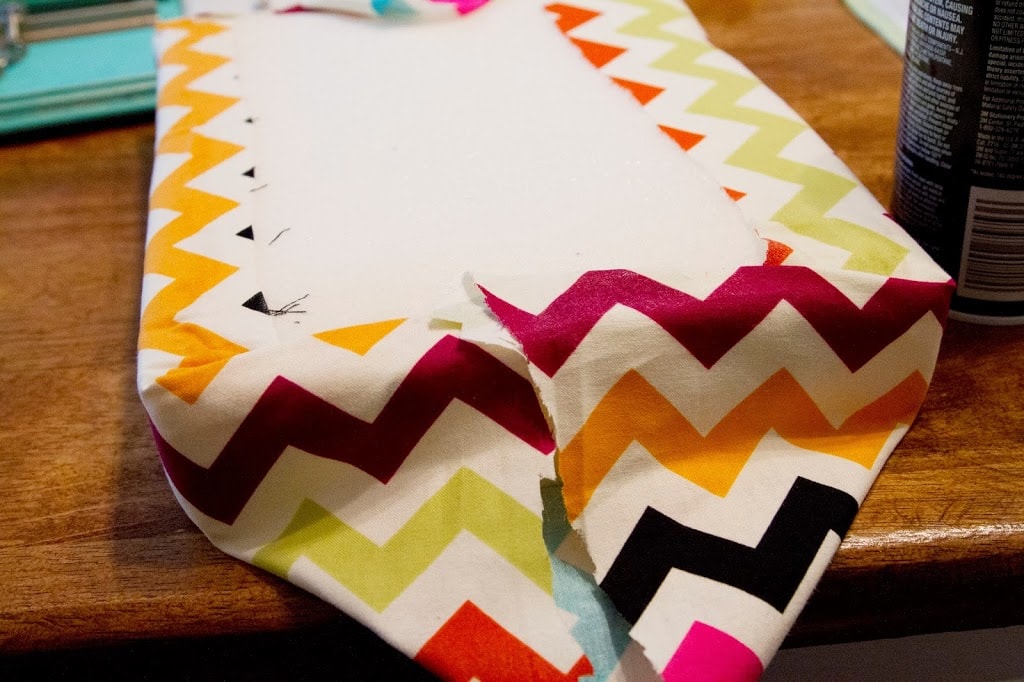
Glue the board to the foam rubber. 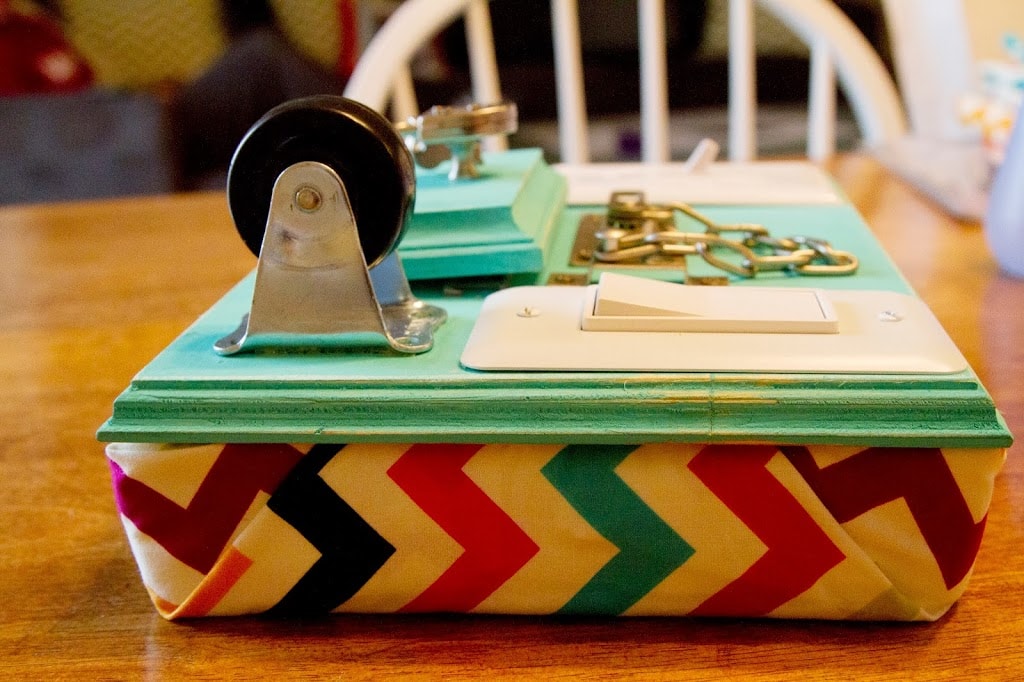
The original bizybord in a gentle shade for the girl is ready! 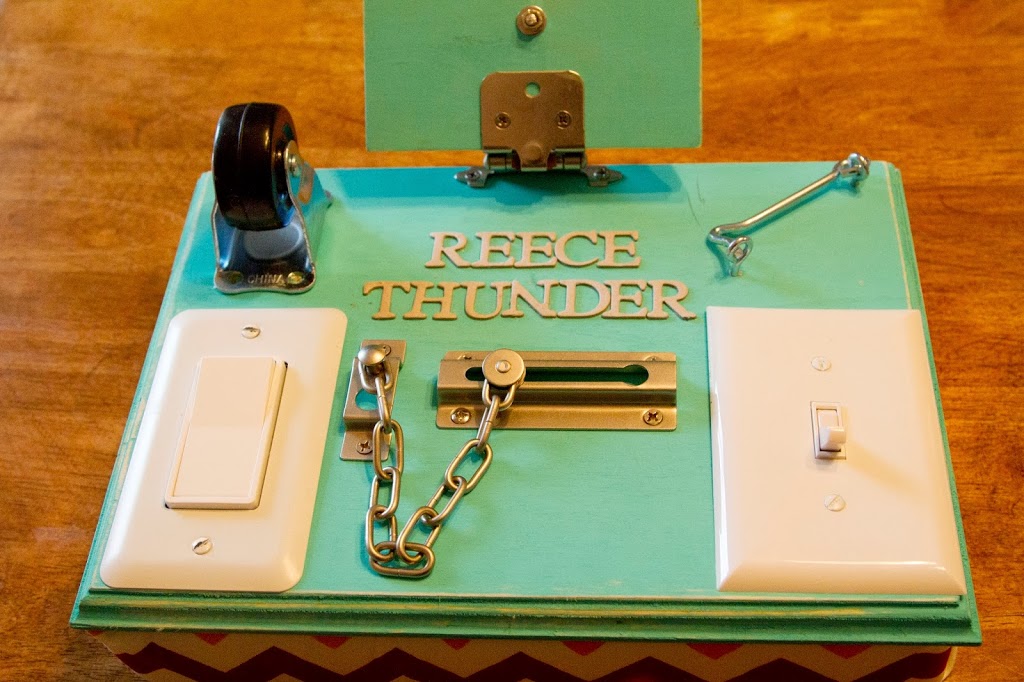
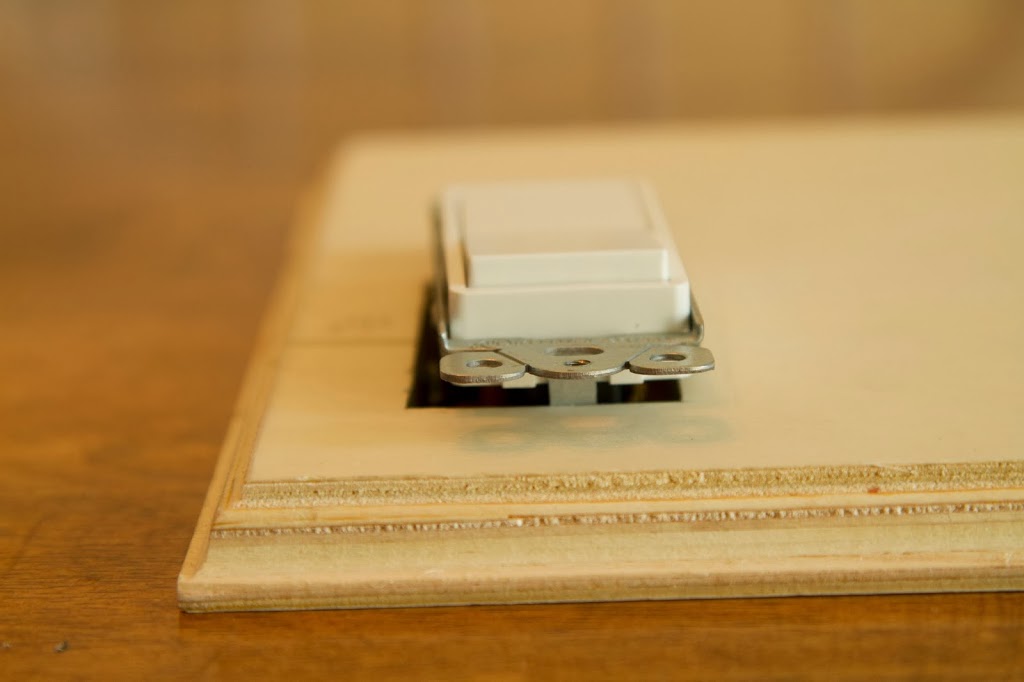
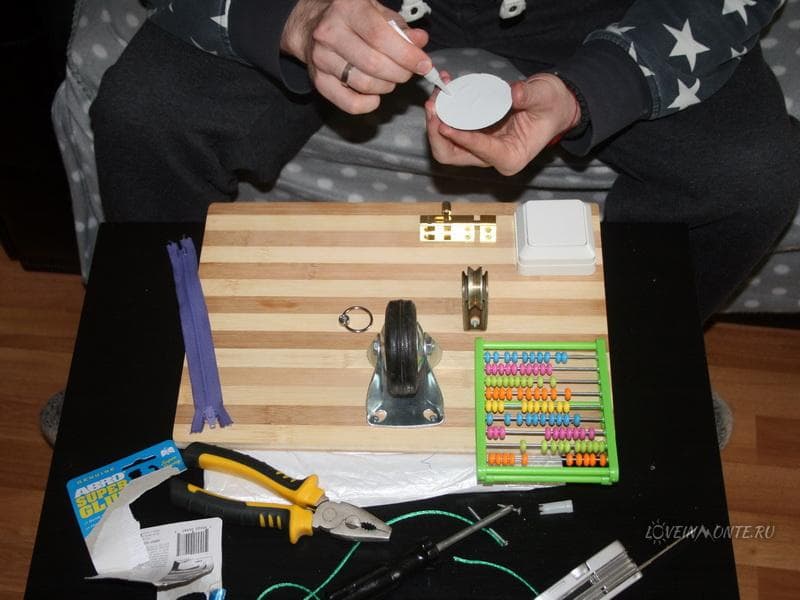
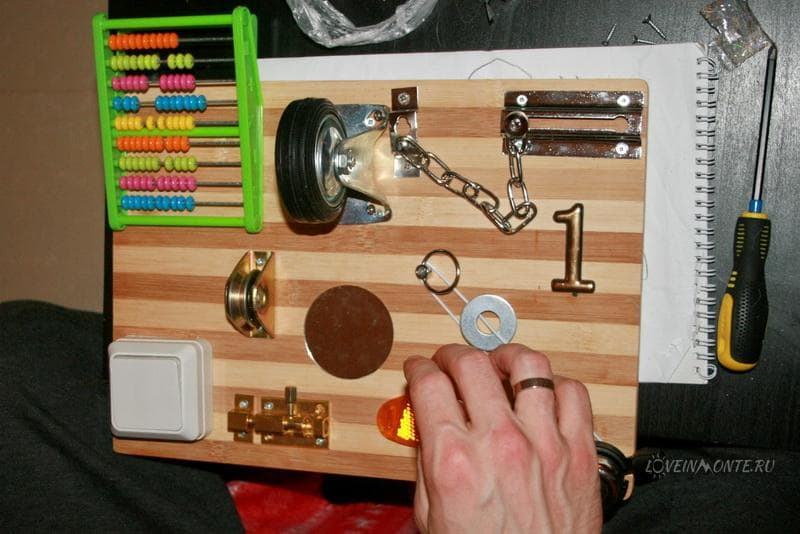
Simple bizybord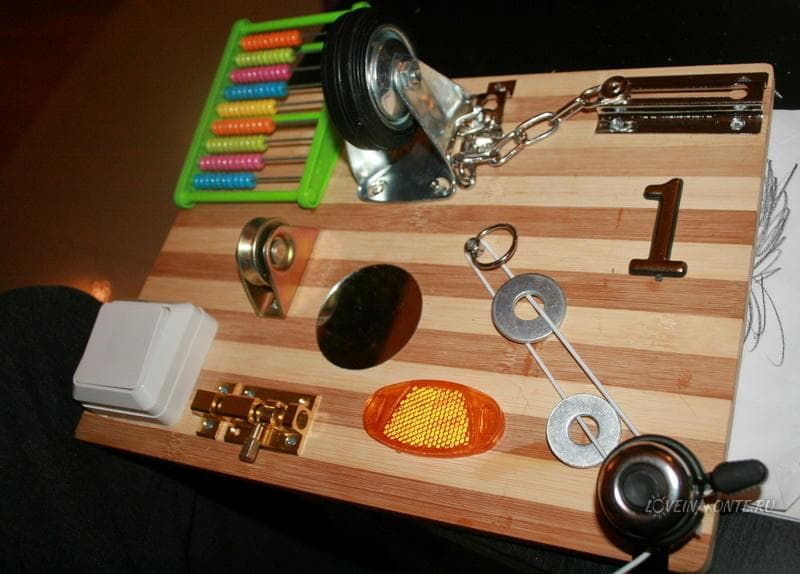
For work you will need:
- cutting board;
- switch, bills and other items;
- screws;
- glue;
- screwdriver.
 Since this workshop is quite simple, you just need to attach the necessary elements to the board.
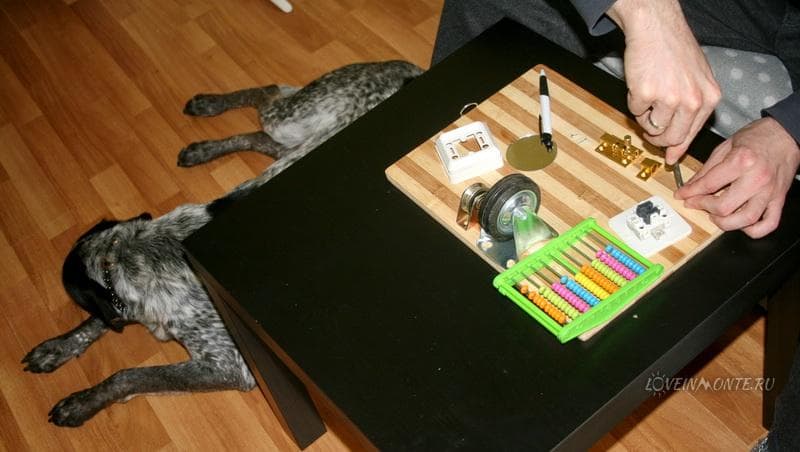
Some of them can just be glued.
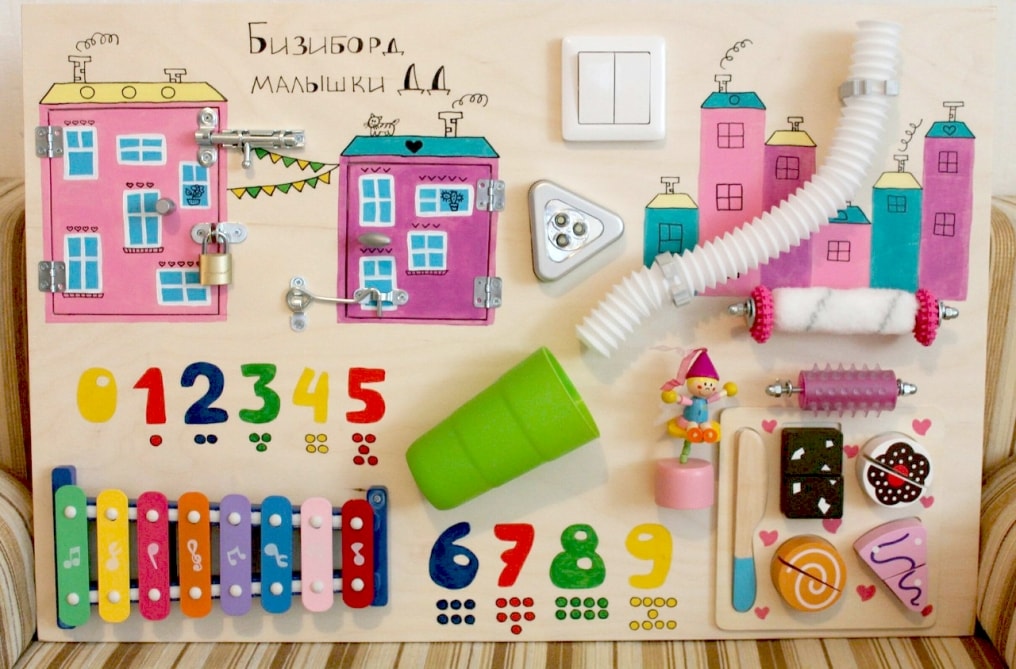
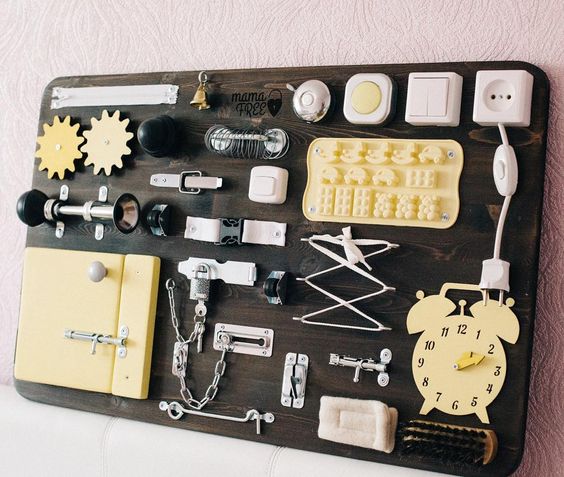
Bizybord: interesting ideas
Surely you have already understood that such a device as a bizybord can be made from a variety of objects. Starting with locks, sockets, switches and ending with beads, zippers, buttons and much more. Therefore, do not be afraid to experiment, because your kid will definitely like it.

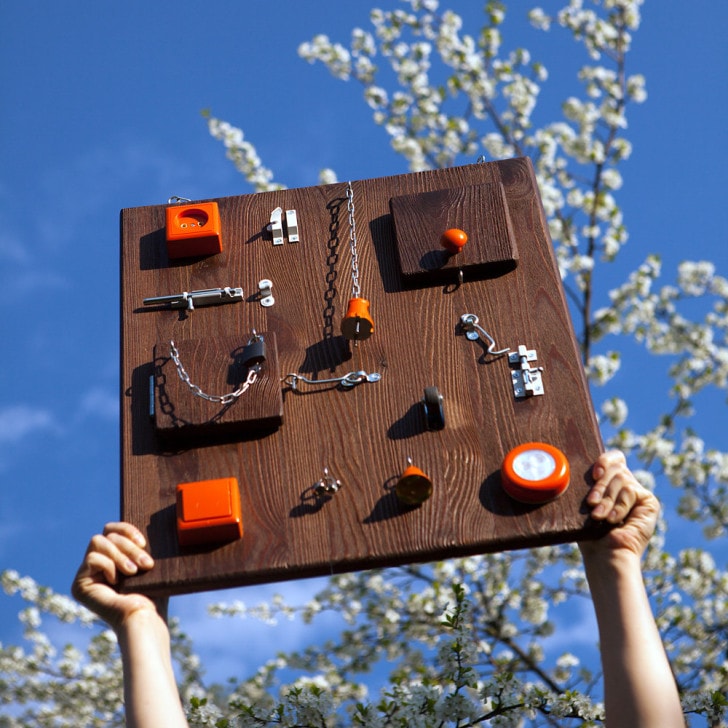


Every parent can make an interesting business board for their child. For this it is enough just to show imagination and stock up on the necessary elements.


