


Probably everyone is pleased to receive gifts, and especially those that are made with their own hands. After all, they put a special love and attention. We offer you to try to make something interesting. For example, a postcard is a great option for beginners in the world of needlework. Especially for this, we picked up several master classes of different complexity.
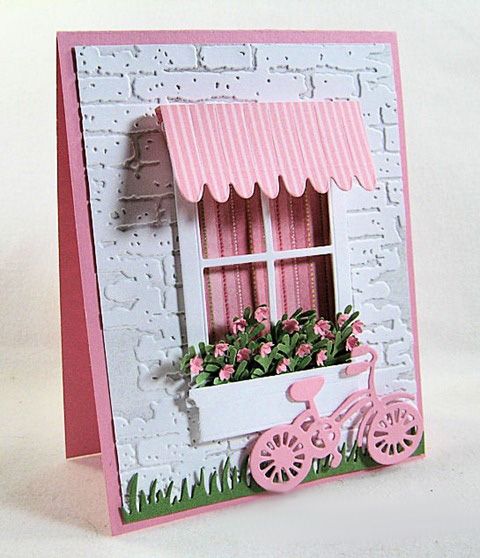
Postcard for girls
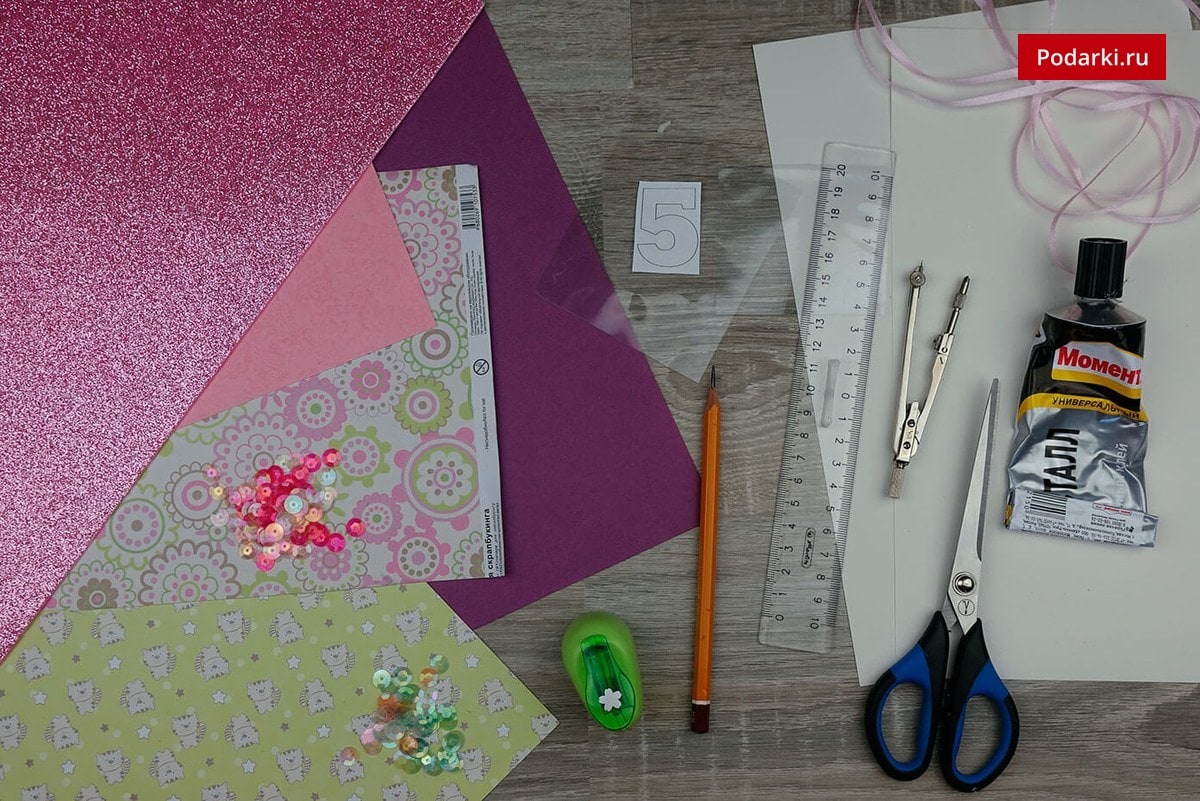
To make a cute postcard for a girl, we will prepare the following materials:
- white cardboard;
- purple paper;
- paper for scrapbooking in three versions;
- pink ribbon;
- glue;
- pencil or pen;
- decorative hole punch;
- sequins;
- transparencies;
- compass;
- scissors;
- ruler;
- glitter foamiran.
We start creating the basis for the postcard. To do this, fold the cardboard in white in half. 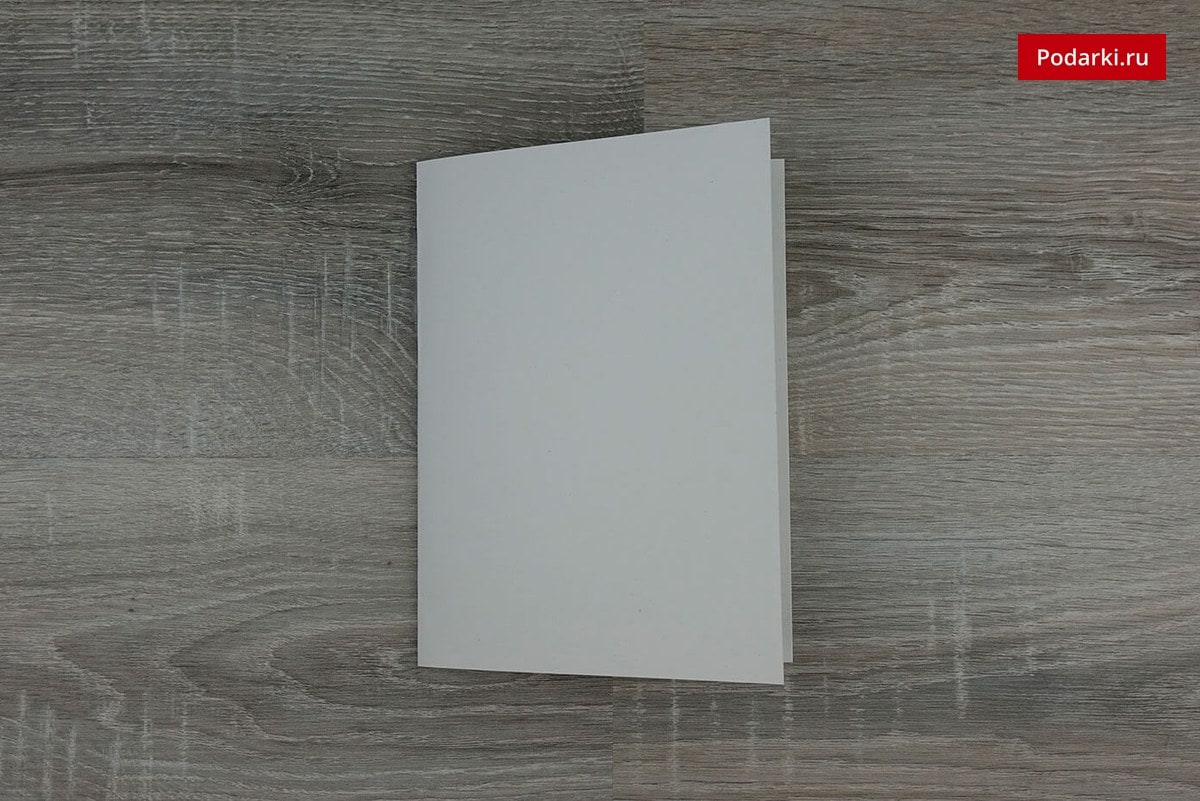
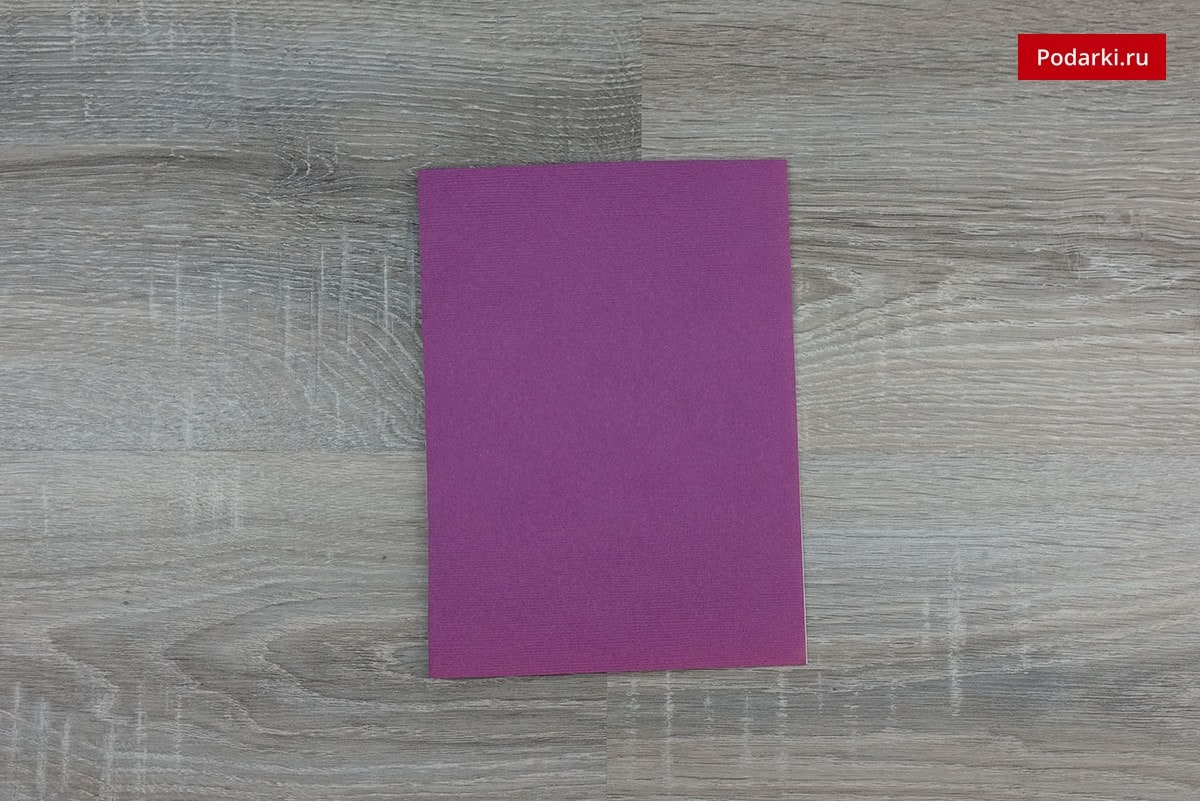
Cut a rectangle out of purple paper to fit one part of the base. Glue it over the postcard. 
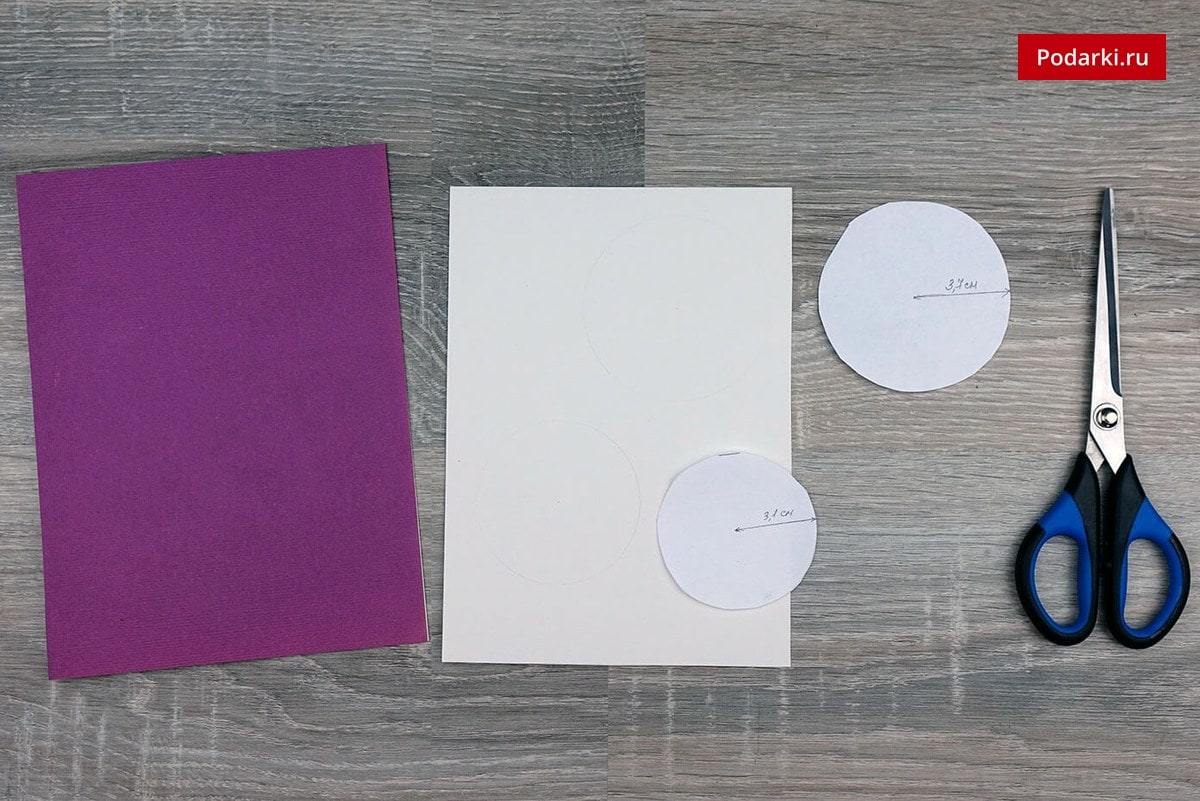
Cut out a white rectangle of cardboard a few centimeters smaller than a postcard.On plain paper, draw a compass circle and cut them, as shown in the photo. 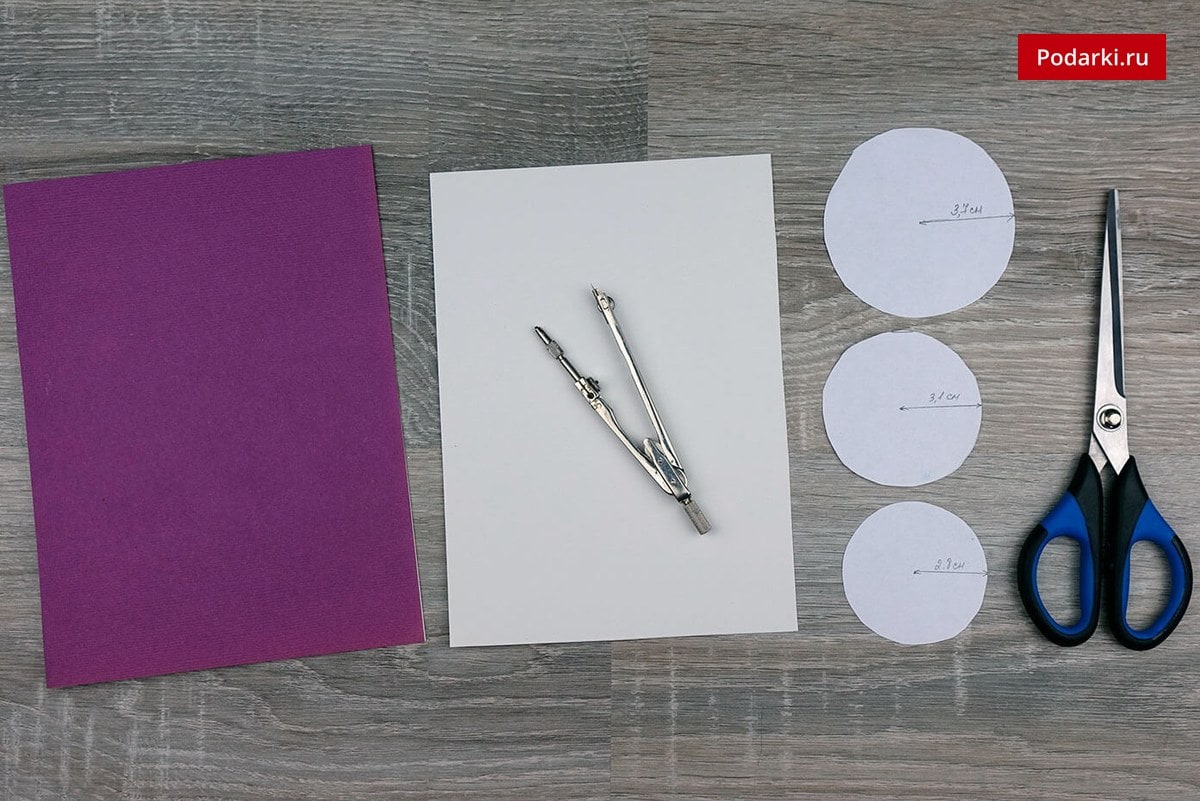
Outline the templates on the previously prepared cardboard and carefully cut out.
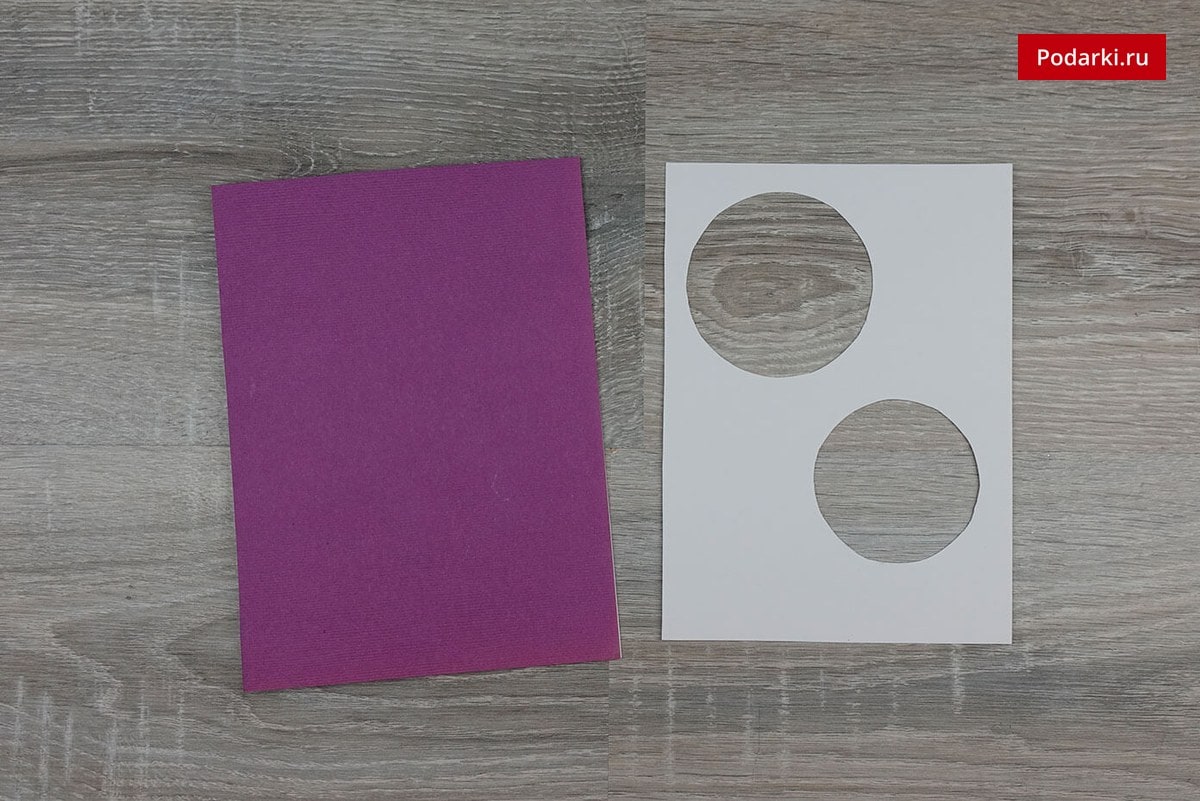
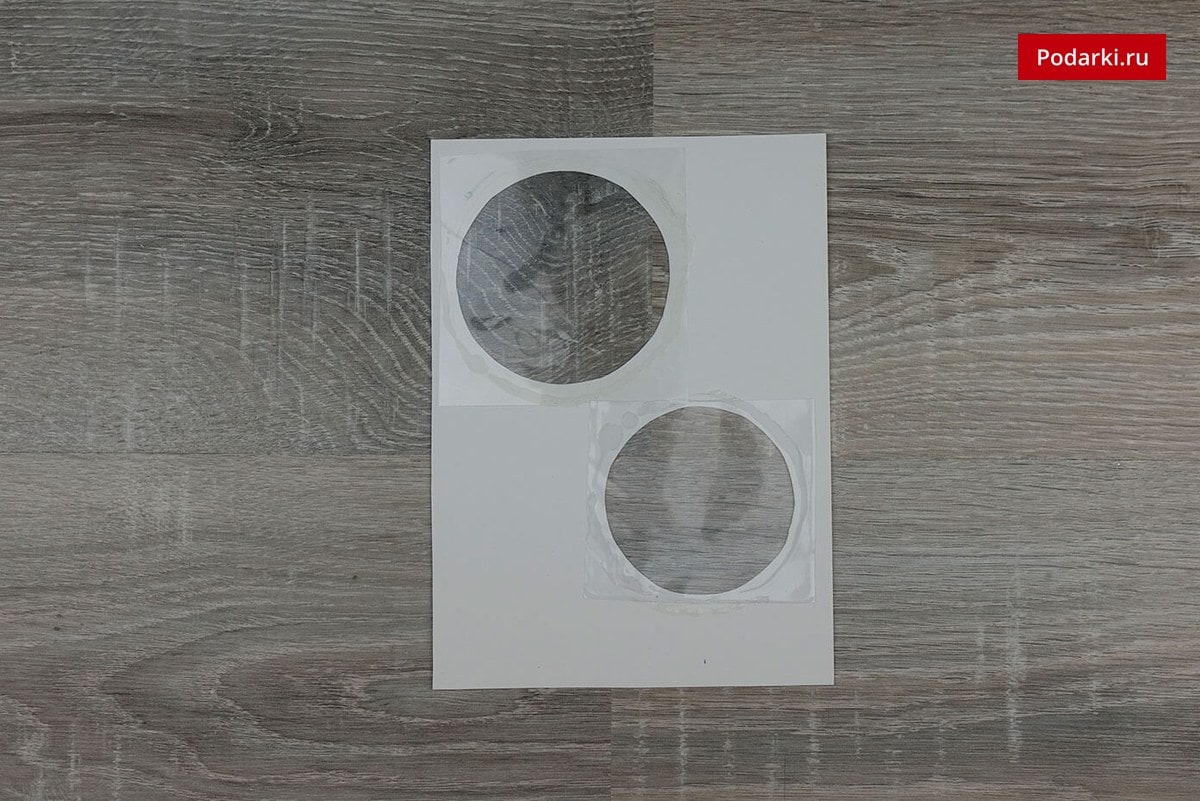
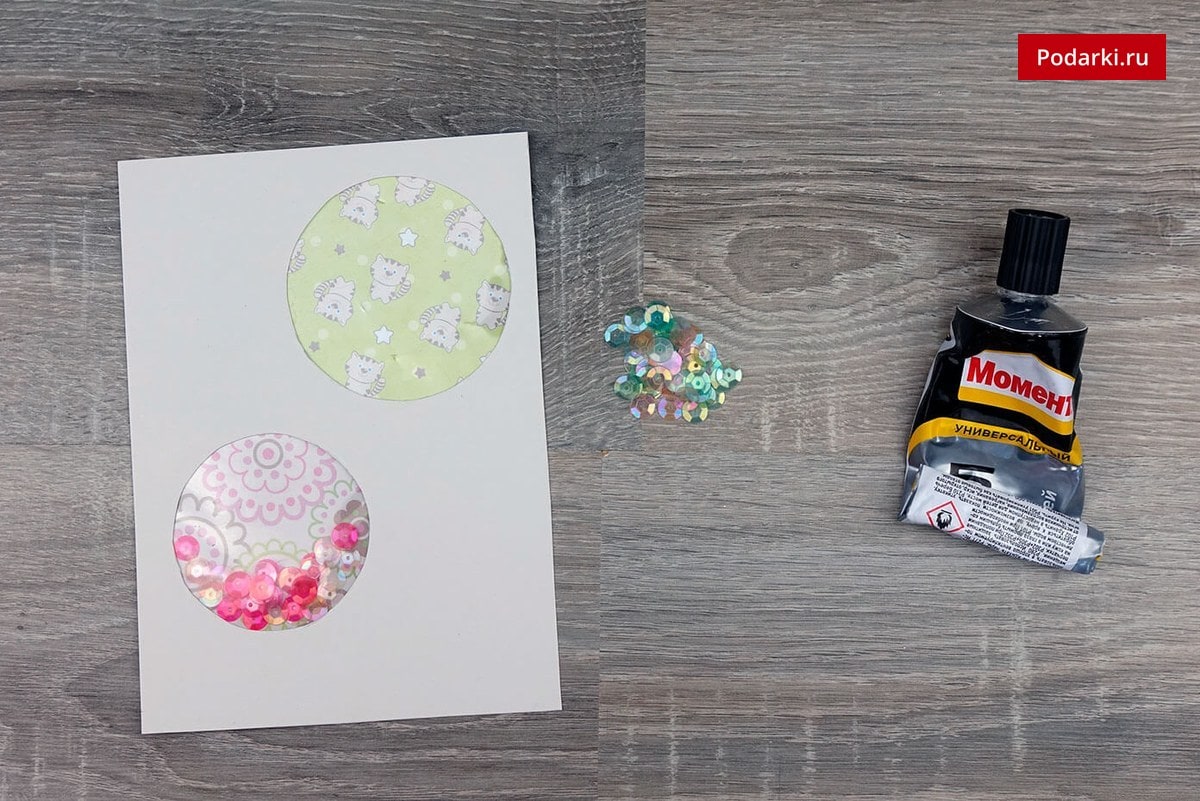
From a transparent film cut squares. Glue them to the blank of cardboard. 
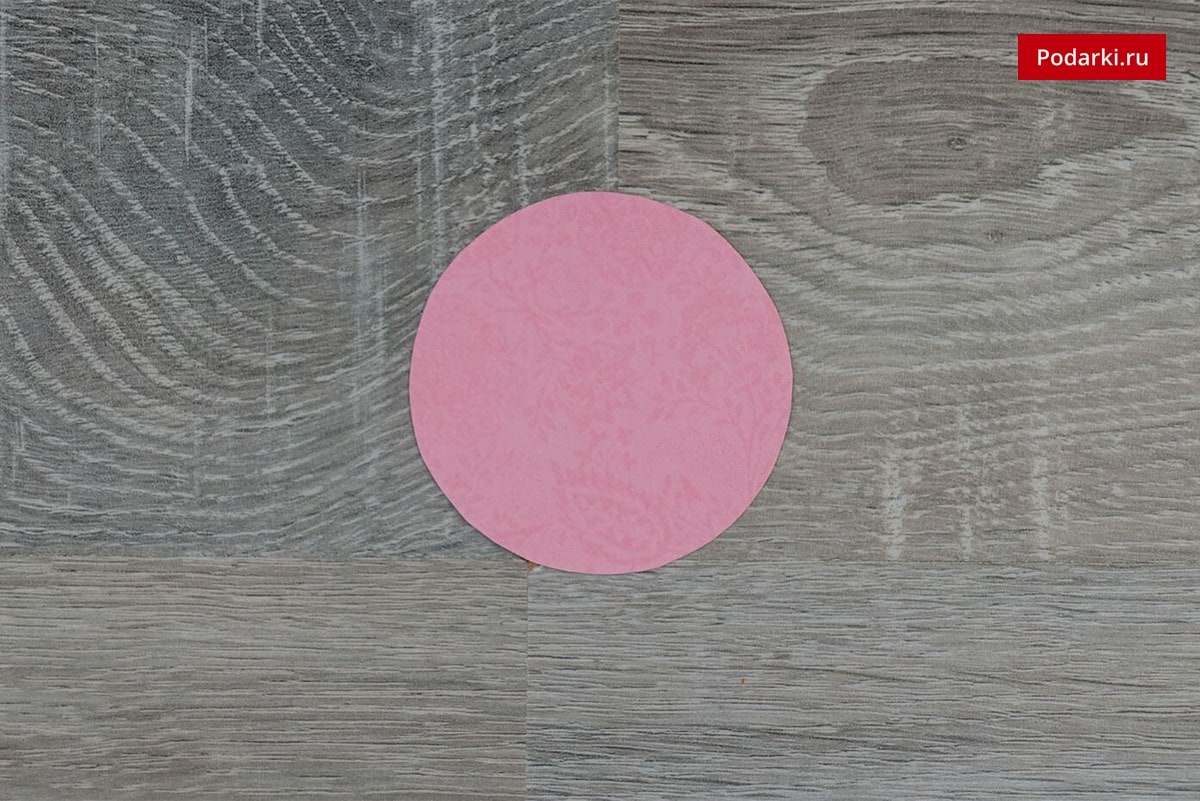
We transfer the smallest template to pink paper and cut a circle. 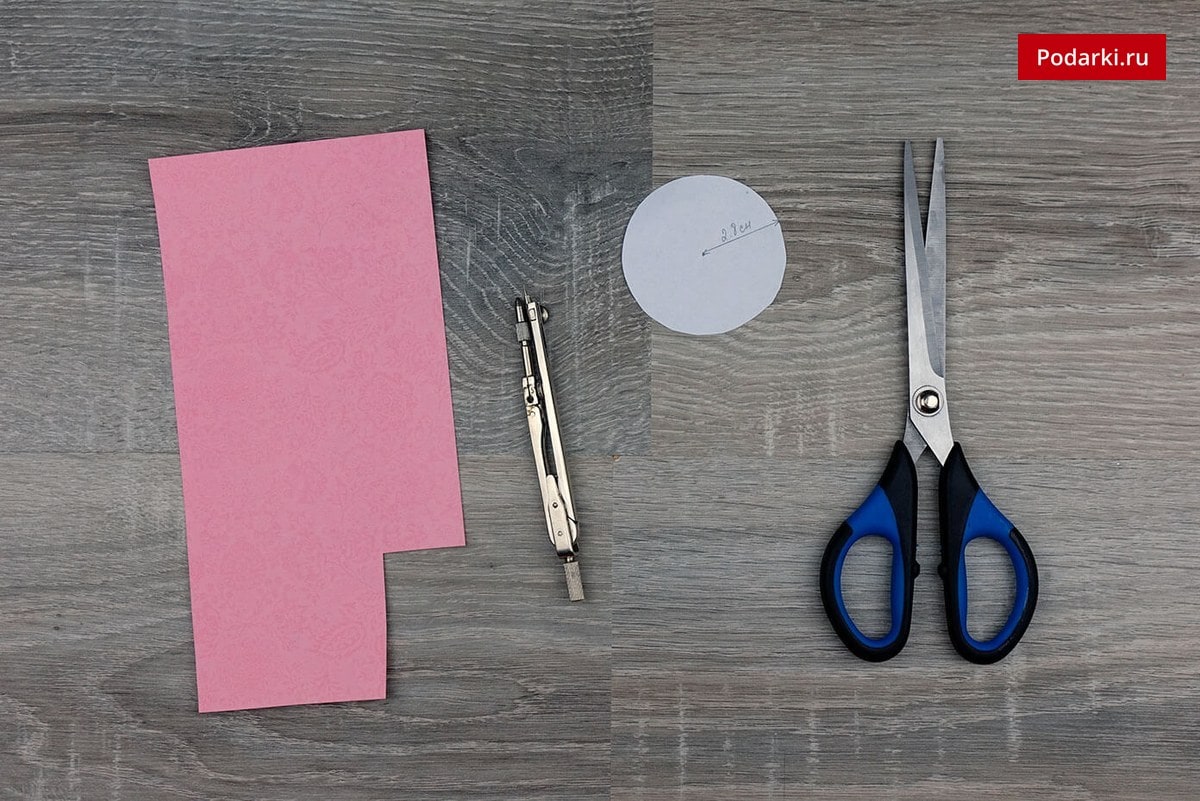
Cut a square from paper for scrapbooking. 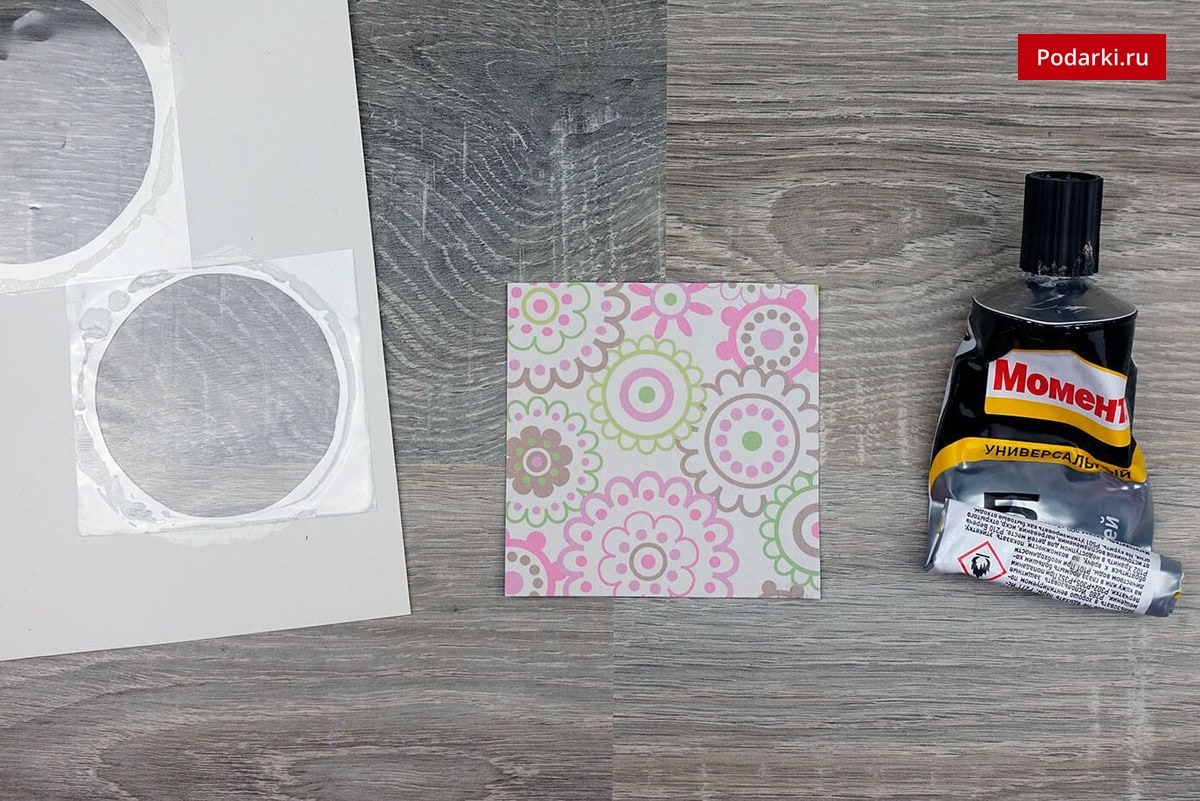
Glue the square to the back of the cardboard, but only on three sides.
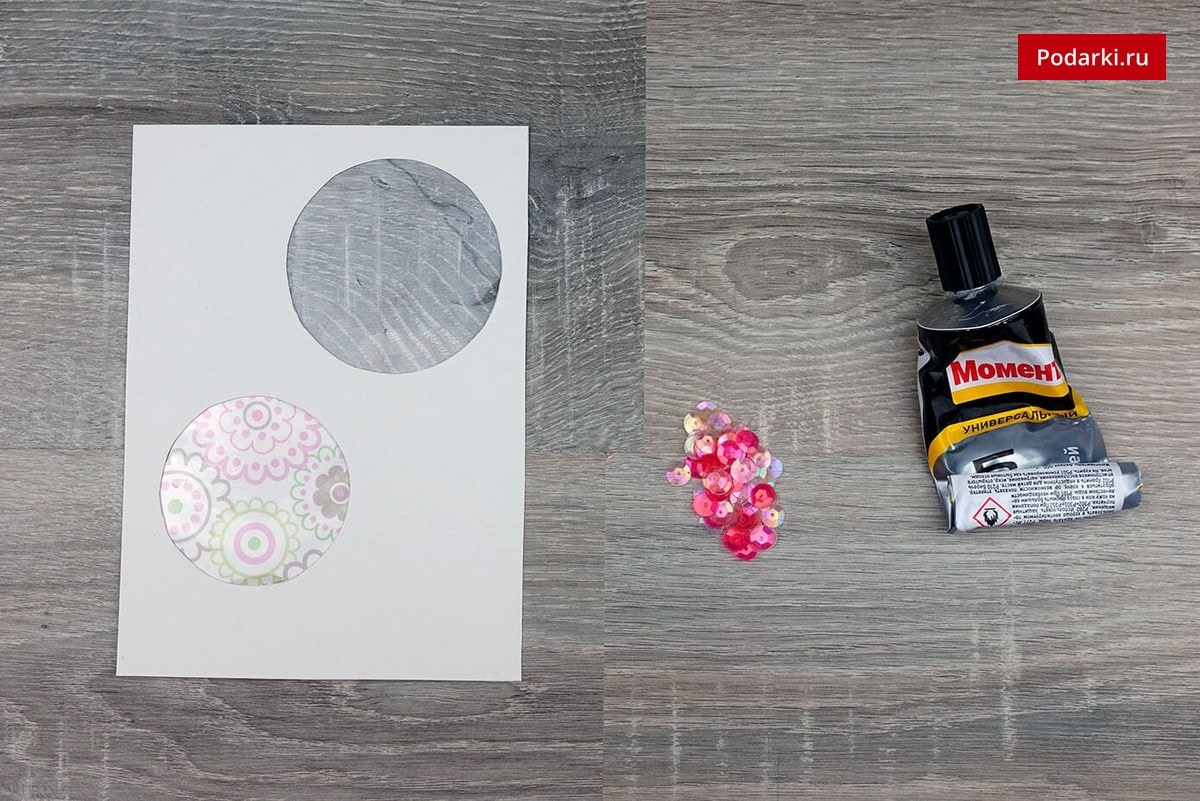
We fill the sequins in the pocket between the paper and the film. We seal the fourth side of the square. 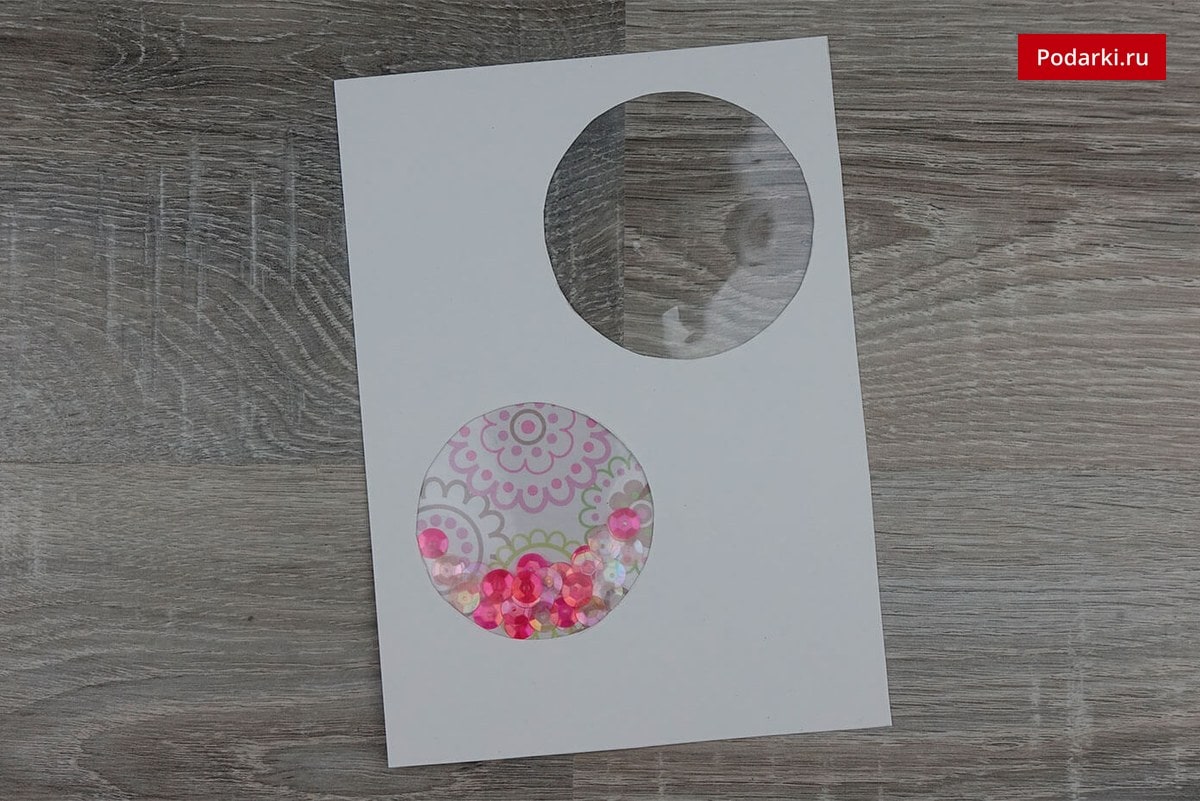
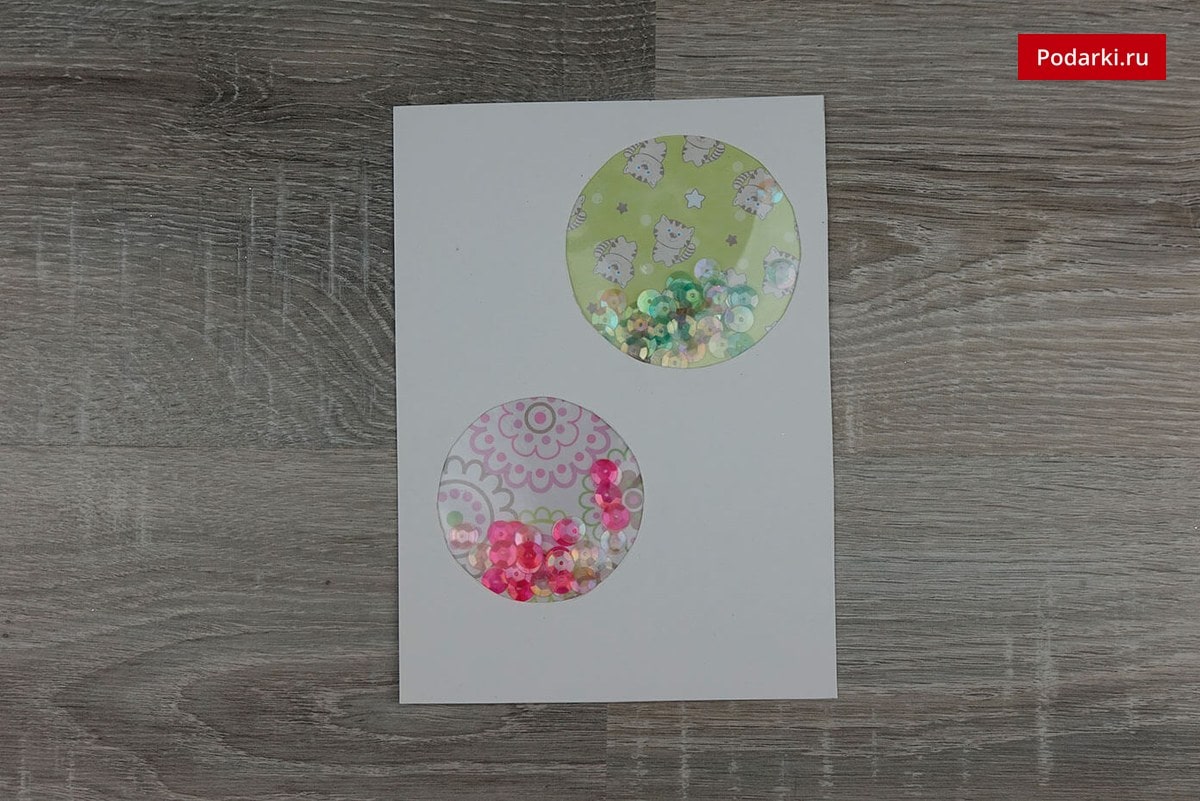
Take a paper for scrapbooking a different shade and cut another square. 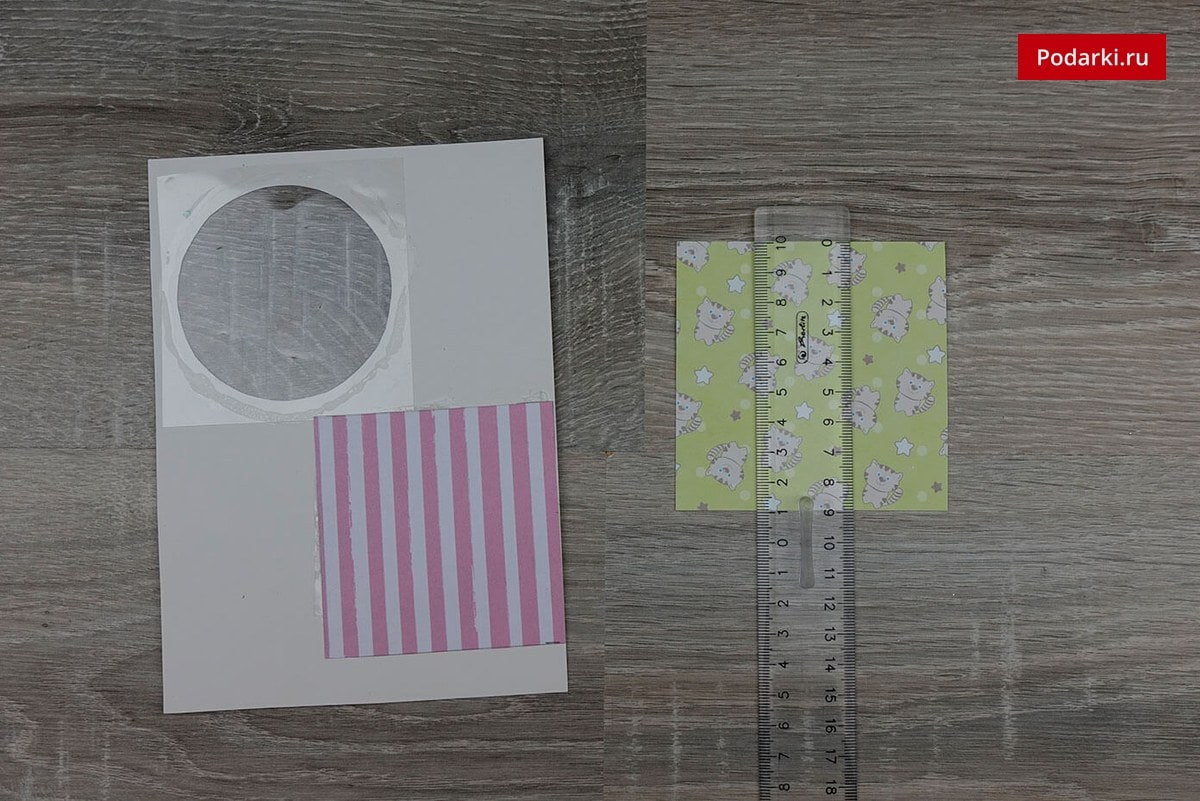
Glue it to the workpiece, as the previous one.
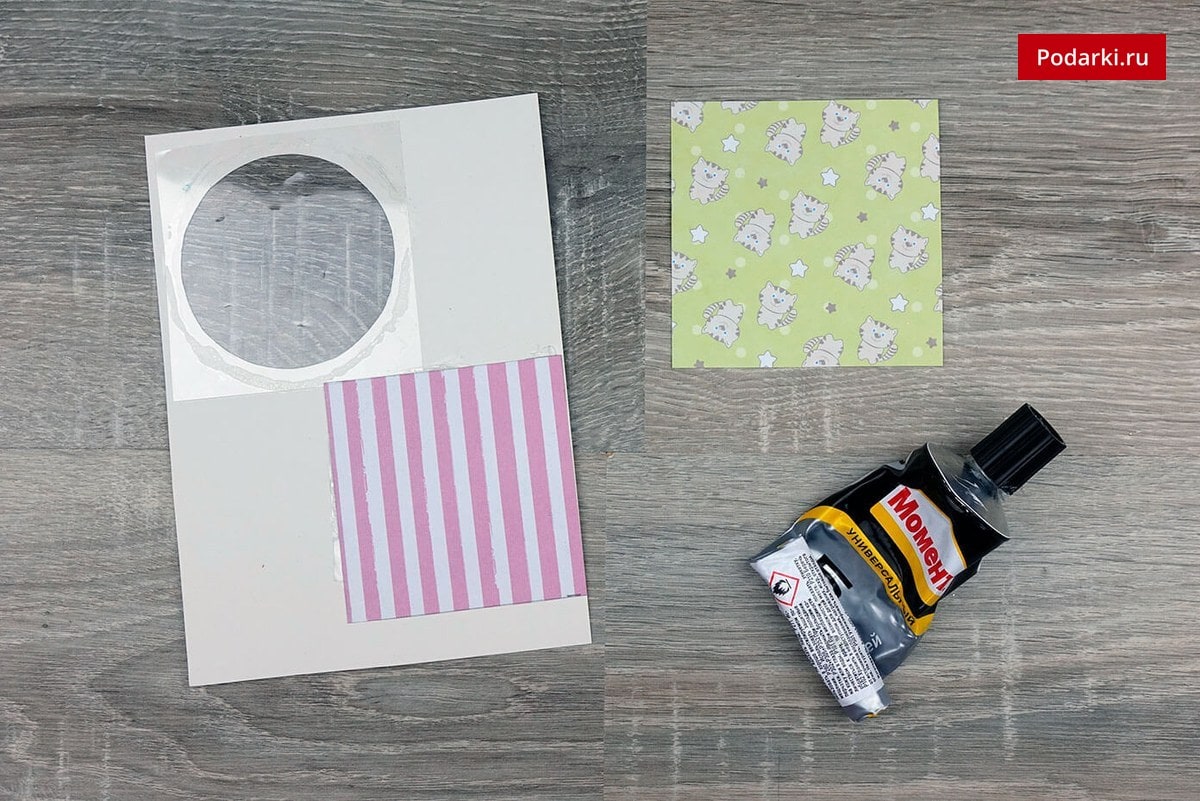
 Pour in the pocket of the sequin of a different color and seal the hole.
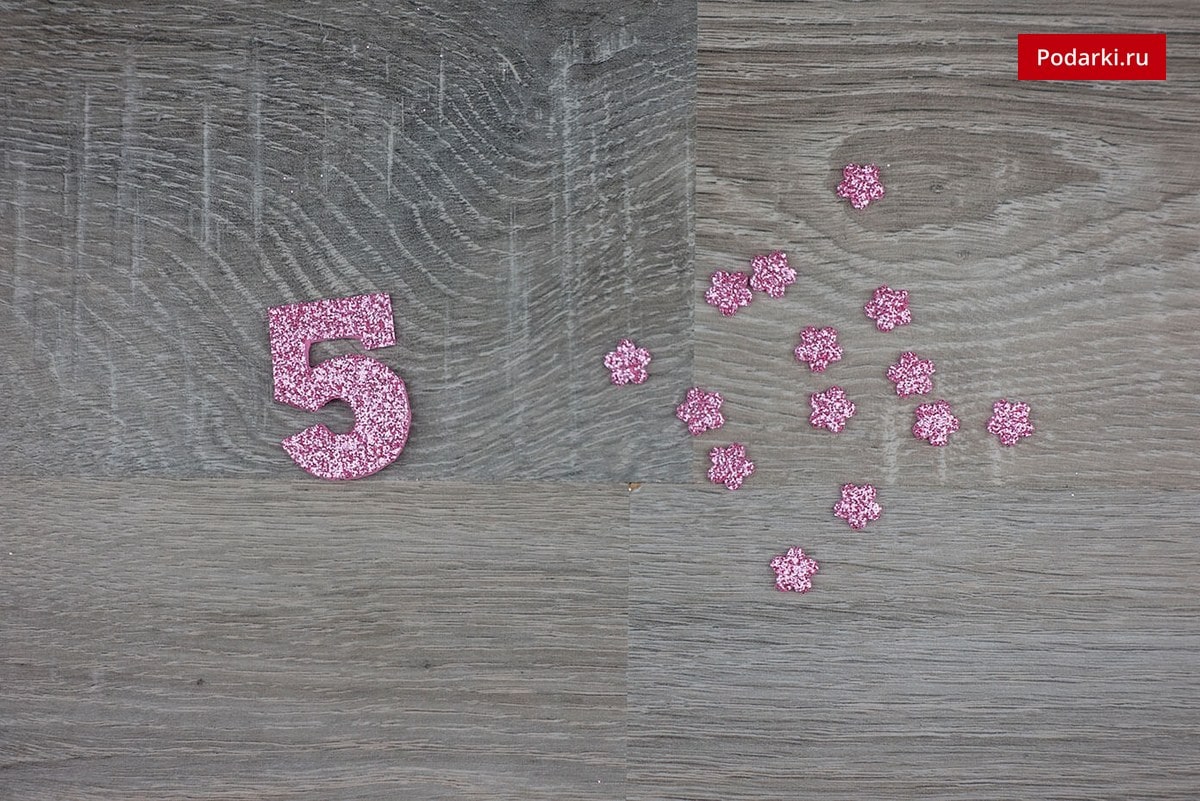
On the glittern foamiran we draw a number that corresponds to the age of the birthday girl. 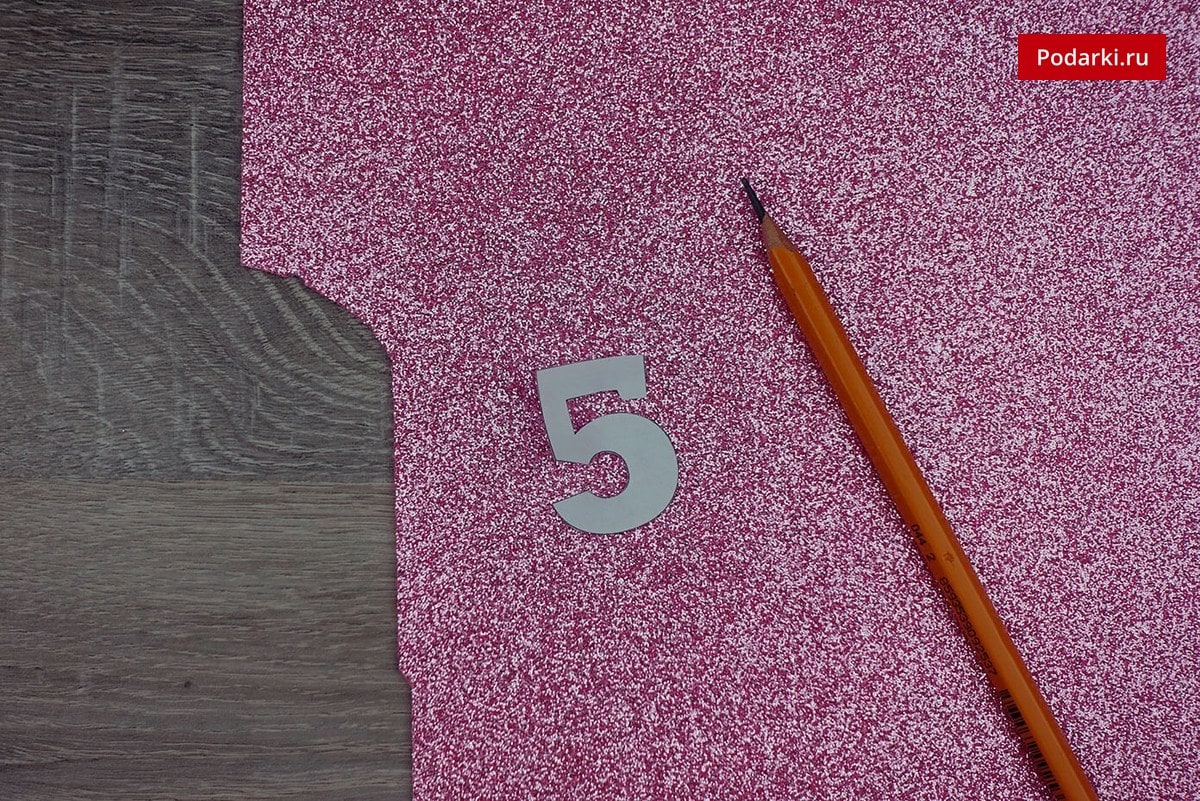
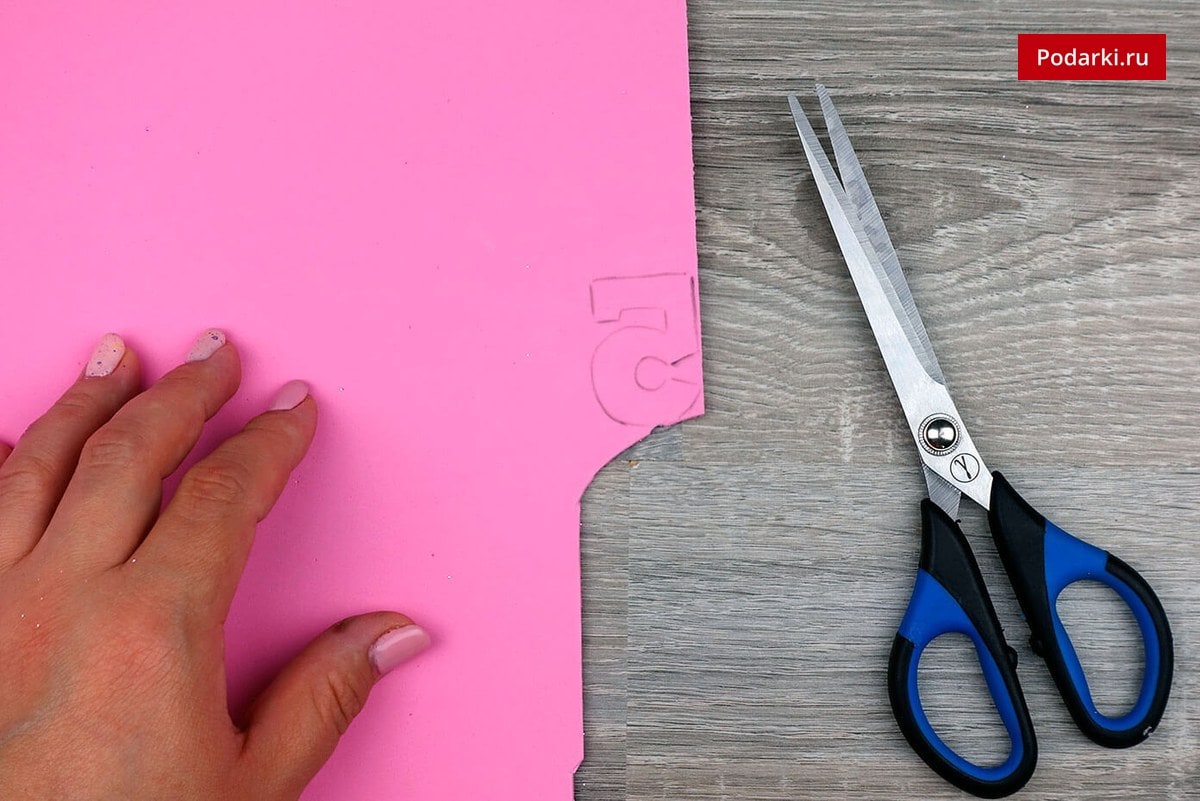
Carefully cut out the figure. 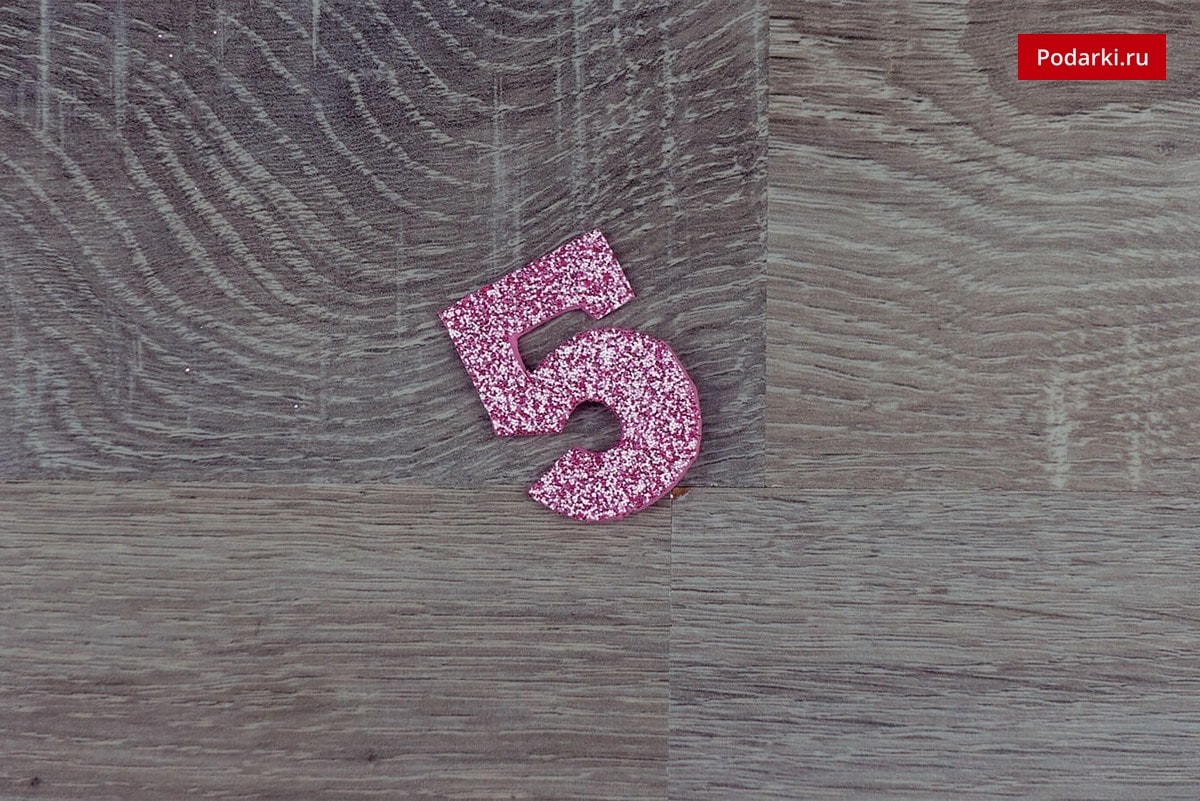
From the same foamiran, we cut flowers with the help of a decorative hole punch. 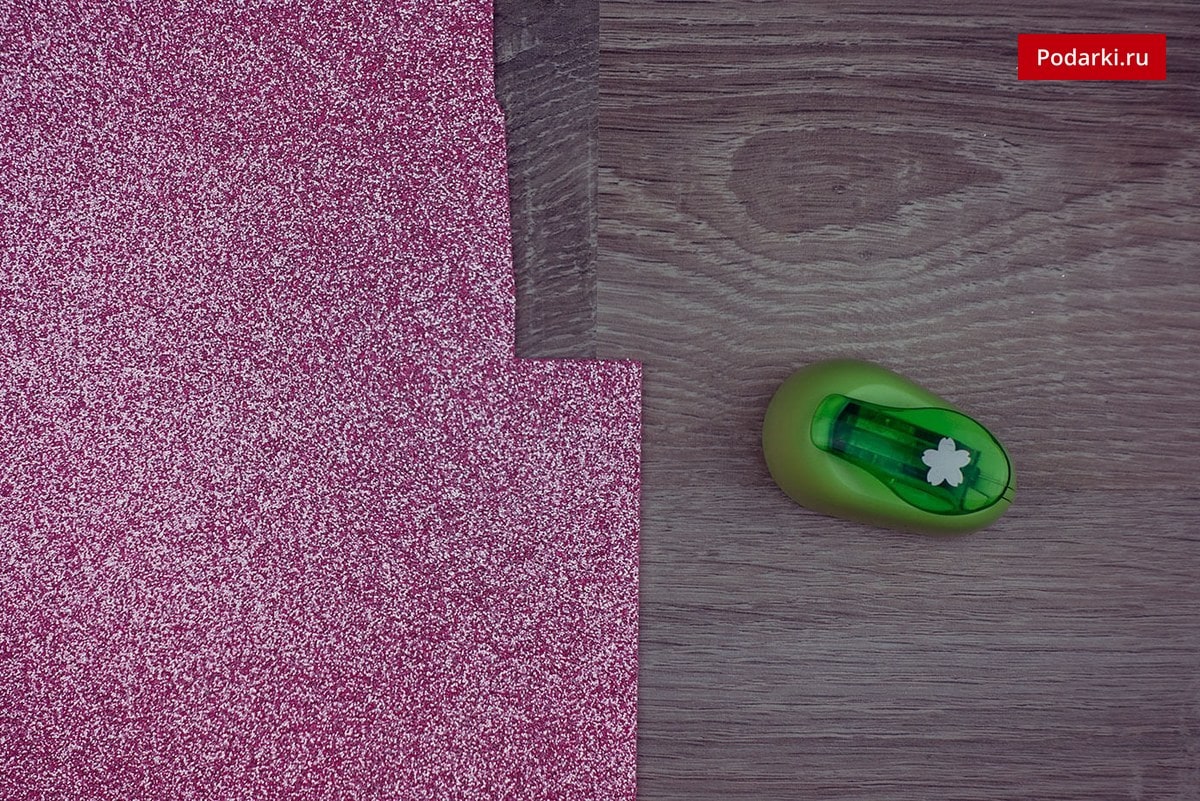
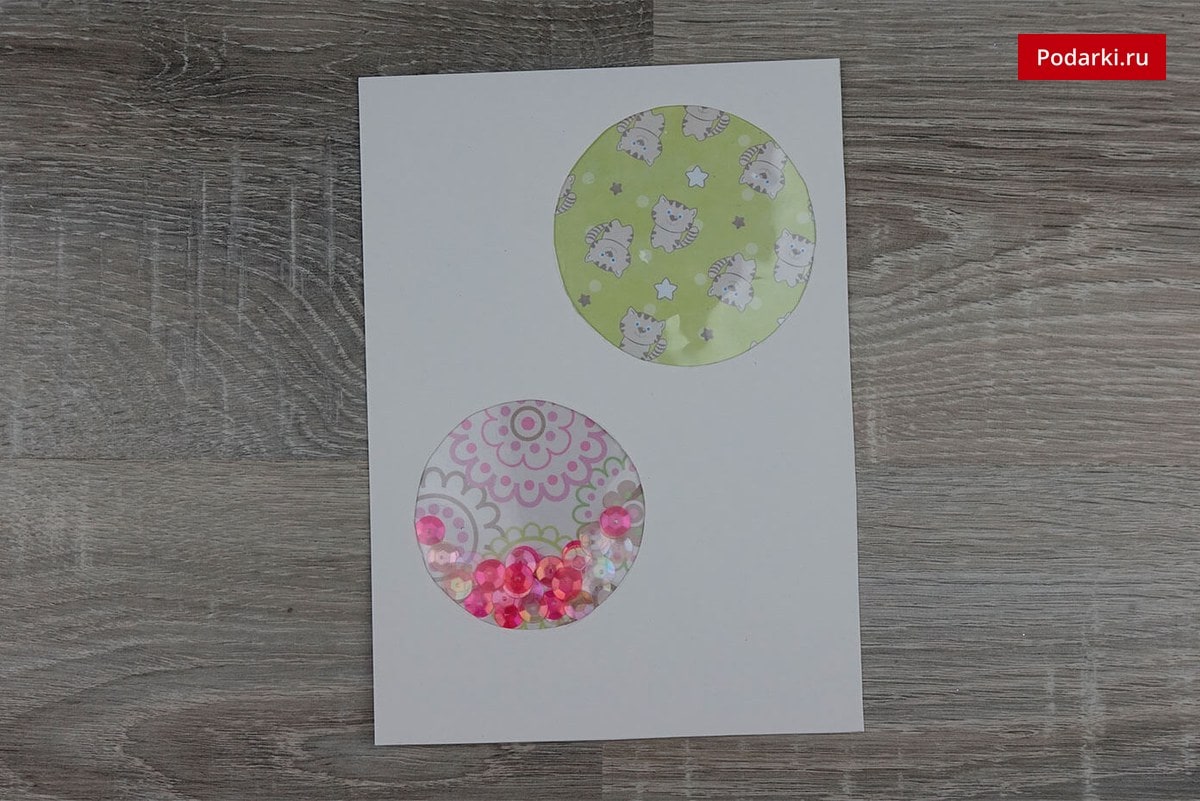
Glue the last cut circle between the two windows on the workpiece. 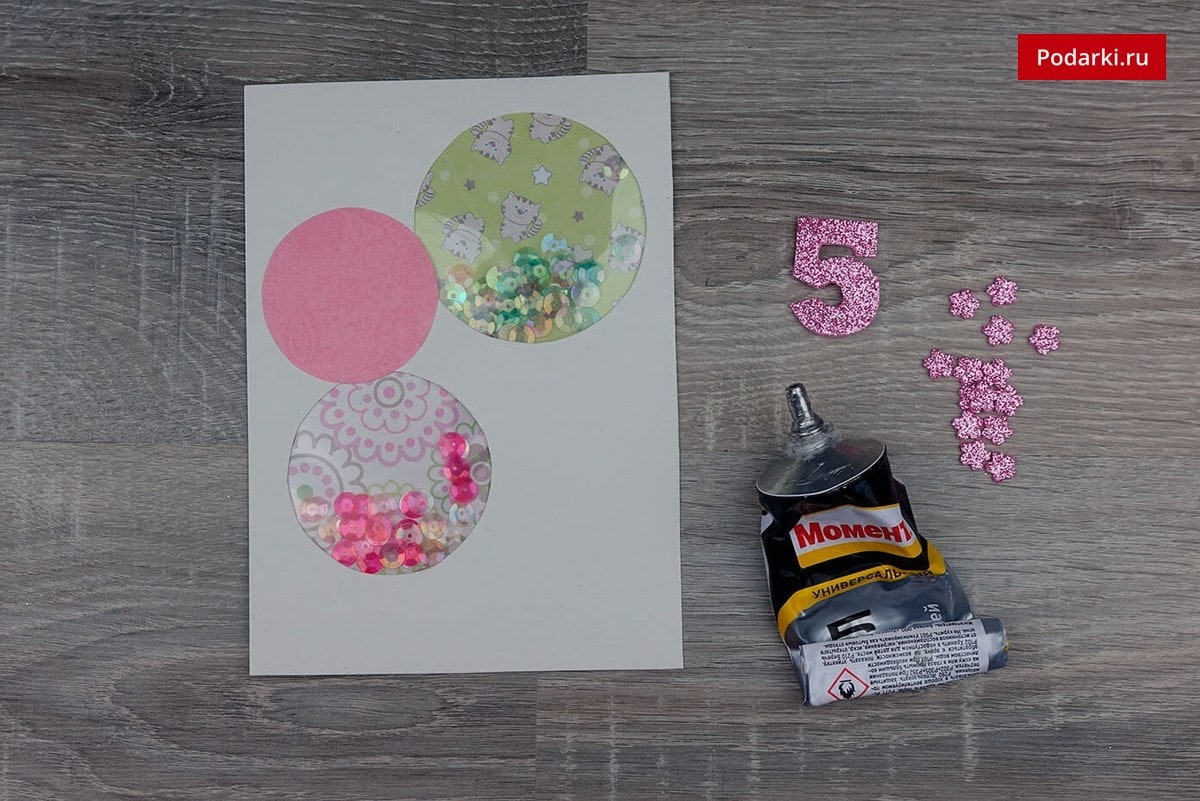
On the circle glue the figure. We decorate a postcard with flowers to your taste. 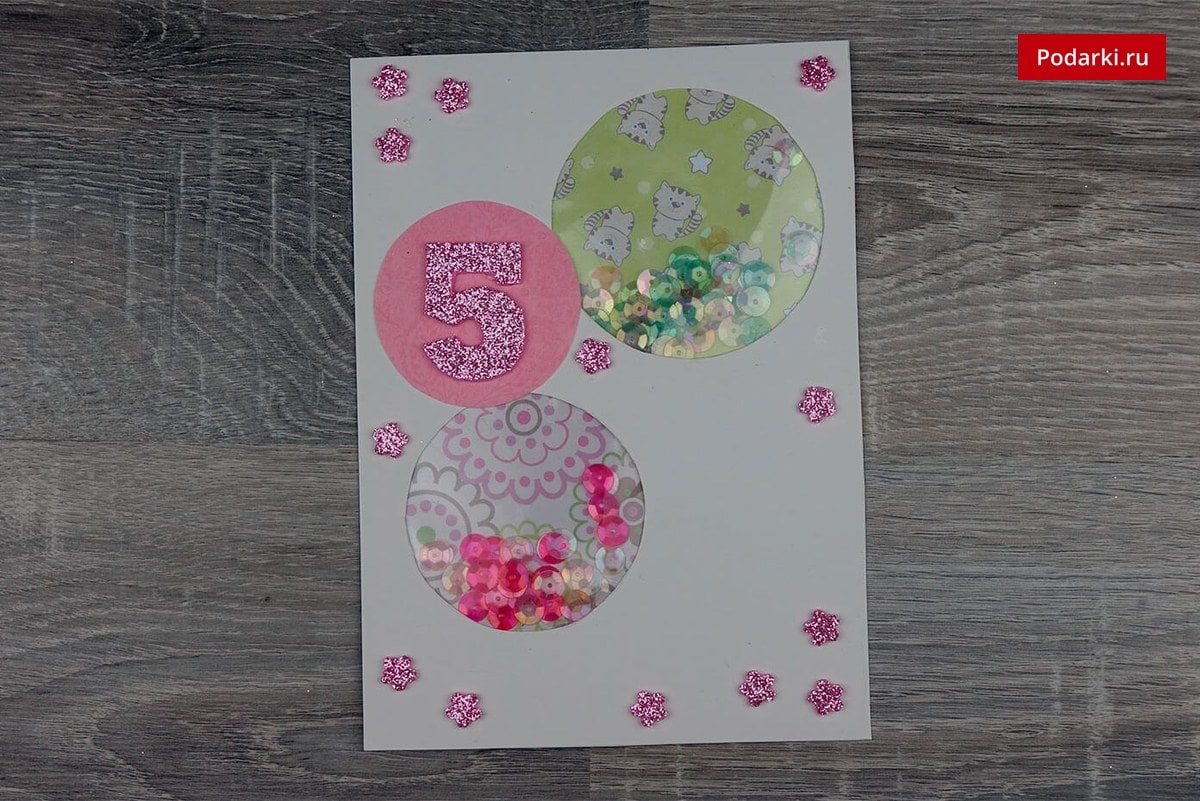
Pink ribbons form bows. 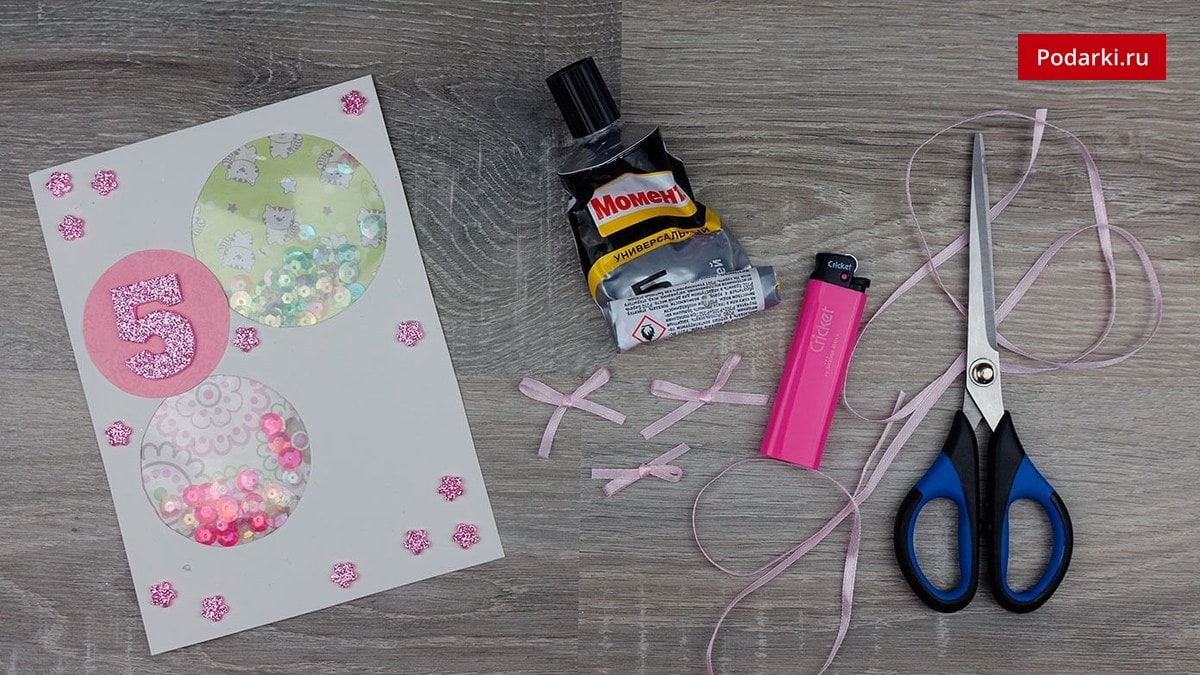
Cut off small pieces of tape. 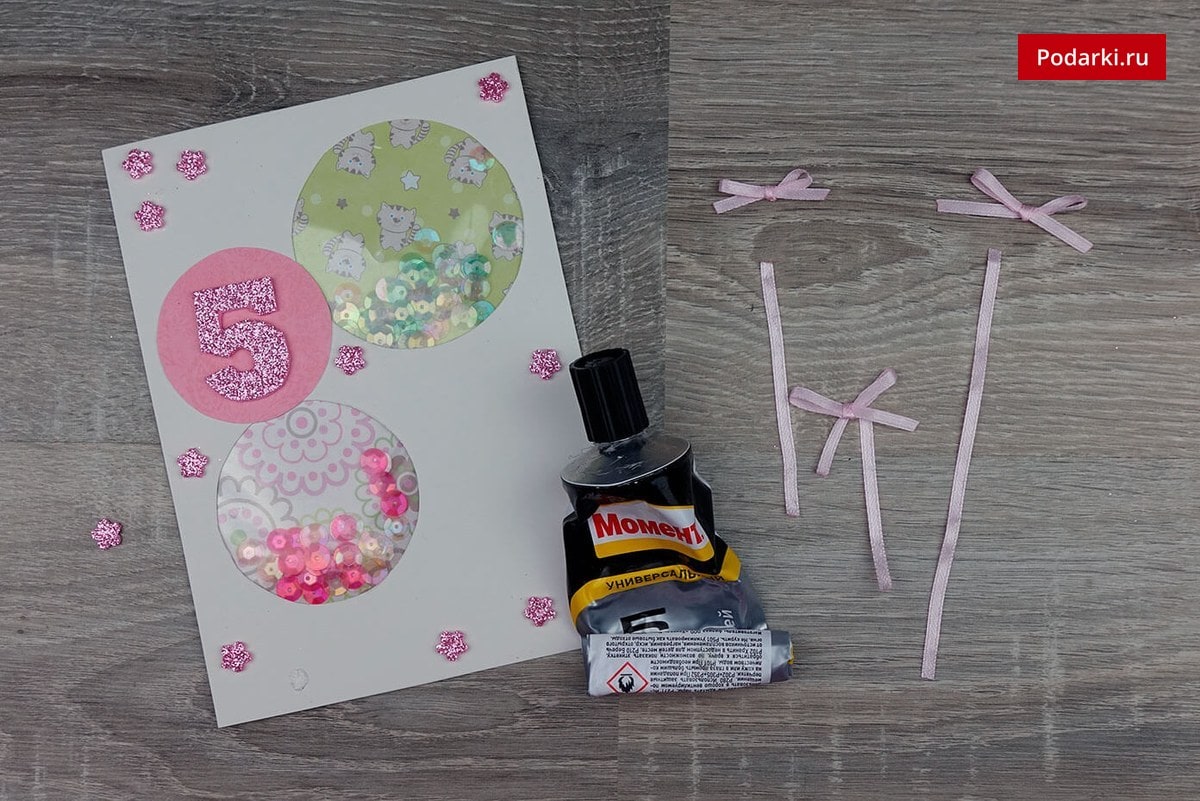
Glue the bows and ribbons so that the circles look like balloons. 
If the pieces of tape are too long, glue the edges on the reverse side. 
We paste the finished composition to the base of the postcard. 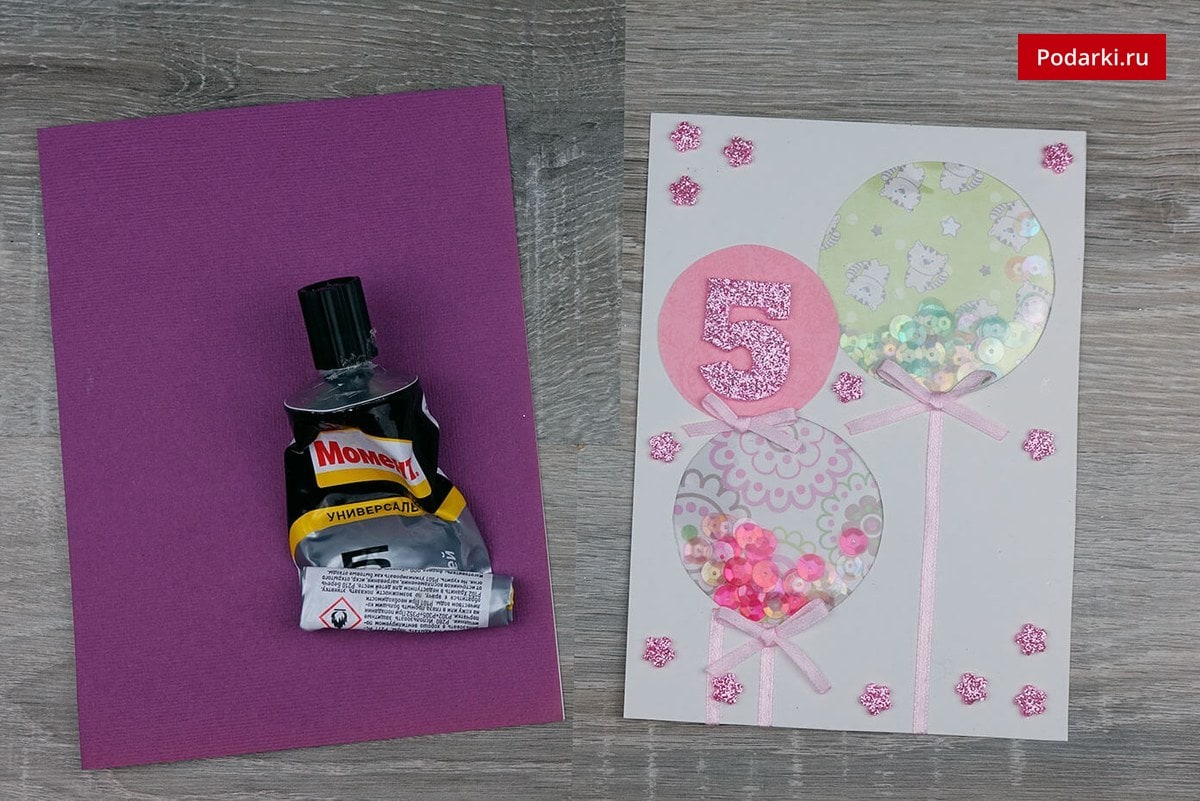
A beautiful, delicate postcard for a young lady is ready! 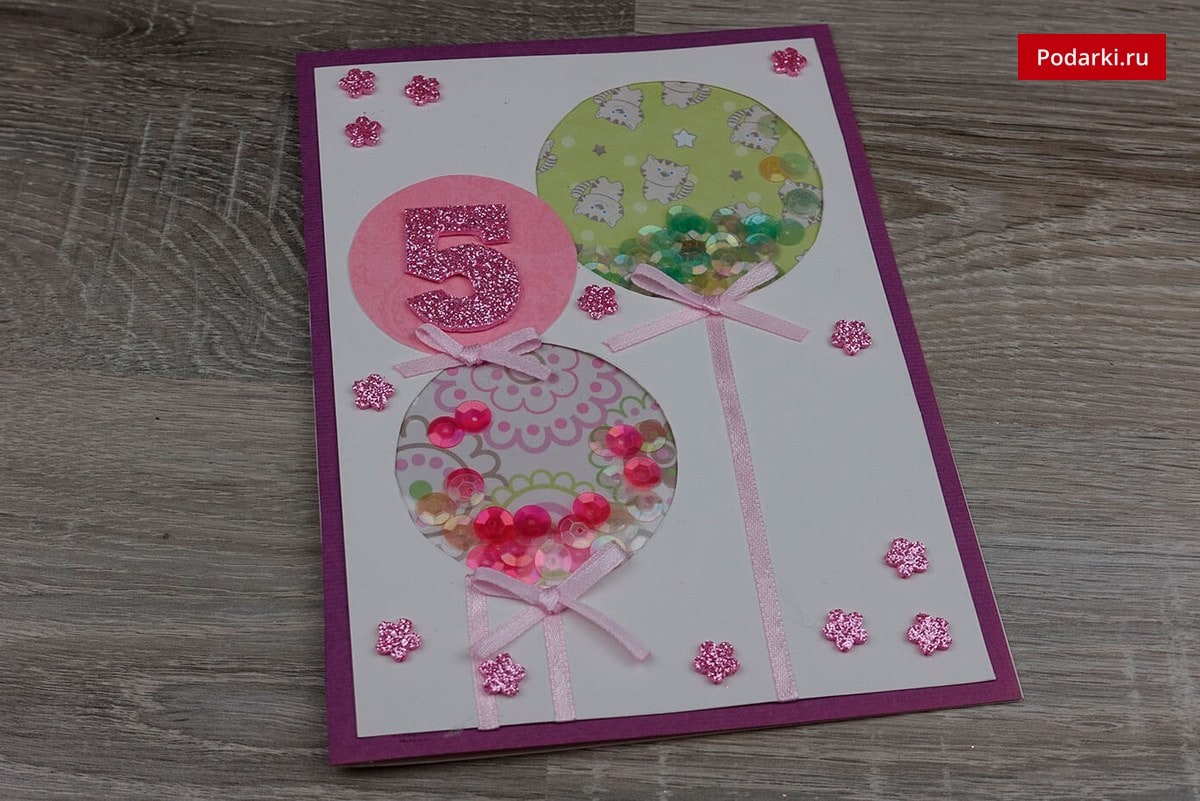
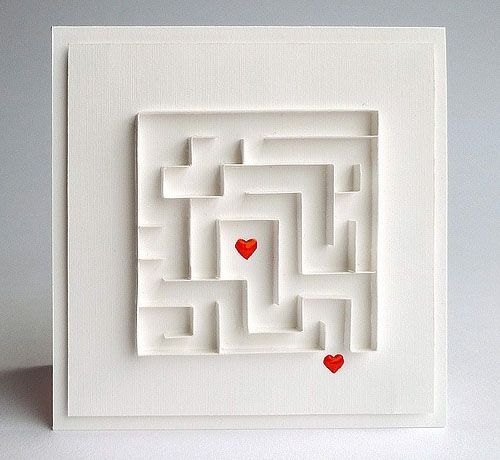
Postcard 3d
If classic postcards seem too simple to you, then we suggest making an unusual 3d version with your own hands.
It will take:
- cardboard of different colors;
- pencil or pen;
- ruler;
- clerical knife;
- glue;
- elements of decor.

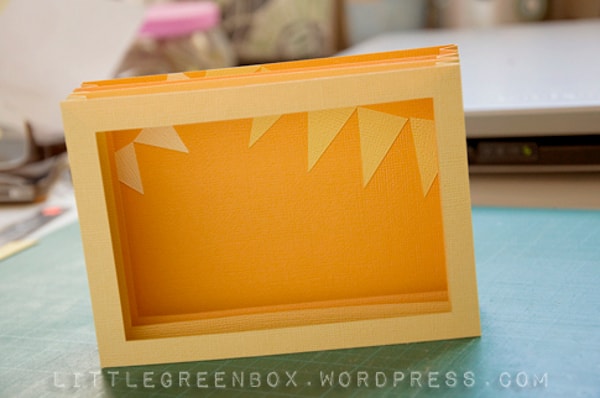
We take four sheets of cardboard and make markings on three of them, as shown in the photo.
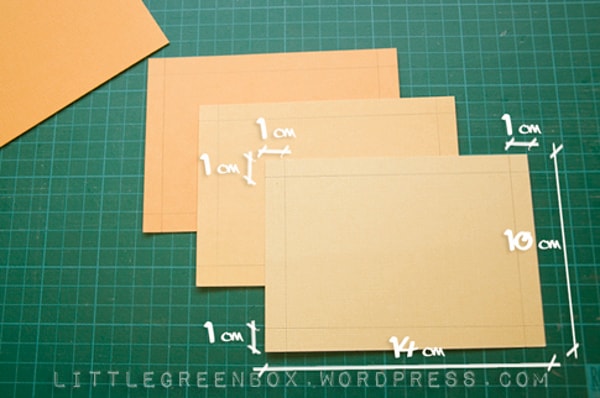
Cut out the cardboard frames along the lines. 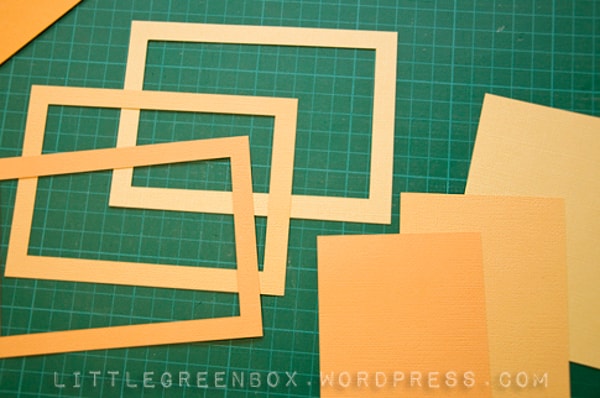
From the remaining pieces of paper cut two strips of cardboard of each color. Dimensions are shown in the photo. Apply the markup and cut the corners of the blanks. Fold the strips in such a way as to make a zigzag. 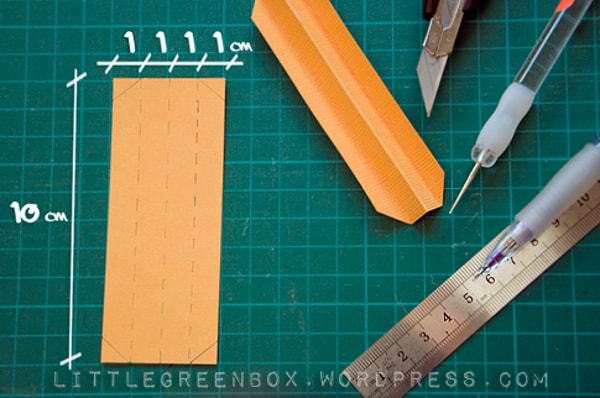
We take the frame, which will be the front of the postcard. From the seamy side we glue zigzags to the short sides of the rectangle. 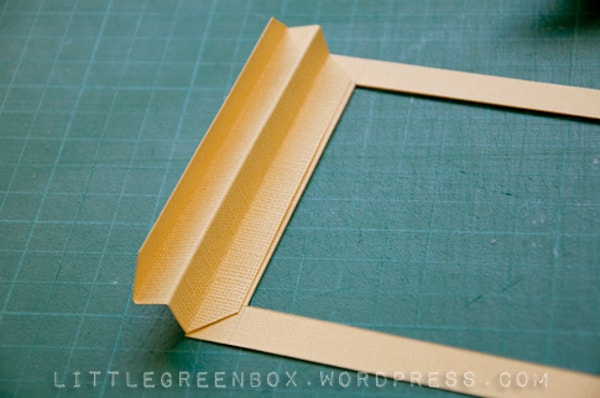
Apply glue to the inner zigzag strip. 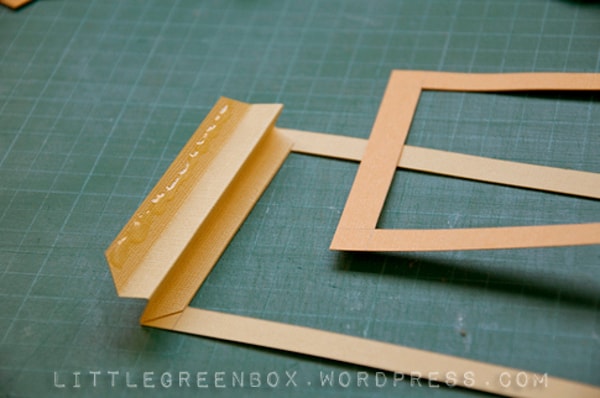
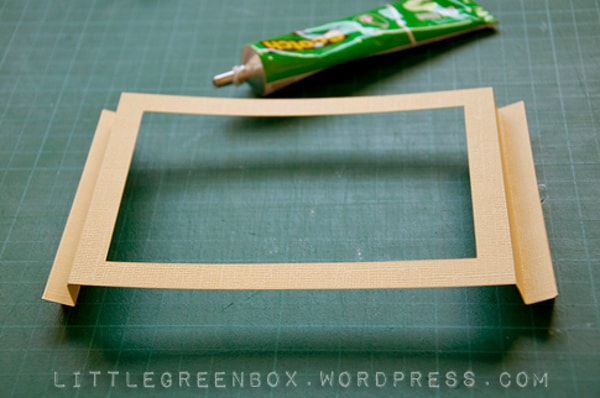
Gently glue the second frame so that the edges do not extend beyond the postcard. 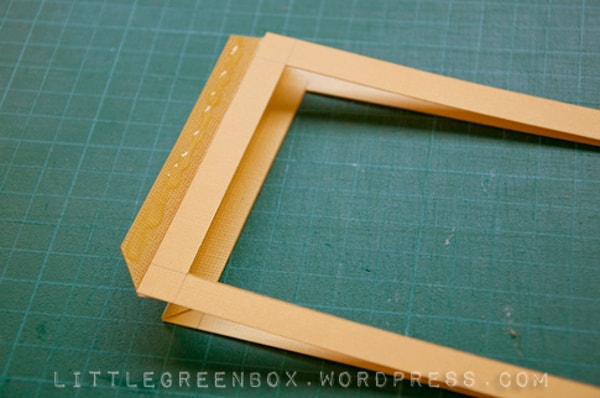
Repeat the same with the other side. 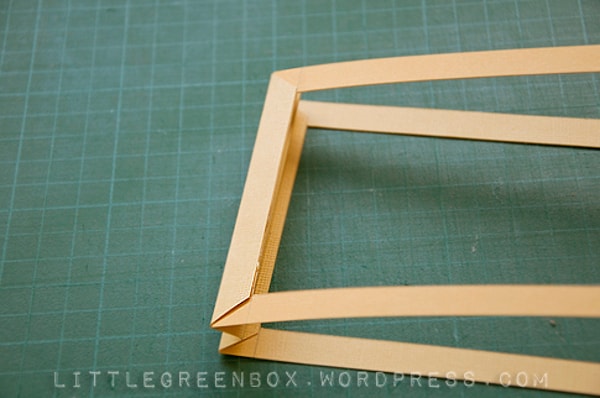
It turned out such a blank for postcards. 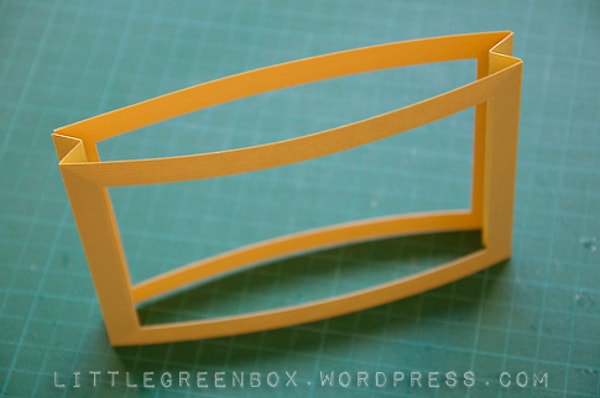
Repeat the same steps and glue the third frame and the fourth sheet of cardboard. 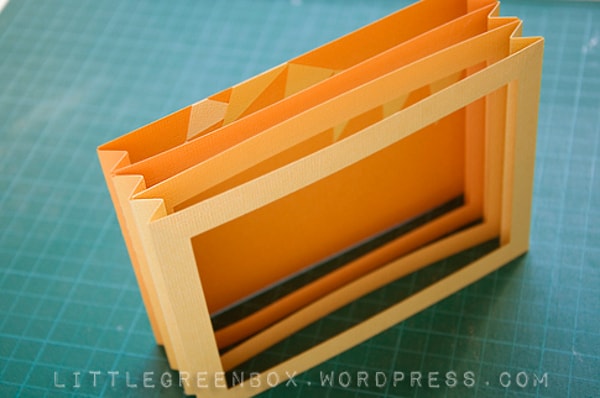
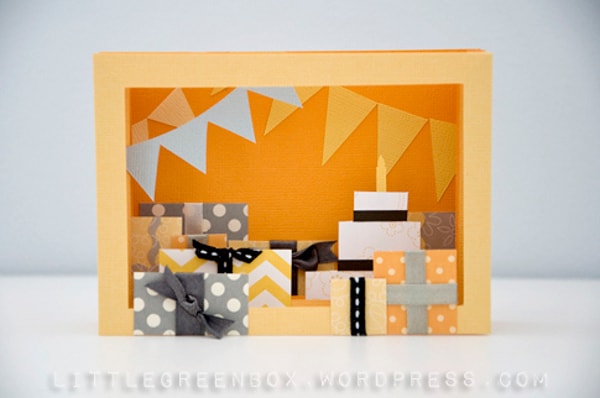
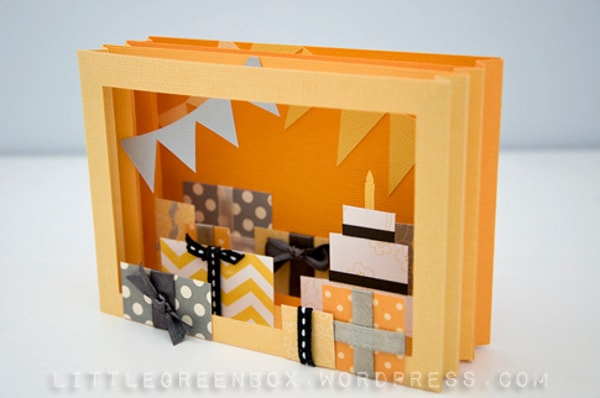
 We cut out various elements of cardboard and use the decor to create a stylish postcard.
New Year card
Winter holidays are a truly magical time, when you especially want to please your loved ones with even such a pleasant trifle as a postcard.
You will need the following materials:
- white and colored cardboard;
- glossy cardboard;
- silver pen;
- pencil;
- scissors;
- glue.
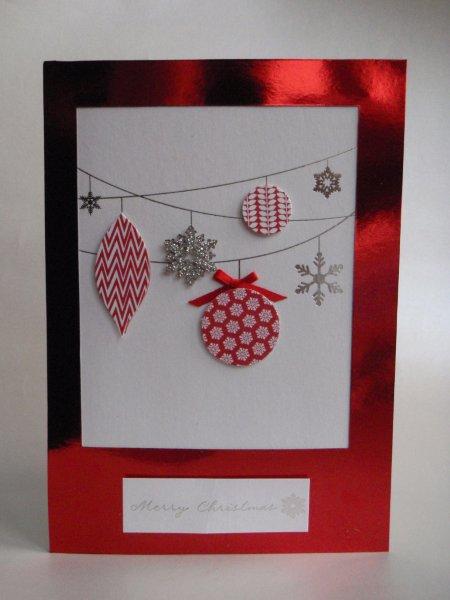
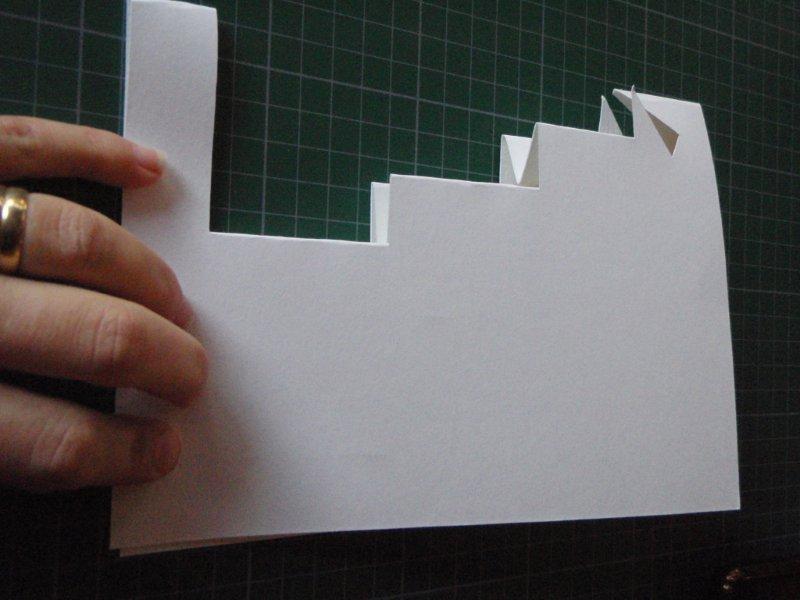
Bend in half a sheet of cardboard white. On the inside we make the markup, as shown in the photo.
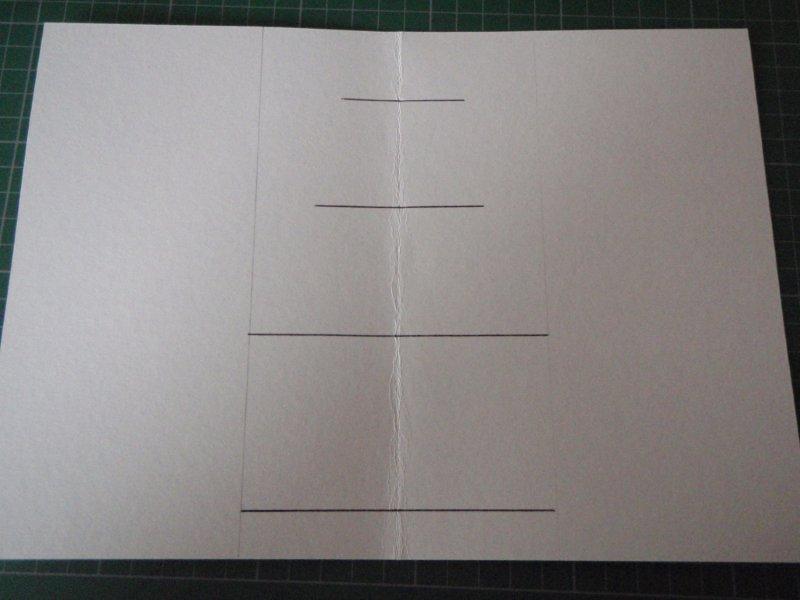
Cut the lines with scissors and fold the elements in the opposite direction. 
We decorate the postcard with colored cardboard, as shown in the photo. 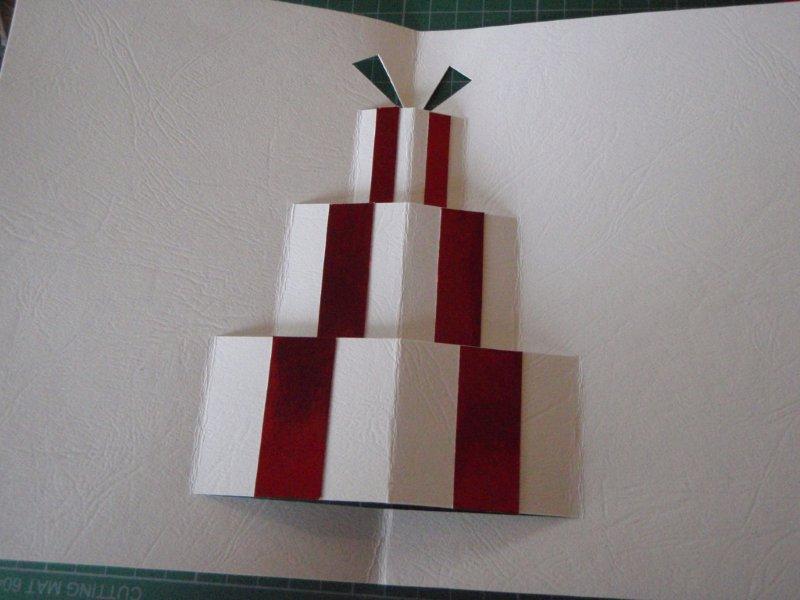 Cut out small cardboard stars for decoration and glue them to the card.
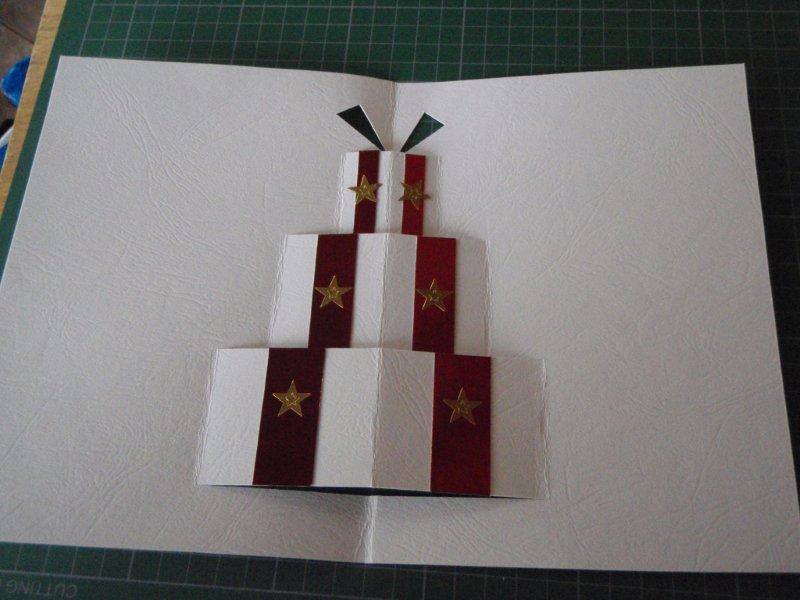
On the sides we glue the stripes of the same color as the stars. 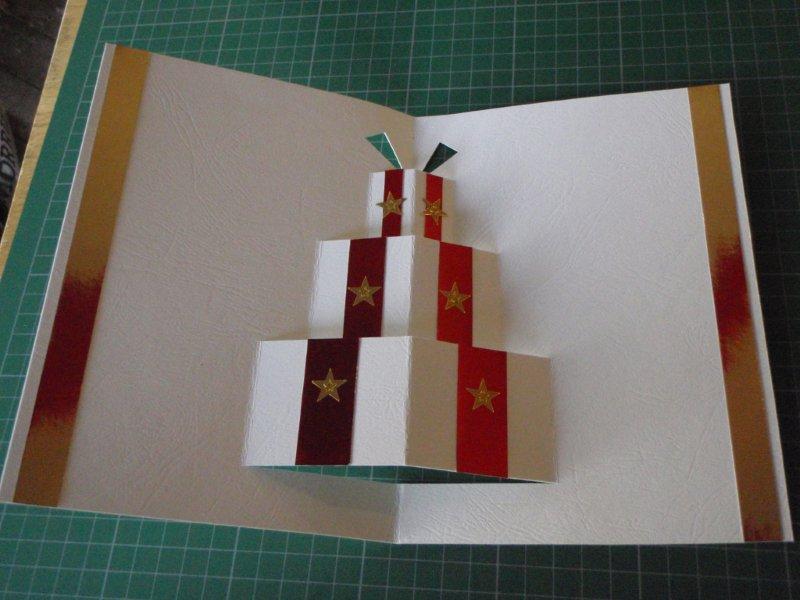
If you wish, you can cut out the inscription and add it to the main composition. 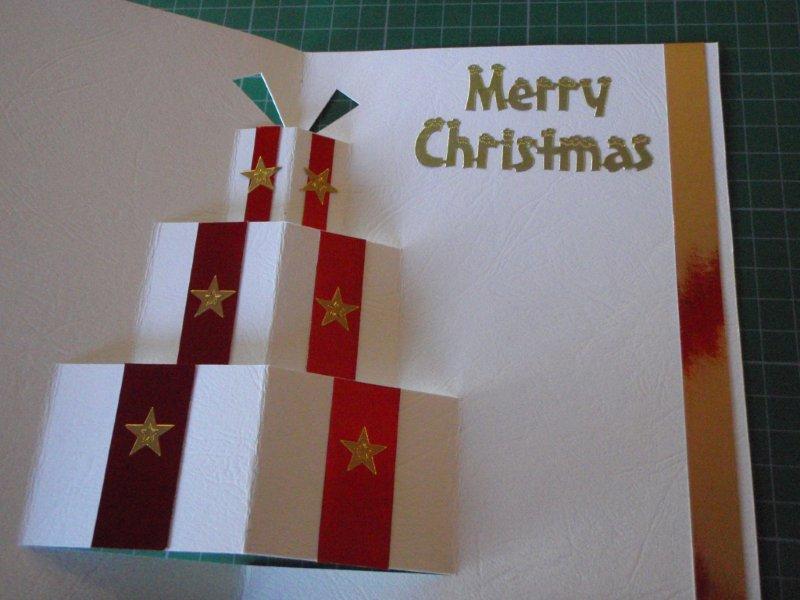
Bend in half a sheet of glossy cardboard. 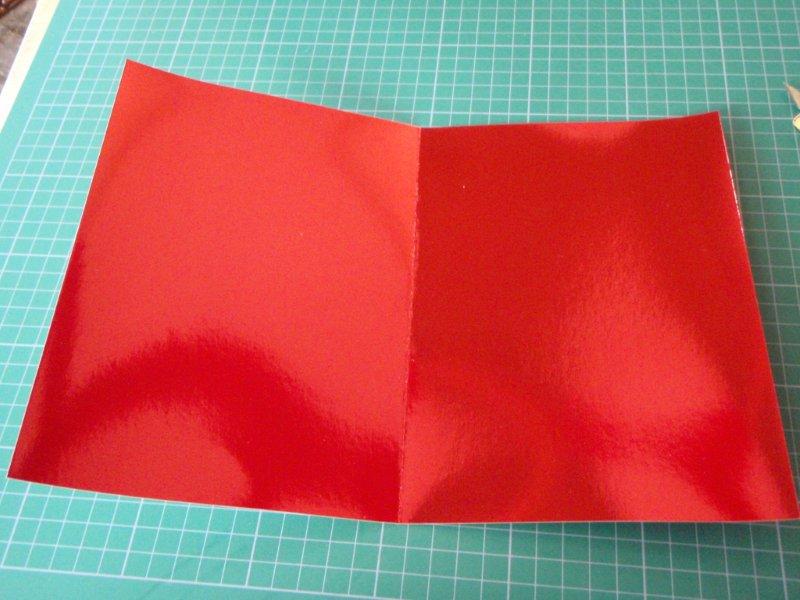
Glue to the inside of the workpiece with the decor. 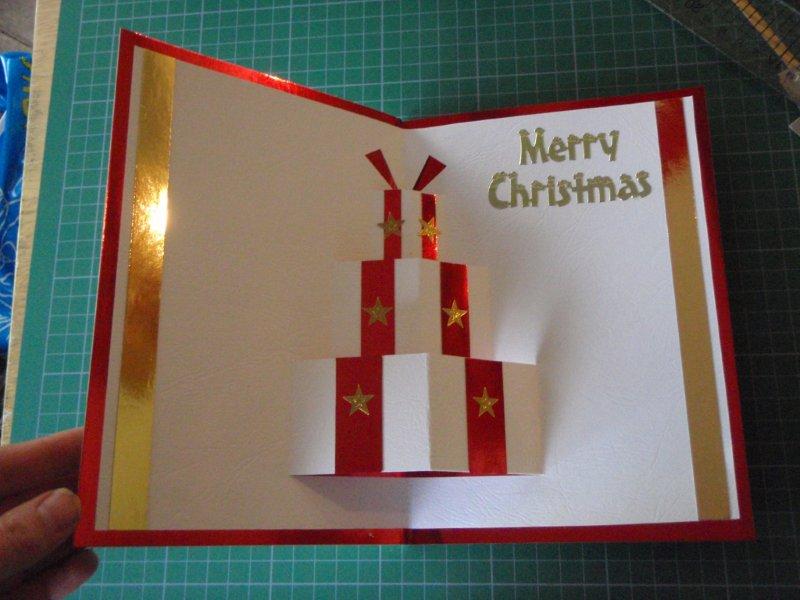 Take a sheet of white cardboard and cut a small rectangle. That he will decorate the front of the card. Cut out different decorative elements from colored cardboard and glue them. We supplement the composition with a silver handle.
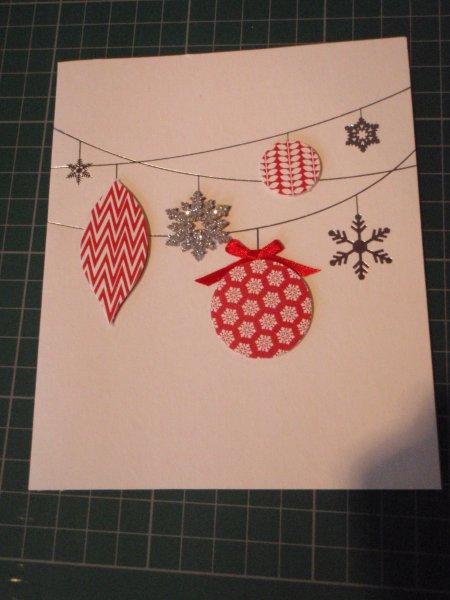 From a glossy cardboard cut a rectangle of a smaller size than a blank for decoration.

From the inside we glue the blank with decorative elements.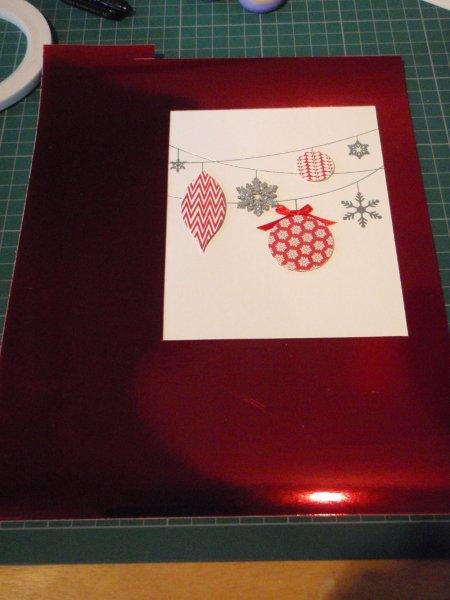
Glue the resulting blank to the front of the card. 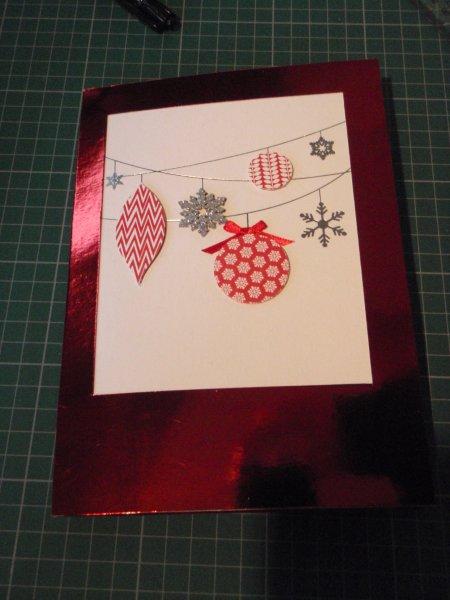

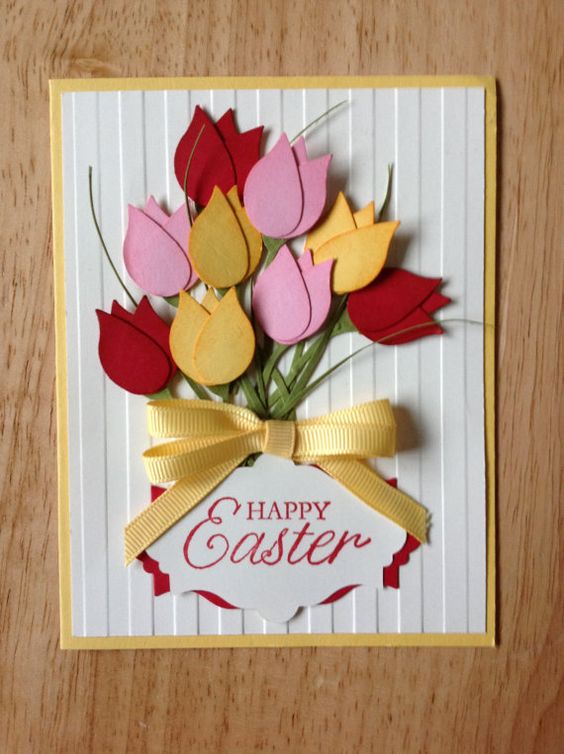
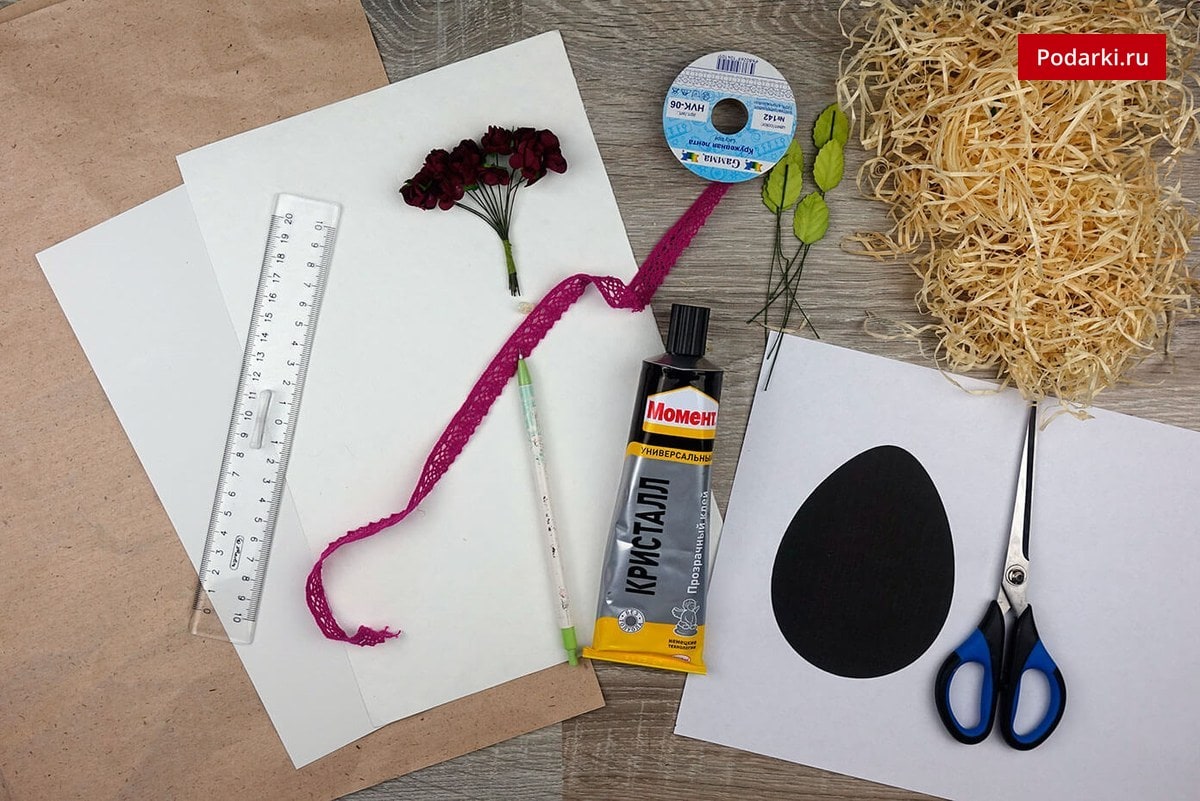
Easter card
To create a card prepare:
- white cardboard;
- white watercolor paper;
- kraft paper;
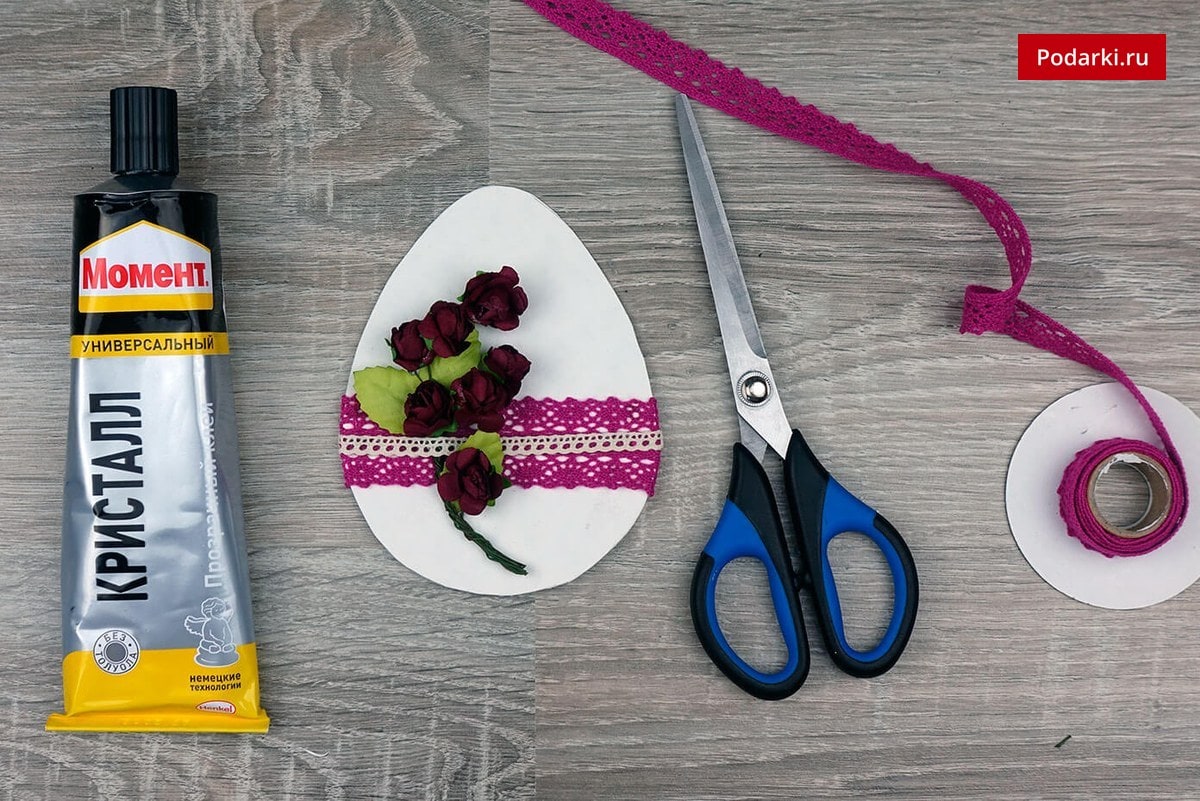
- lace ribbon;
- glue;
- an egg pattern;
- ornamental grass, leaves and flowers;
- scissors;
- ruler;
- pencil.
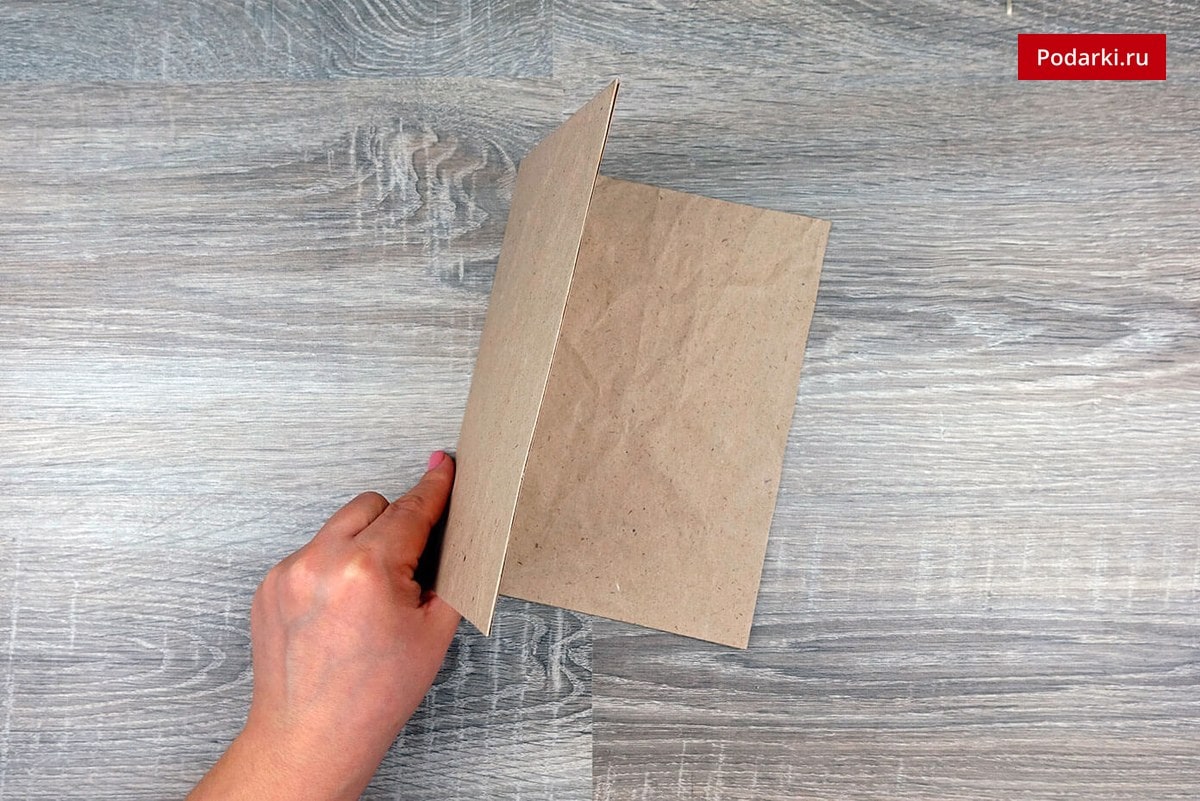
Fold white cardboard in half. That is what will be the basis of the postcard. 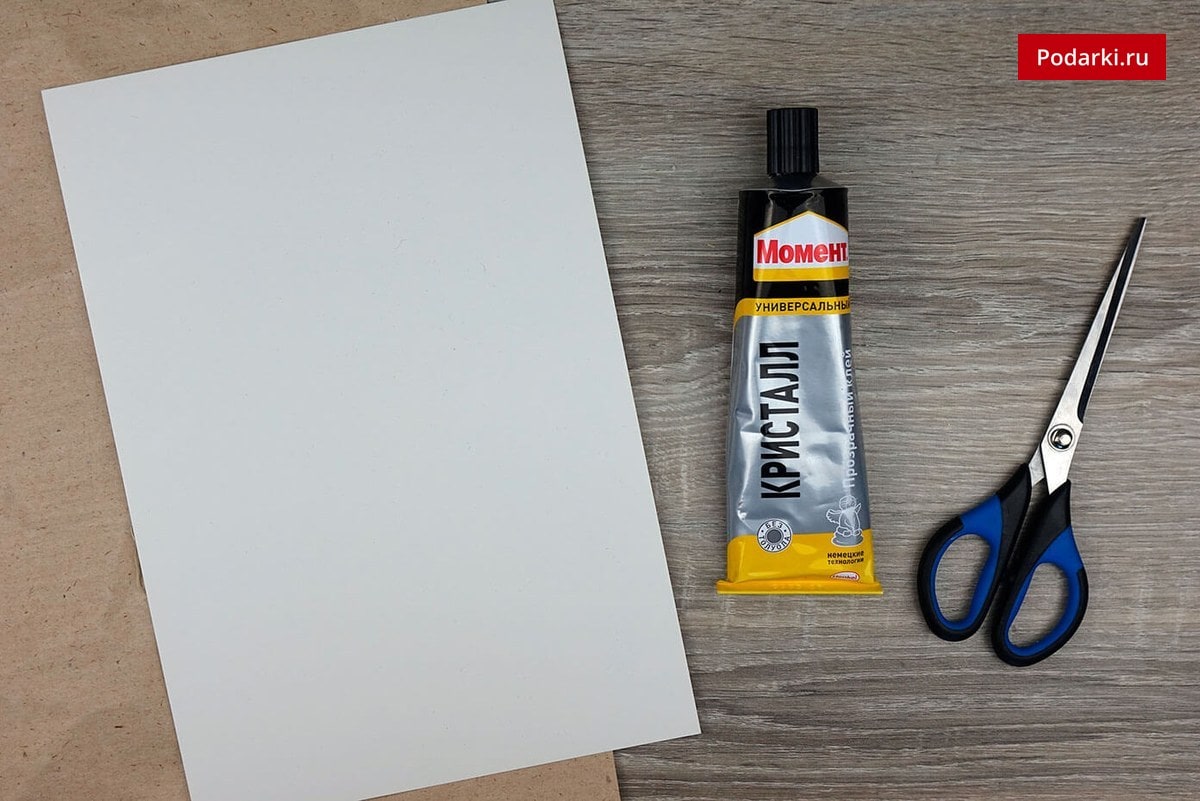
Glue the blank to the Kraft paper face. 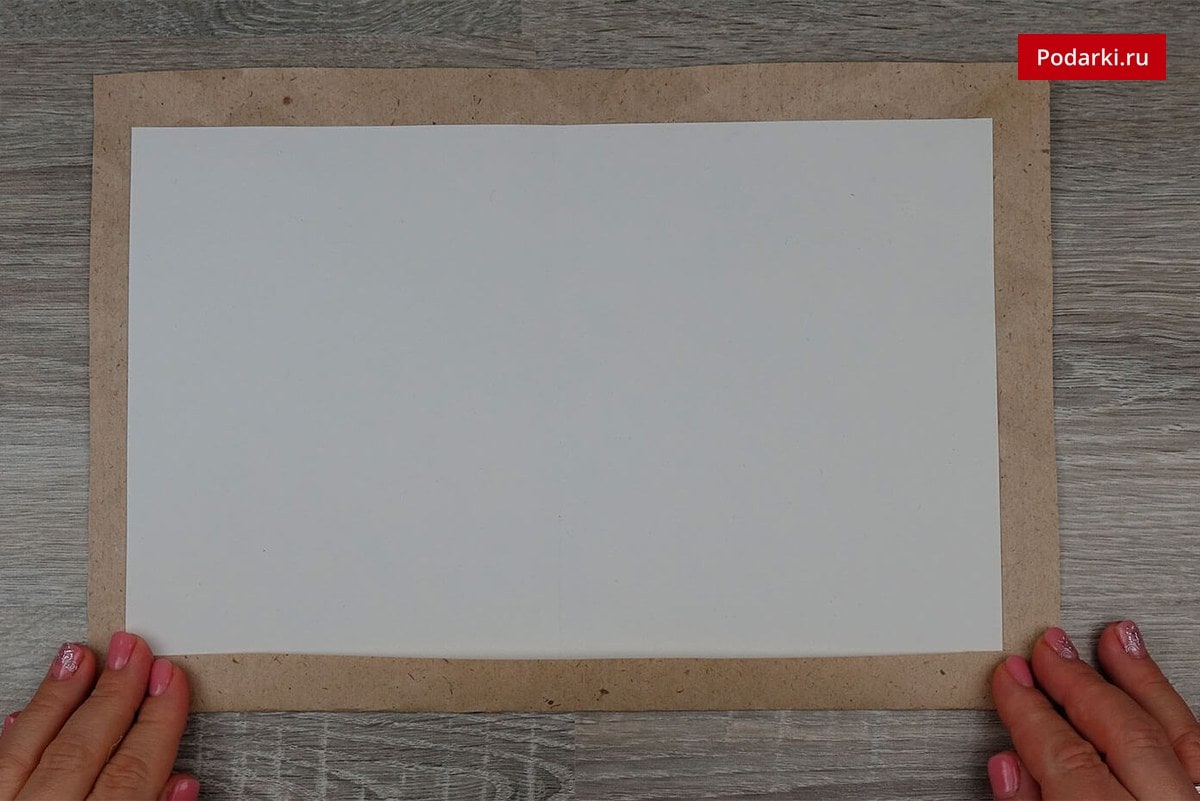
The edges of the kraft paper are wrapped and pasted inside the postcard. Cut the corners, as shown in the photo. 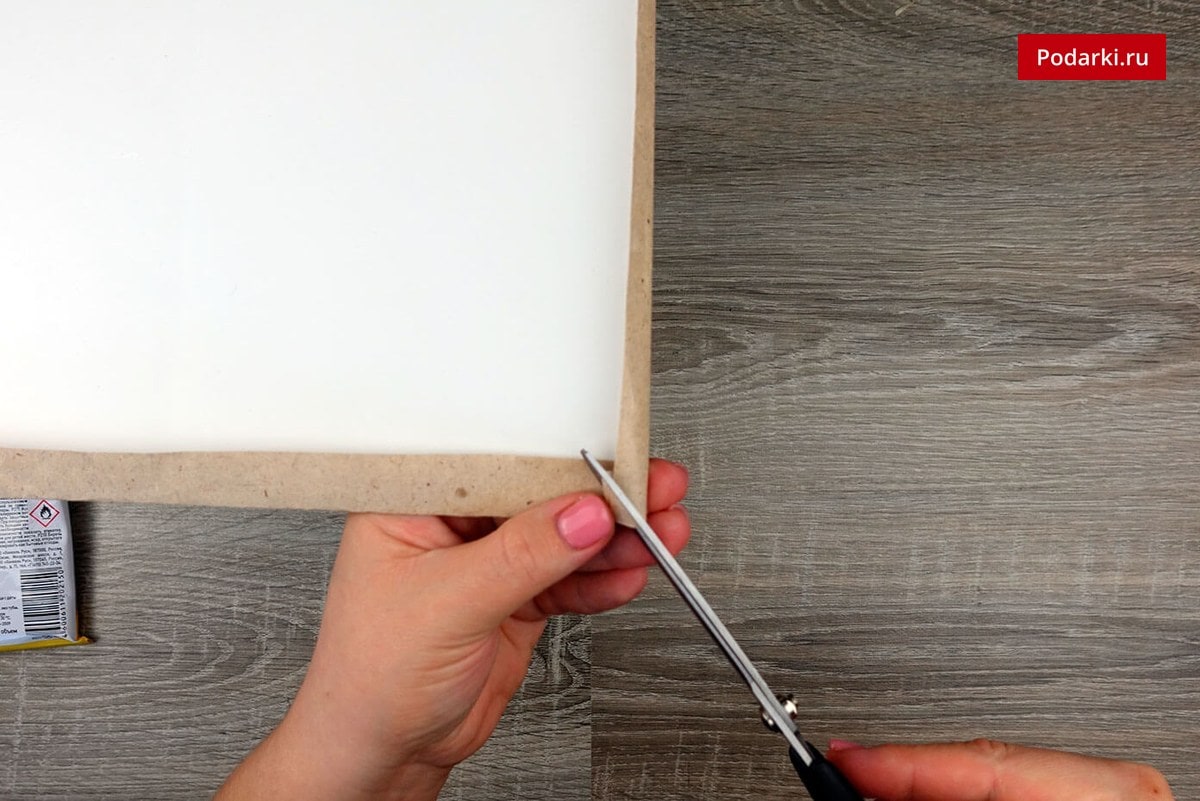
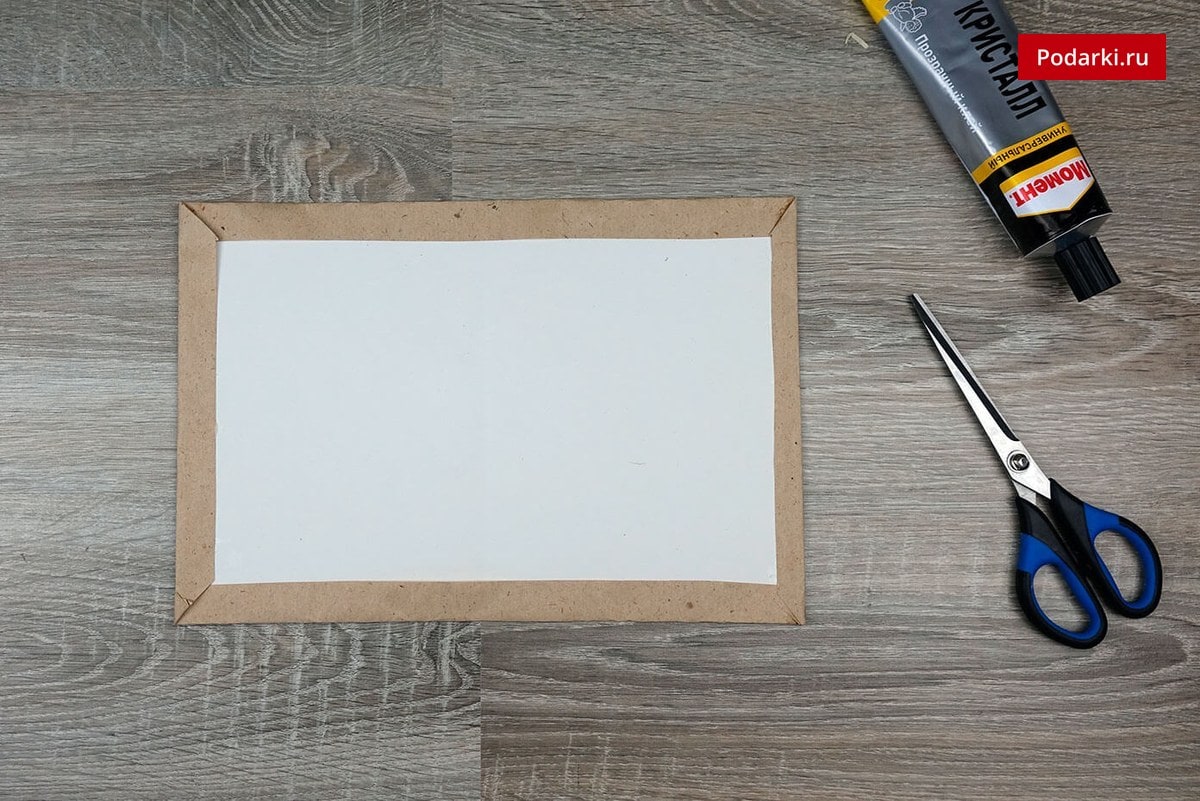
Glue the kraft paper to the card from the inside. 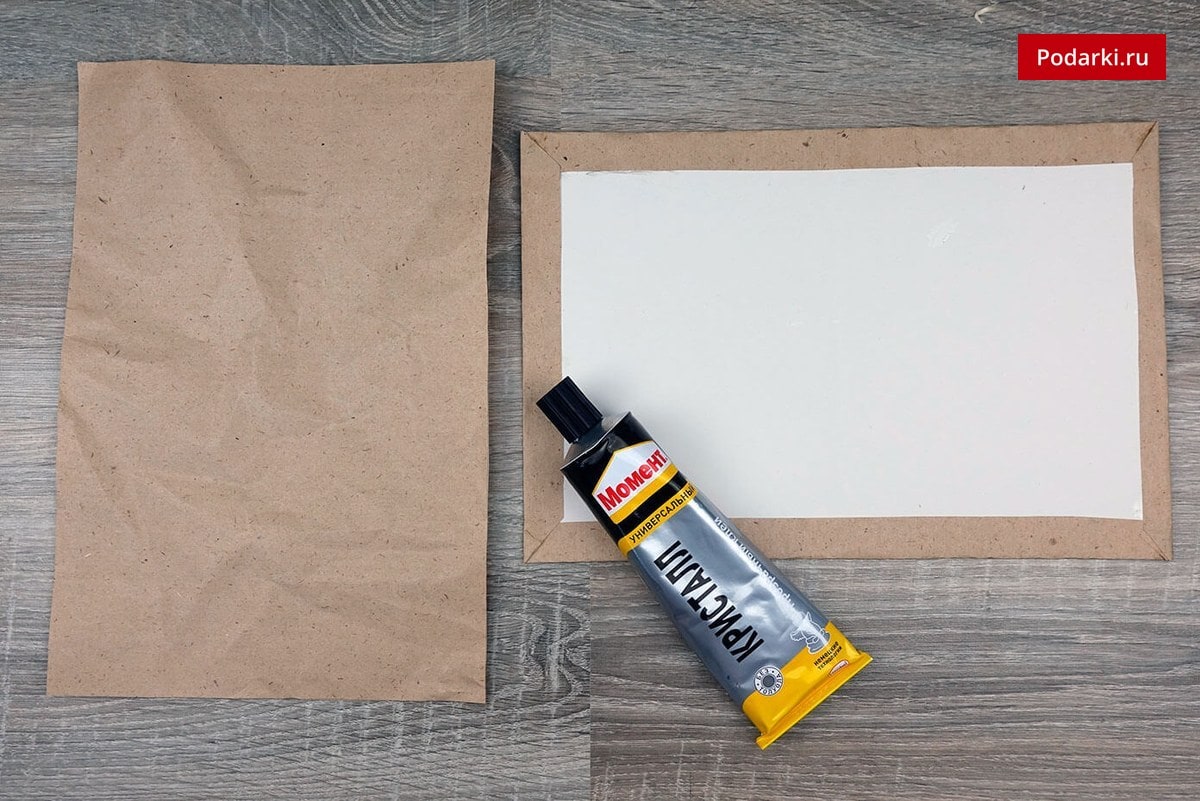
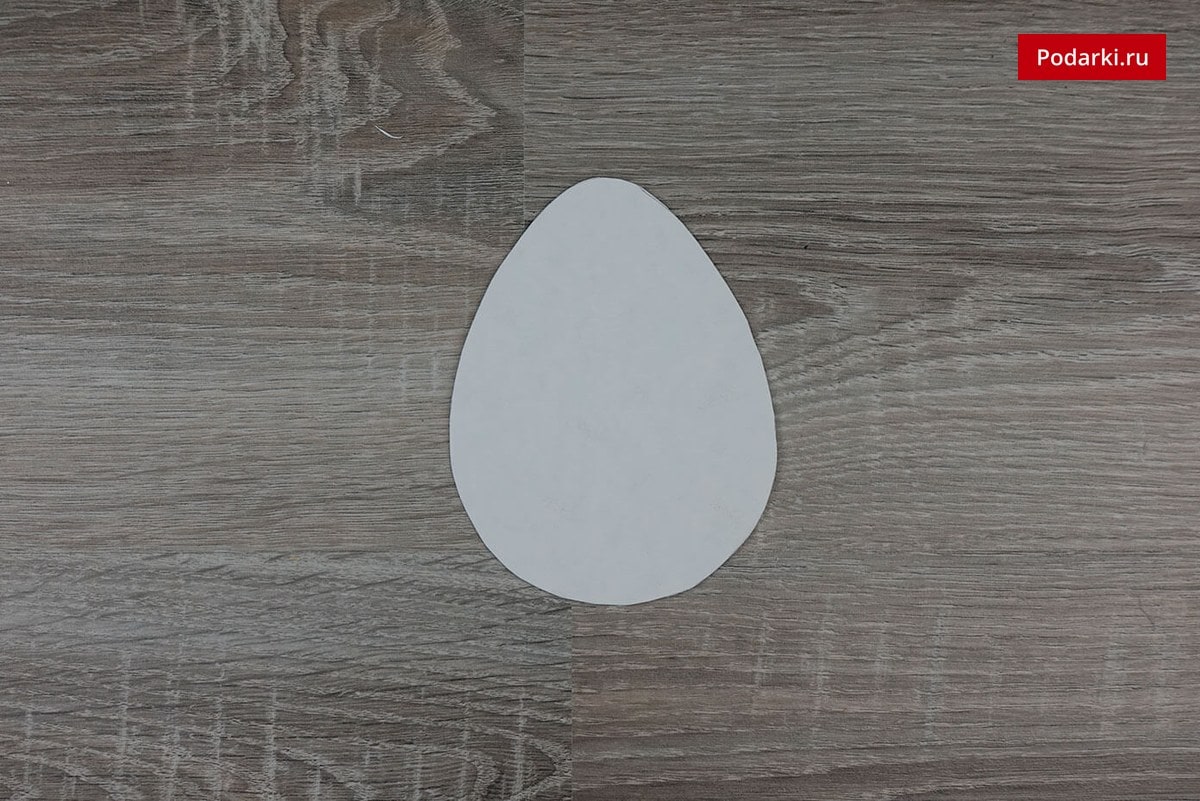
Cut out the egg pattern and transfer it to watercolor paper. 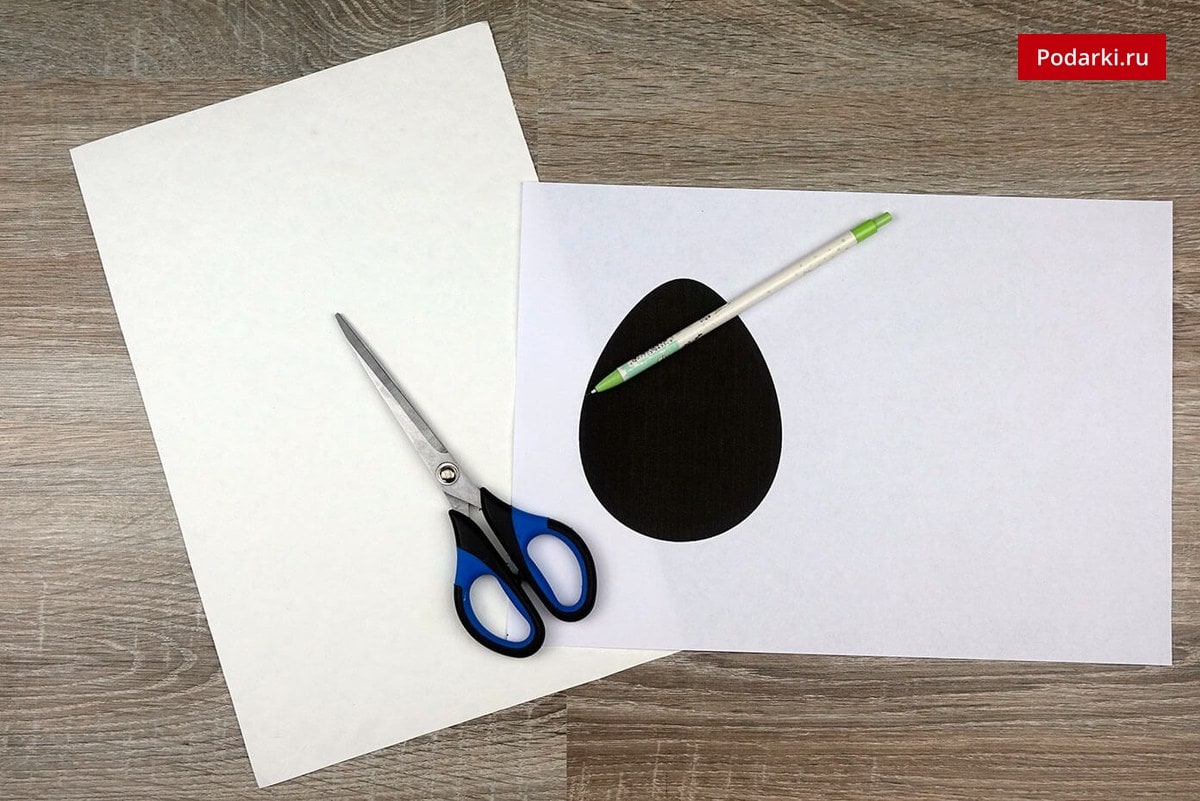
Cut off three lace ribbons. We collect decorative flowers and leaves in a single composition. 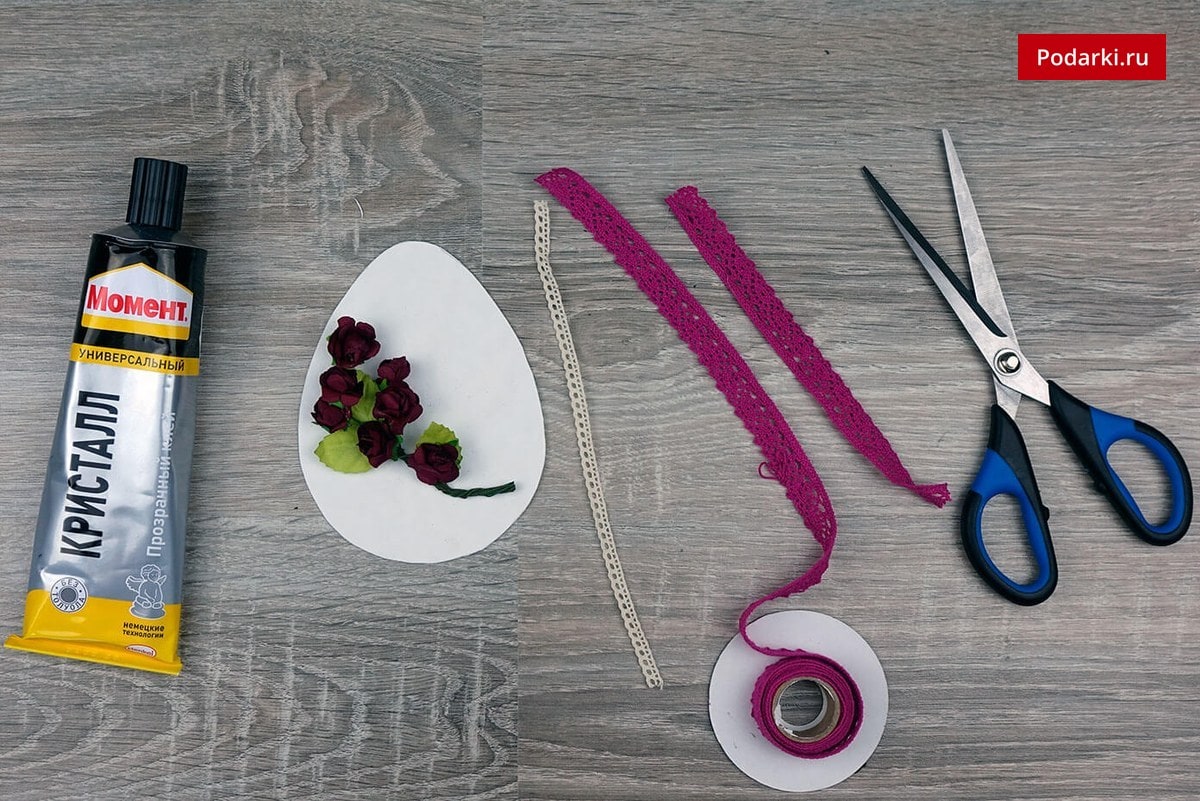
Glue the two bright ribbons to the workpiece, and wrap the ends inside. 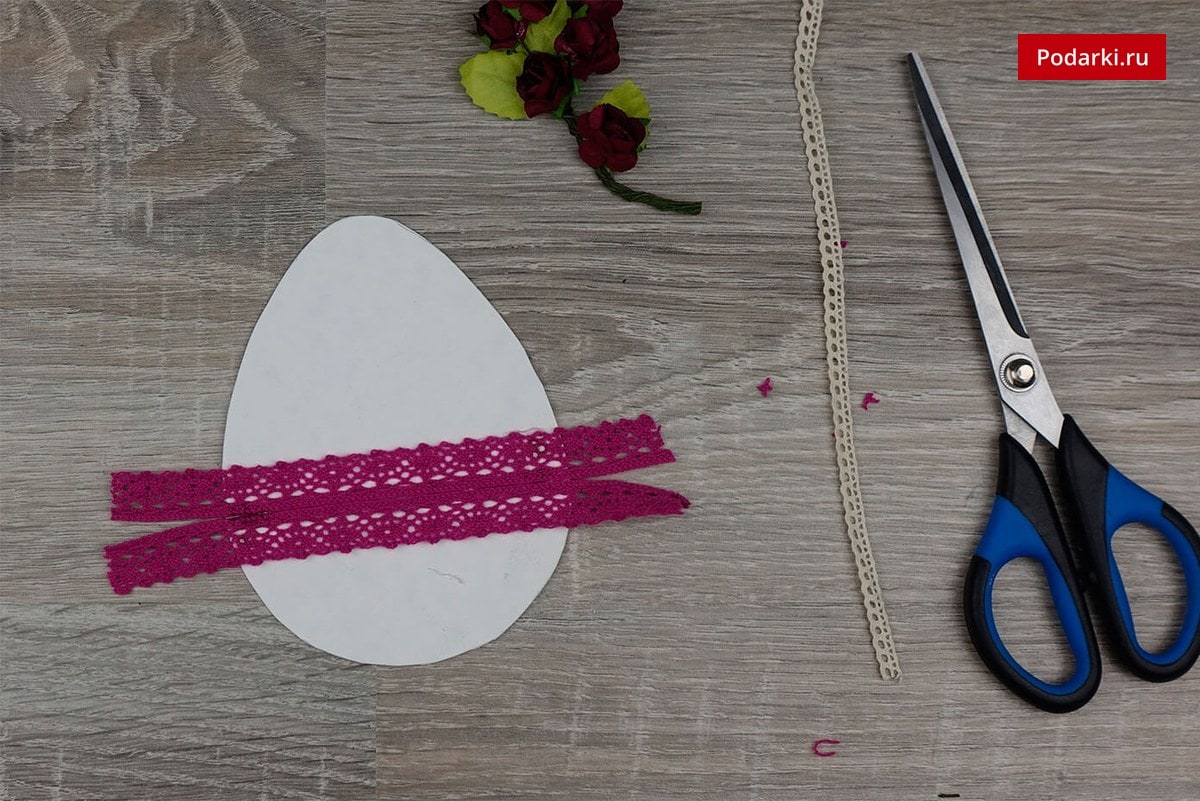
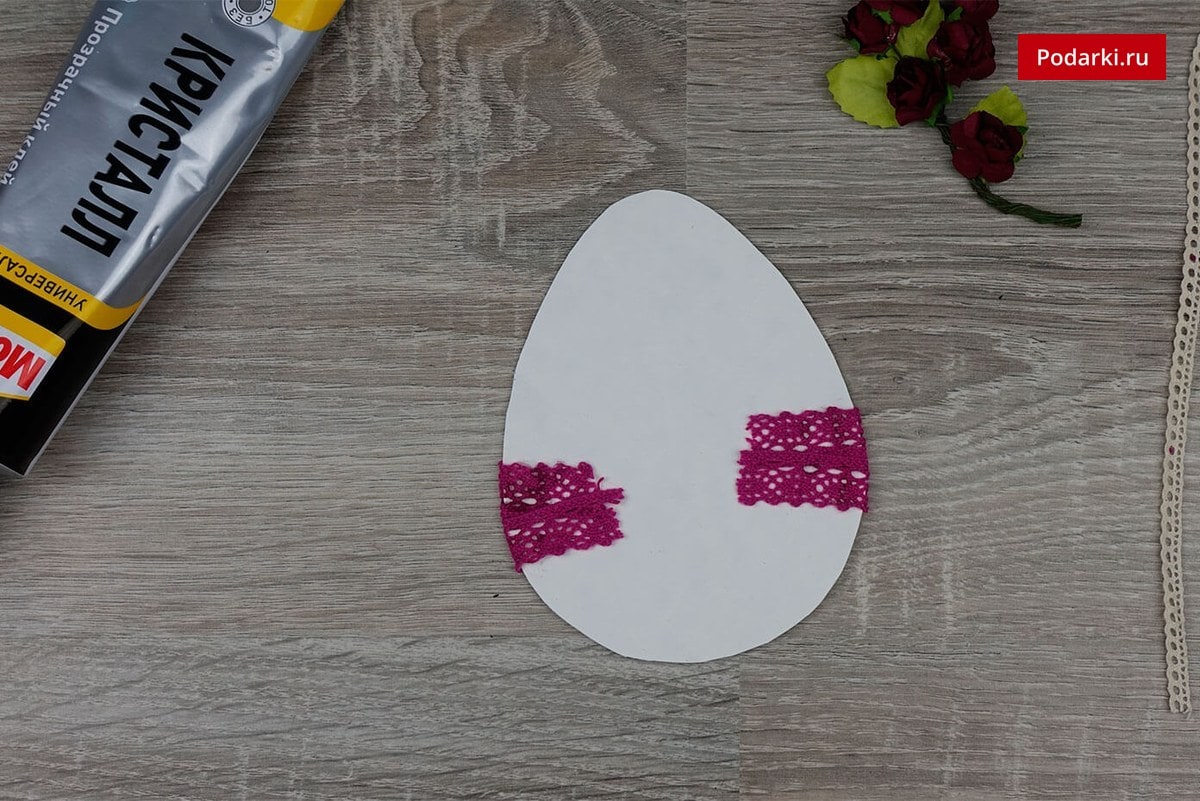
Attached to the ribbons of the composition of flowers. 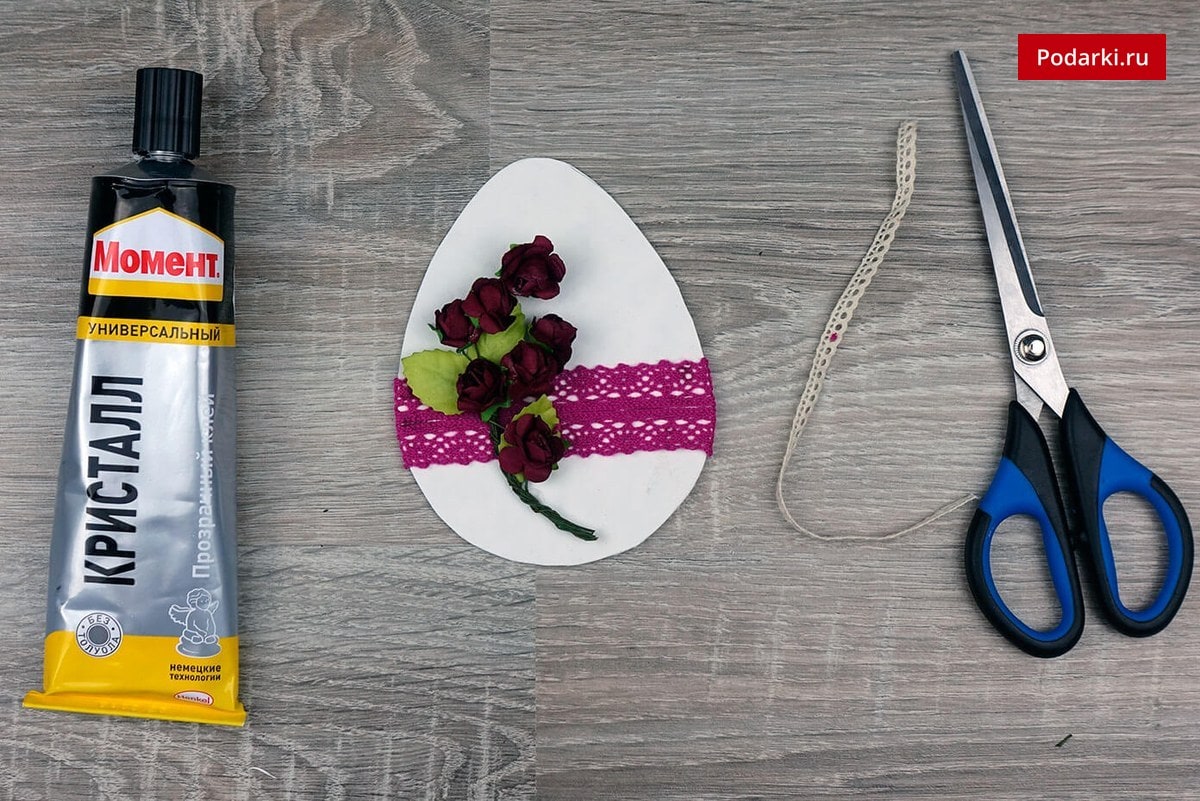
On top of the bouquet glue the third tape, wrapping the ends into the inside. 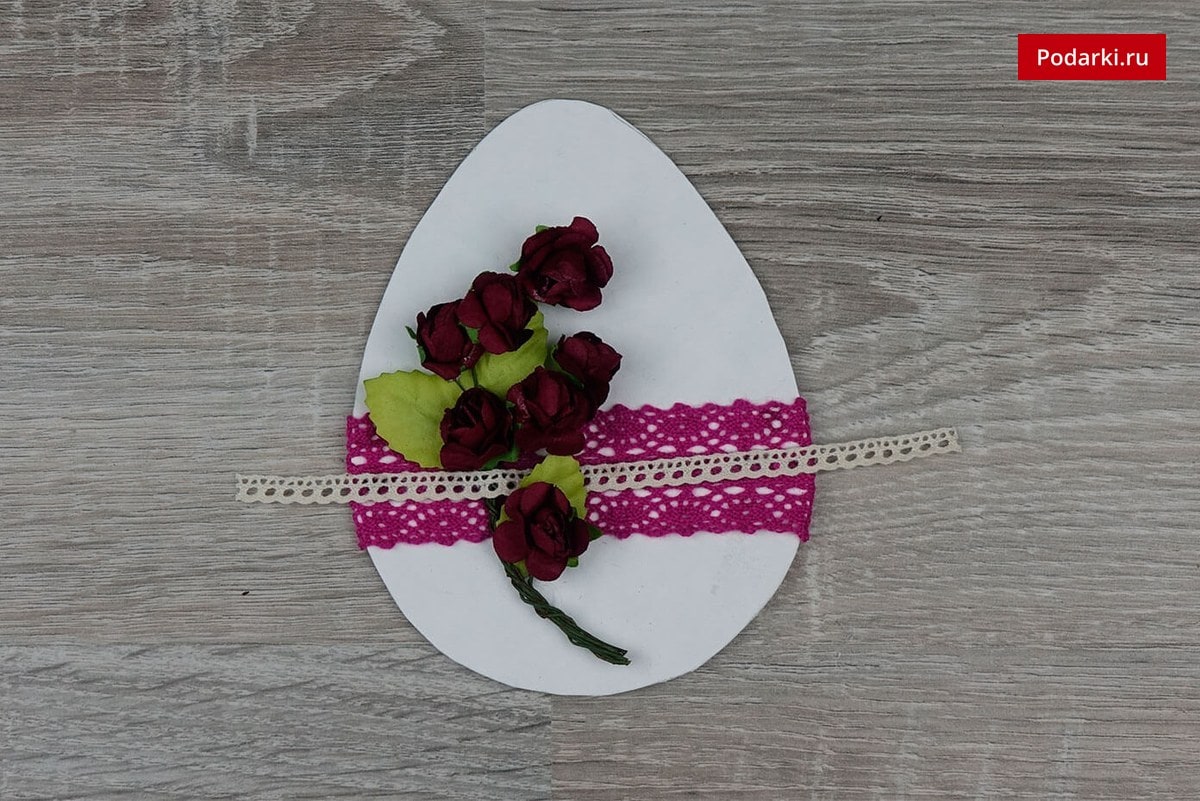
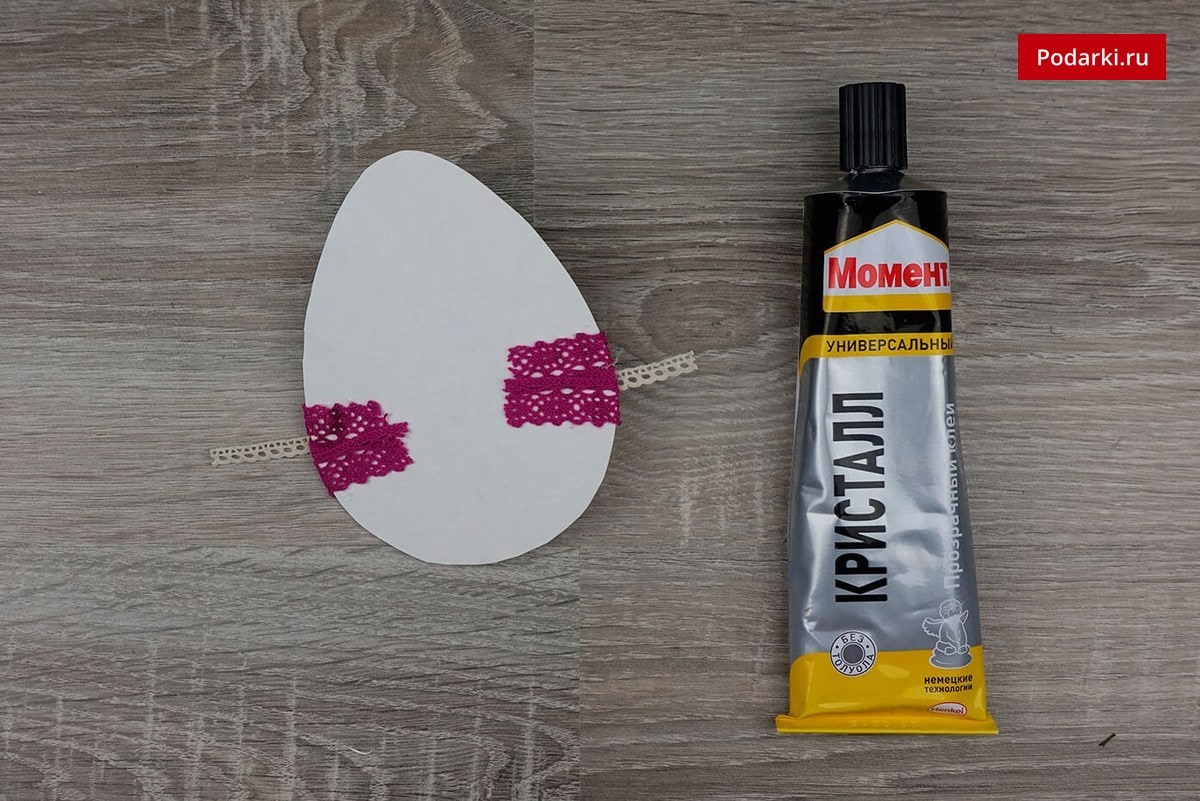
Decorate the egg with a ribbon from the top and bottom sides. 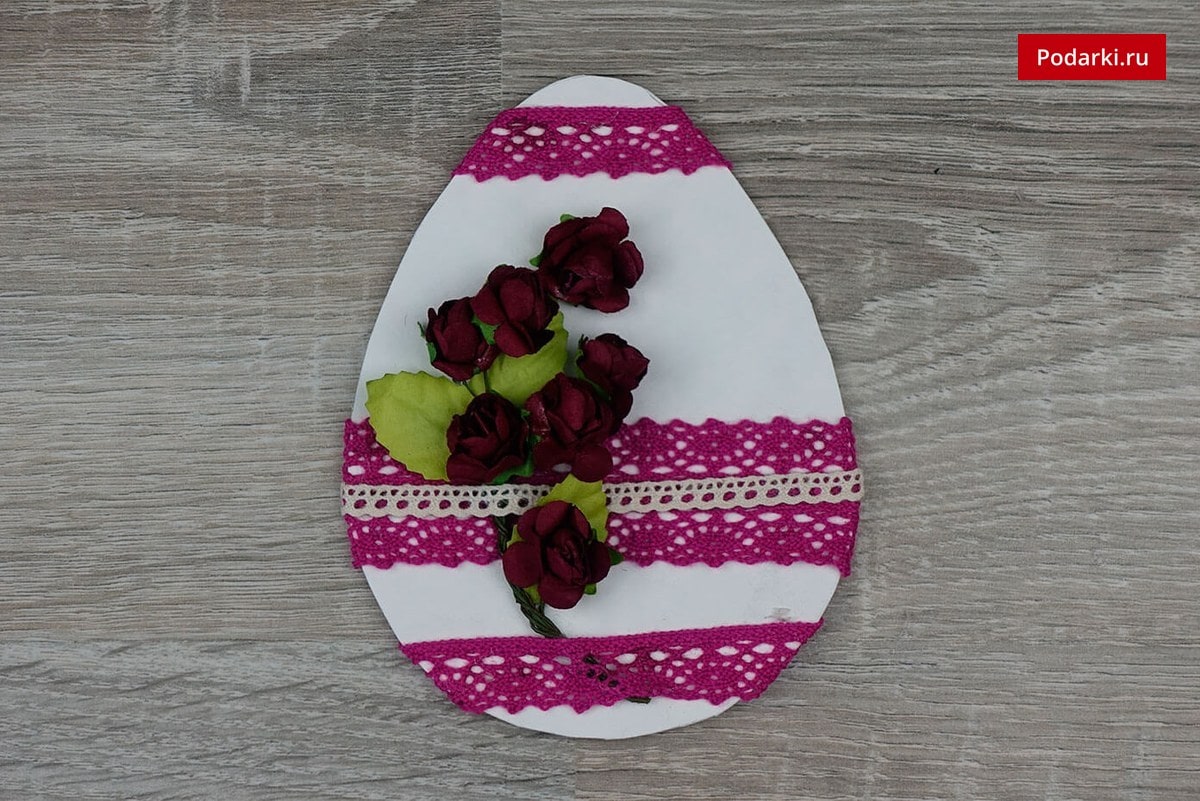
We attach decorative grass to the front side of the postcard, with the exception of the central part. 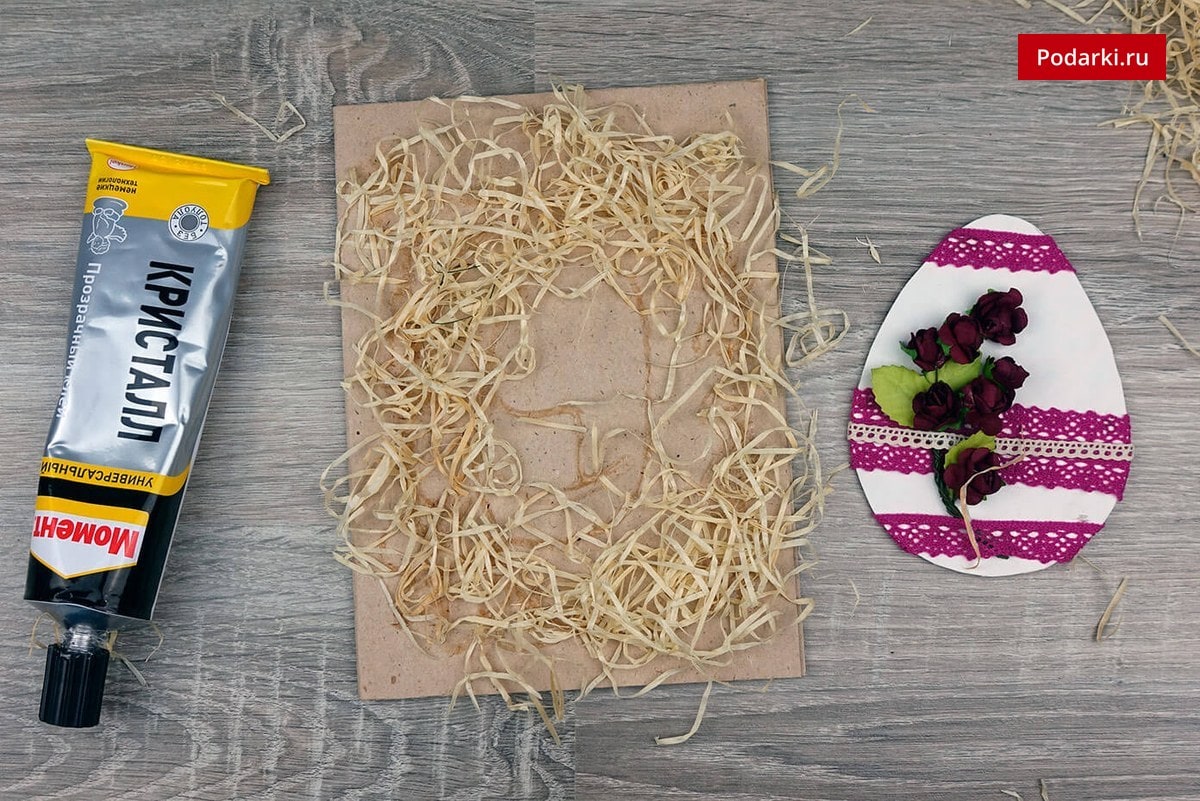
Gently glue decorative egg in the center of the postcard. Beautiful, festive composition is ready!  Postcard for men
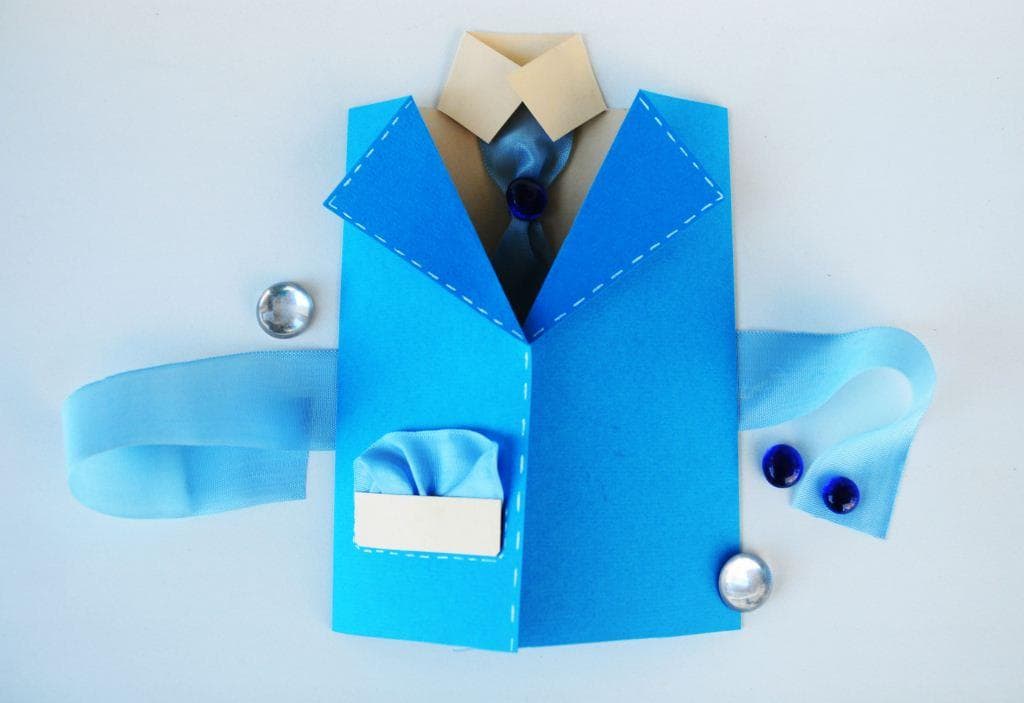
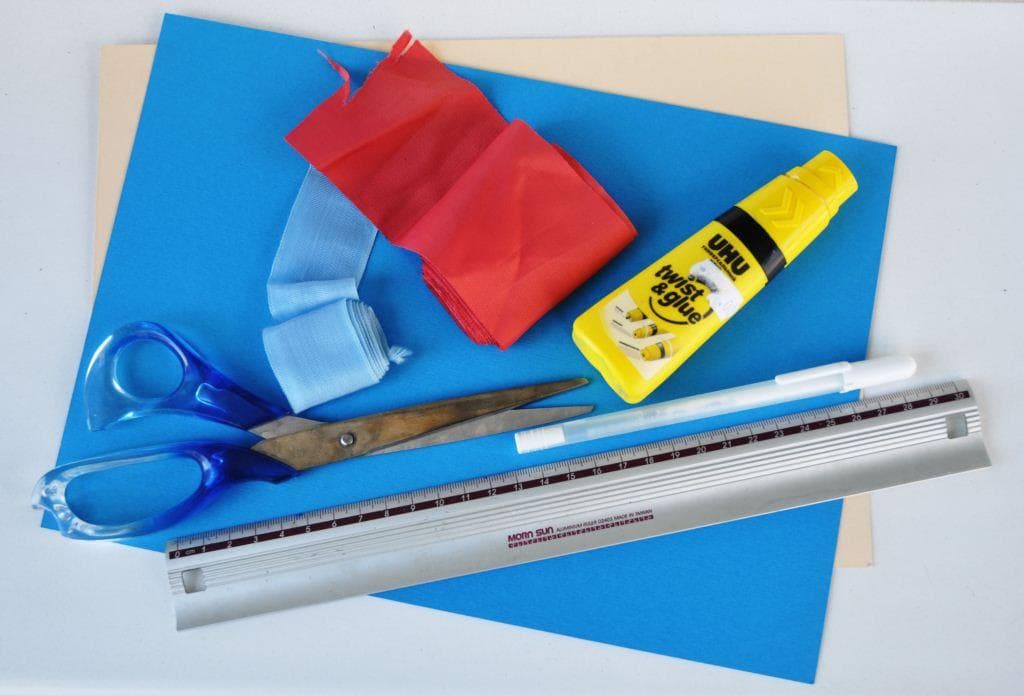
Necessary materials:
- thick two-sided paper in blue, gray or brown;
- light paper;
- satin ribbon;
- scissors;
- pen and pencil;
- ruler;
- glue;
- bead.
We shorten a sheet of colored paper so that its length is no more than 18 cm. Using a ruler, measure 7.5 cm on one side and 8.5 cm on the other. Carefully bend the edges along the marking. We turn away the upper corners, as shown in the photo. 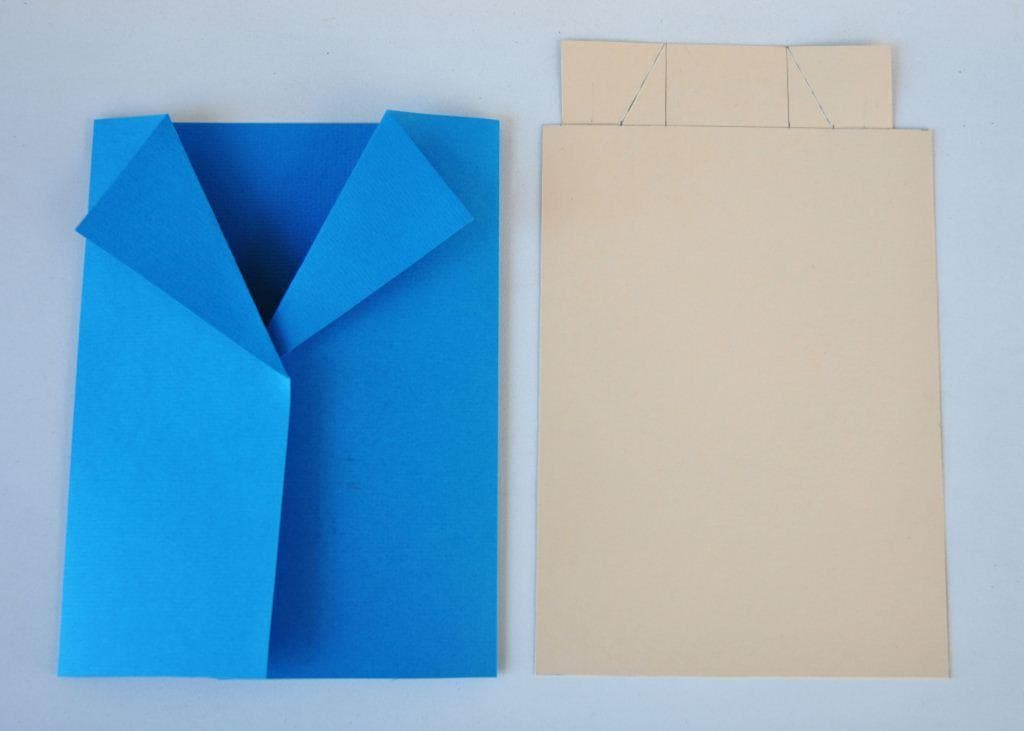
We start preparing the "shirt". To do this, use light paper and transfer markings to it, as shown in the photo. 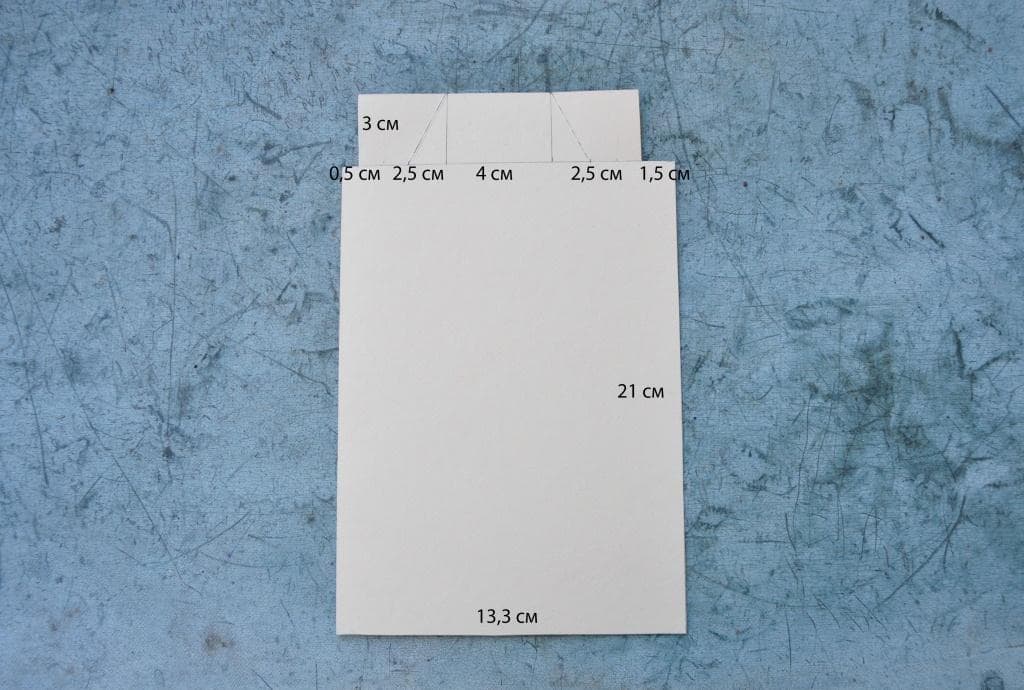
On the light blank, we make cuts and bend the paper along dotted lines. 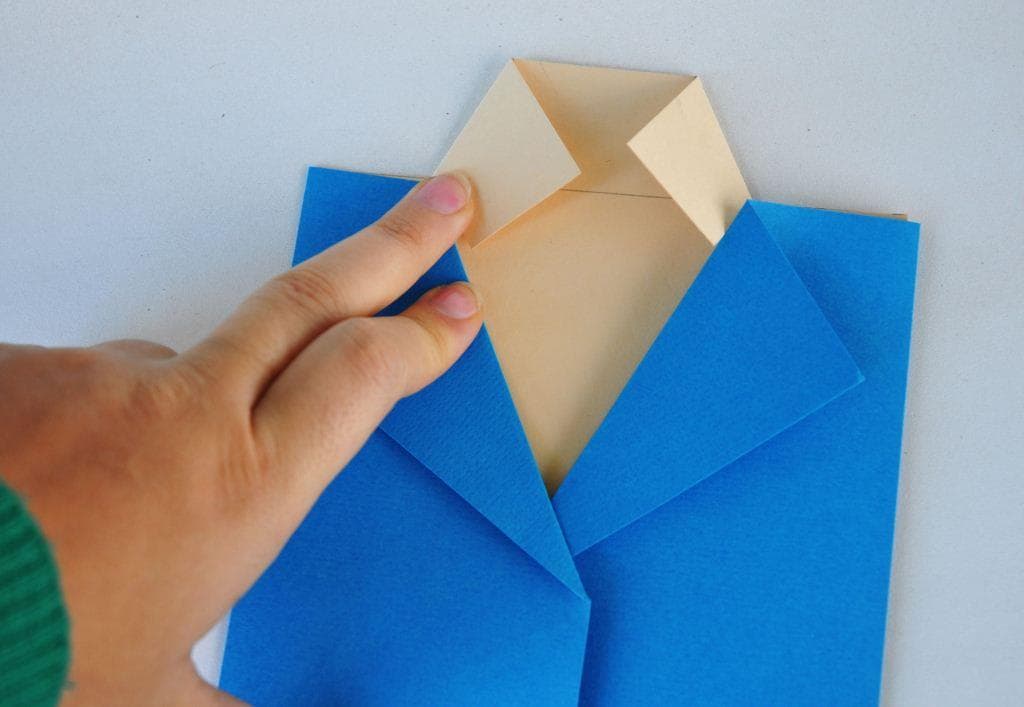
Cut off satin ribbon is smaller than the size of the workpiece. Bottom edge give the shape of a triangle and hold them over the fire, so that the tape does not crumble. Glue the other edge to the shirt. 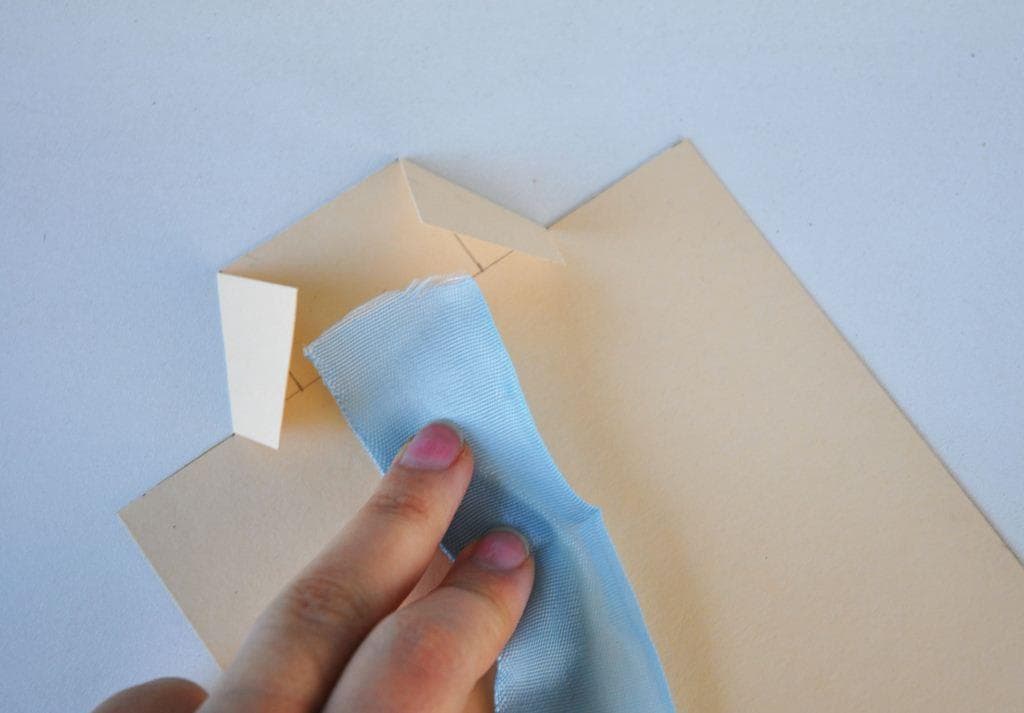
Putting the ribbon in the fold and glue a bead to it. 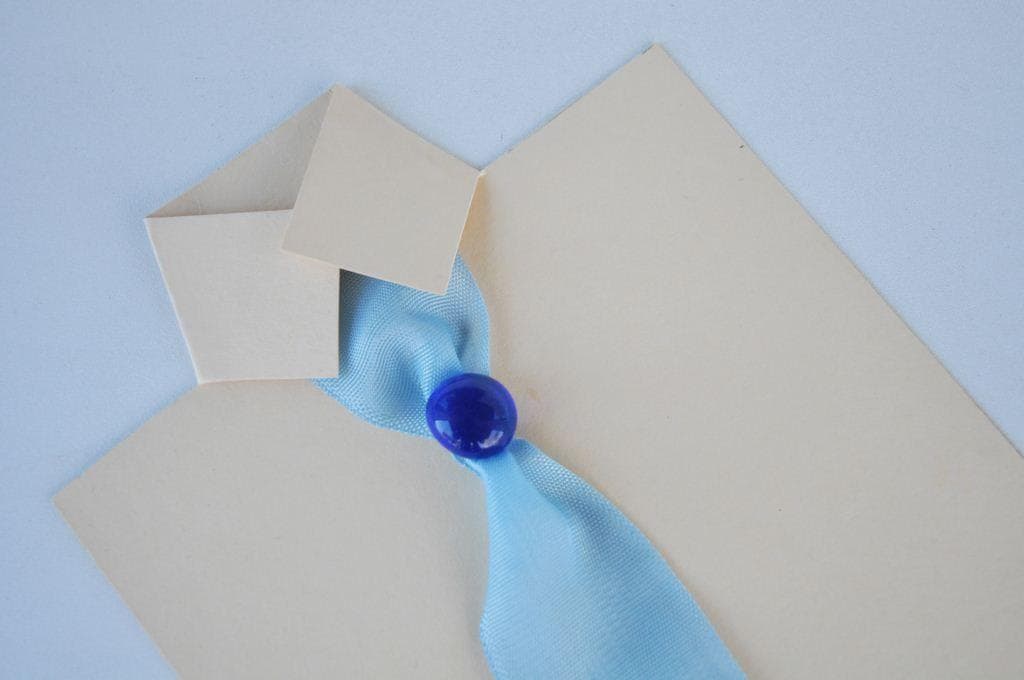

From a light paper cut a small rectangle. We take a piece of tape, collect it with folds and glue it on the inside of the workpiece. 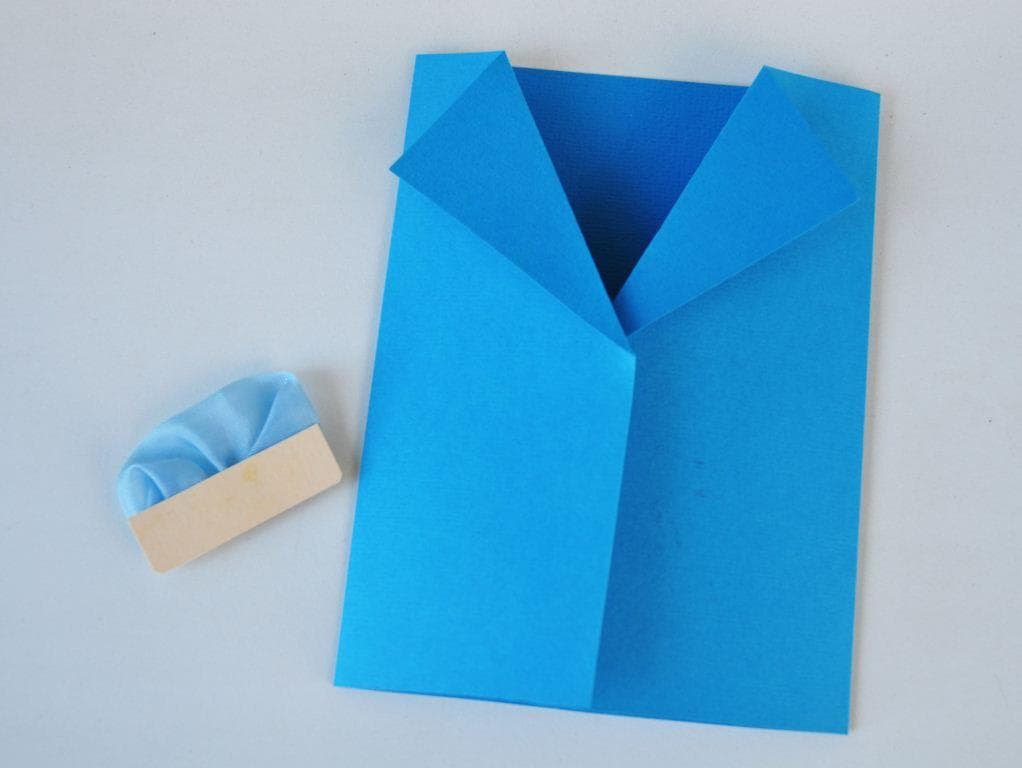
Glue the pocket on the jacket. 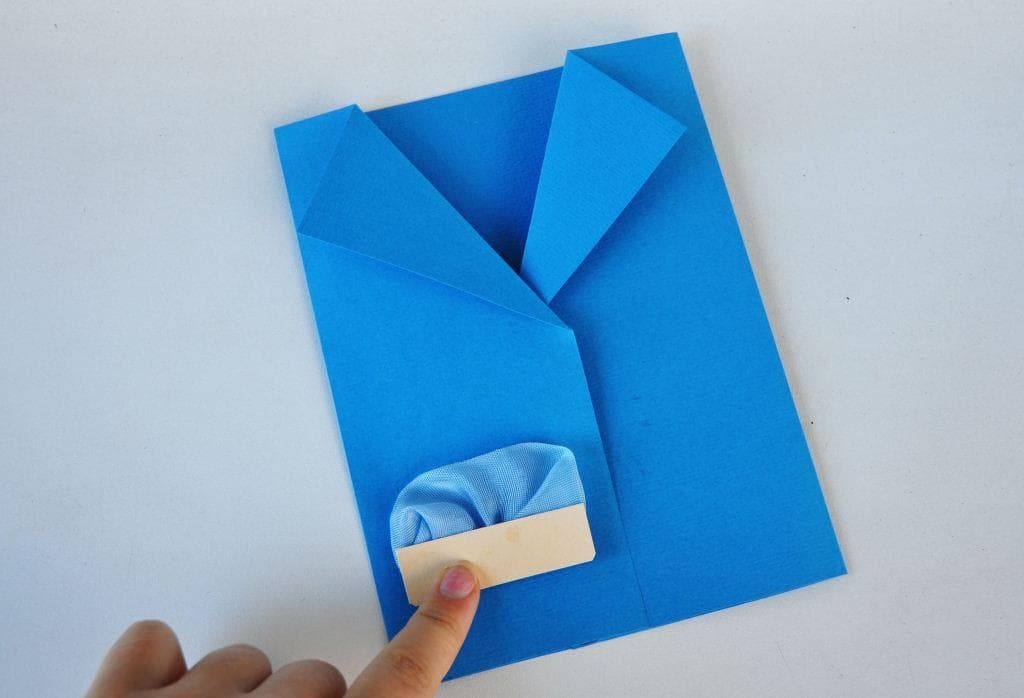
We connect two blanks among themselves. If desired, you can draw a dotted line around the entire edge of the jacket. 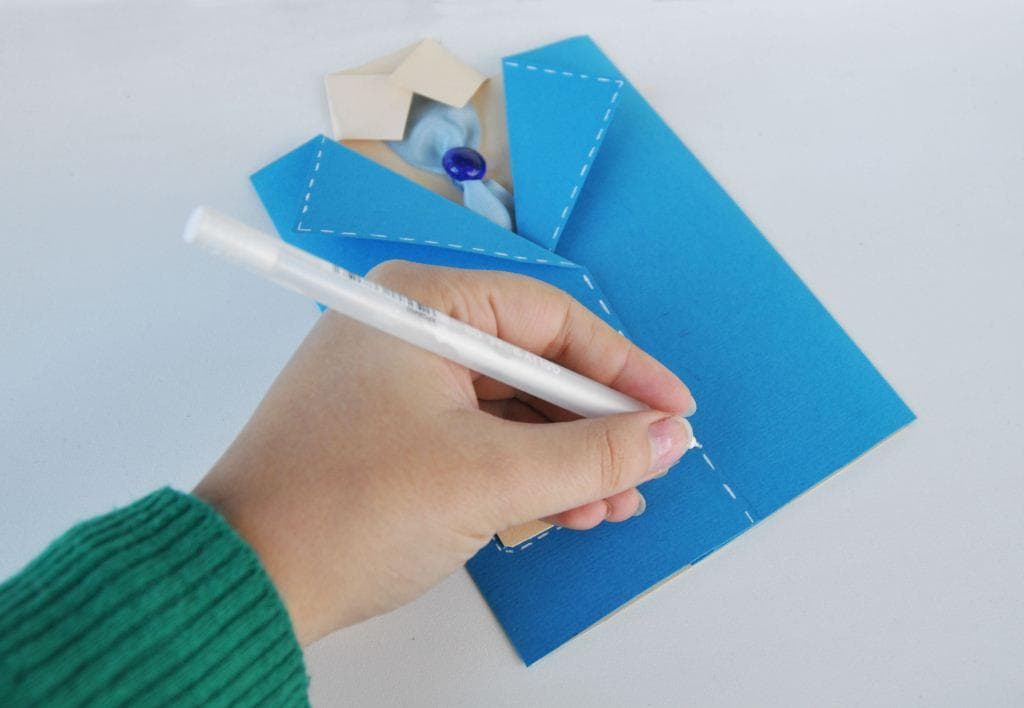
Such an unusual postcard will delight every man. 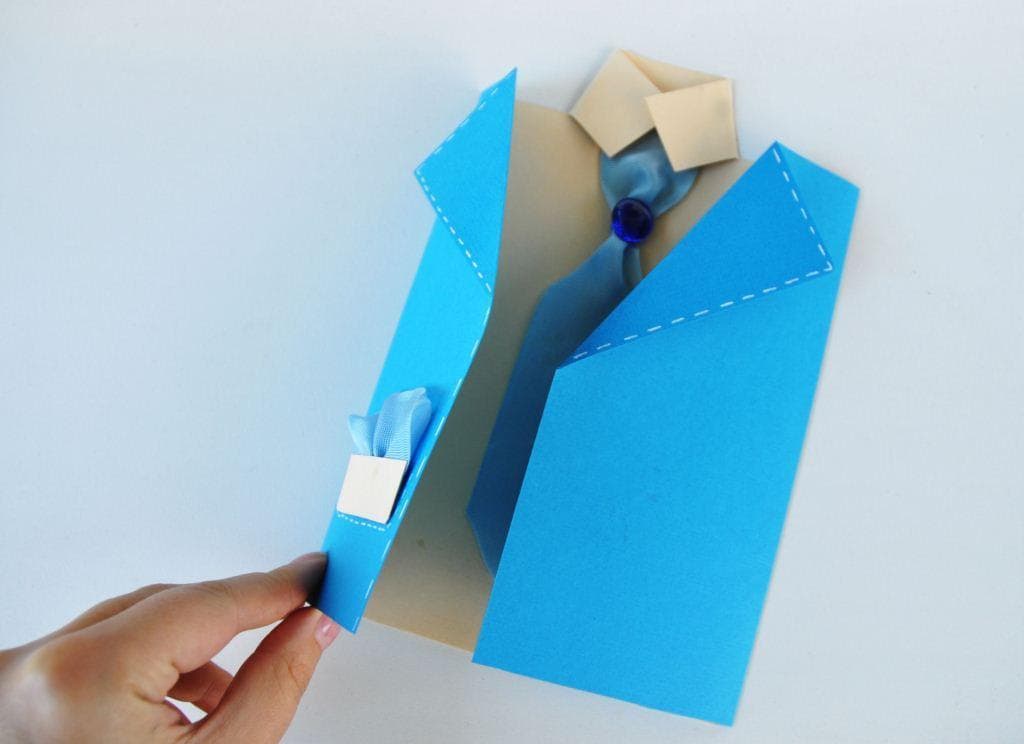
Everybody can make a beautiful, original postcard. To do this, do not need special skills and unusual materials. Just a little assiduity and desire.


