


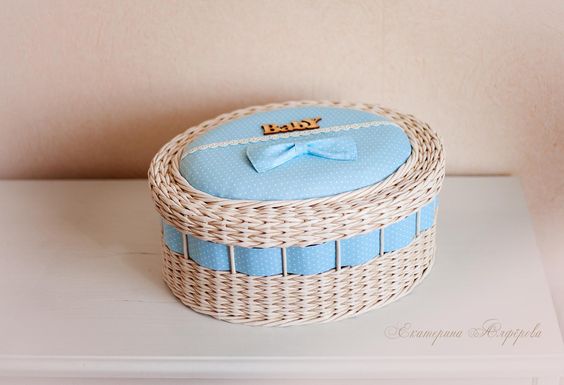
A box is a must have for every girl. After all, it can store a variety of jewelry and jewelry. Of course, you can buy any option you like in the store, but we suggest trying to do it yourself. This box will meet all your requirements and will definitely become a stylish accent in the room.

Chebbi-chic box
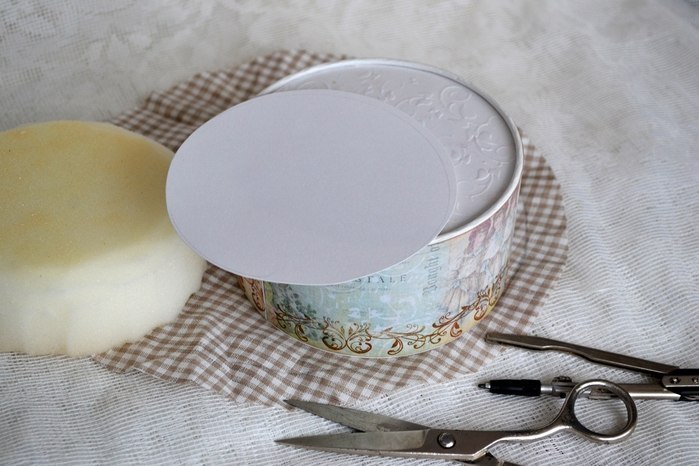
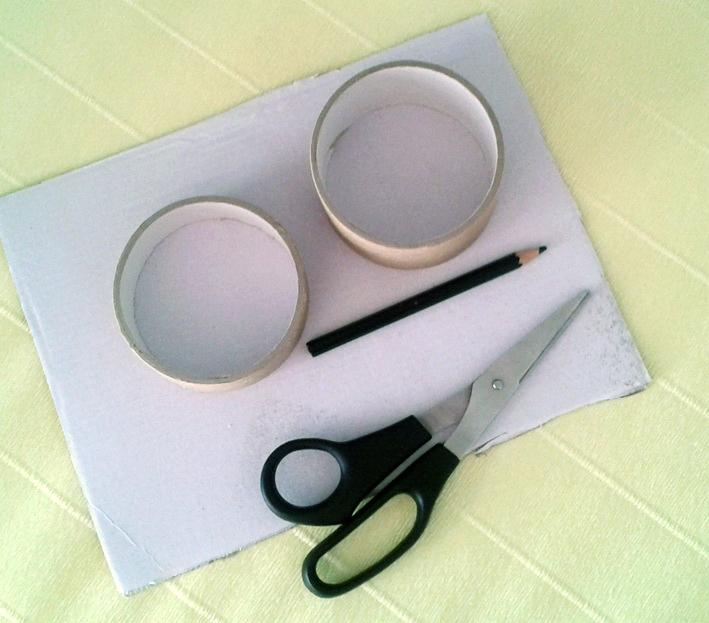
The elegant small box is perfect for storing jewelry.
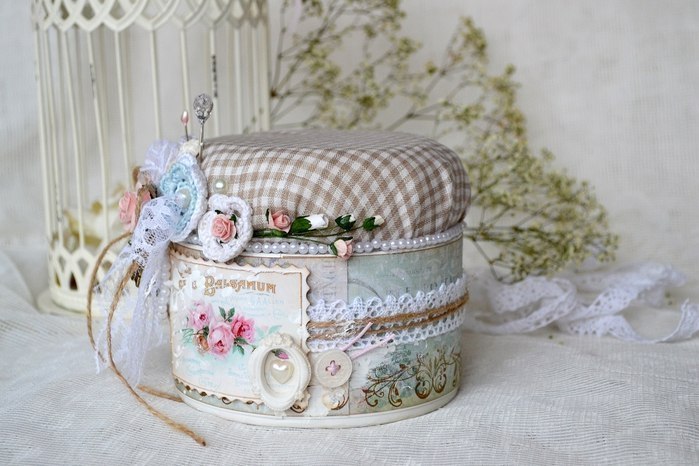
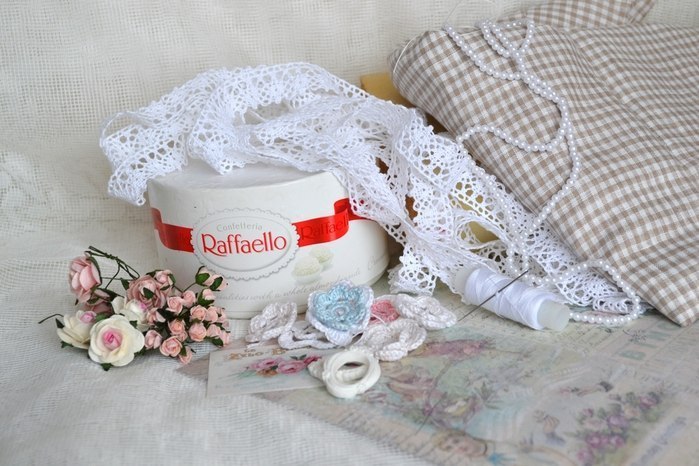
To create it you will need:
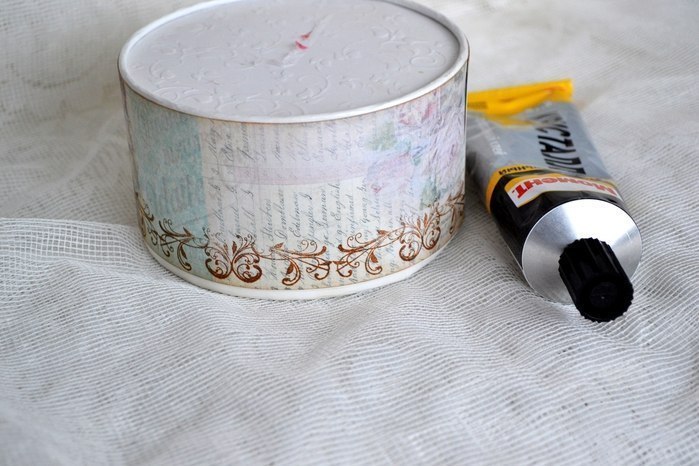
- box "Raffaello";
- lace;
- ribbon of beads;
- the cloth;
- decorative items;
- threads;
- glue;
- polyfoam or polyfoam;
- paper;
- thick thread;
- sheet with a picture.
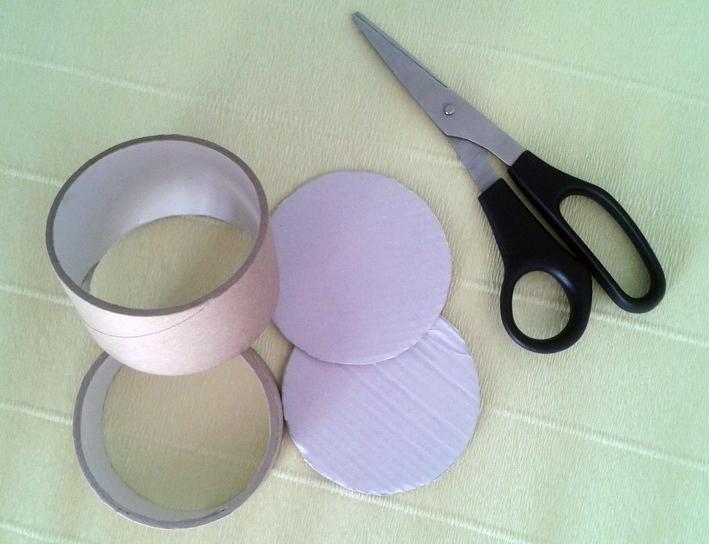
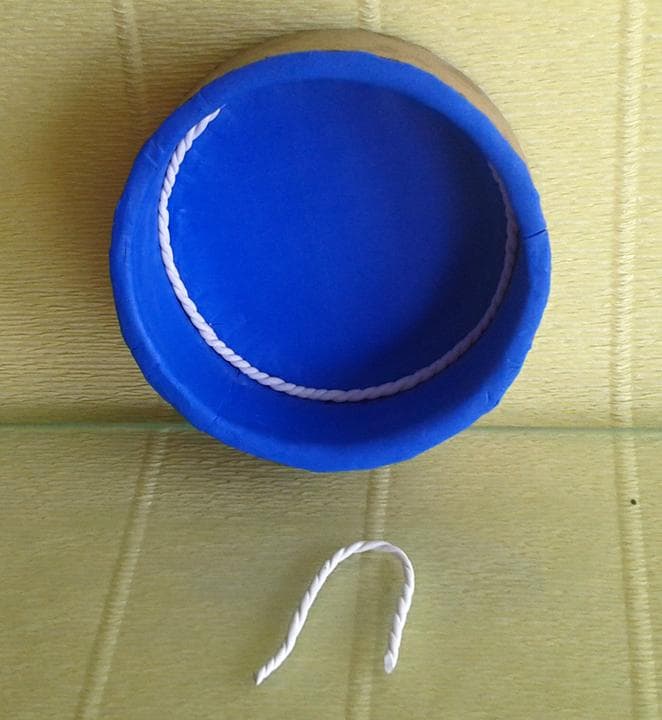
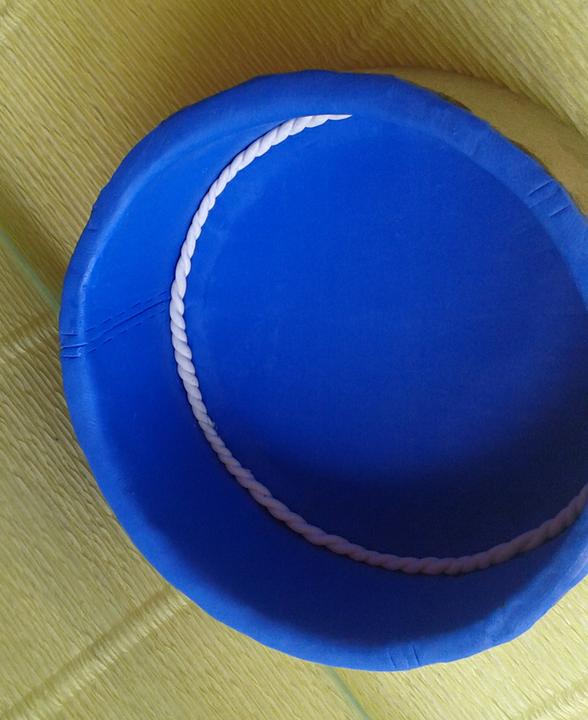
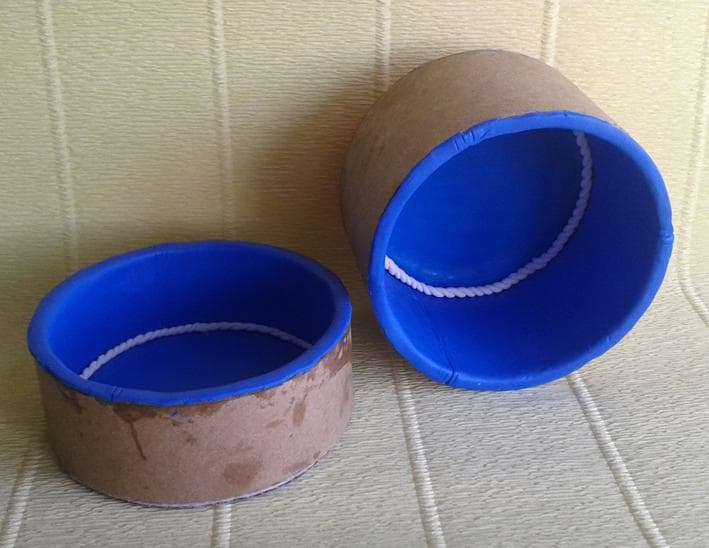
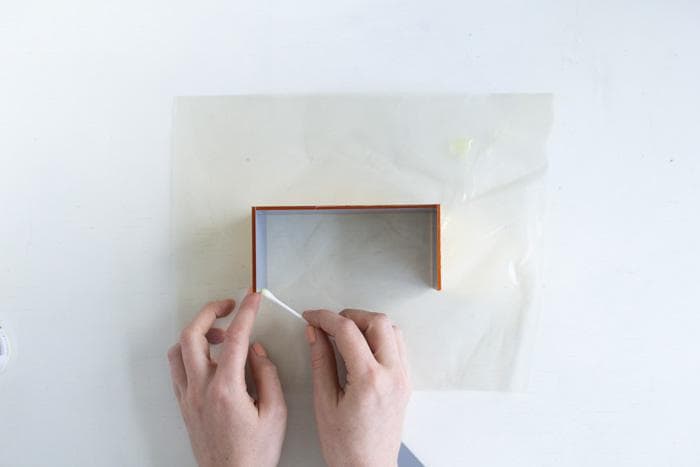
Cut a circle from the paper bottom of the box. Prepare the same size volumetric circle of foam or foam. Glue around the box sheet with a pattern.
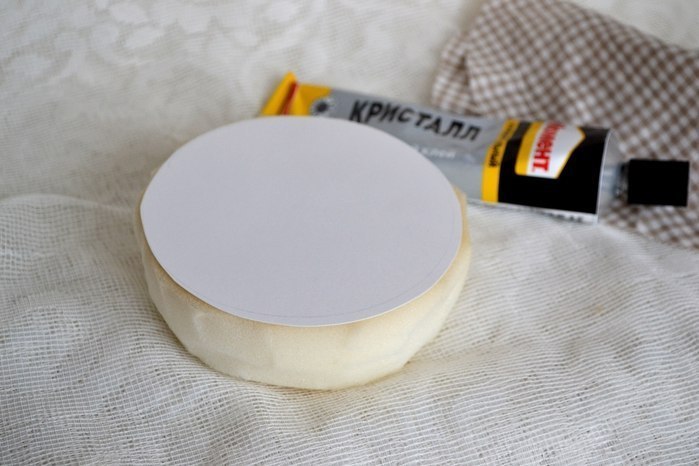
Cut a circle out of the fabric a little more than foam.
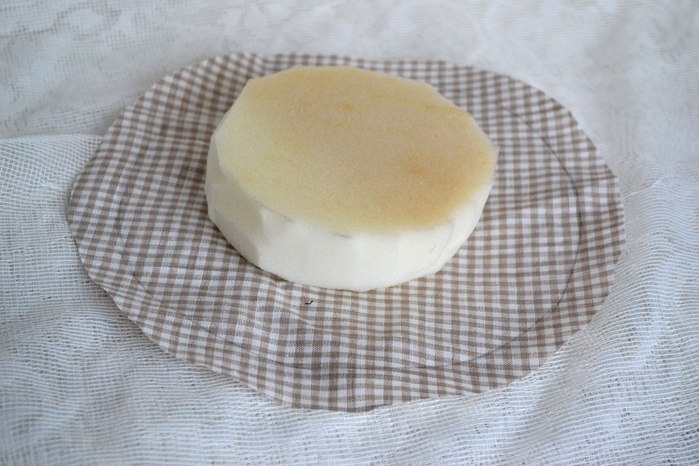
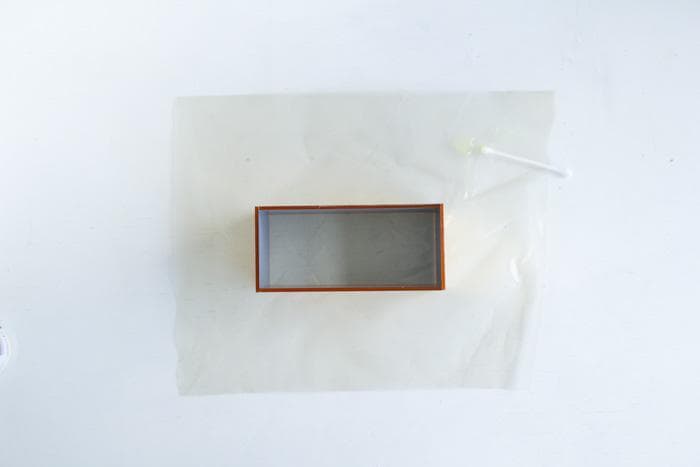
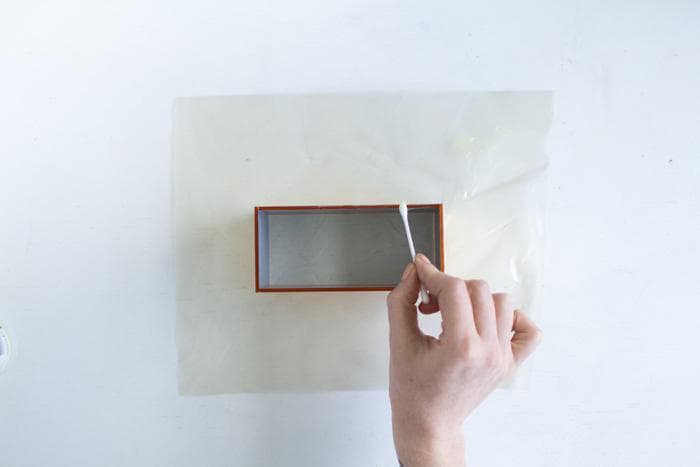
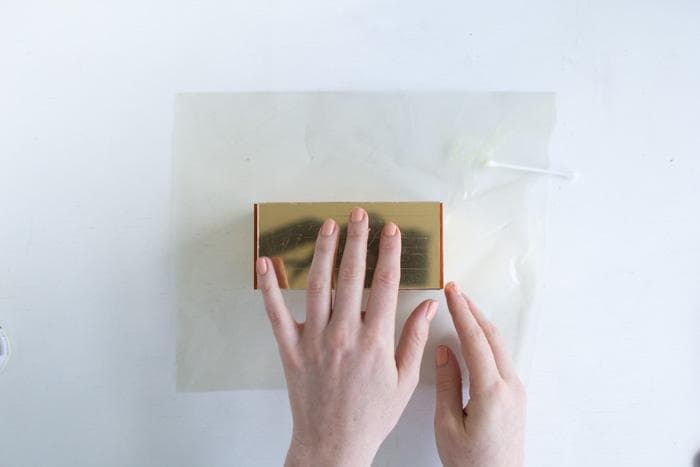
Put a circle of paper on top of the foam and sheathe it with a cloth. This will be the cover of the box.
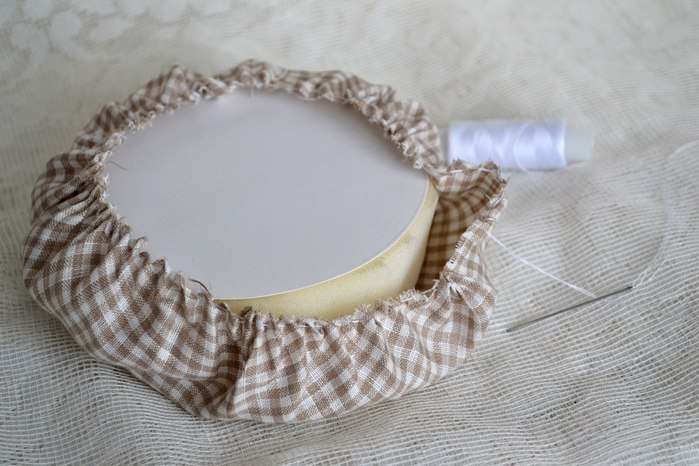
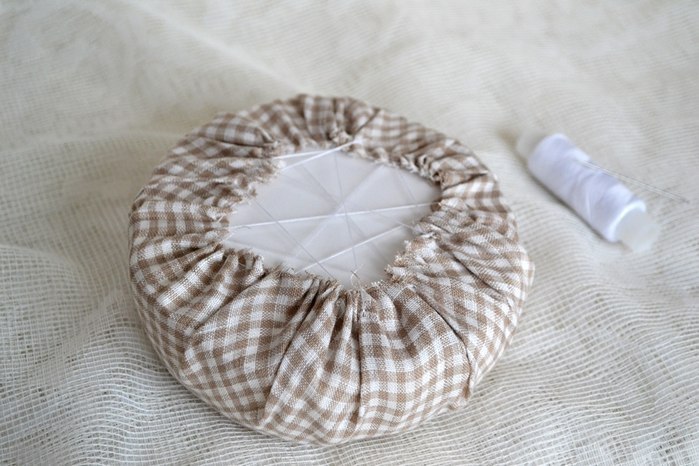
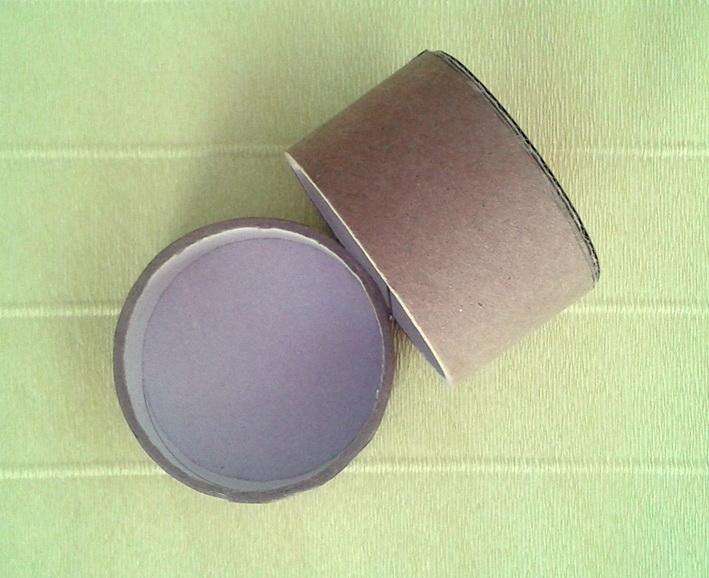
We connect the cover to the box.
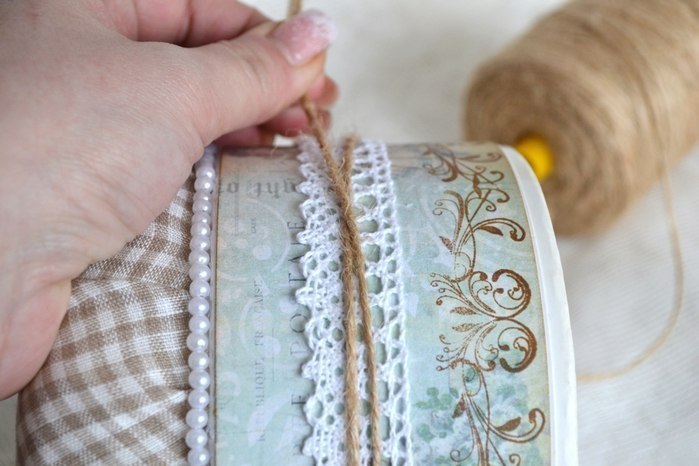
We decorate the box with lace, beads, thick thread and other elements.
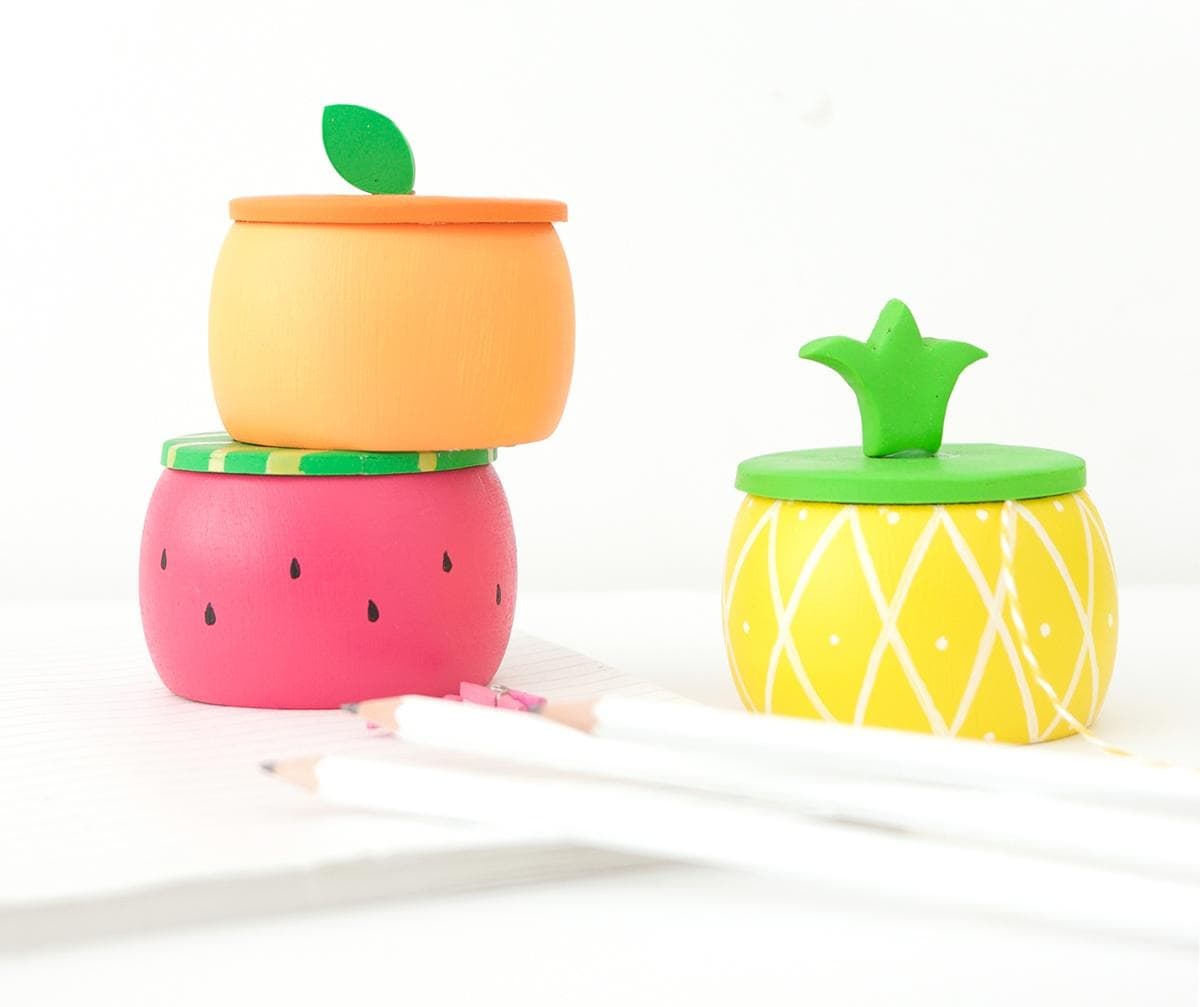
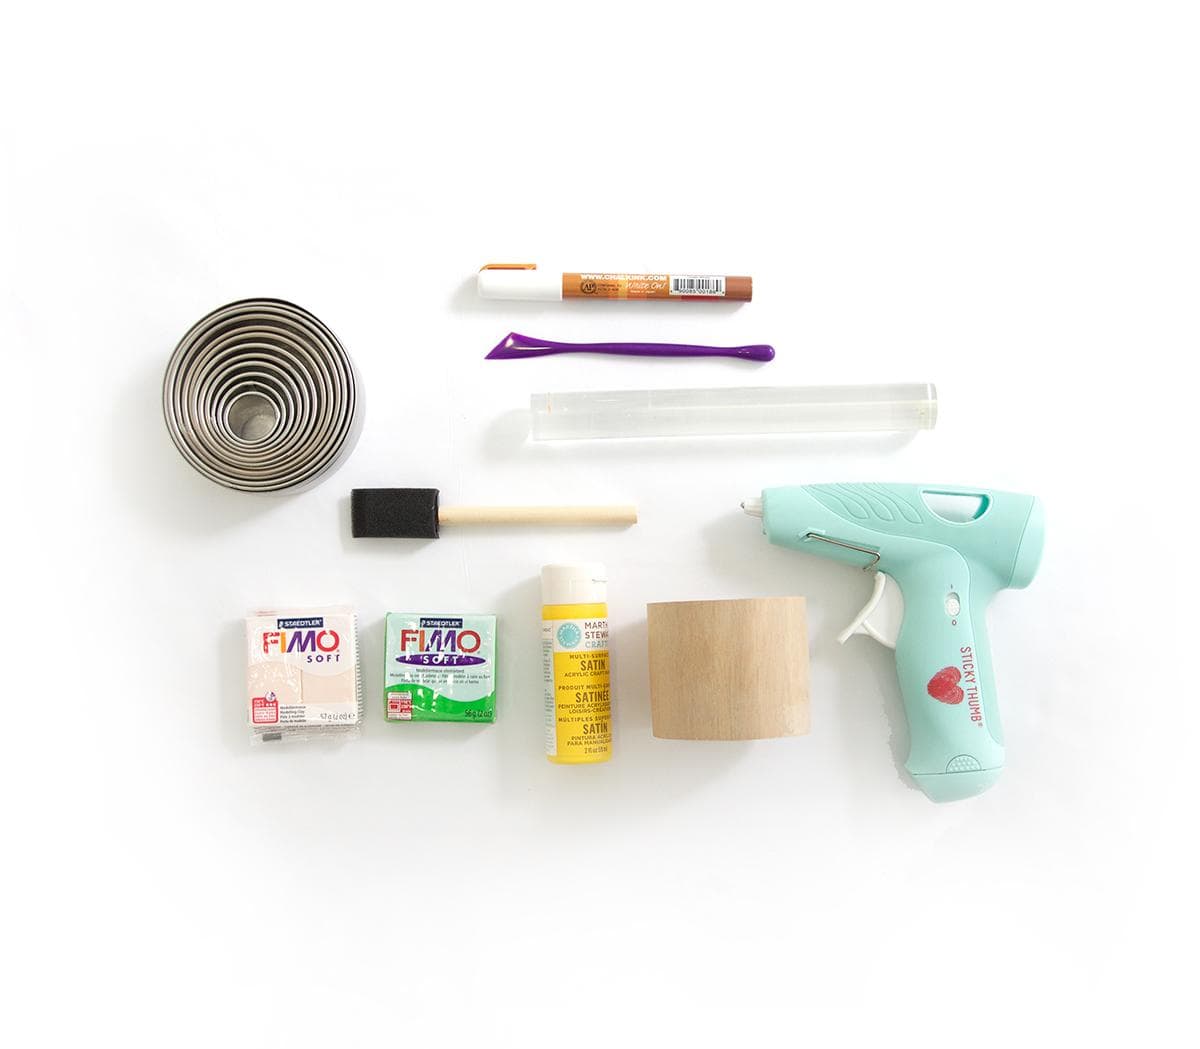
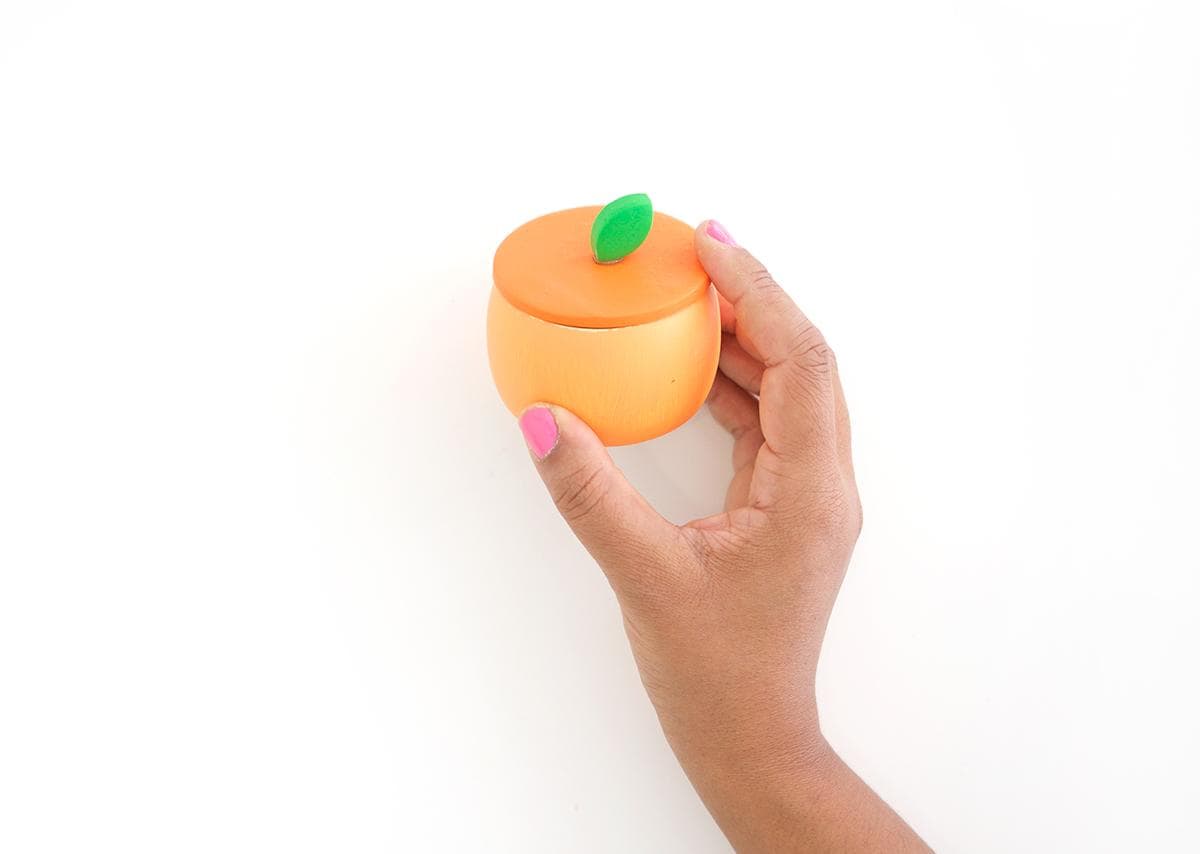
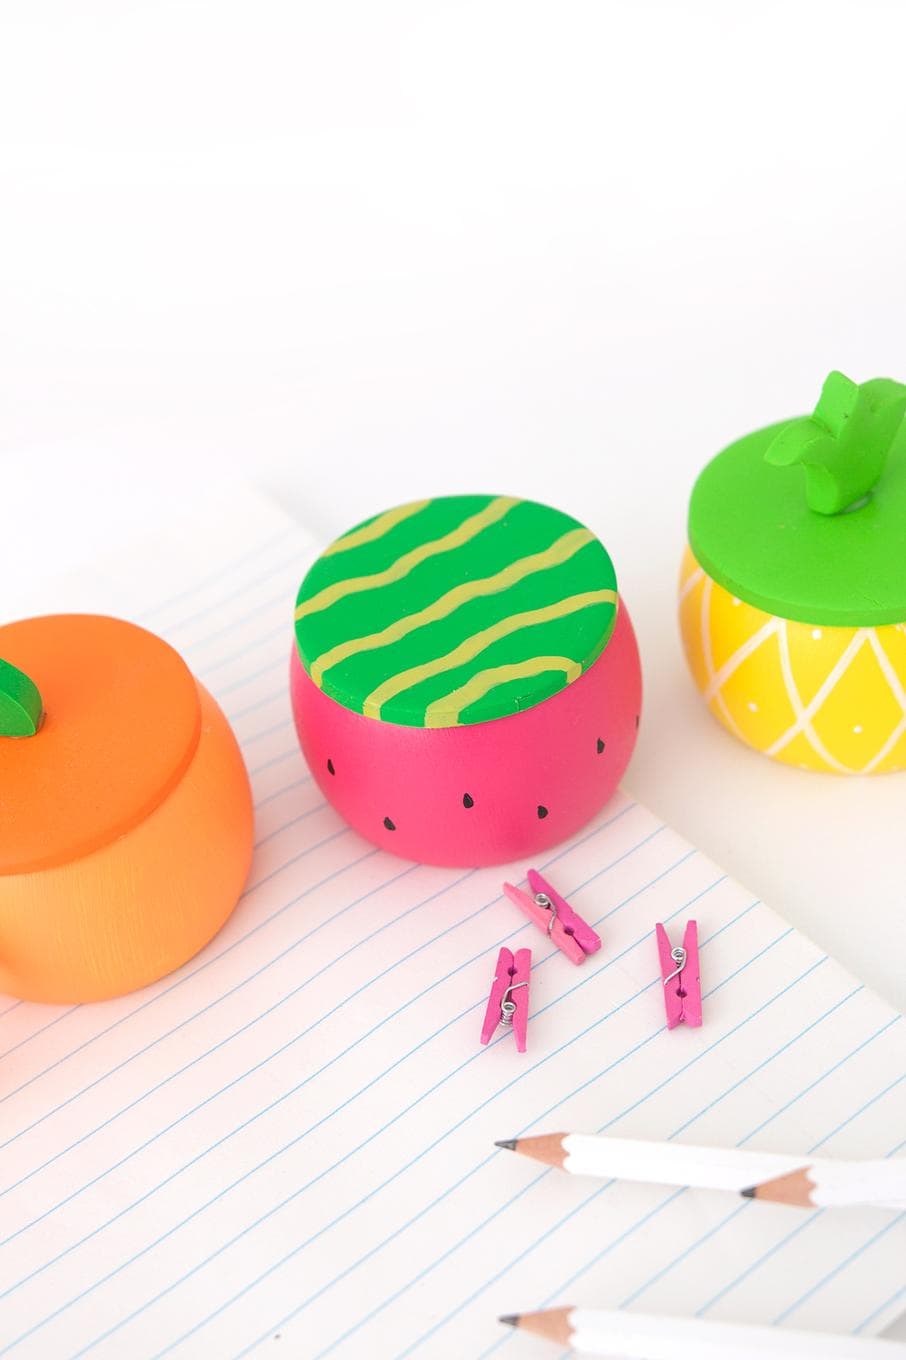
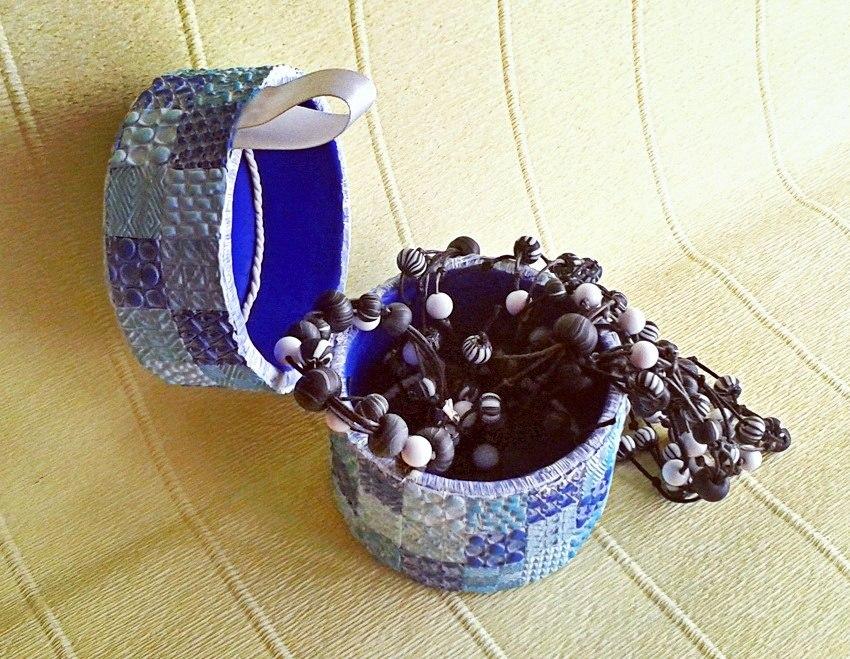
Caskets from wooden bracelets
Stylish, bright handmade boxes will definitely become a bright accent of your interior.
For their manufacture we will prepare the following materials:
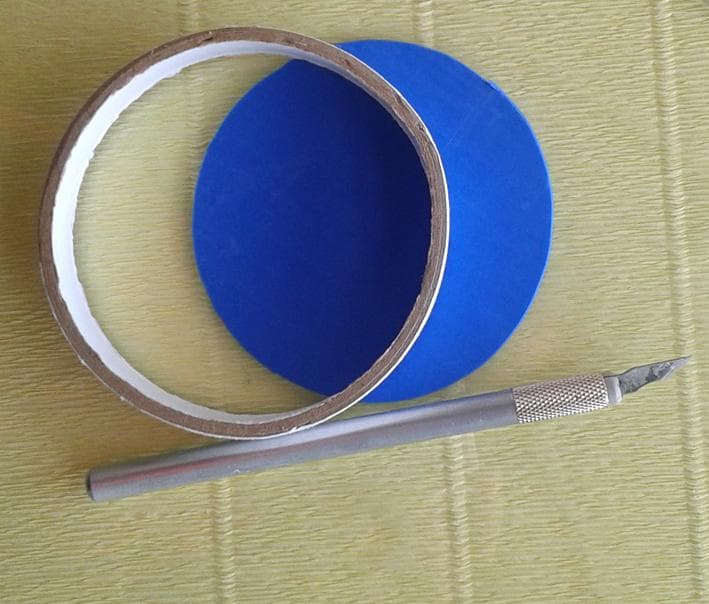
- wooden bracelets or blanks of this form;
- gun with glue;
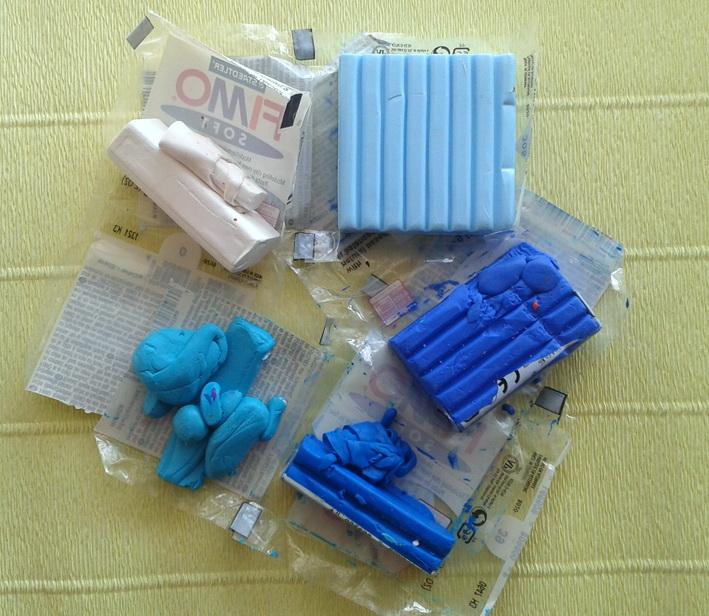
- polymer clay of different colors;
- tools for working with it;
- round cookie molds;
- white marker;
- paints;
- brushes.
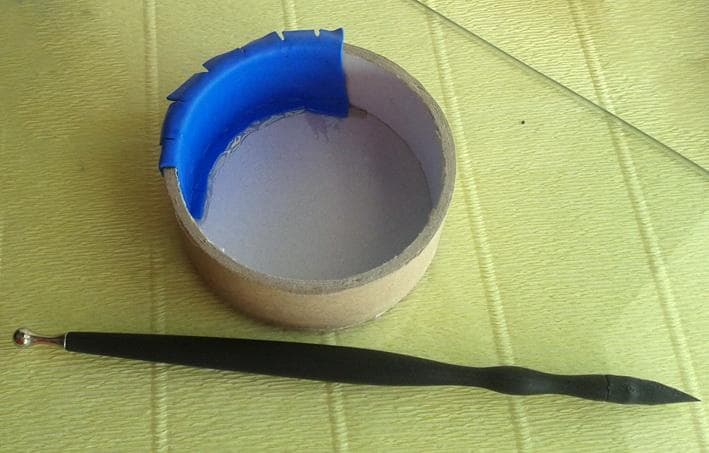
Roll out a thin layer of polymer clay using a rolling pin.
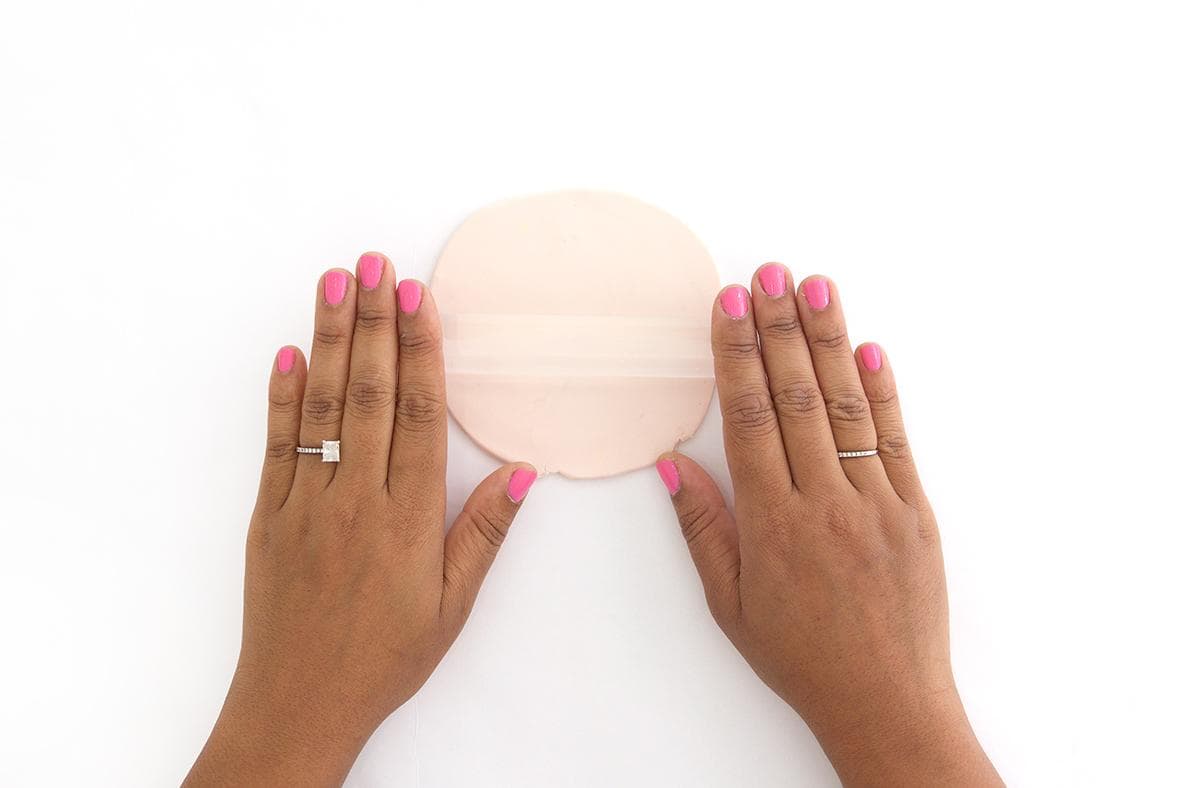
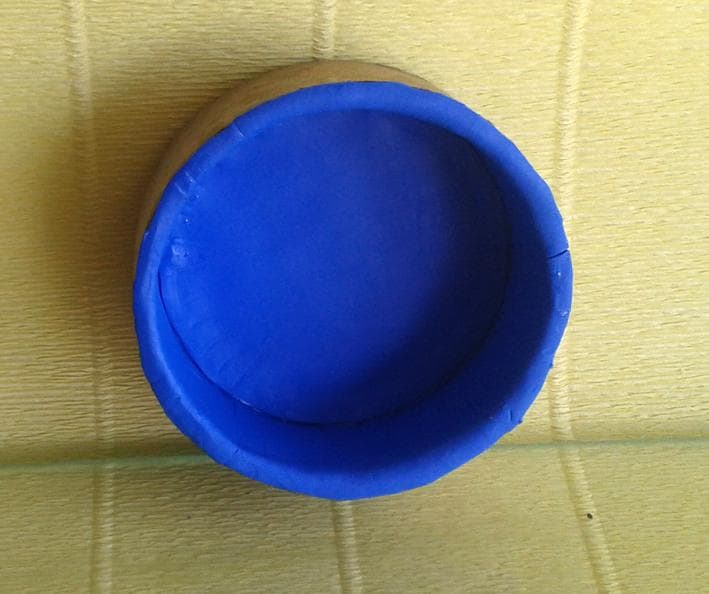
Squeeze the bracelet circle, which will be the bottom of the box. Bake it, following the instructions specified by the clay manufacturer.
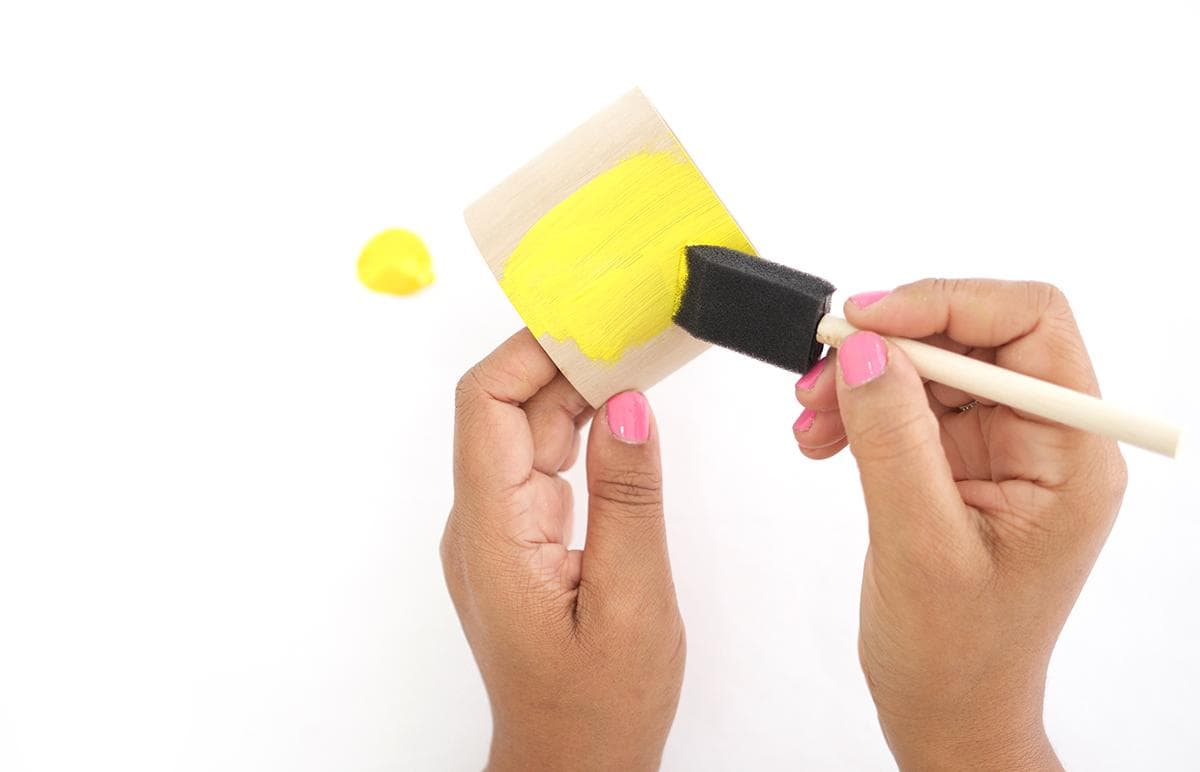
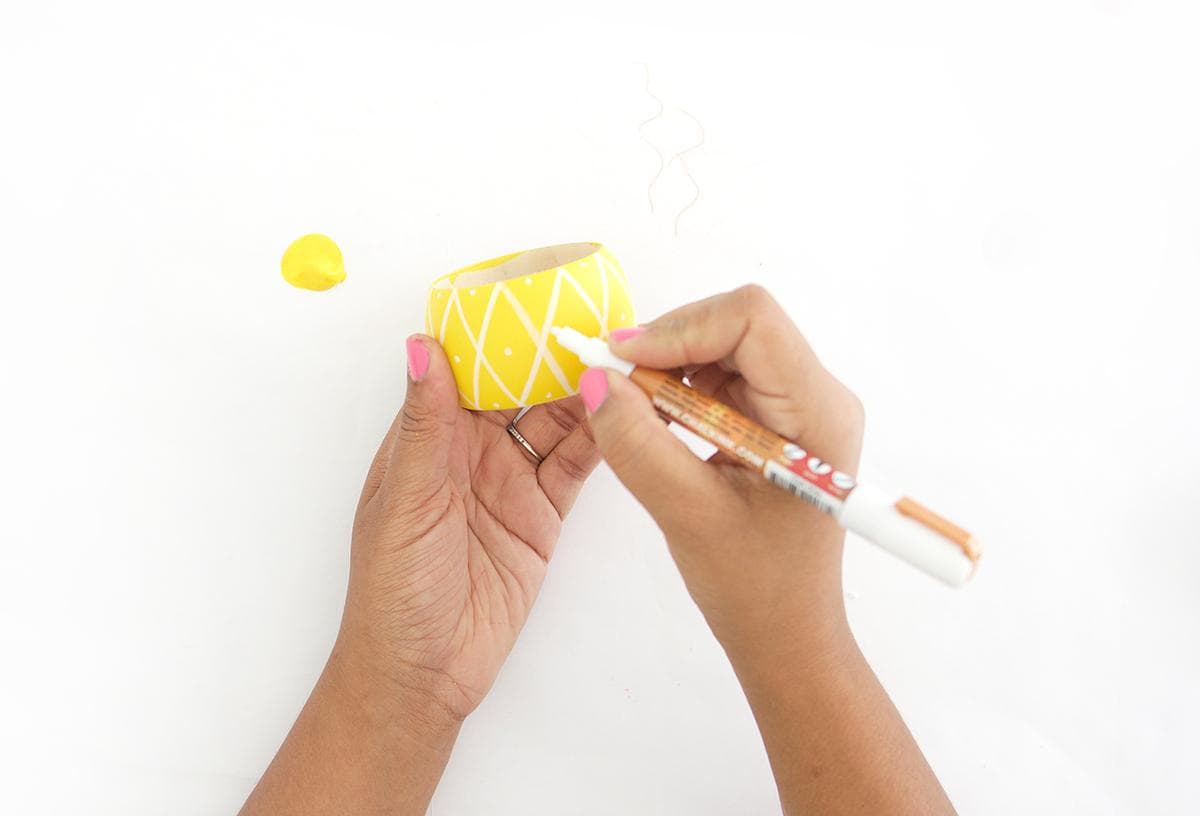
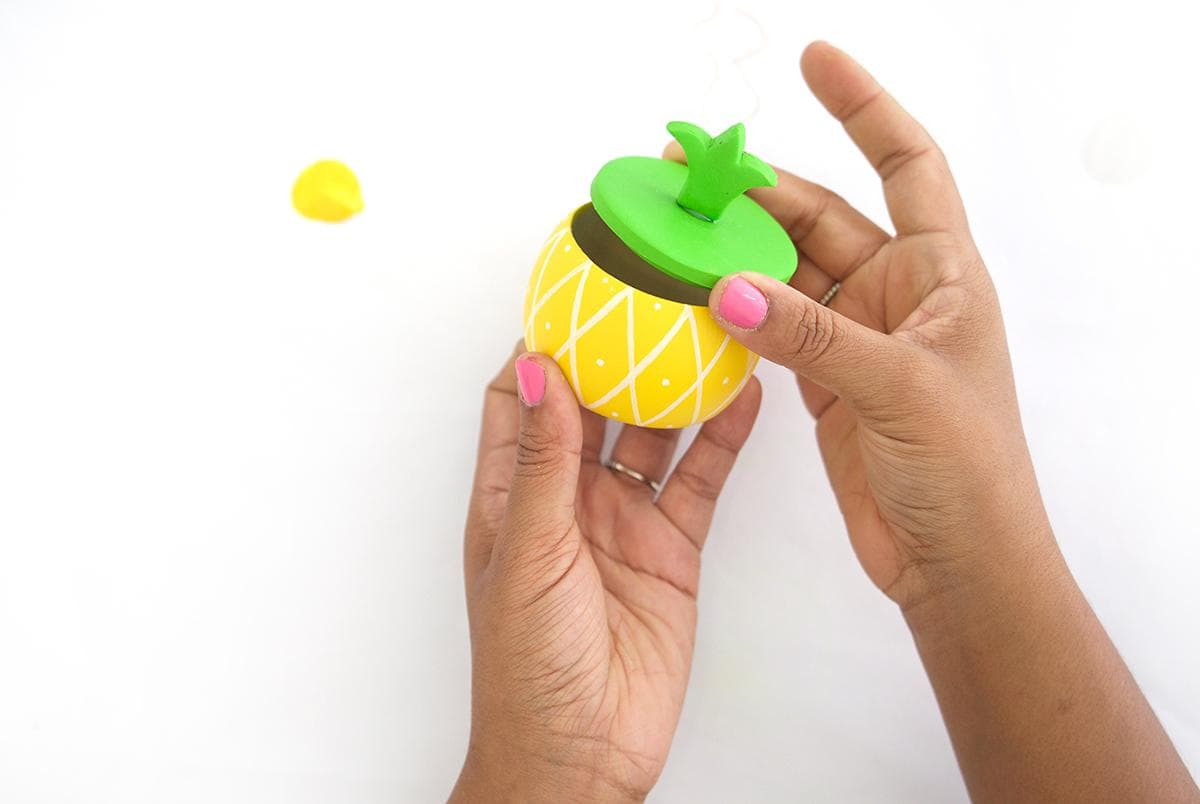
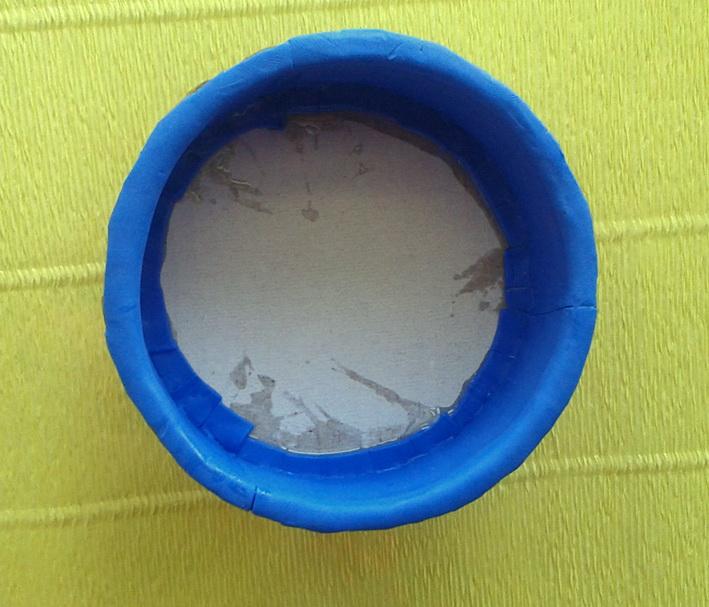
Paint the bracelet with yellow paint.
White marker put a pattern on the bracelet. In this case, diamonds.
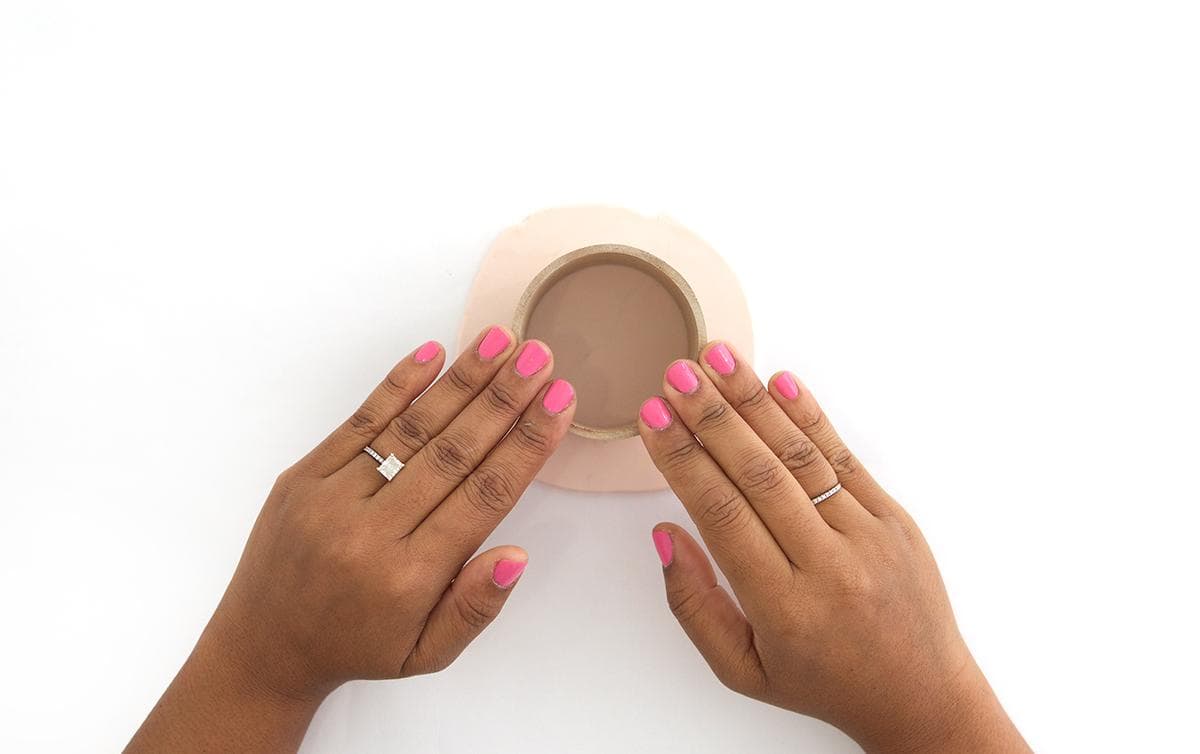
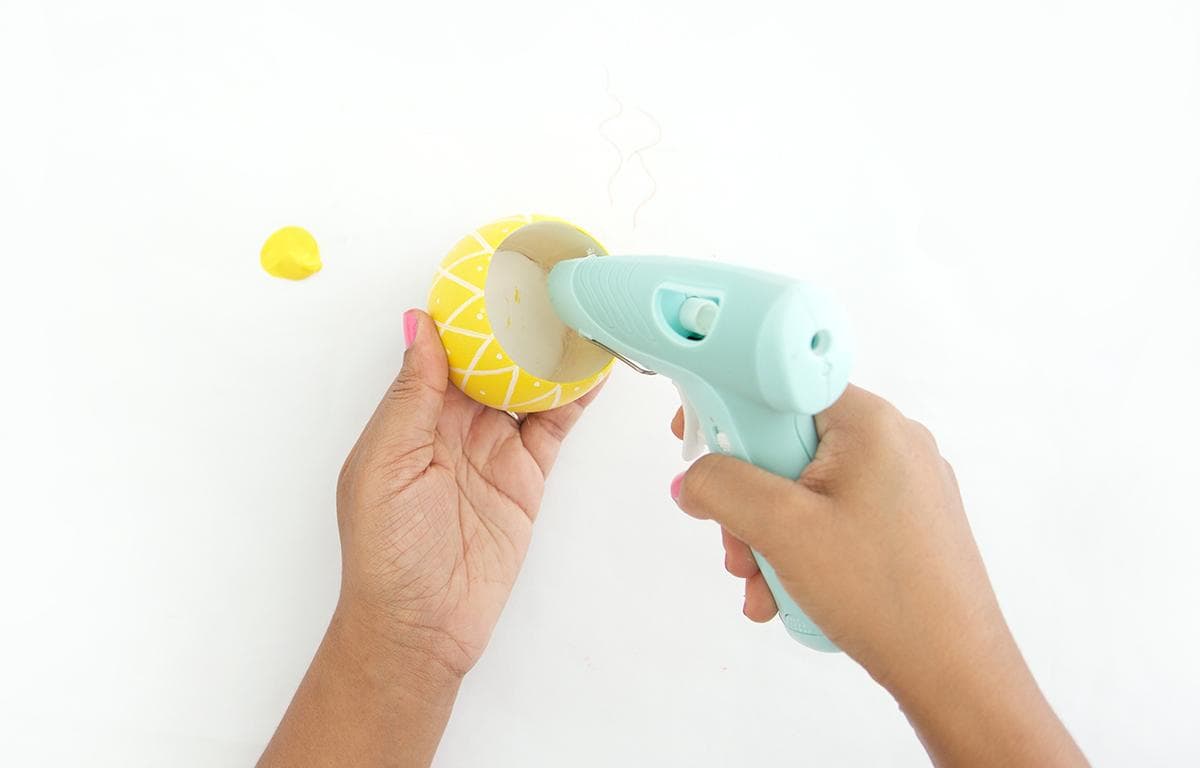
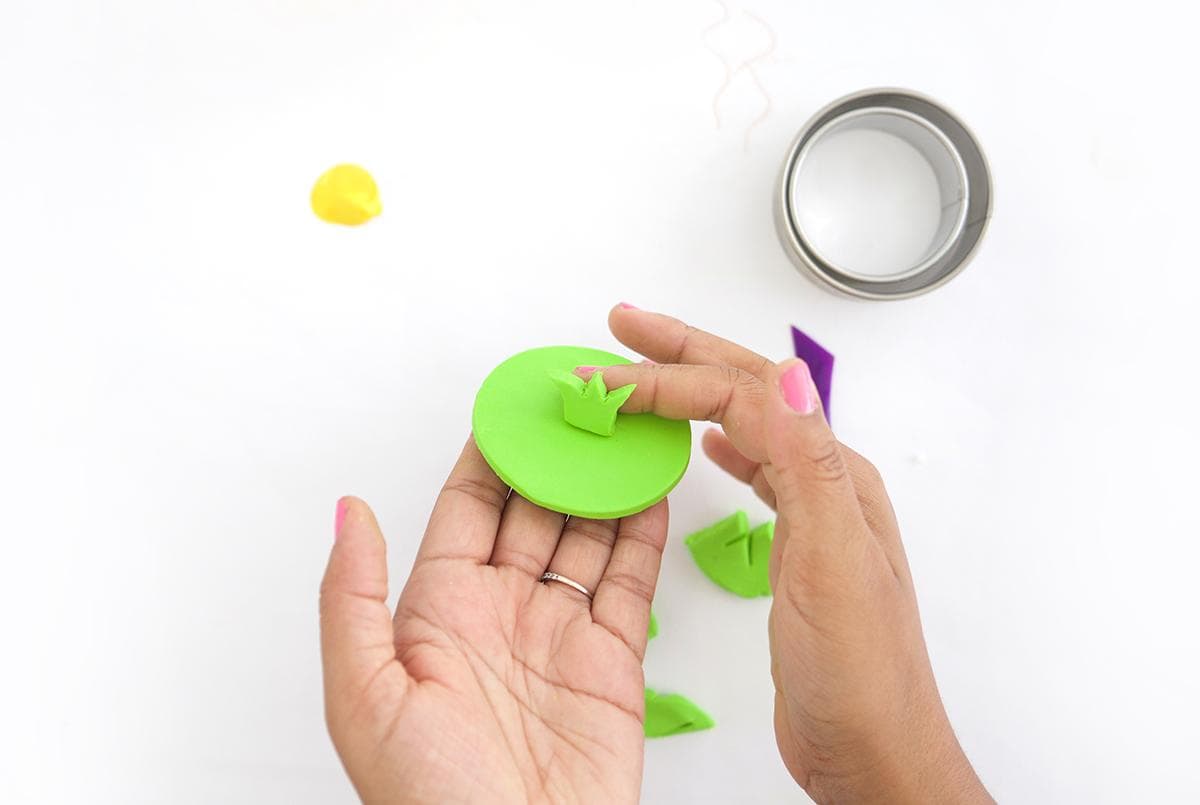
Insert the bottom inside the bracelet and glue it with a special hot-melt adhesive.
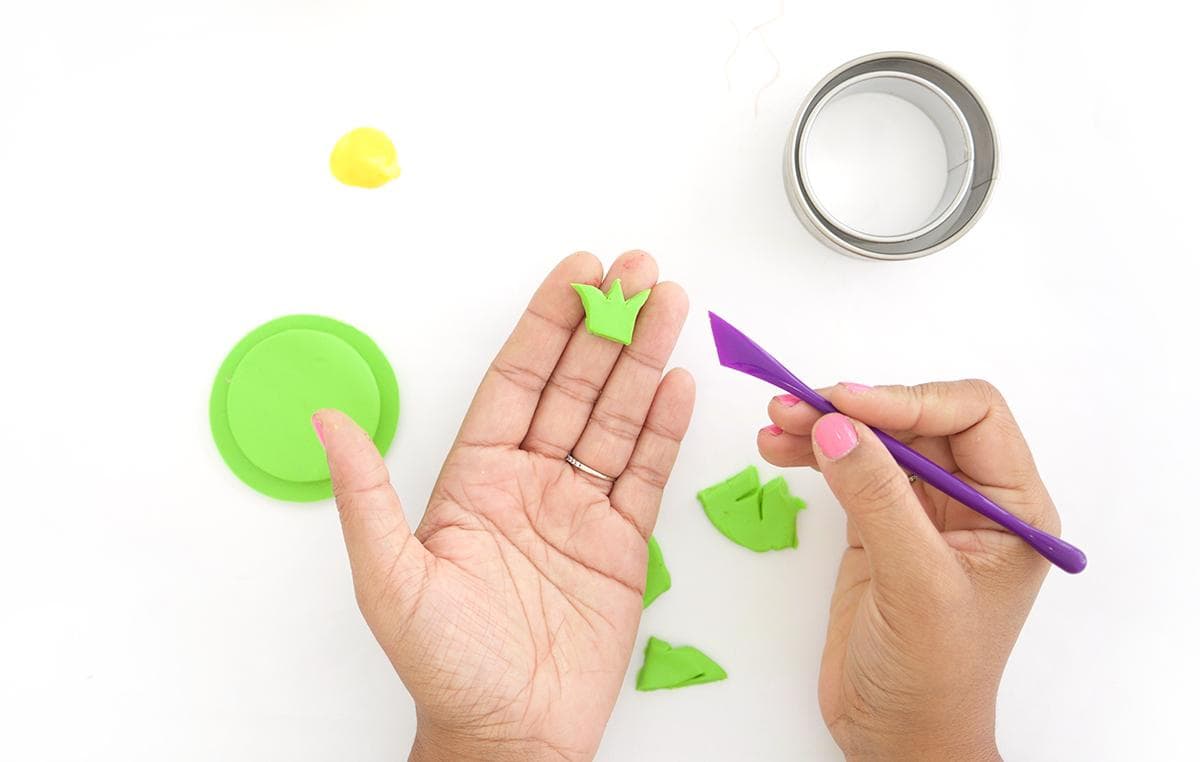
We take two forms for cookies. One of them should have a bracelet diameter, and the second one should be slightly smaller.
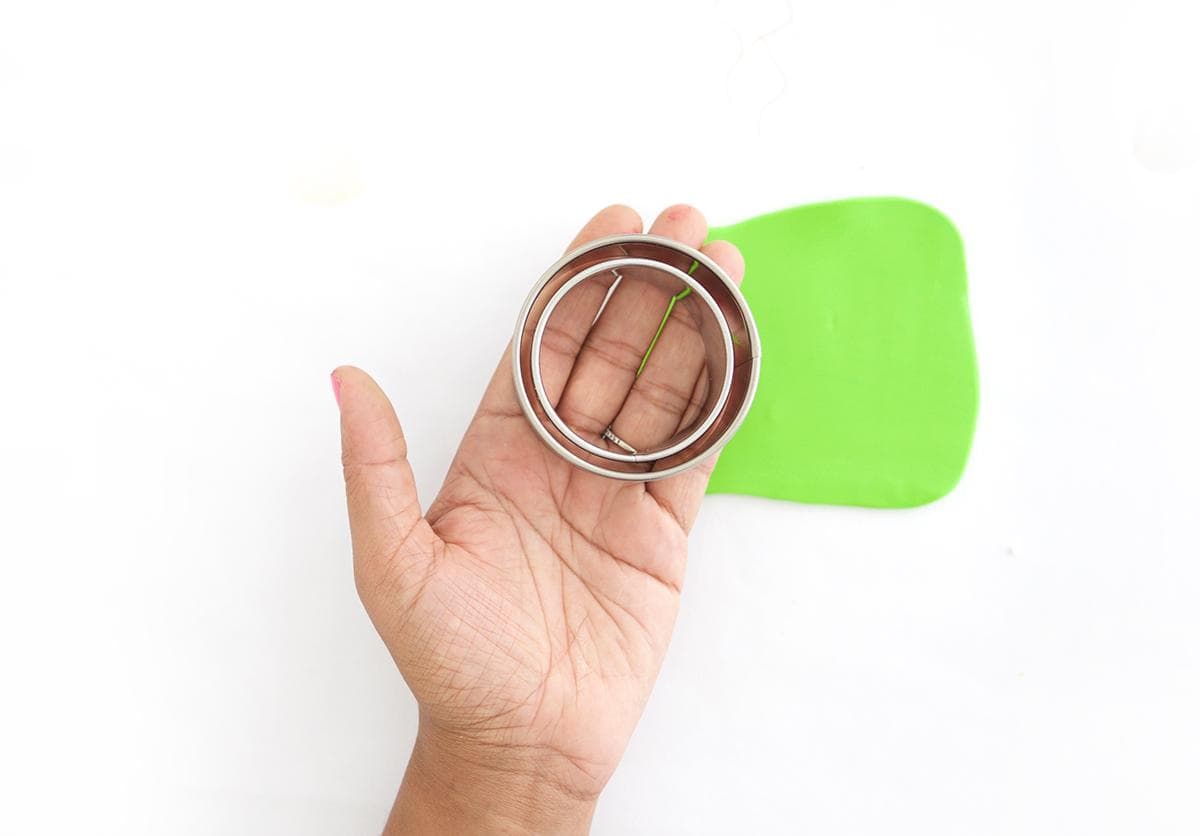
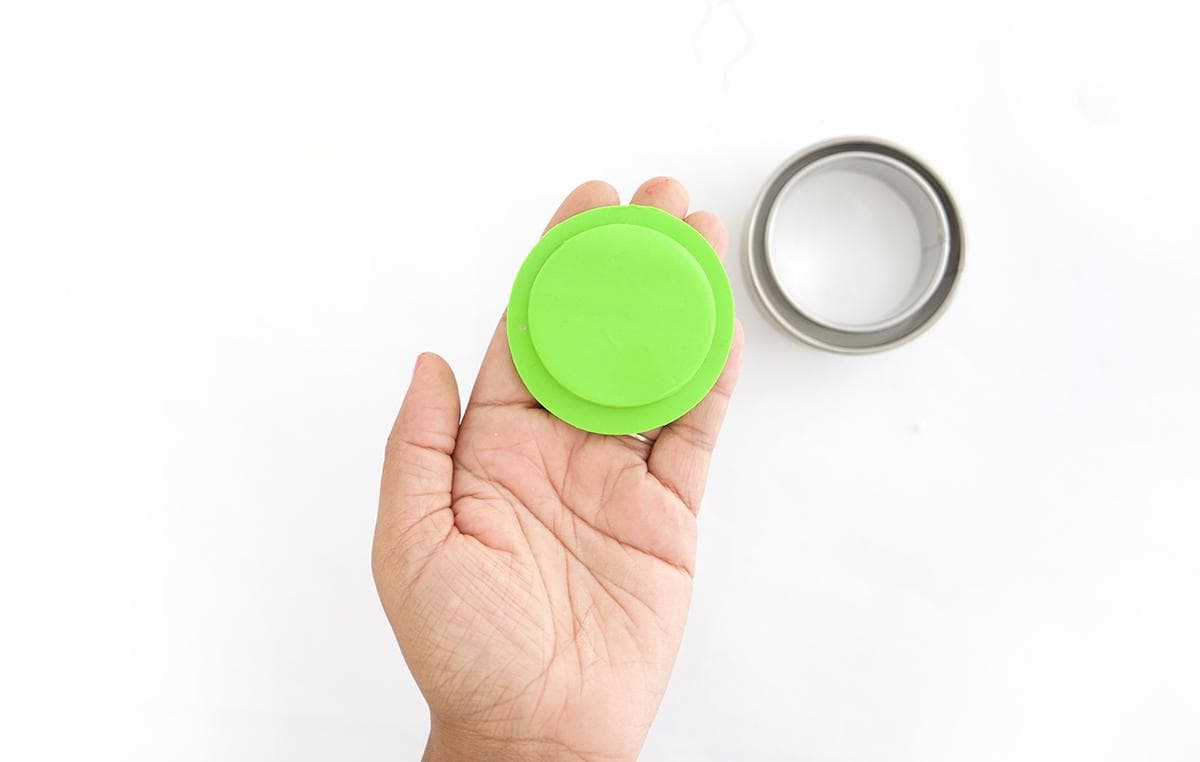
Squeeze out circles of polymer clay green. Bake them and glue them together.
Cut a leaf from a layer of polymer clay with a knife. Bake them and glue them to the lid of the box.
Bright, summer box is ready!
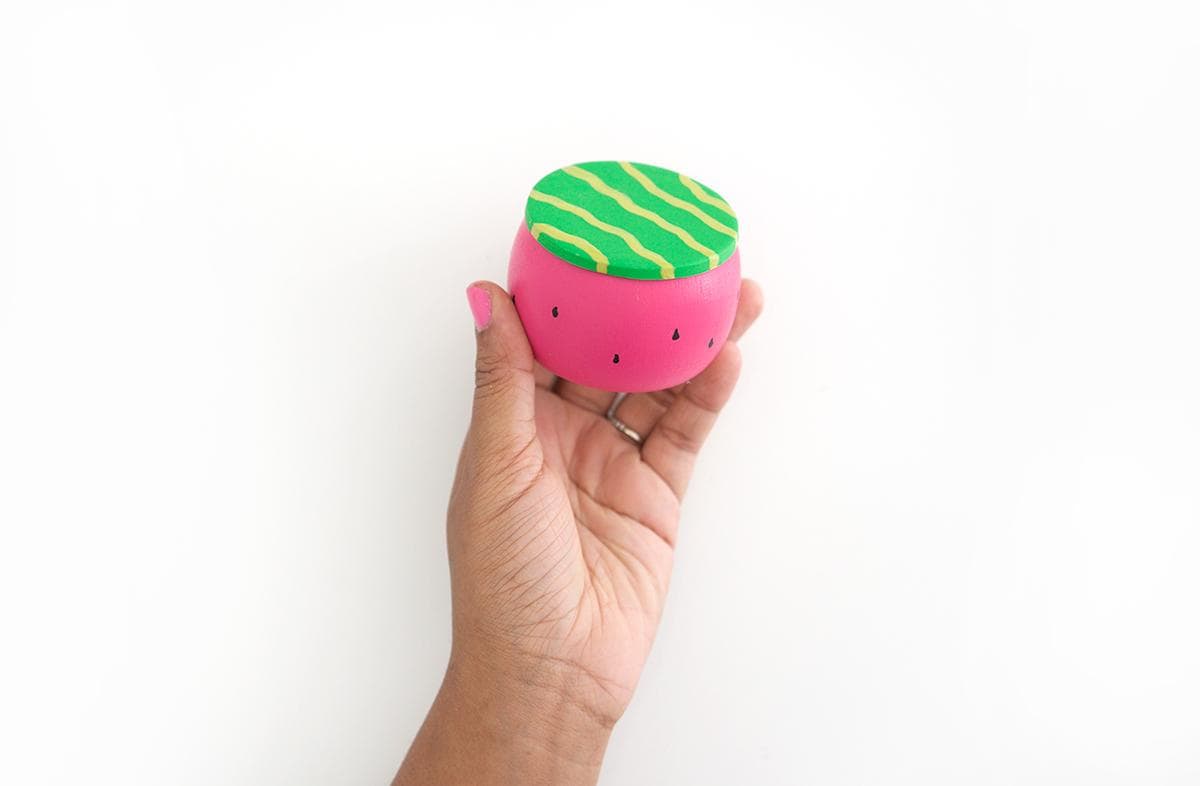
Other caskets can be made on the same principle. Excellent examples in the photo.
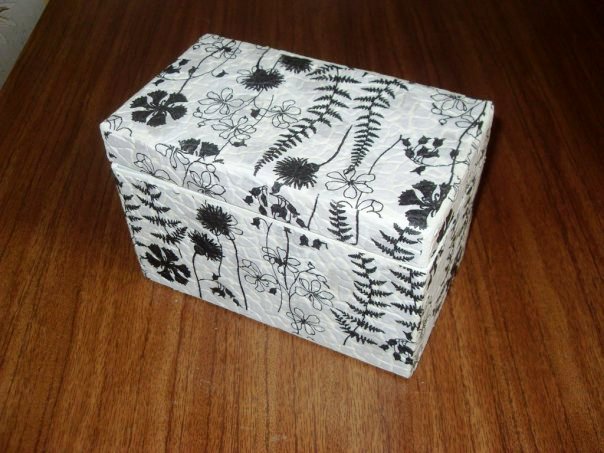
Egg Shell Box
Everyone can make an unusual box with eggshell decor. It looks quite interesting, so it will definitely attract attention to itself.
We will prepare the following materials:
- cardboard box;
- eggshell;
- paints;
- napkins;
- PVA glue;
- manicure sticks;
- tassel.
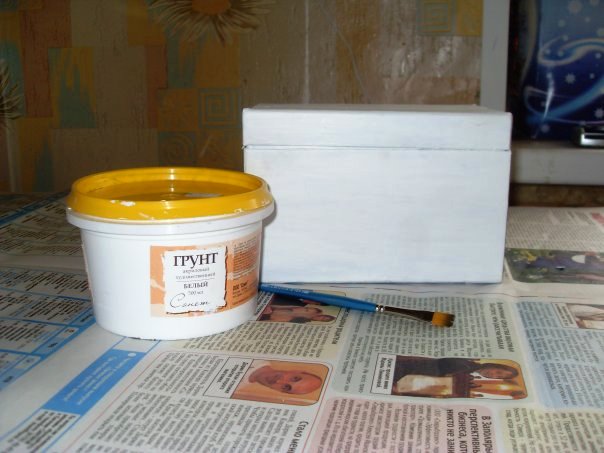
Clean and level the box with sandpaper.
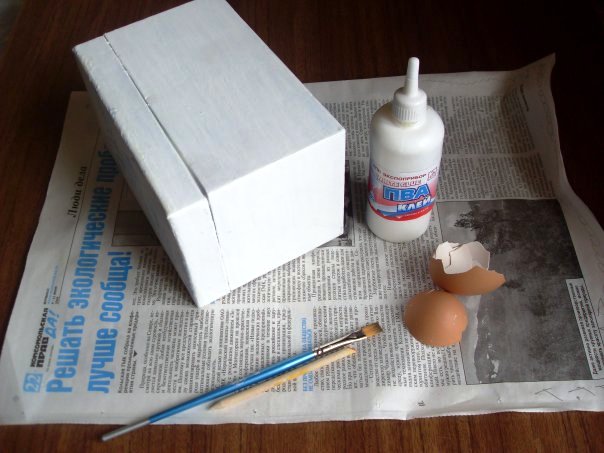
We smear a small part of the box with PVA glue and apply the shell to the surface.
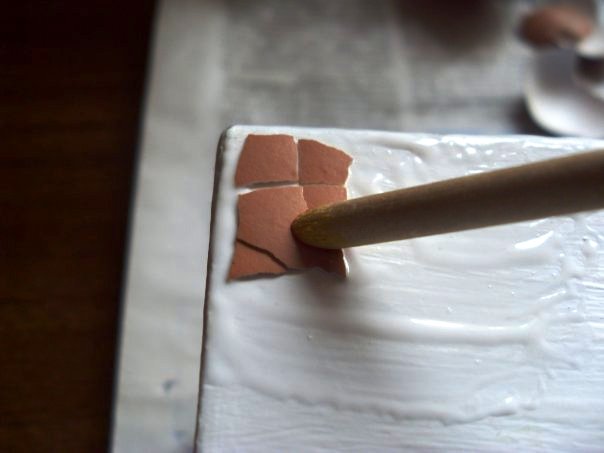
With a stick we make a little bit of it so that the shell cracks. Then move the fragments apart to the desired distance to form a mosaic.
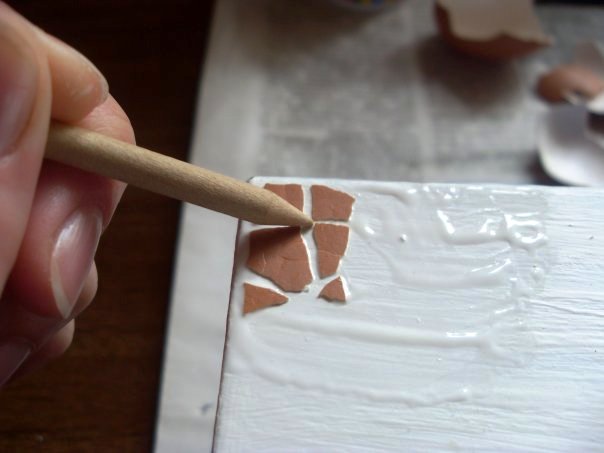
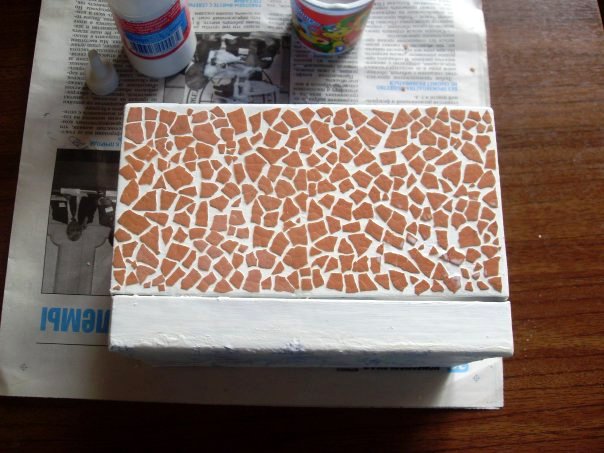
When all the shells are laid, we treat the surface with white glue.
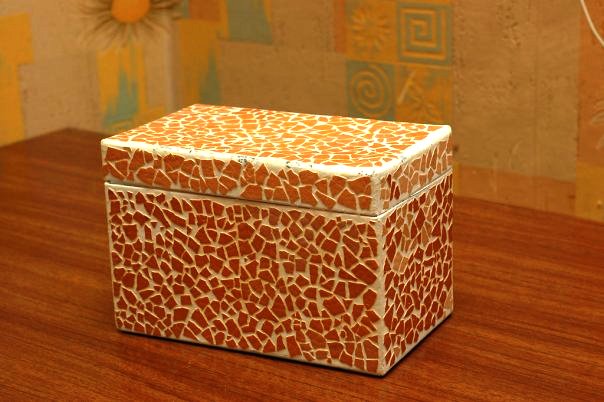
Cover the box with acrylic paint in several layers.
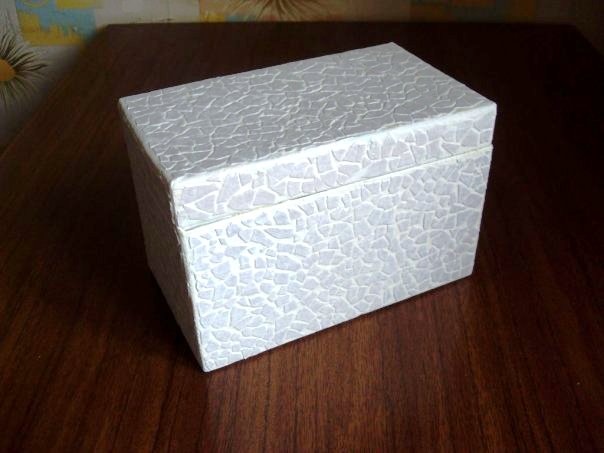
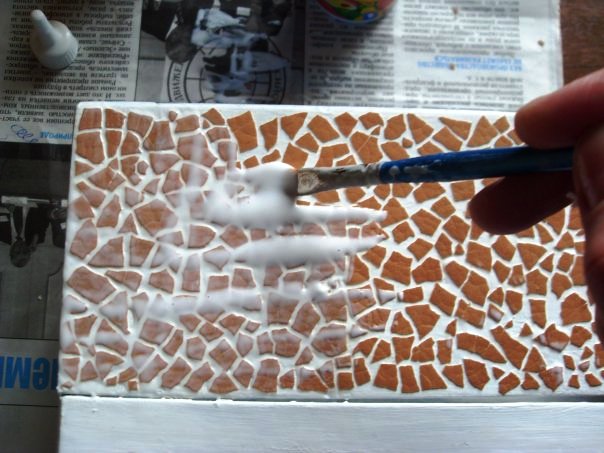
Getting to the decoration. For this, we separate two layers from the napkin, leaving the one on which there is a drawing. We coat the surface with a layer of PVA and immediately apply a napkin, after which we apply another layer of glue.
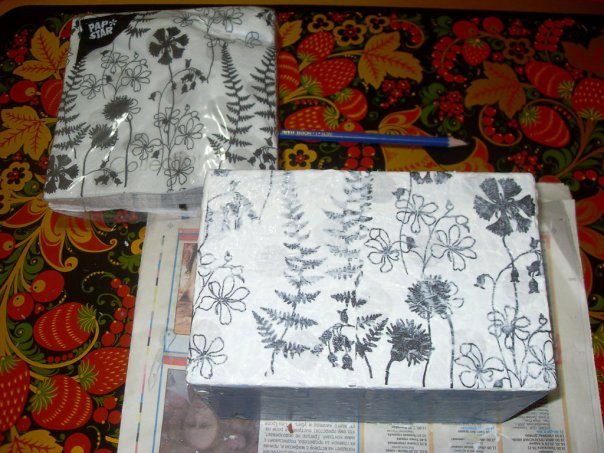
Leave the box to dry for several hours.
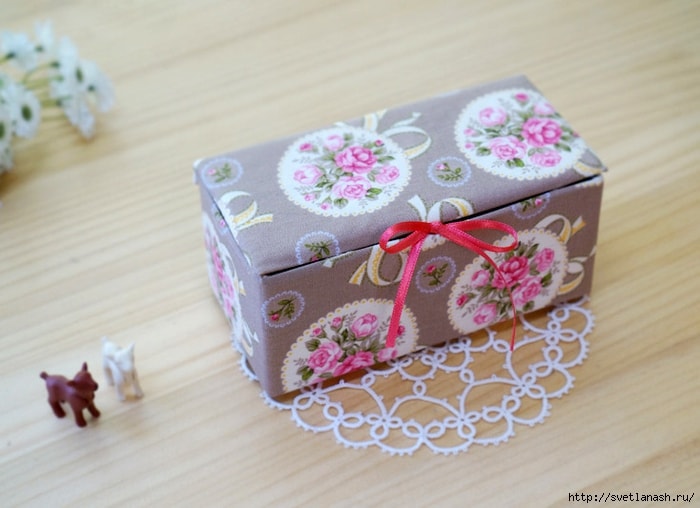
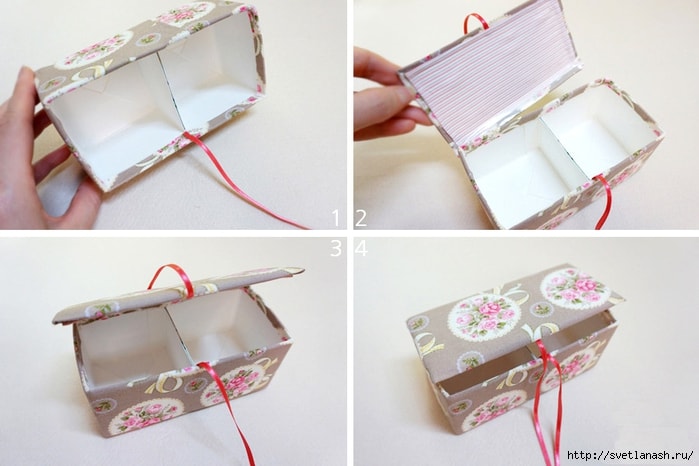
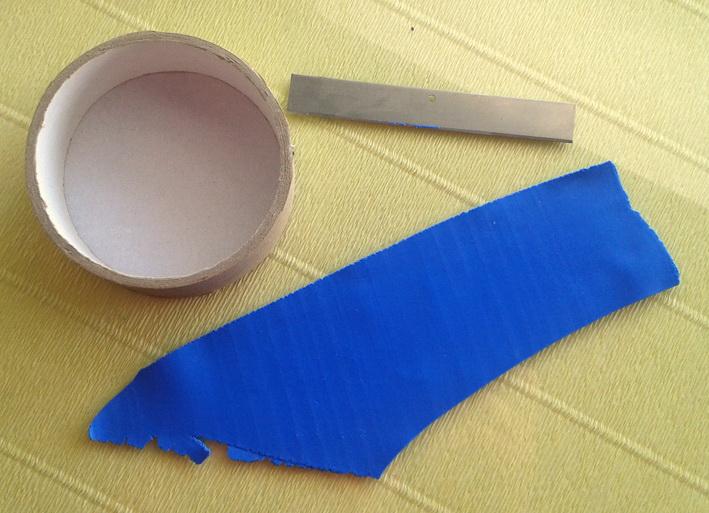
Dairy Packing Box
Small box - the perfect solution for various trifles. That is why girls like her so much.
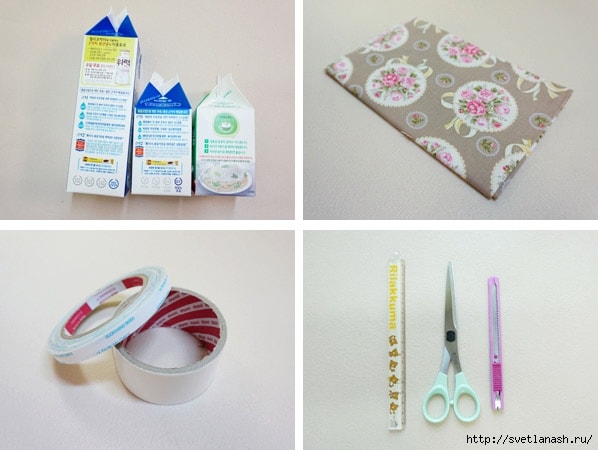
For work you will need the following:
- packaging from dairy products;
- the cloth;
- double sided tape;
- scissors;
- ruler;
- ribbon;
- knife.
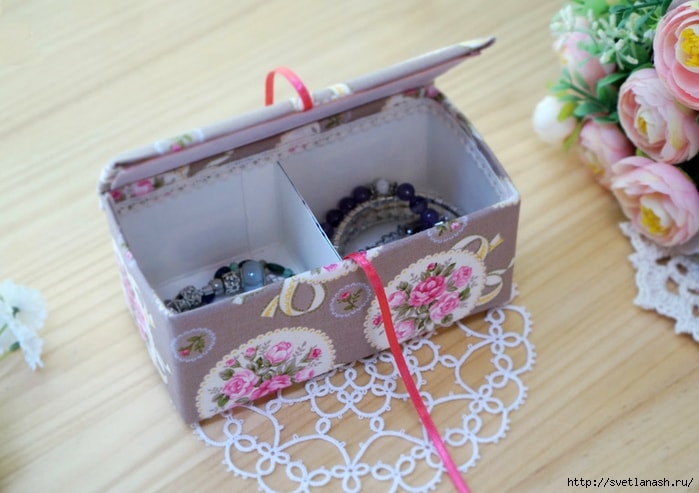
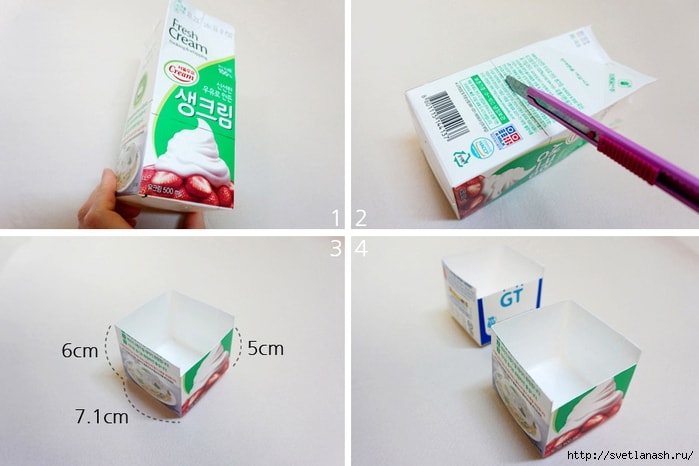
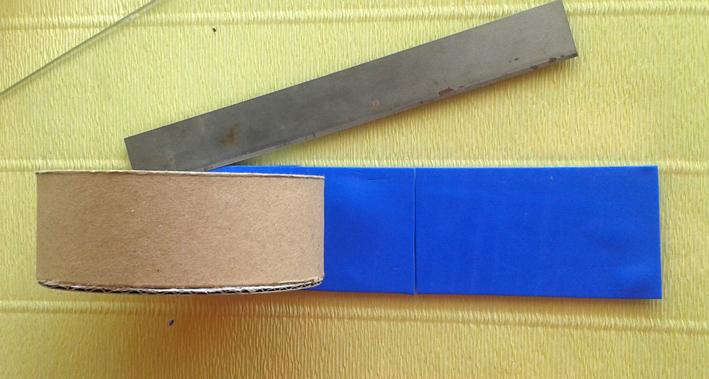
Cut out two identical containers from the package to create the casket compartments.
We connect them together with double-sided tape and glue the casket with a cloth. Do not forget to handle the bottom.
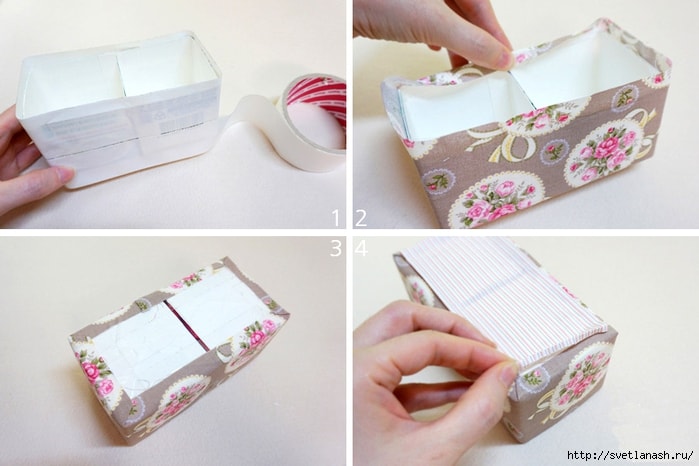
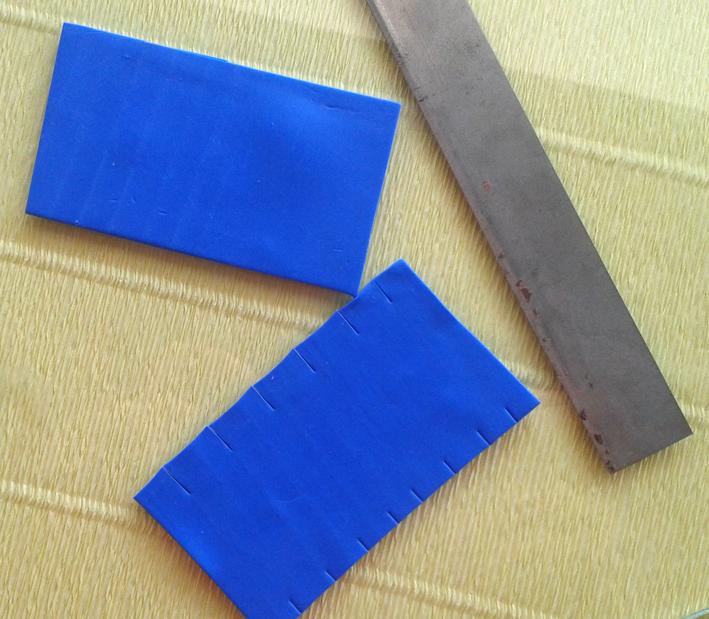
Cut a rectangle out of the package, which will be a cover. Glue it with a cloth with scotch tape. Glue the ribbon so that you can tie the box.
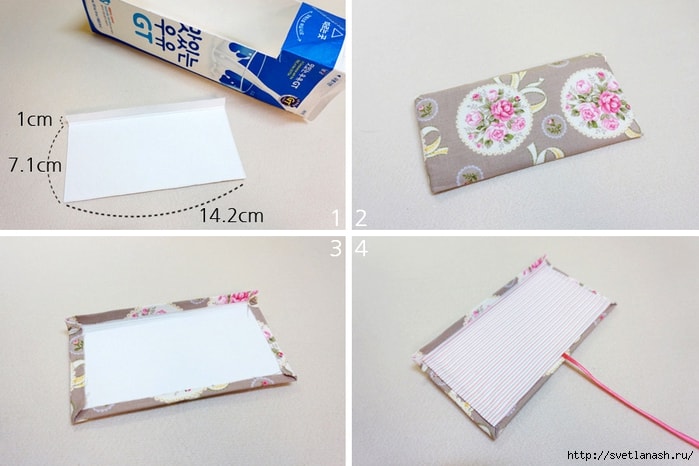
Connect the base and cover with double-sided tape. Sweetheart box for little things ready!
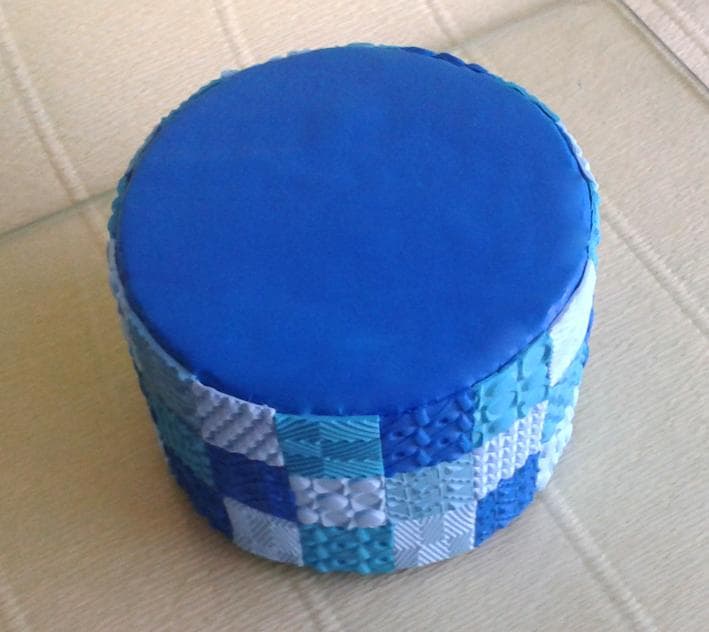
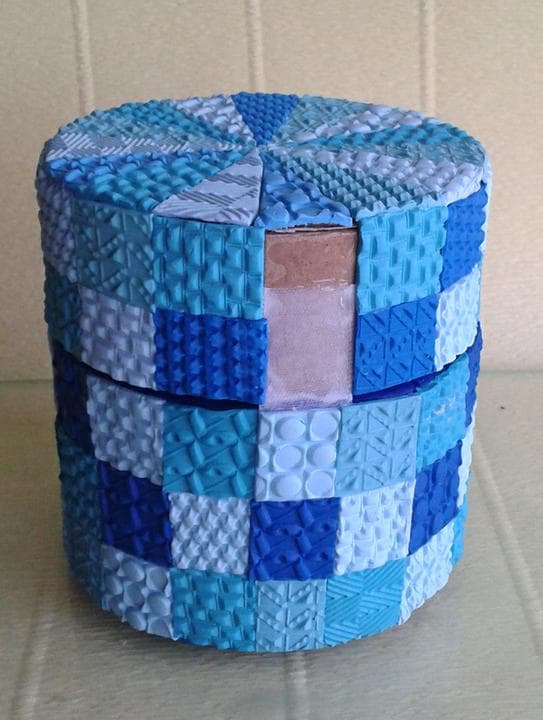
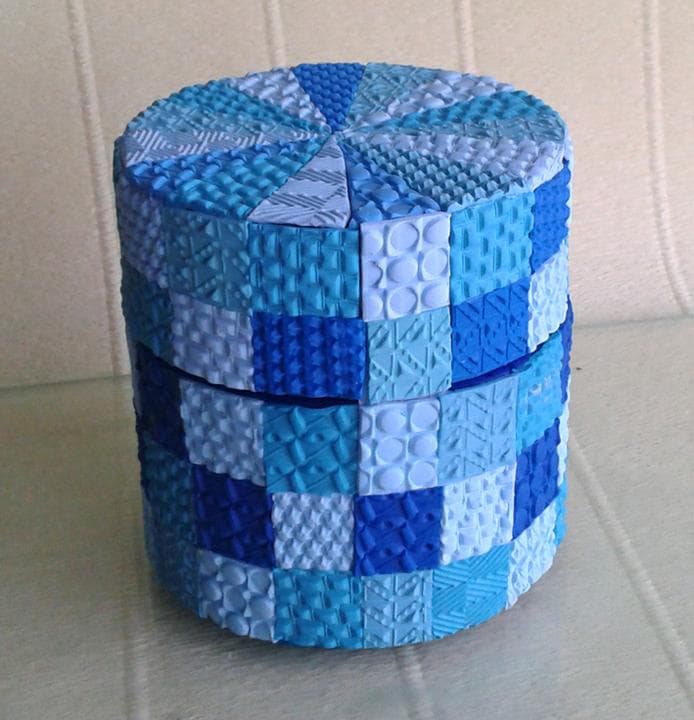
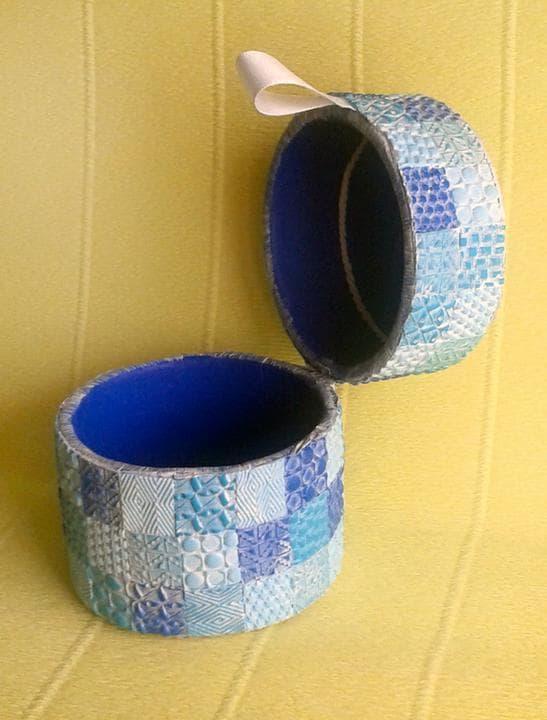
Box in mosaic technique
To make such a box yourself will need:
- polymer clay;
- liquid plastic (fimo-gel);
- knife and scissors;
- reels of scotch;
- cardboard;
- glue;
- satin ribbon;
- texture sheets for clay;
- talc;
- plastic varnish;
- brush;
- roller for rolling plastic.
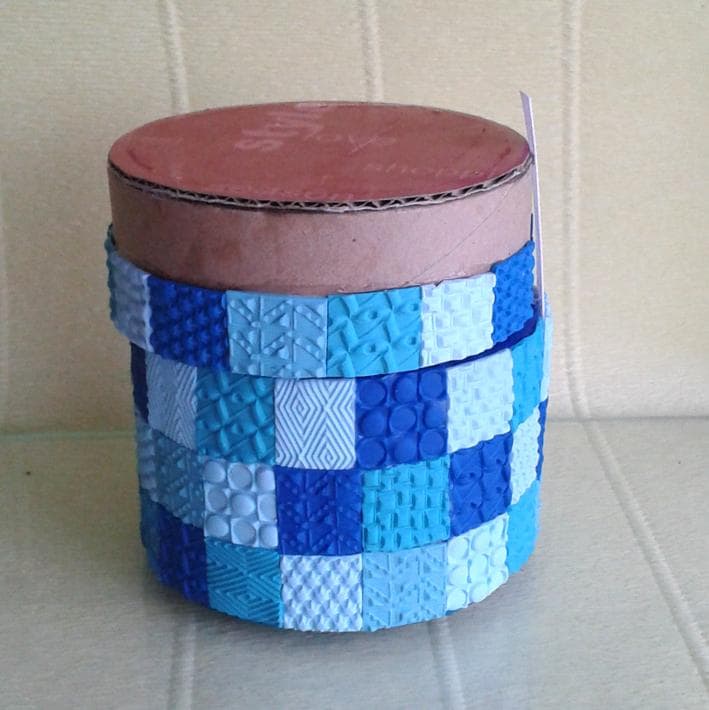
Cut out two circles from cardboard, which will be the bottom of the base and the top of the lid.
Glue the parts with glue.
Polymer clay of any color can be used as a decor. But white is considered obligatory, since it can be used to create different shades.
Roll out a thin layer of clay to decorate the inside of the box.
We cut the clay a little wider than the bobbin.
Cut it into several parts, making cuts.
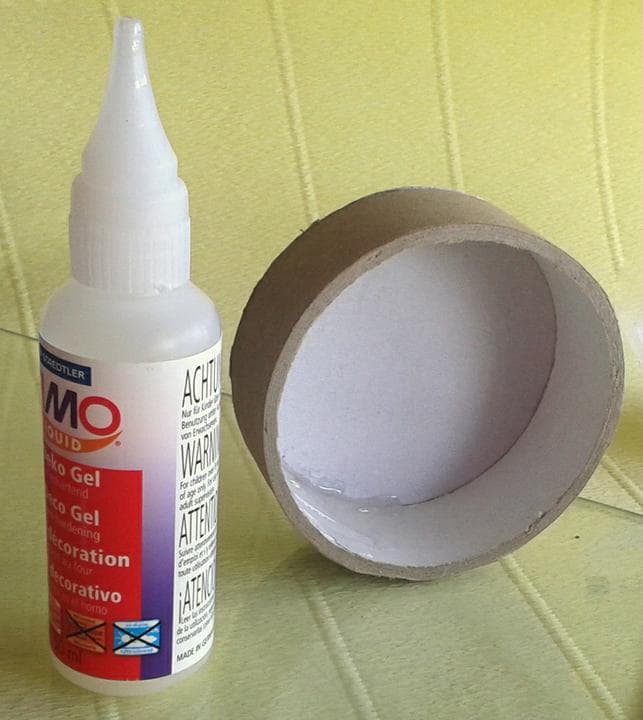
Prepare the reel, lubricating the walls and junctions of the bottom with a special gel.
We lay clay on the prepared area and press it well. It is very important that there is no air left, as bubbles may appear later.
Cut the upper edge with a knife.

We cover the reel with clay, well working through the joints.
Cut a circle out of clay, slightly smaller than the inner diameter of the base.
Lubricate the bottom and attach the circle.
To hide the joints, we make flagella in a contrasting color and lay them out.
We give vertical joints the similarity with a decorative seam.
In the same way we make out the second part of the box, after which we bake them in the oven. Temperature and duration are indicated by the manufacturer on the package.
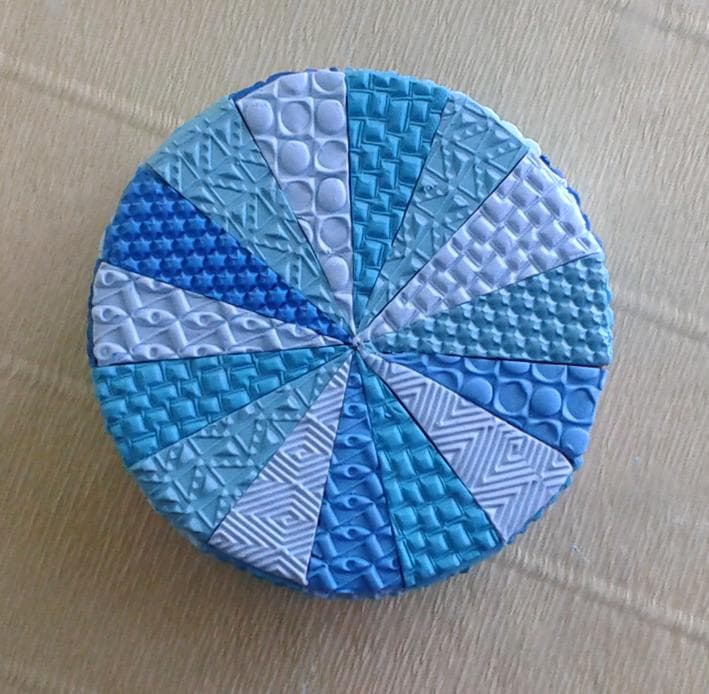
In the meantime, we are preparing a design for the outer walls. To plastic not clogged in the pattern on the texture sheet, use talc.
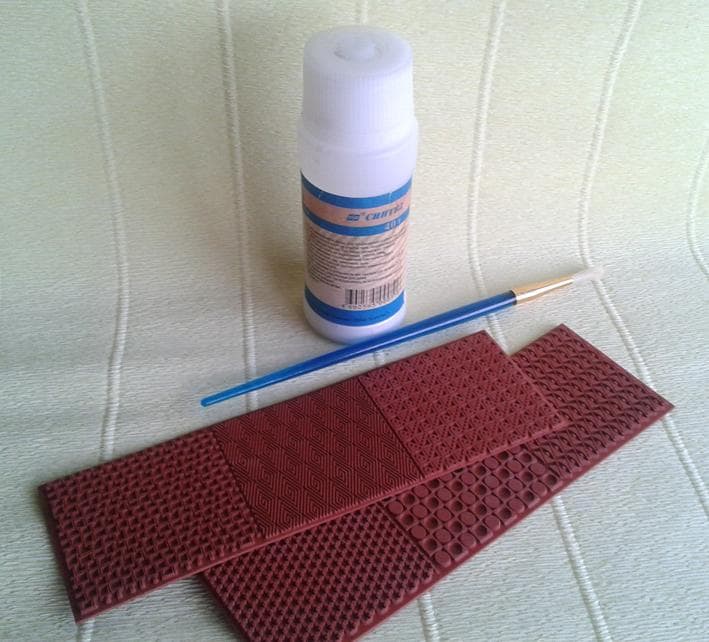
With the help of a roller for rolling plastic, we form a variety of drawings.
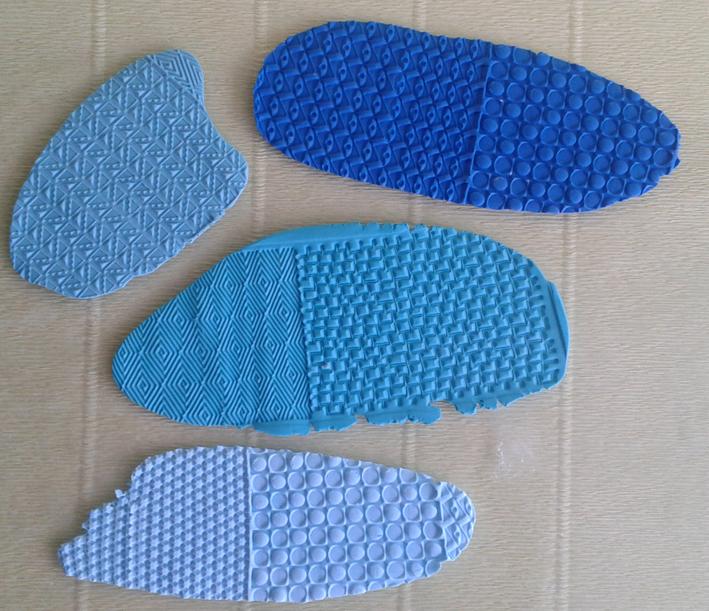
Cut them into squares for easy operation.
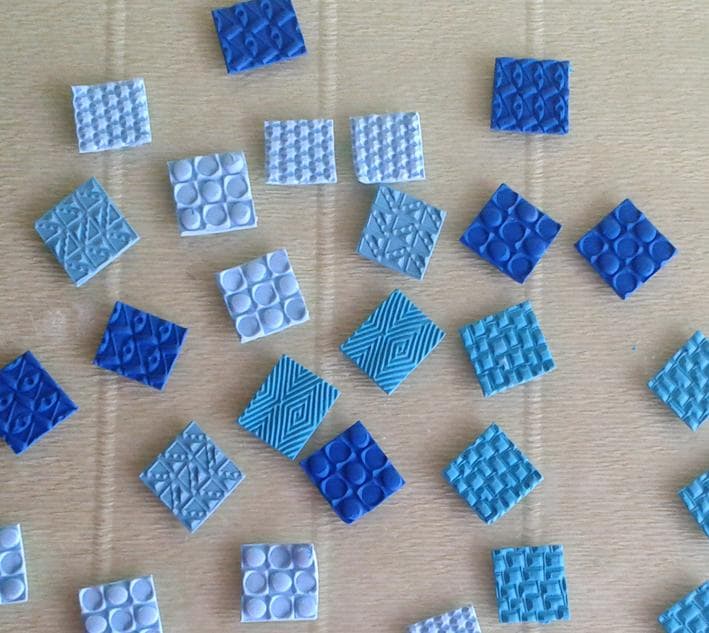
After the base has cooled, lubricate it with gel and lay out a mosaic. We alternate colors and patterns to make the box original.
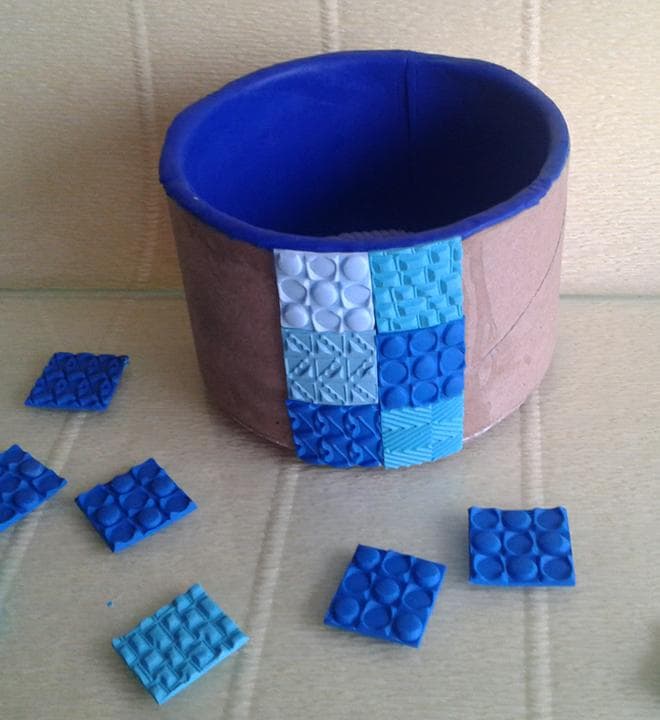
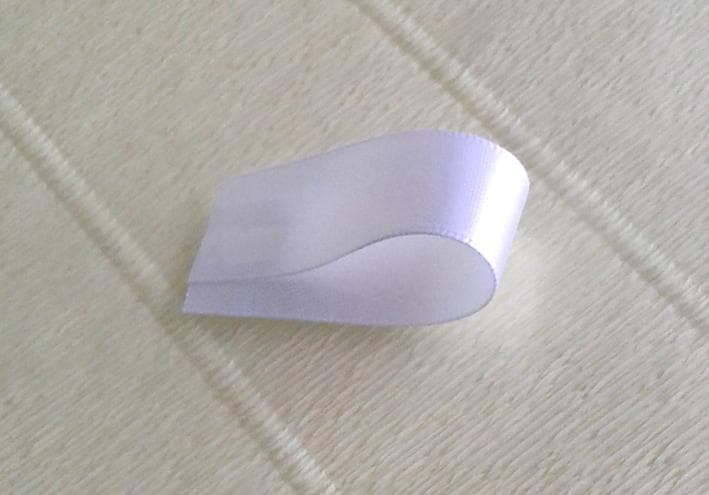
Leave free one lane to make the mount.

Glue the satin ribbon to the base, and then grease it with gel to close it with squares.
Close the bottom of the box with a layer of clay and bake in the oven.
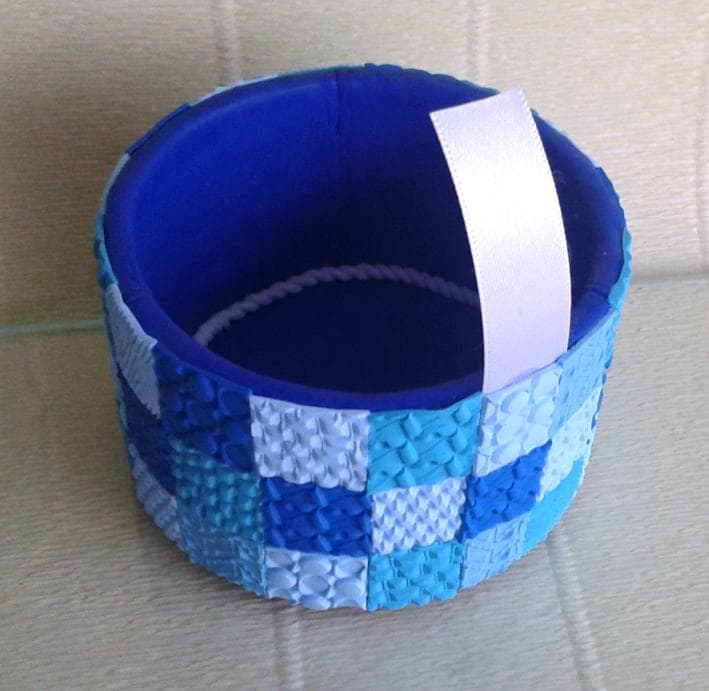
After the lower part has cooled, we decorate the upper part. We spread the bottom row of squares, lubricating the base of the gel. We leave empty one row to connect the two parts of the box.
Decorate the cover with triangular-shaped clay pieces.
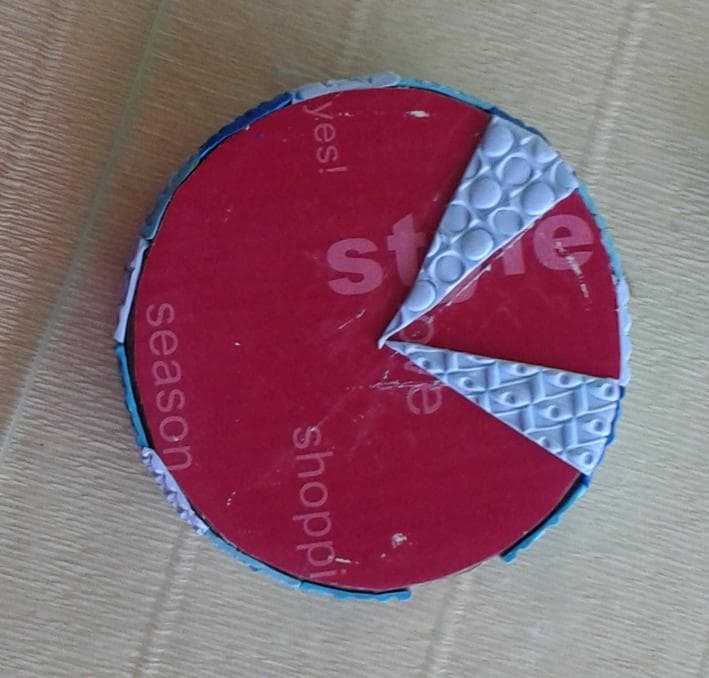
Press them firmly to the base.
Glue the second part of the satin ribbon to the cover.
We make a small loop of tape.
Raise the pieces of the mosaic and glue the tape. Bake the finished product. Then we cover the box with white acrylic paint.
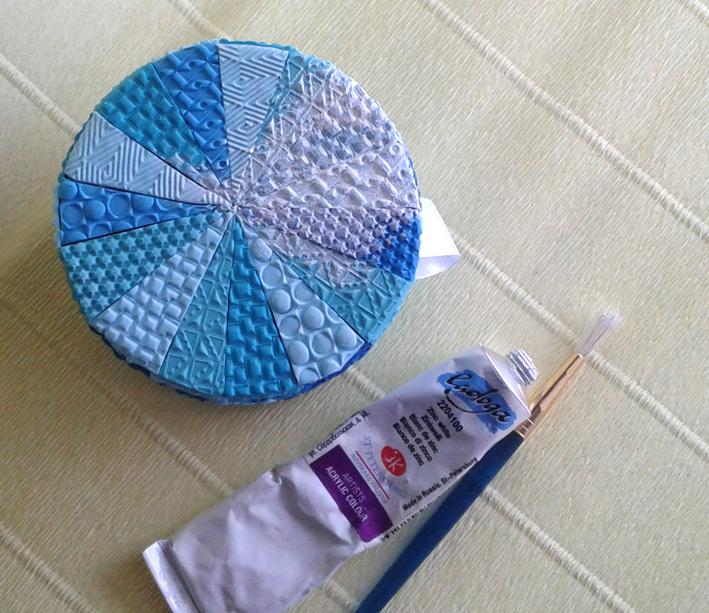
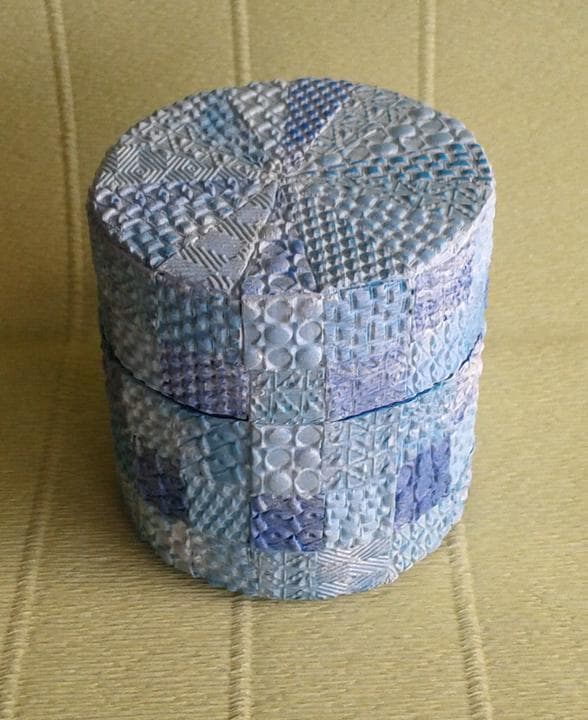
We wash off paint from convex patterns with a damp napkin. We cover with matte varnish for plastics.
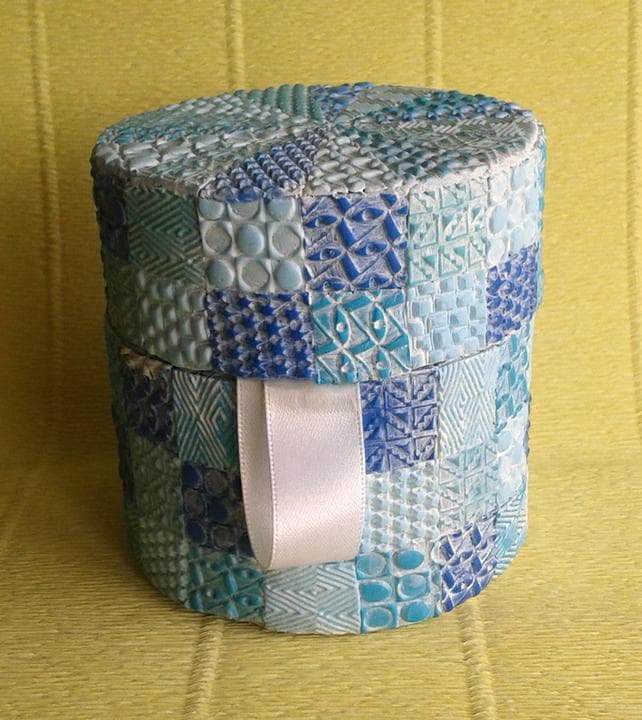
The unusual box is ready to use.
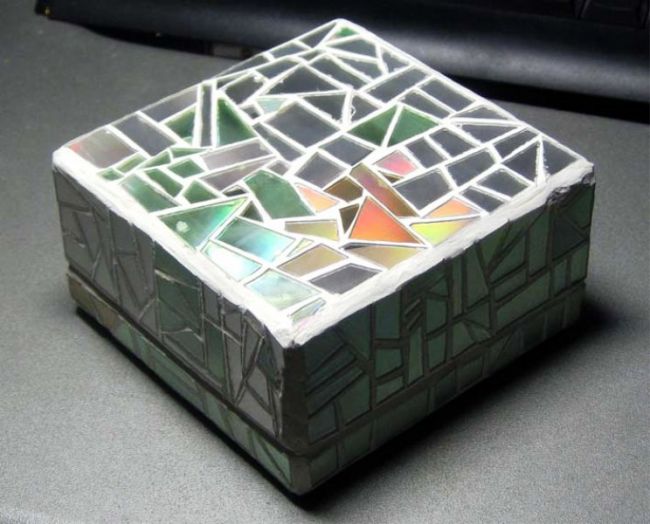
Box out of the box
A stunning box will appeal to every girl. It will not take much time or money to make it, so we recommend trying it.
Necessary materials:
- scissors;
- discs;
- cardboard box;
- putty;
- glue.

Prepare discs, cutting them into pieces. Then glue on the cardboard box. Leave the product for some time until completely dry.
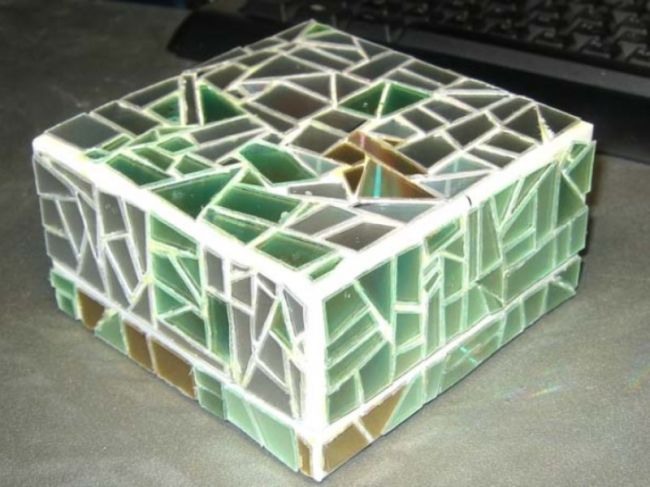
We rub the seams between the pieces of putty.
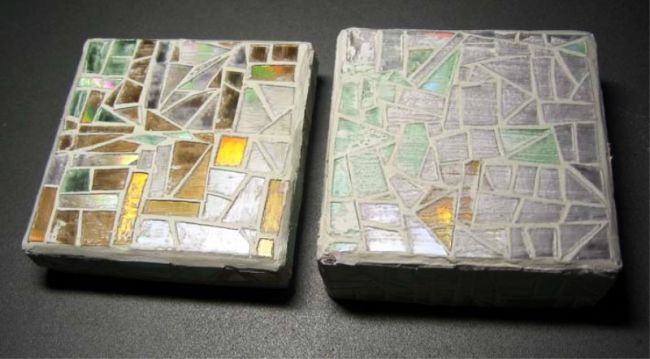
Remove excess grout and process corners and seams.
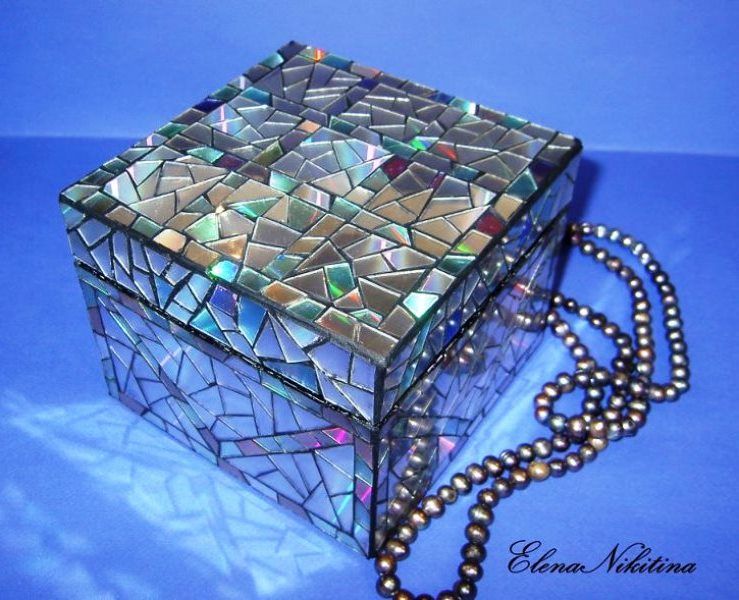
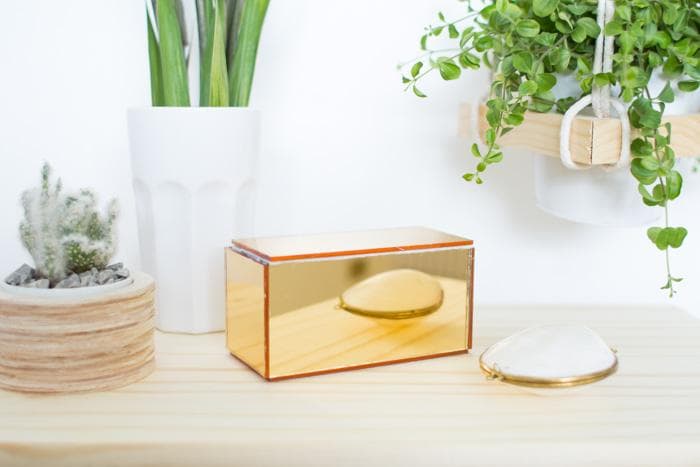
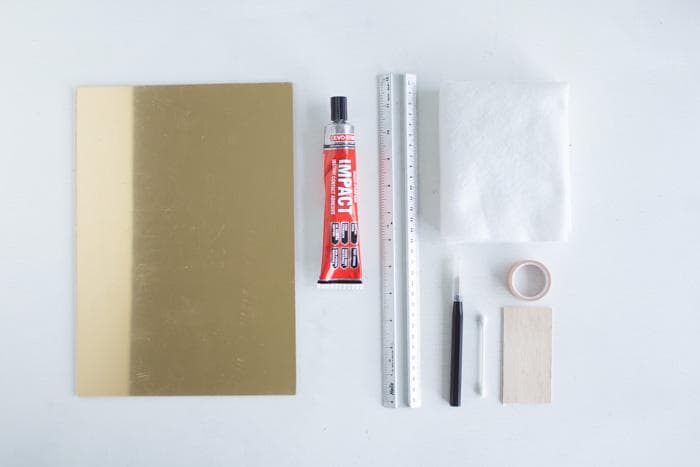
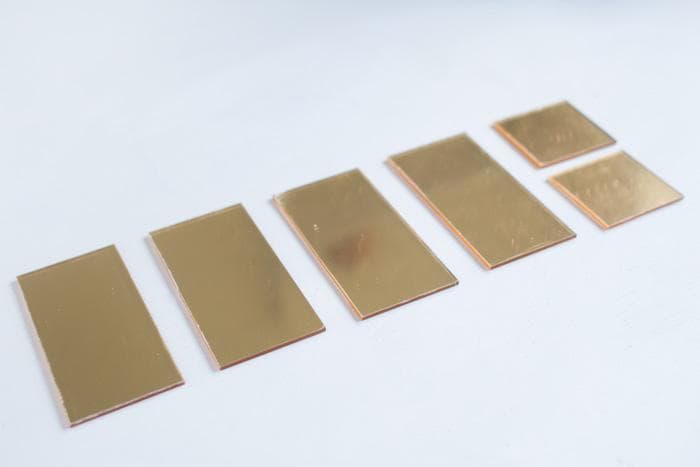
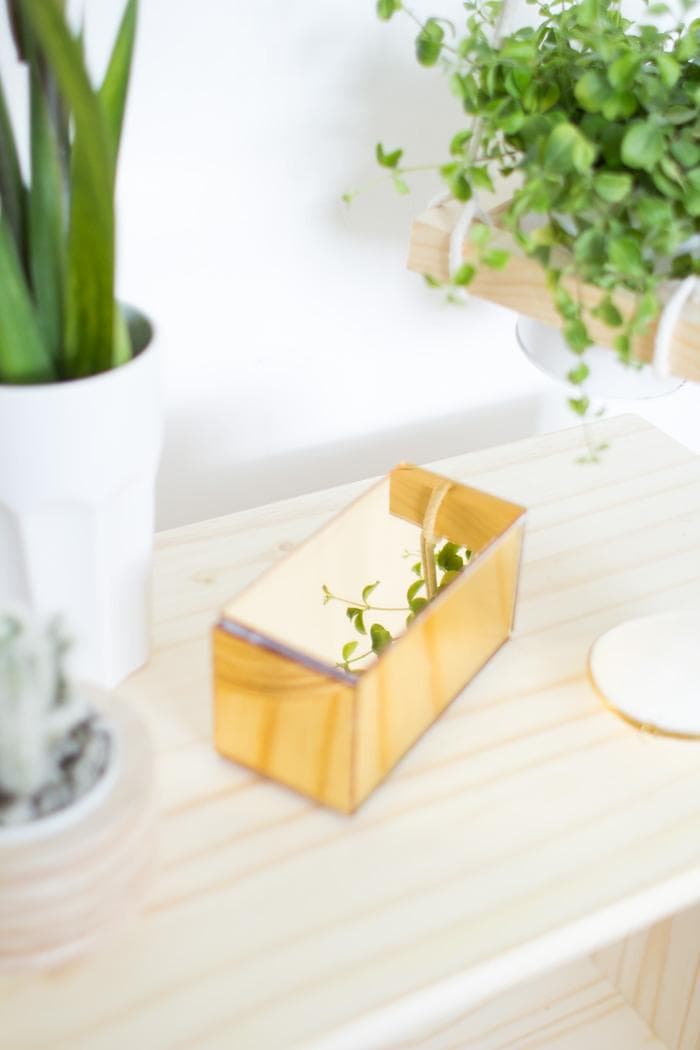
Mirror box do it yourself
Mirror box looks really amazing. If you want to make the same, read on and we will share all the secrets of its manufacture.
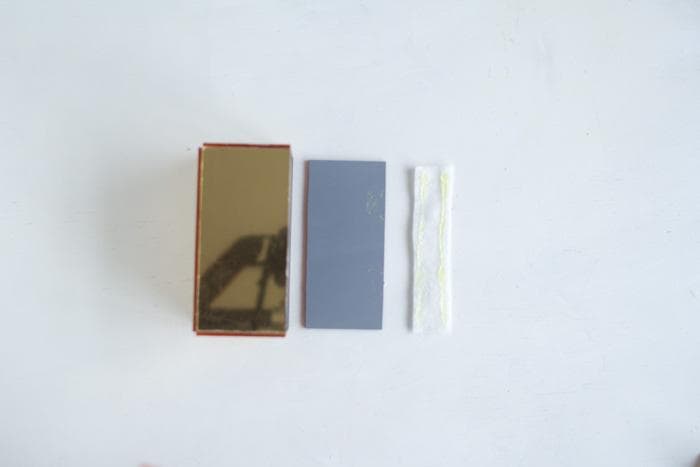
We will prepare such materials:
- acrylic plastic with mirror coating;
- good glue;
- construction knife;
- protective glasses;
- gloves;
- ruler;
- masking tape;
- felt;
- brush.
It is very important at the first stage to decide on the size of the box, since it is necessary to prepare three panels. On a sheet of plastic along the markup, we install a metal ruler and draw a knife along it several times.
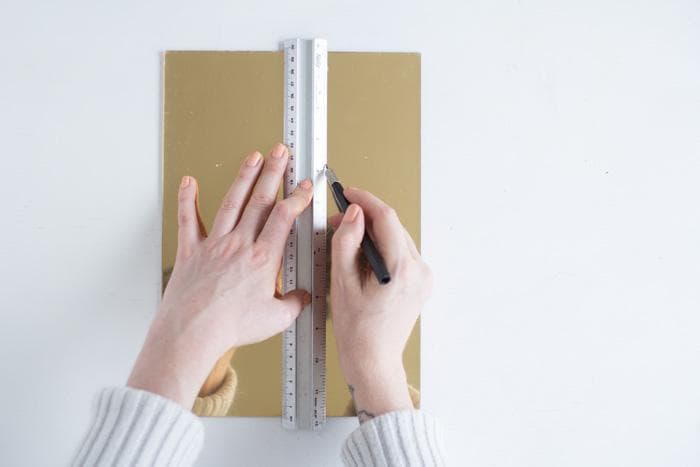
We put on glasses and gloves, after which we place the plastic on the edge of the table and click on the hanging part of the sheet. The breakdown should be uniform.
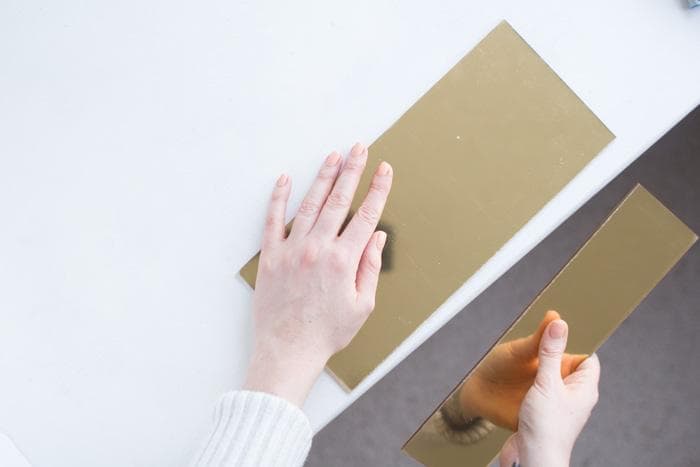
Shorten the plastic to the desired length.
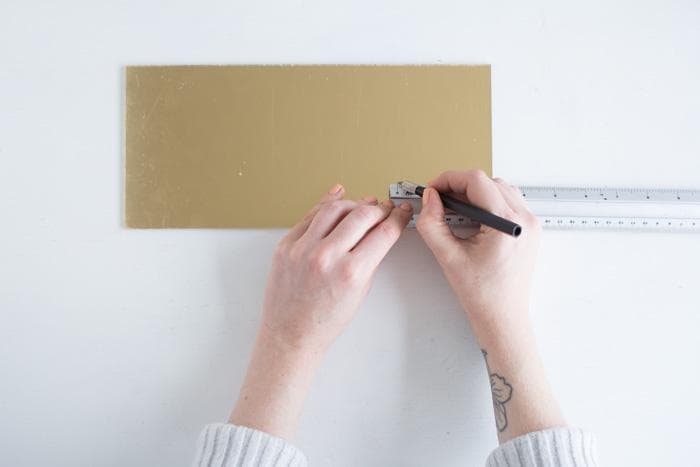
We make the rest of the panel.
We put in a row two square blanks and one rectangular.
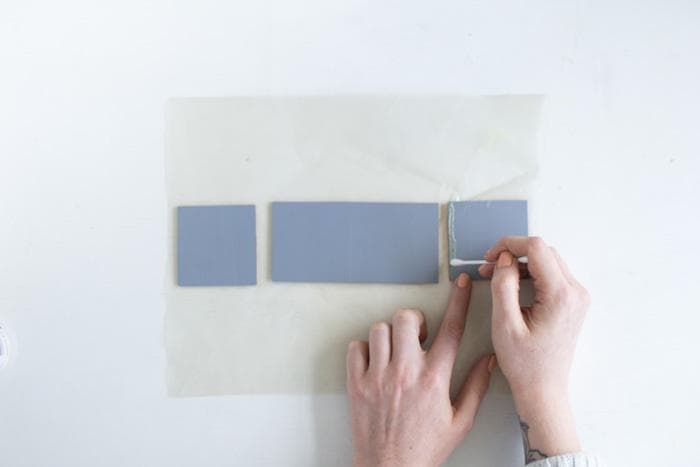
Along one of the edges we apply a strip of glue.
We connect the parts together.
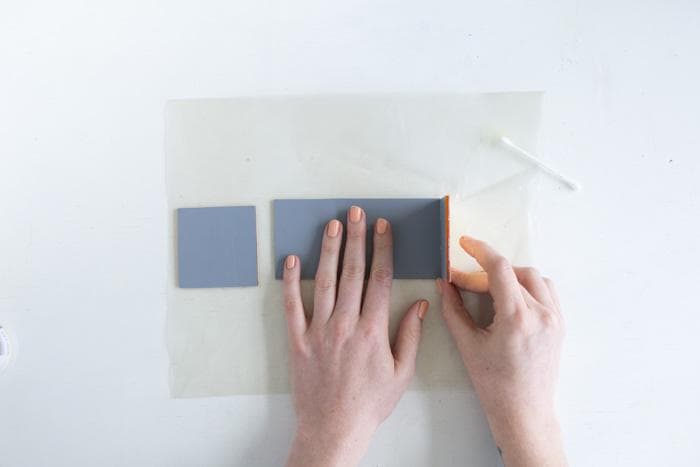
We glue another rectangular panel to the construction.
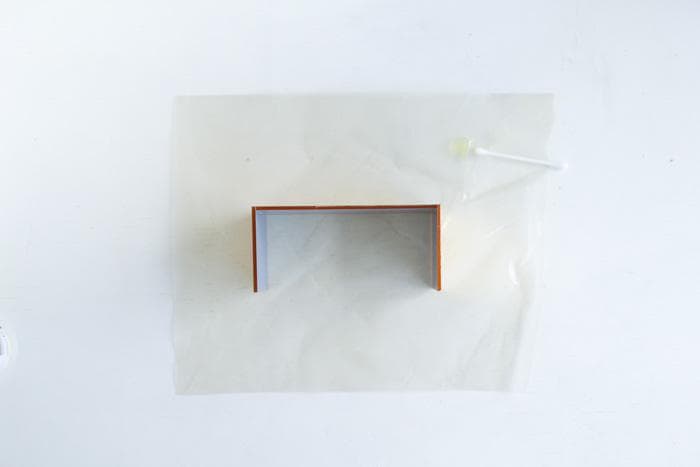
Apply glue to the upper edges and glue the workpiece. We leave the product at 12 o'clock.
Cut the strip of felt and apply glue along the long edges.
Putting the last panel to the box. So get a cap.
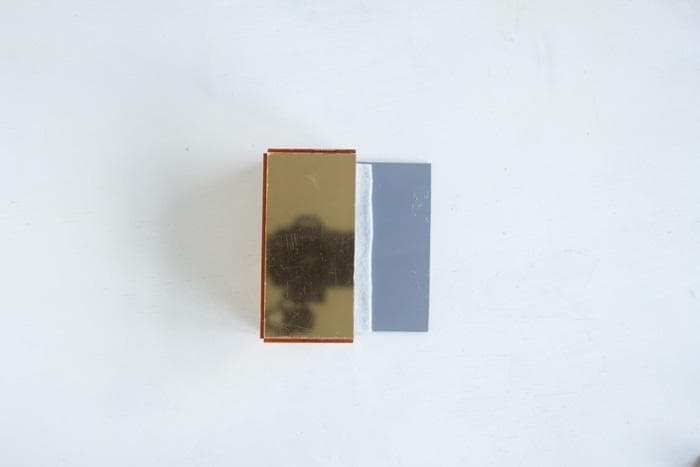
After the product has dried, we paste felt on the inside of the box.
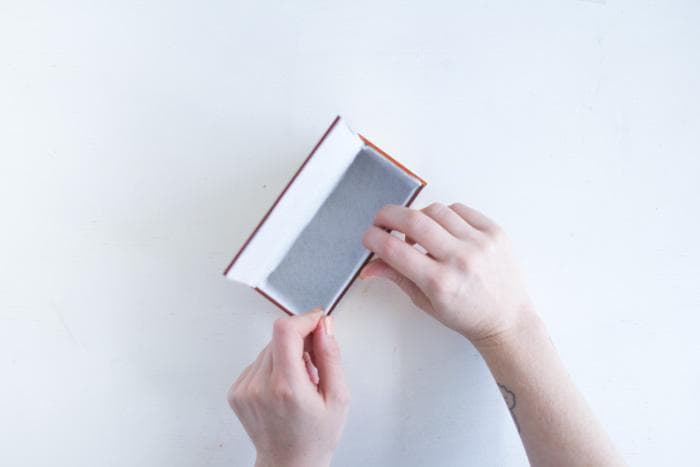
Remove the protective film from the plastic.
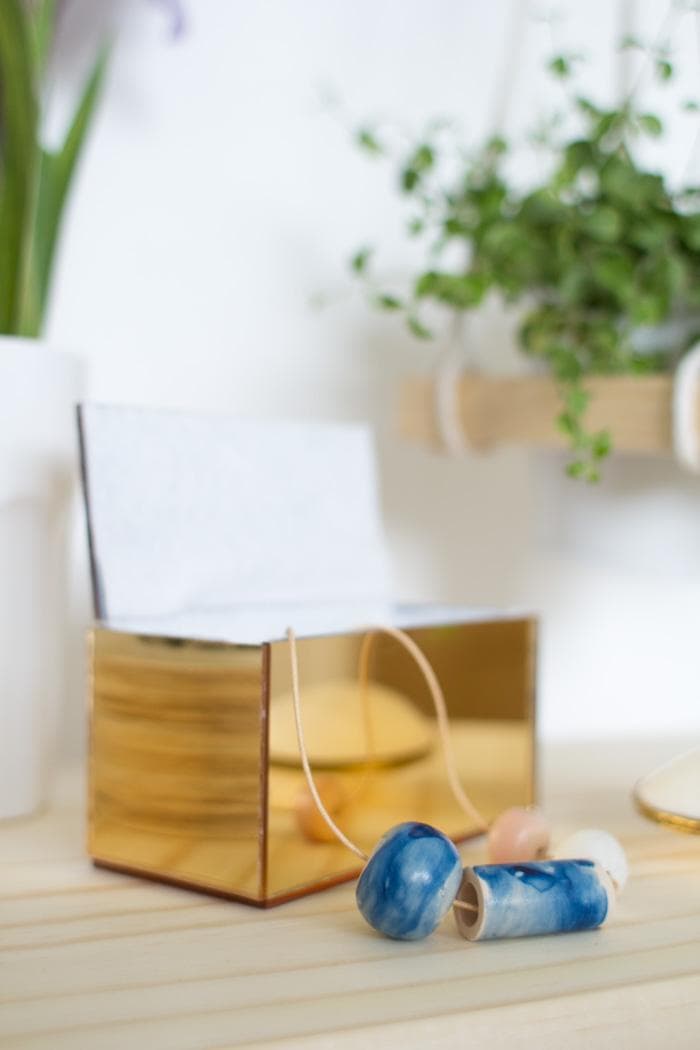
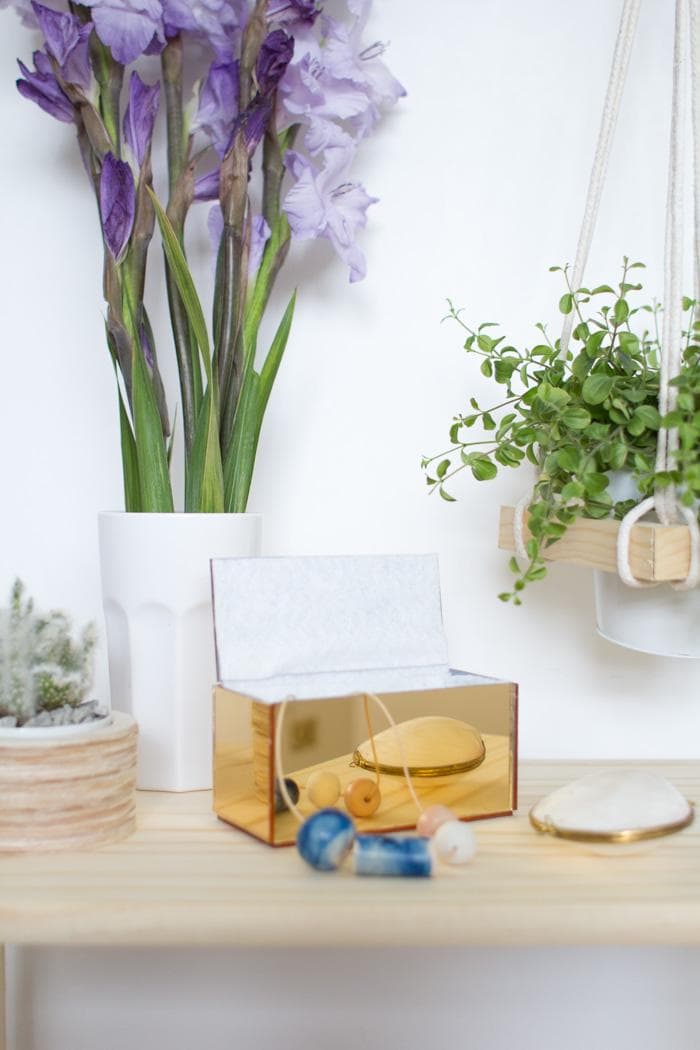
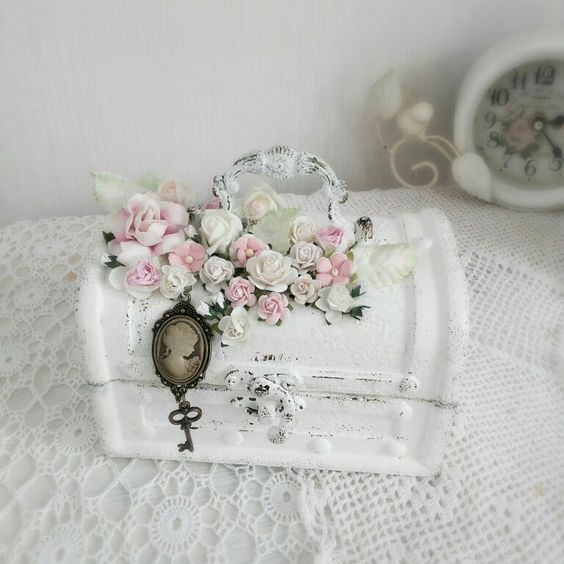
Beautiful handmade jewelry box always attracts attention. Moreover, it can be done with all the wishes. Therefore, such a thing would be ideal for storing your jewelry.
Have you tried to make a box with your own hands or do you prefer to buy finished products?


