


On the eve of the New Year, there is a festive atmosphere everywhere. Everyone wants to quickly choose gifts, surprise loved ones. And of course, we must not forget about the thematic attributes of such a bright event. How to make them yourself, we will tell in today's article.
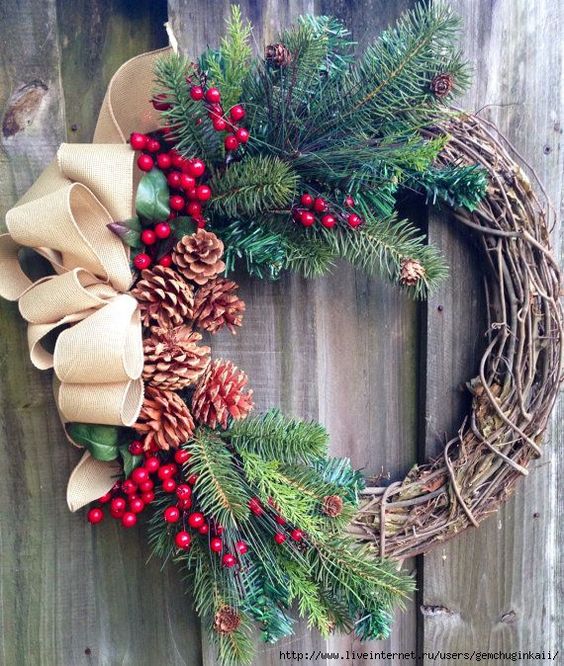


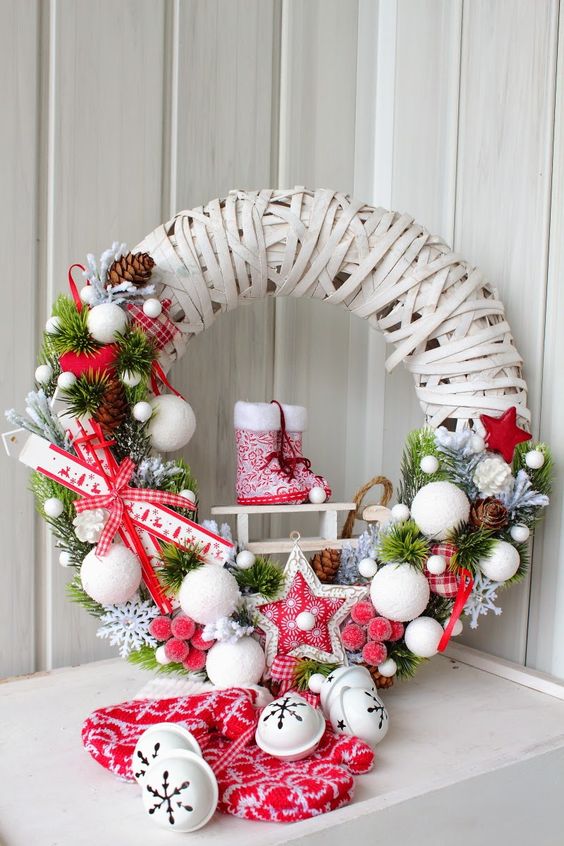
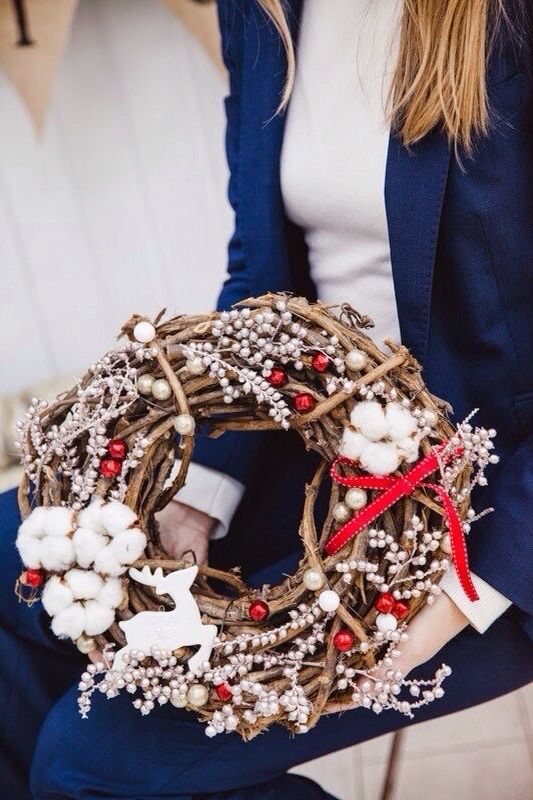
Unusual Christmas Wreath
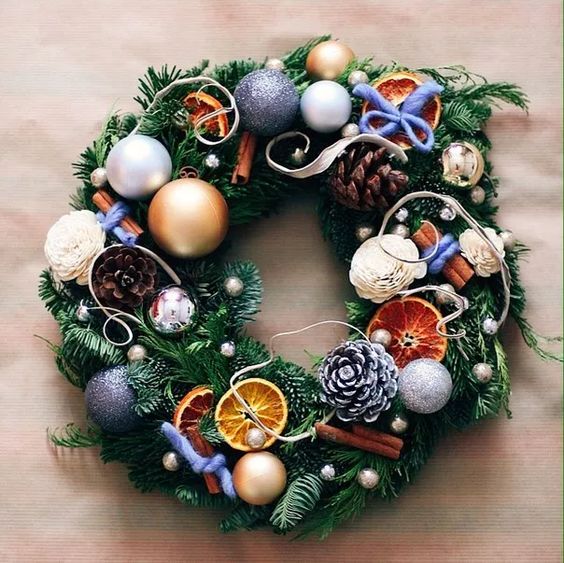
In Western countries, a Christmas wreath is a mandatory attribute of the holiday. It is created by the whole family, adding interesting elements of decor. In Russia, he was treated ambiguously for a long time. But now such decorations can be seen in many. Therefore, we offer to make an unusual wreath with your own hands.
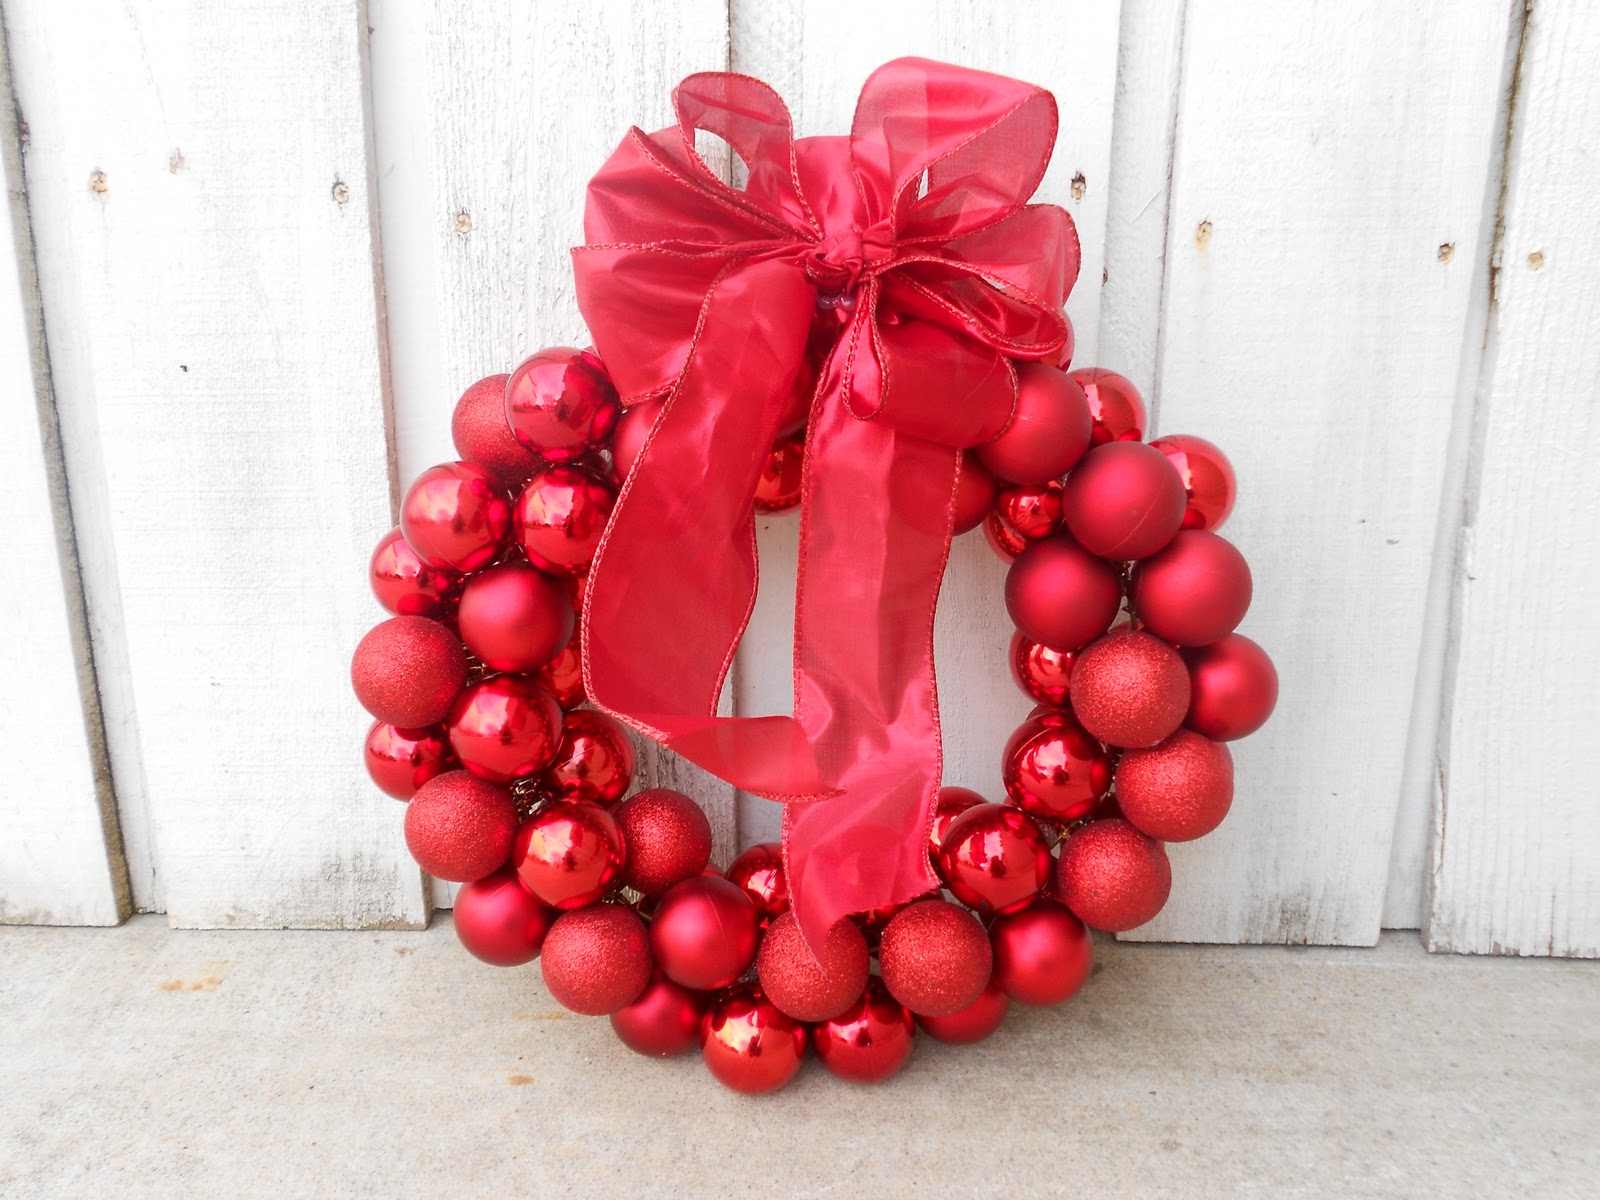
We will prepare such materials:
- wire hanger;
- pliers;
- balls of different diameter;
- glue;
- wide ribbon.
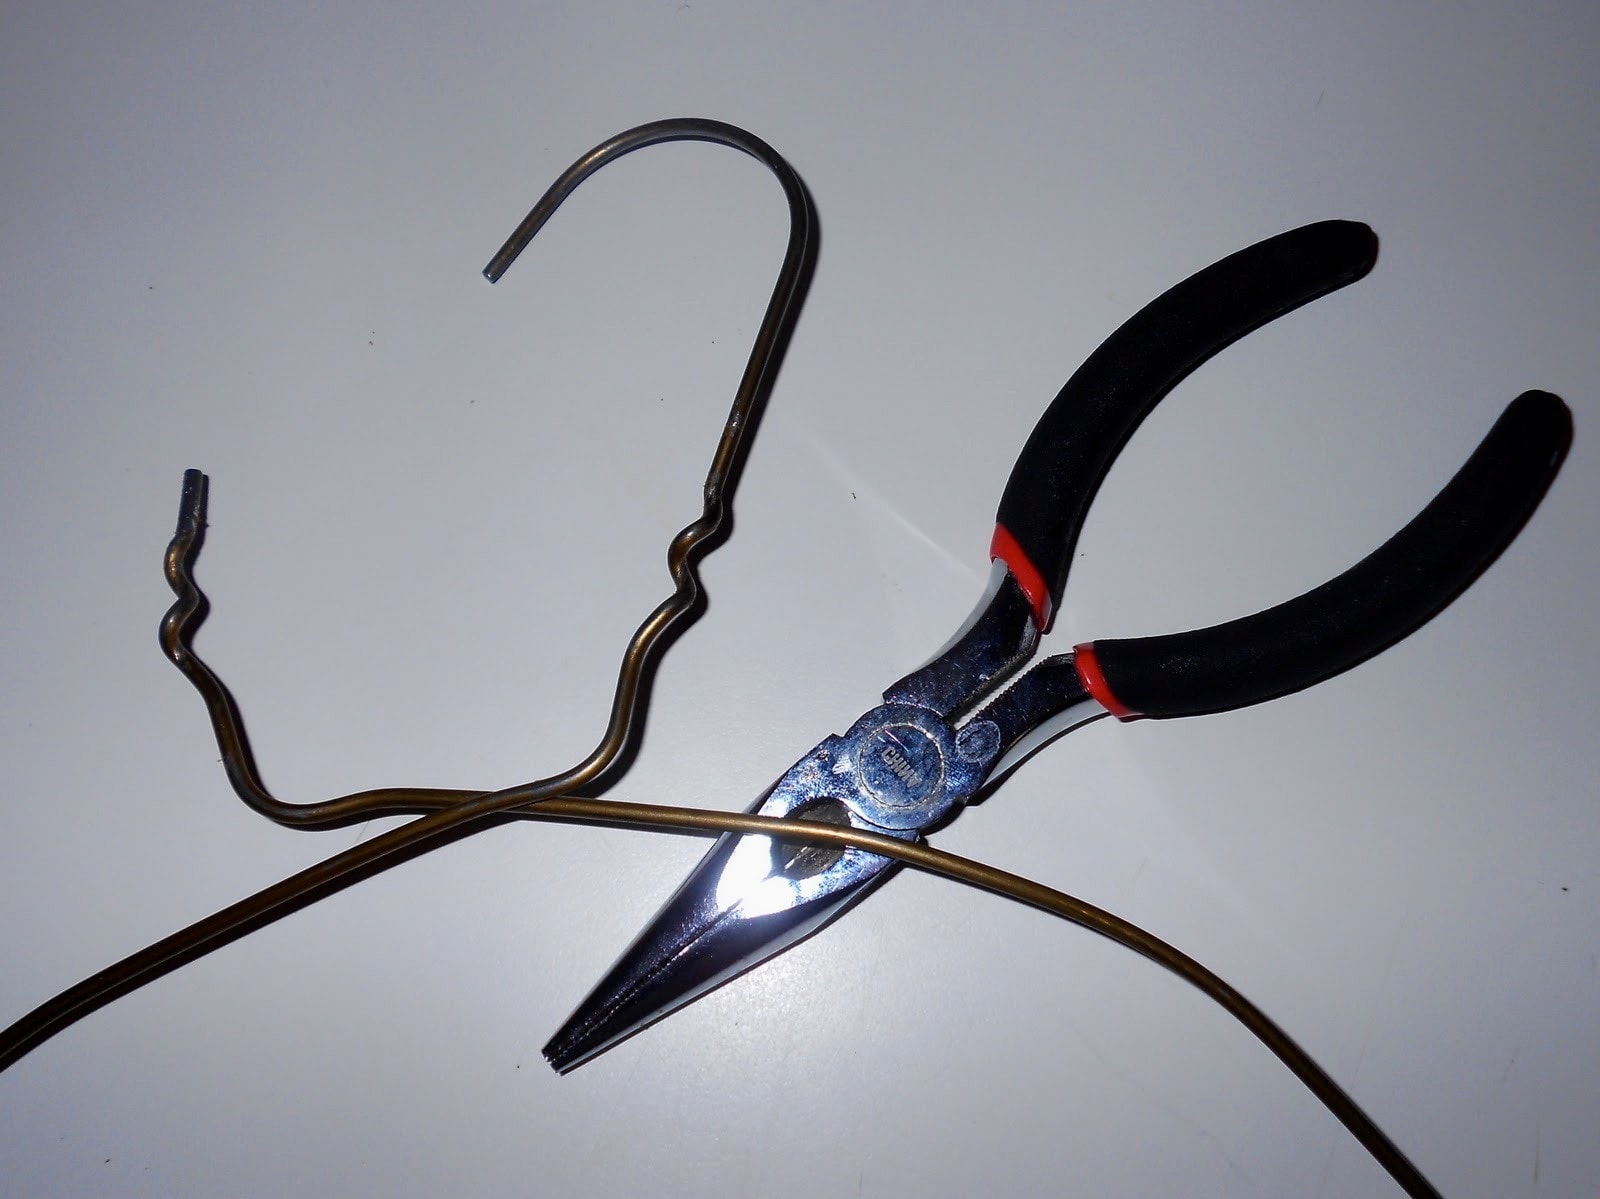
Give the hanger a round shape, as shown in the photo.

Using pliers, we separate the hanger.
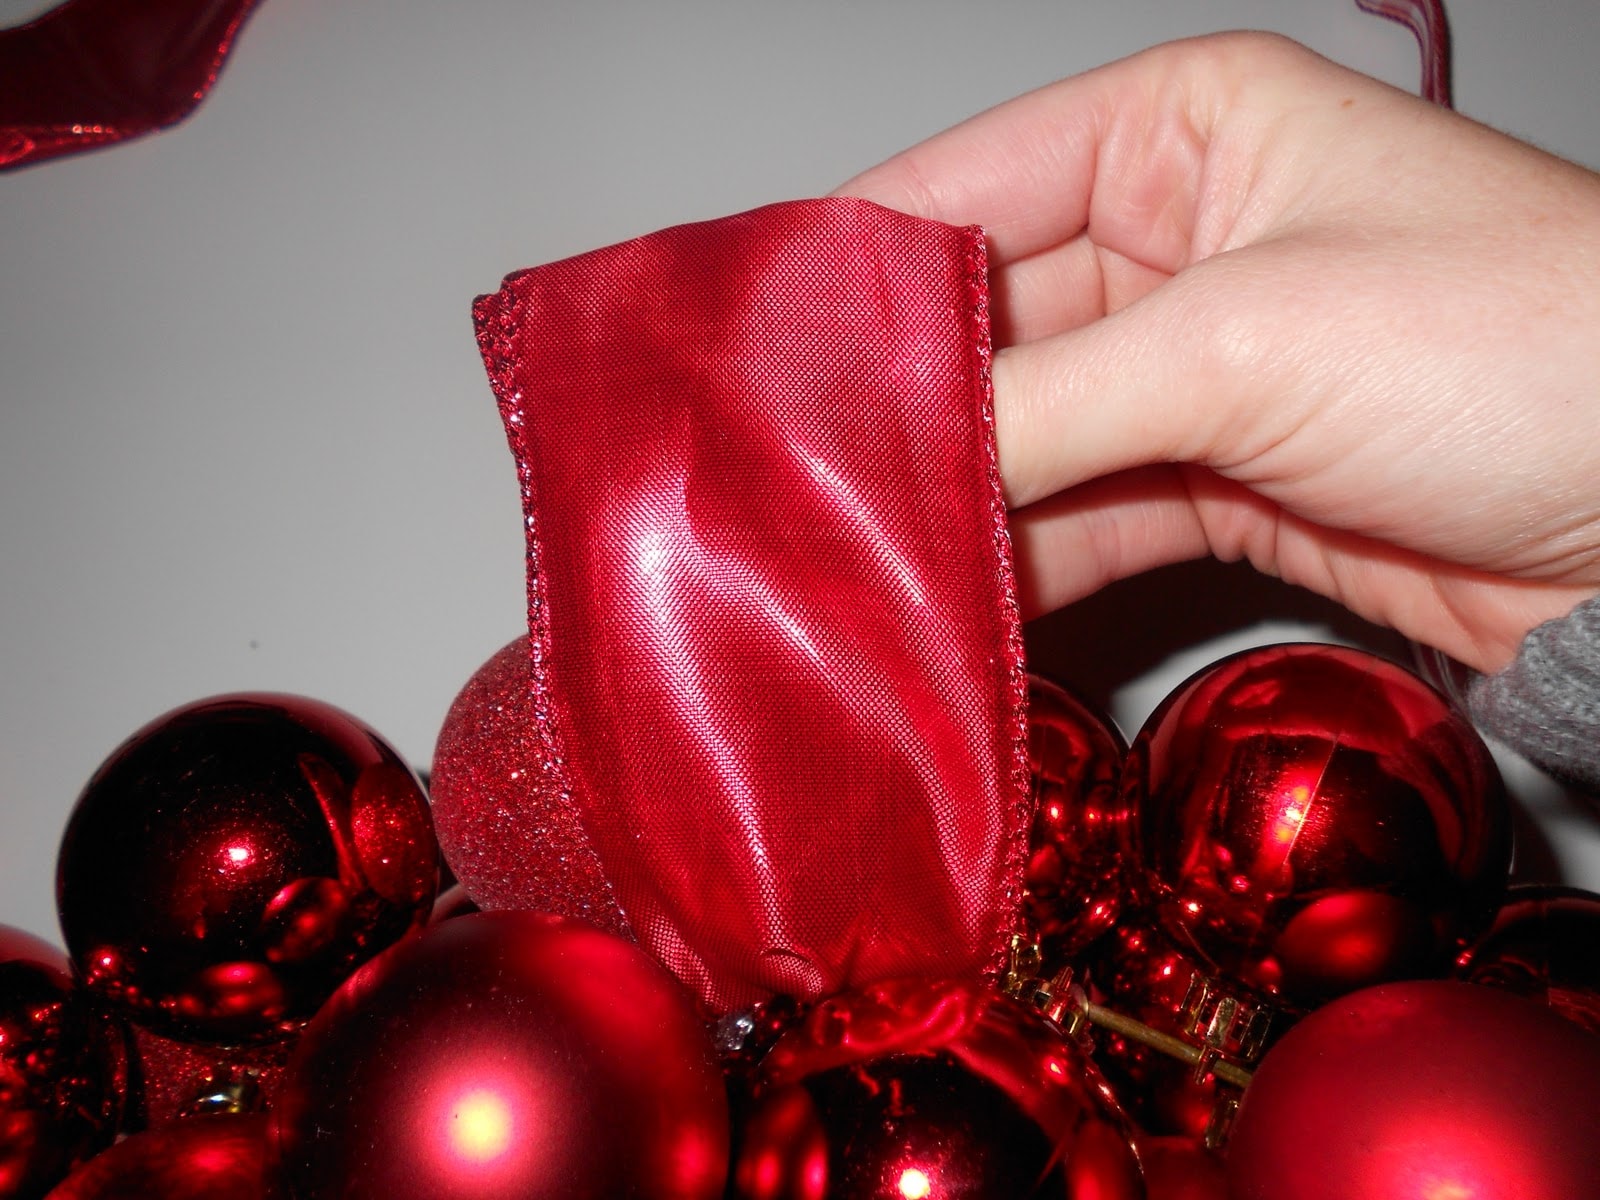
Stringing holiday balls on the base very close to each other. This is to ensure that the wire is not visible.
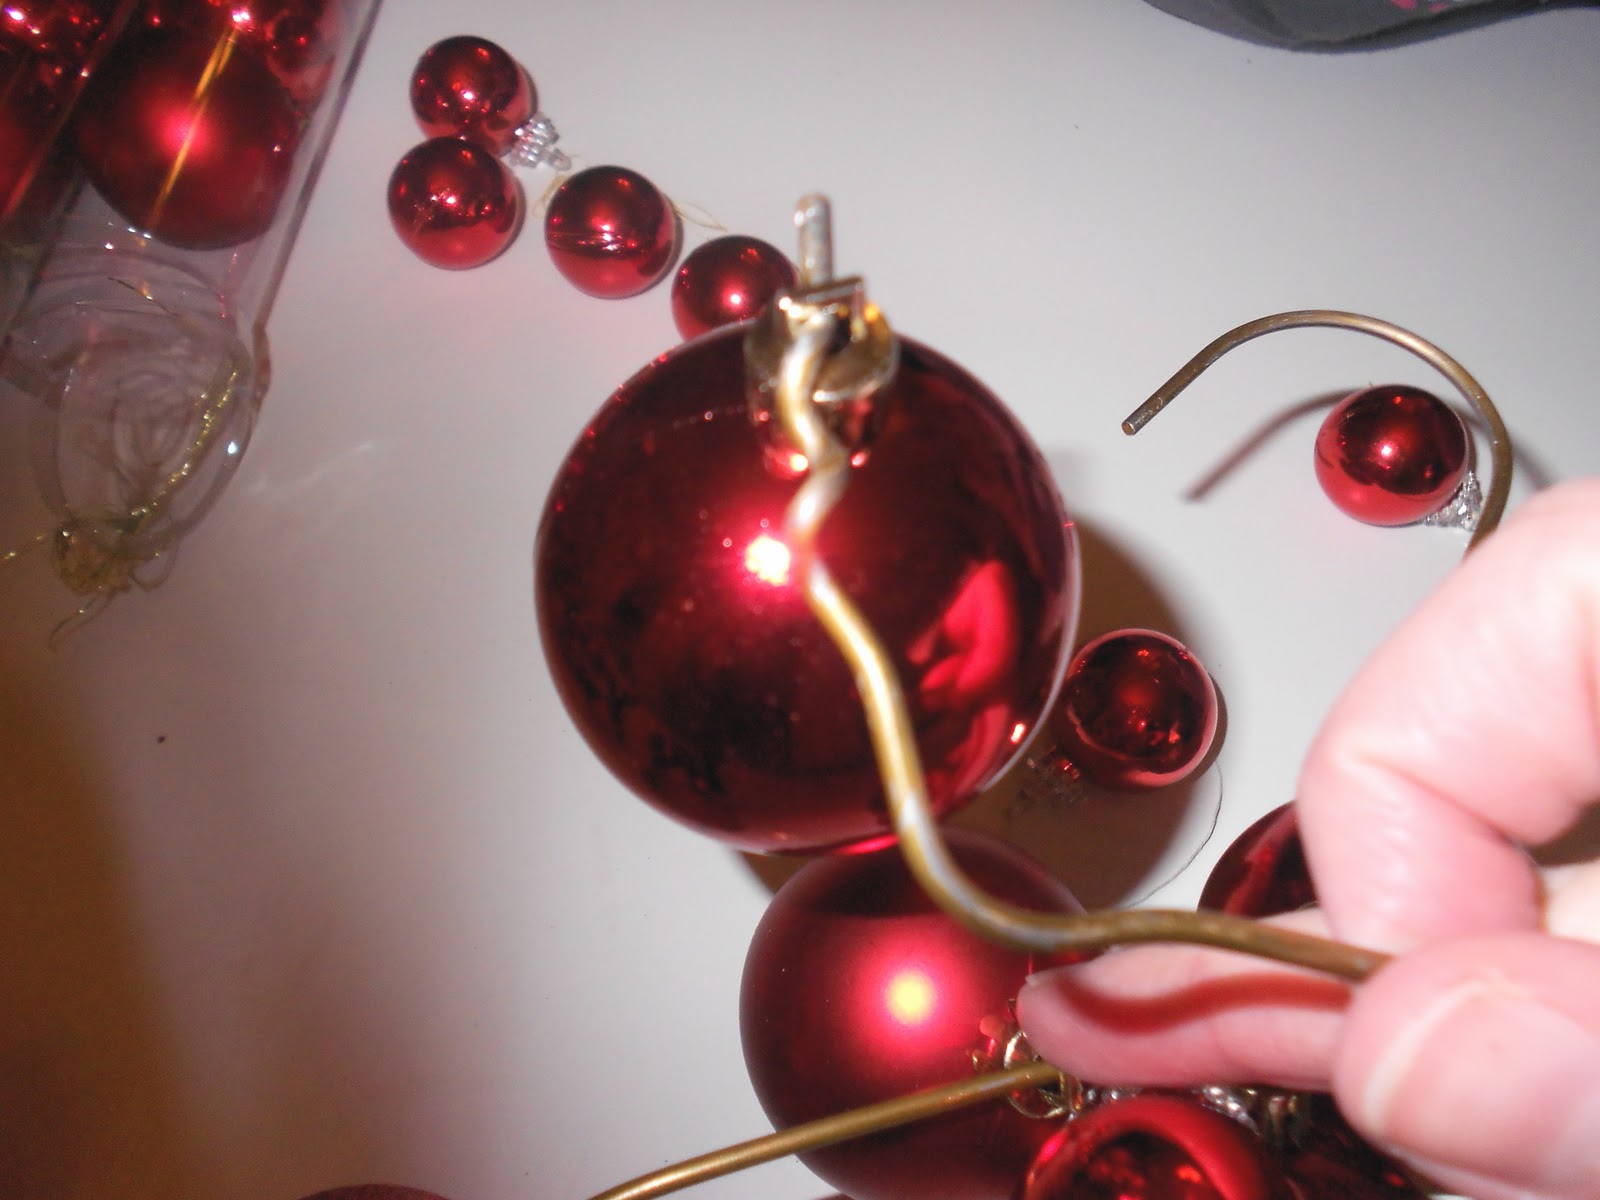

If the balls change position and roll down, fix them with glue.
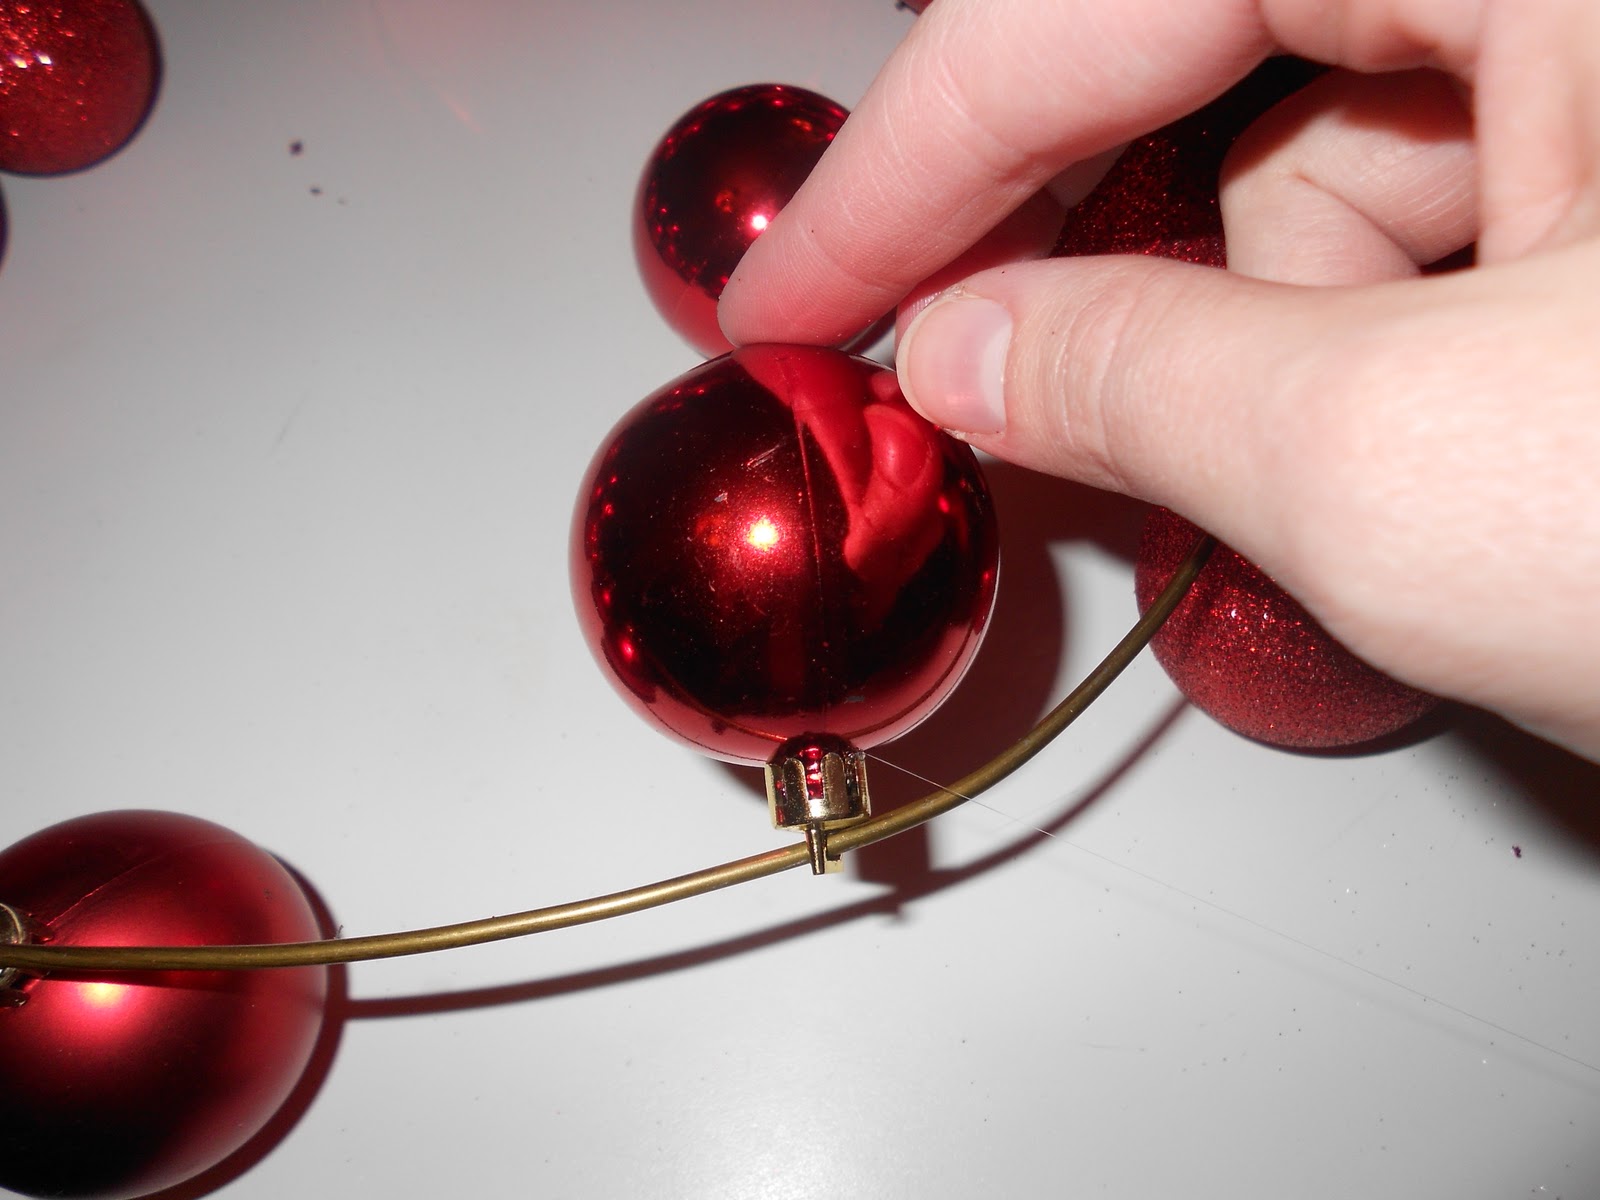
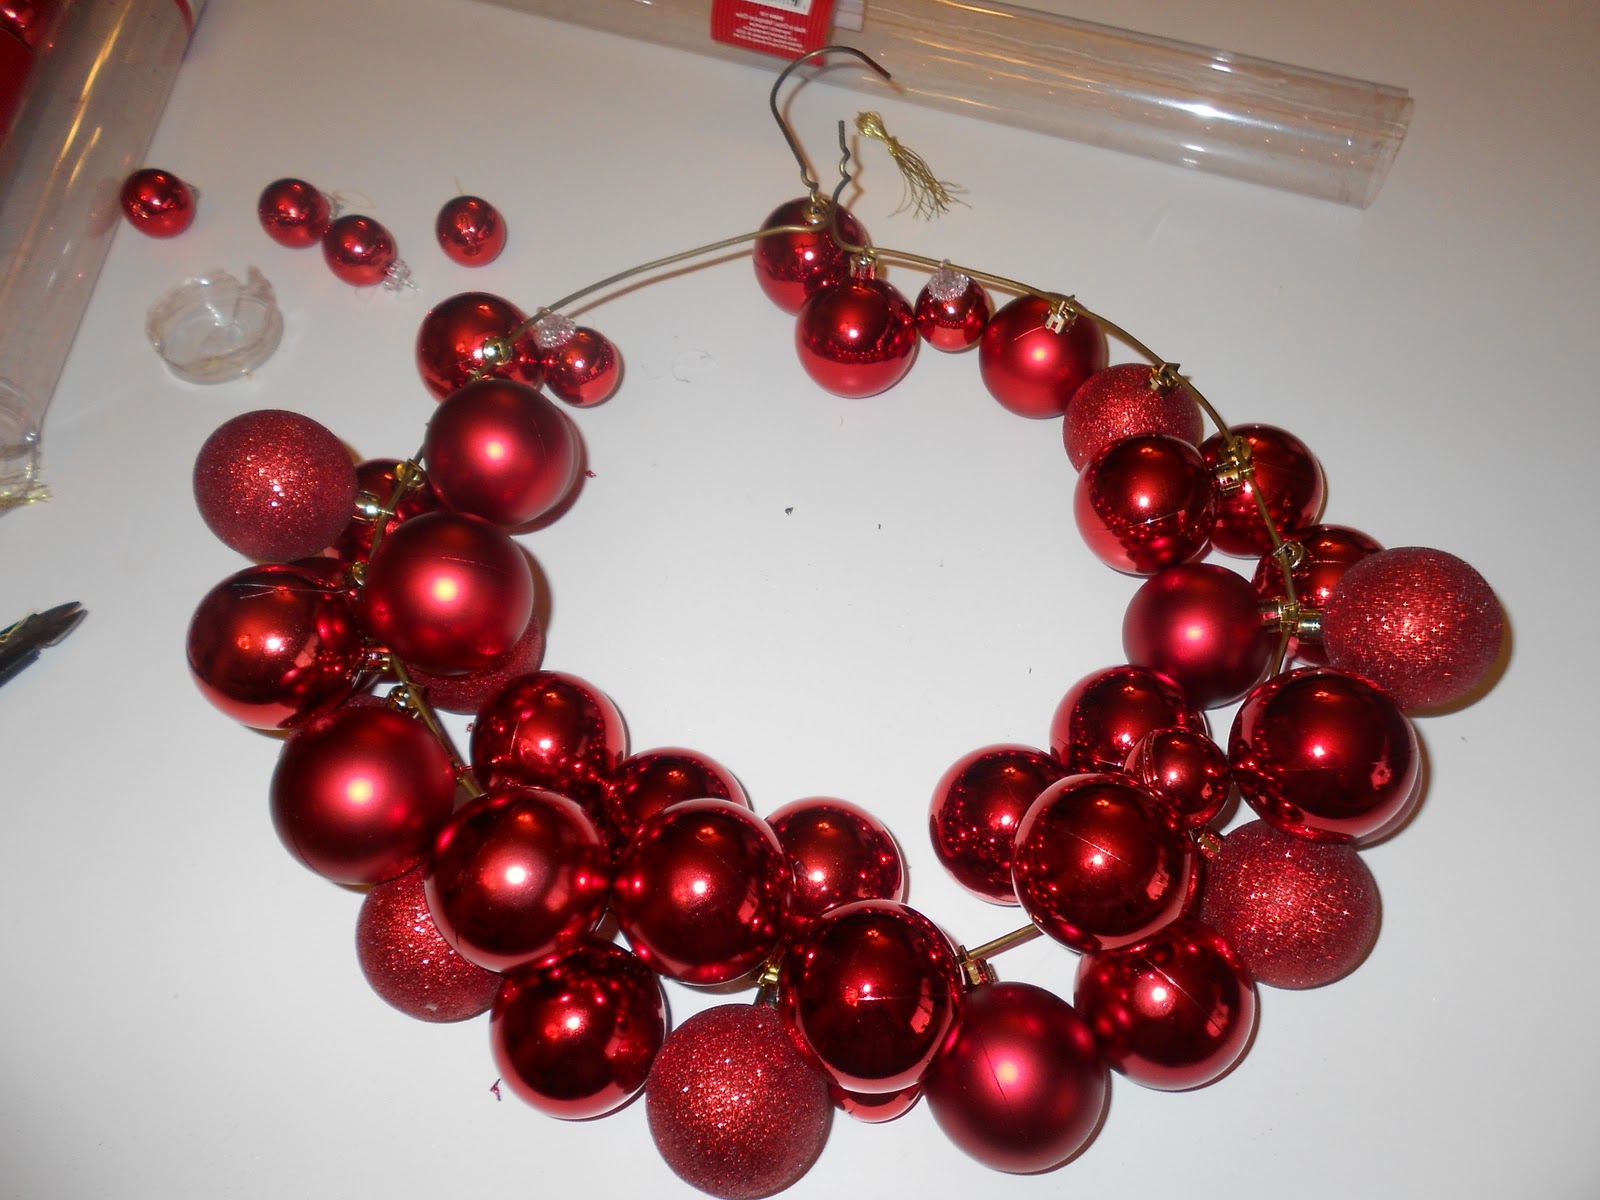
The wreath should be tight and keep in shape.

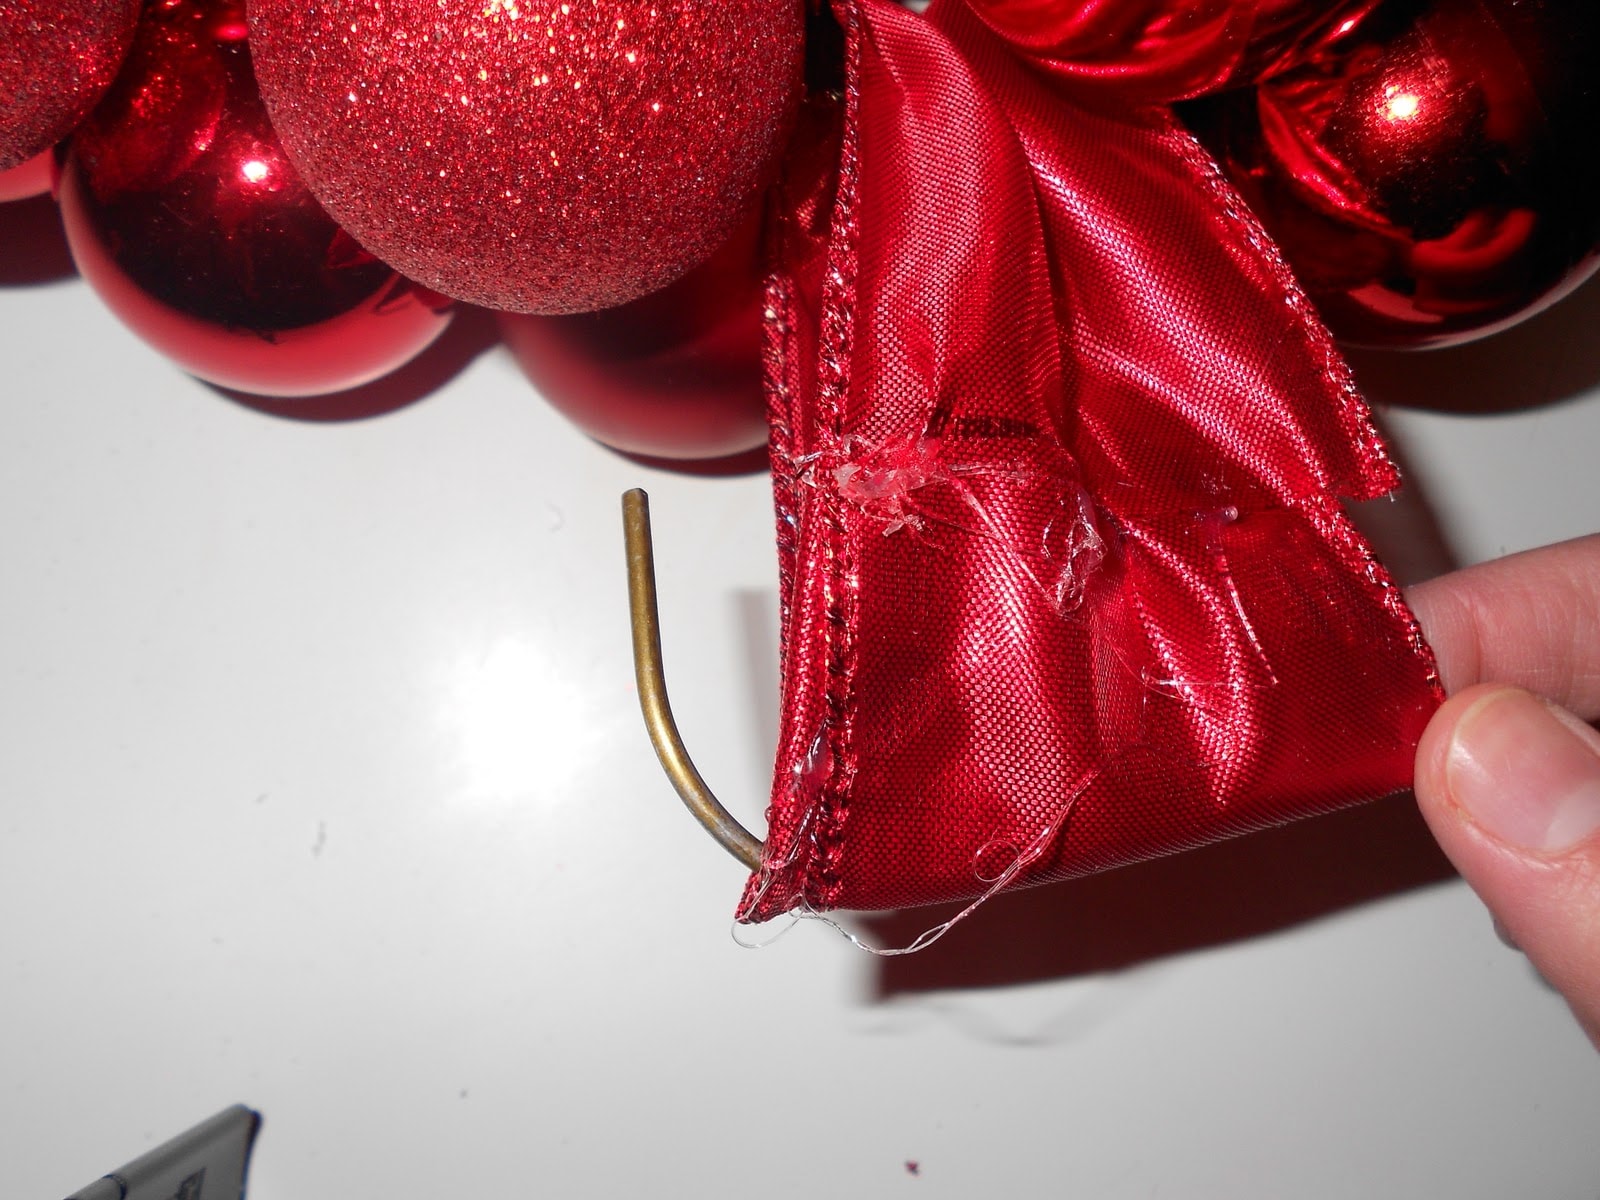
We connect the hanger with pliers.

Wrap the hook with red tape and glue it.
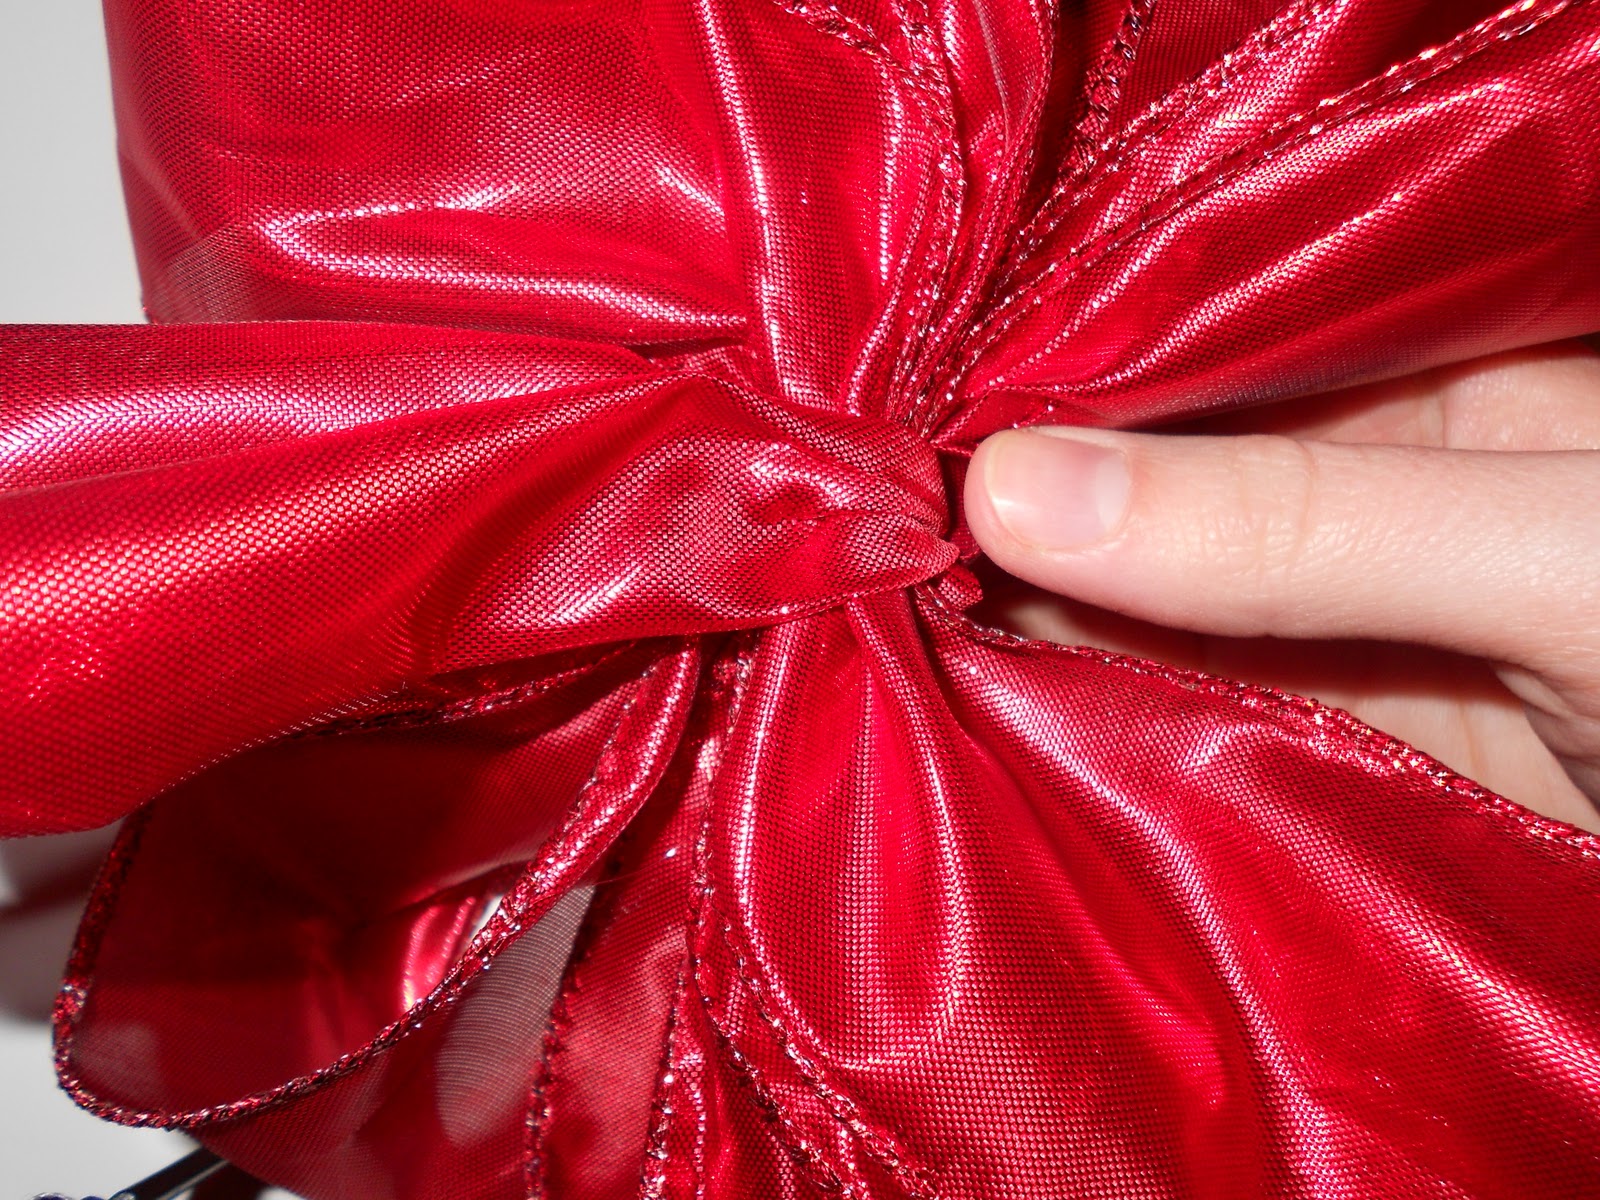
We form a beautiful, volumetric ribbon bow and attach to the wreath.

A beautiful, bright, festive wreath will definitely appreciate all your guests. By the way, it is not at all necessary to do exactly this option, which is shown in the master class. Show imagination, use different decorative elements and then something worthwhile will surely turn out.


Cute Christmas tree toys
You can create such interesting and original Christmas tree toys with your own hands. For the first you need the following:
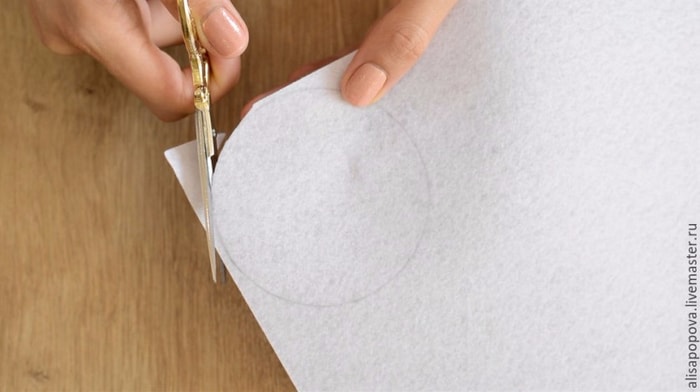
- white felt;
- round shape pattern;
- scissors;
- threads;
- beads of different colors and sizes;
- needle;
- pencil;
- thin ribbon.
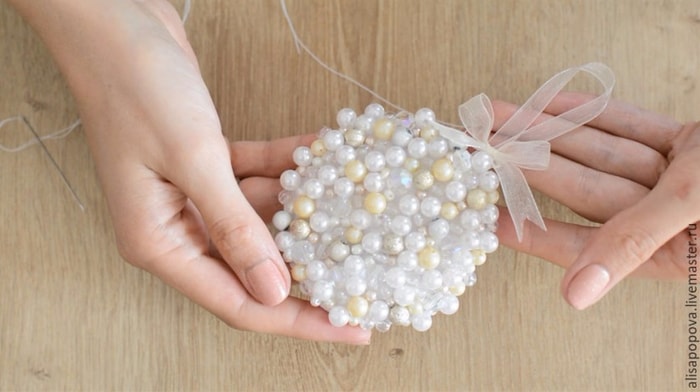
We transfer the round shape template to the felt and cut it.
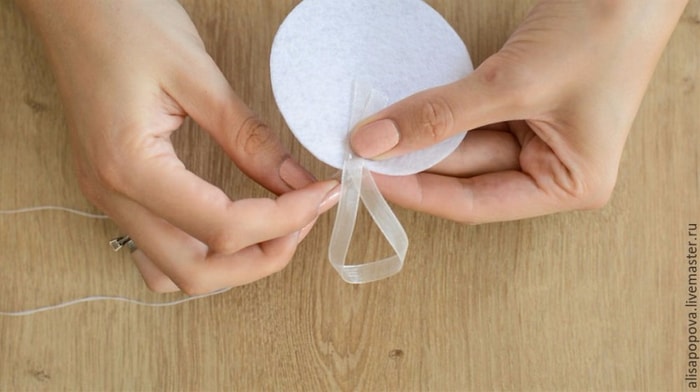
We sew to the blank a loop of tape.
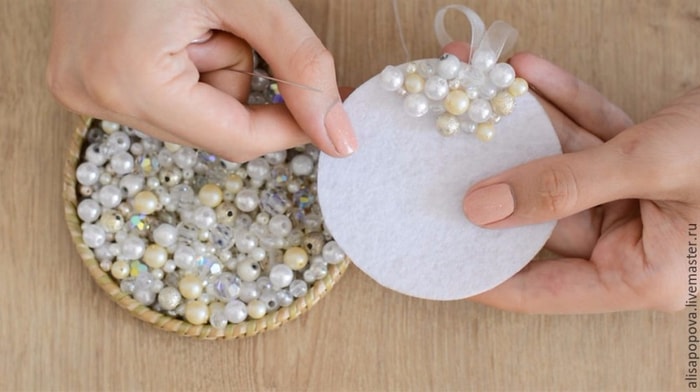
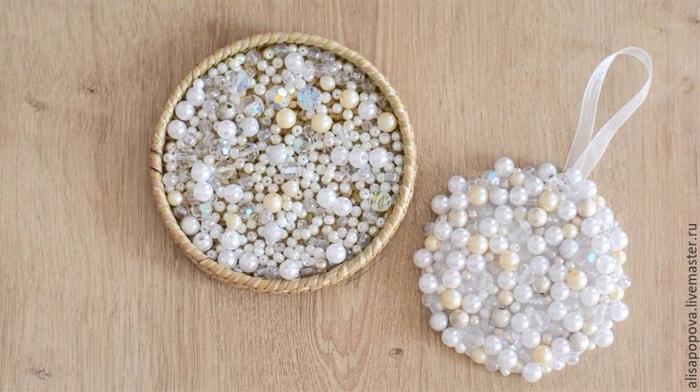
Beads of different sizes and colors sew to the blank of felt.
From a small piece of ribbon we make a bow and attach it to the eyelet.
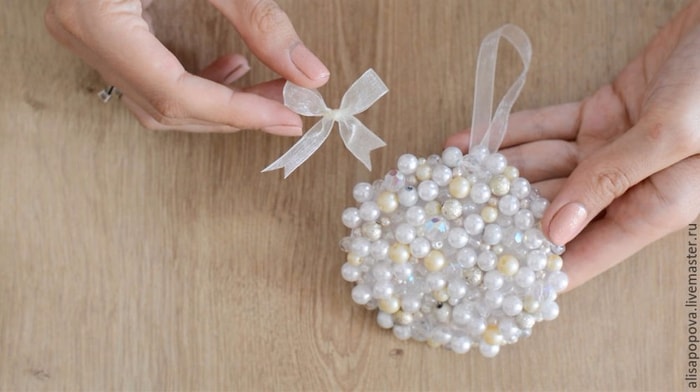
A cute round shaped toy is ready!
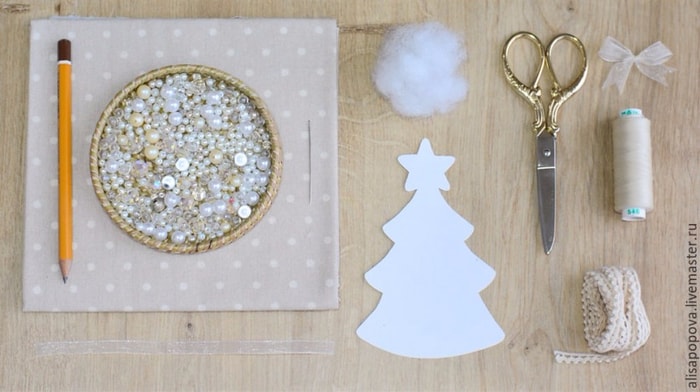
To make a toy in the form of a tree, we will prepare the following materials:
- light colored fabric;
- beads;
- template in the form of a tree;
- scissors;
- needles;
- threads;
- pencil;
- synthetic winterizer;
- beautiful lace;
- tape.
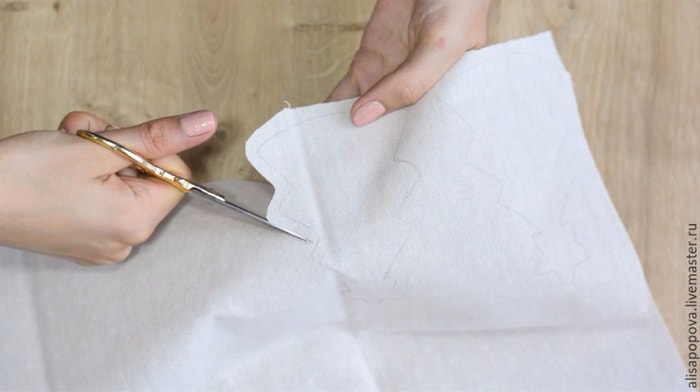
We transfer the template to the fabric and cut out two identical parts, leaving about 5 mm around the edges.

We connect two parts with the front side and along the contour we sew half of the workpiece.
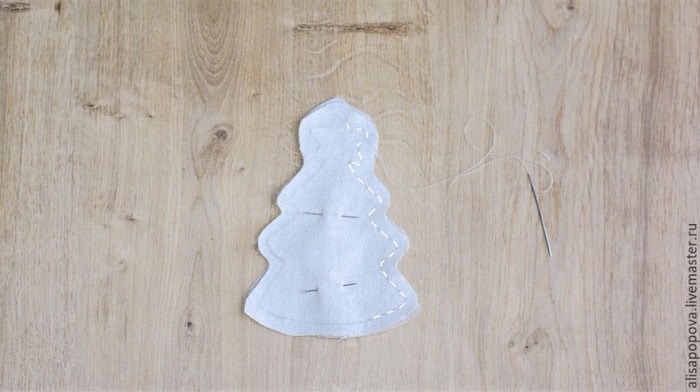
From a thin ribbon make a loop and sew it from the inside, leaving the loop at the bottom.

We sew the second part of the workpiece, leaving room for it to turn out.
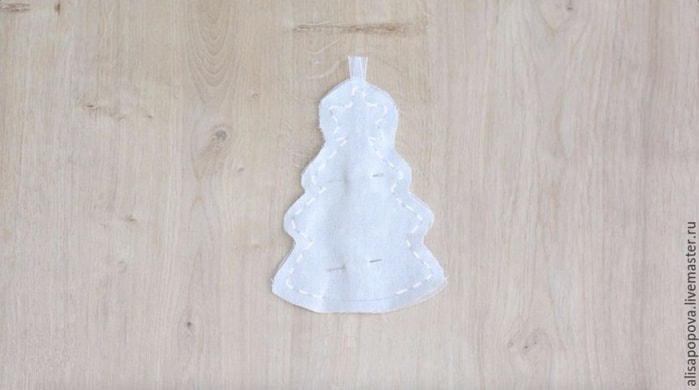
We turn out the product and fill it with padding polyester. We sew the rest of the fabric with a secret stitch.


We sew lace to the base of the Christmas tree, after which we attach beads randomly.

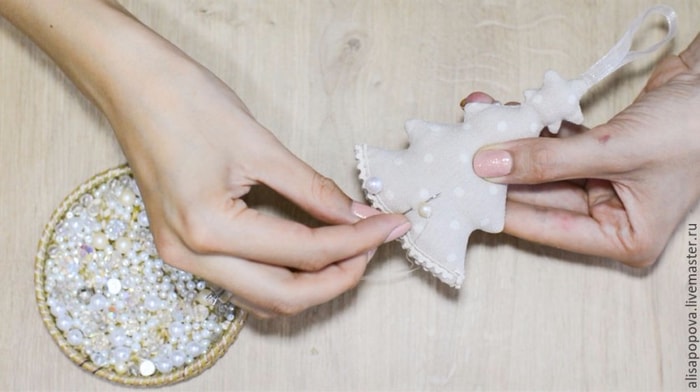
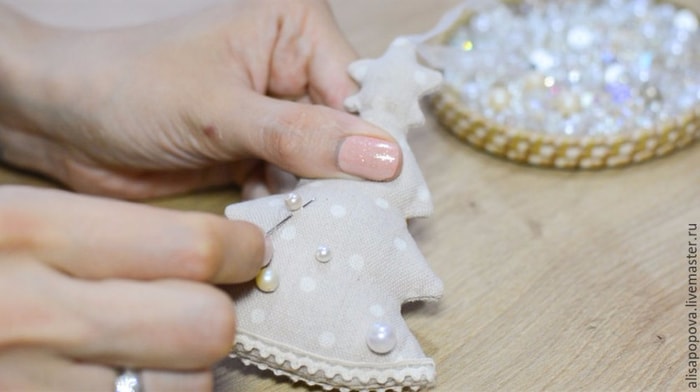
From a small piece of ribbon we make a bow and sew it to the base of the loop.
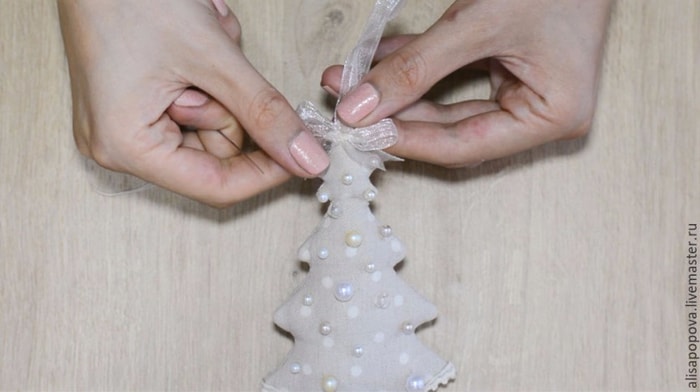
This toy will be a great decoration for your Christmas tree.

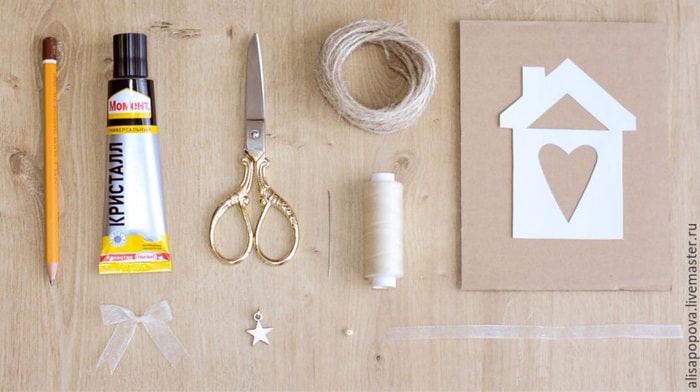
To make a toy in the form of a house, we prepare the following:
- thick cardboard;
- pattern in the form of a house;
- harness;
- scissors;
- glue;
- thin ribbon;
- a thread;
- needles;
- bead.
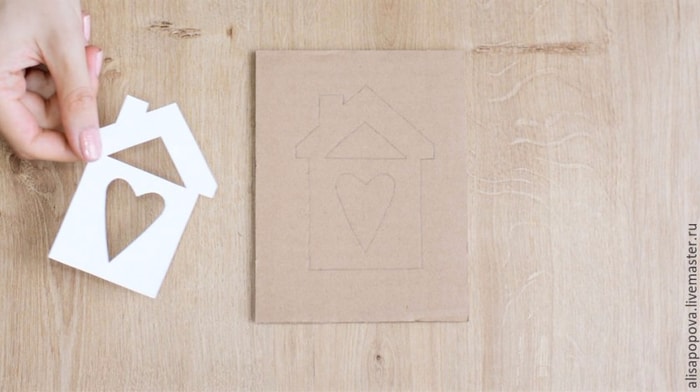
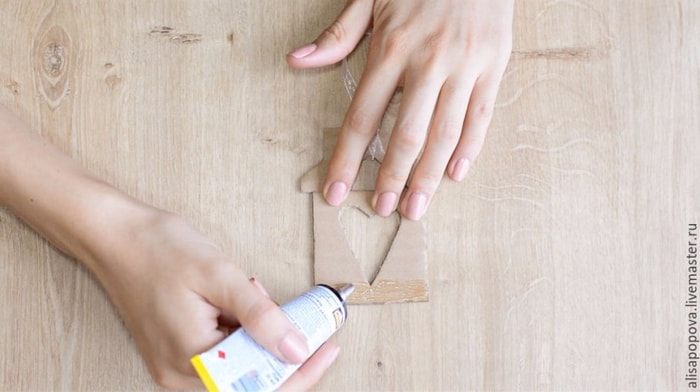
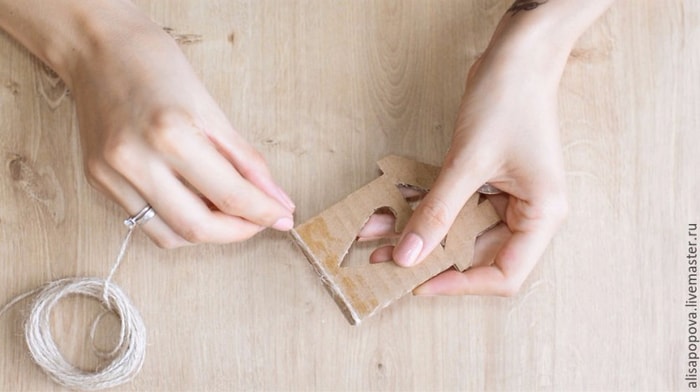
The template in the form of a house is transferred to cardboard and neatly cut out.
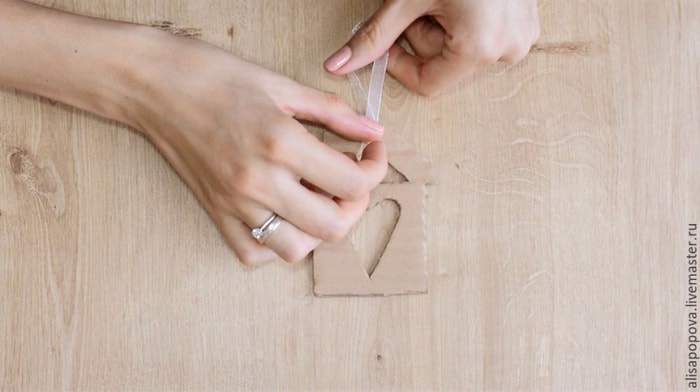
From a thin ribbon make a loop and glue it to the top of the house.
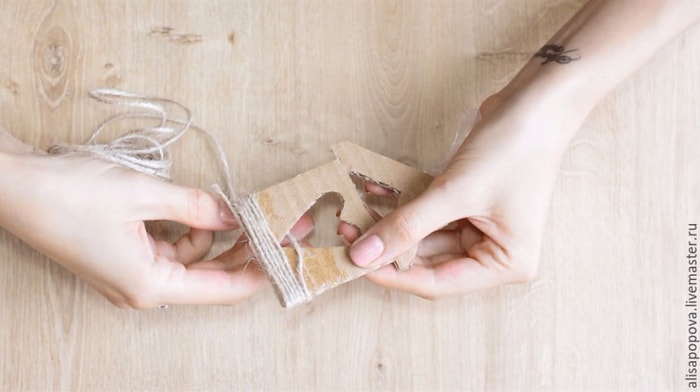
Gently glue the harness to the workpiece in a circle, starting from the bottom.


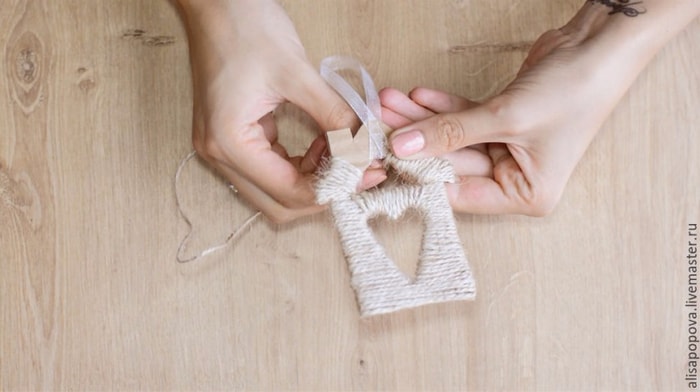
From a small length of ribbon we make a bow and glue it, as well as a bead to the base of the ribbon.

If you wish, you can make a small star and attach it to the window.

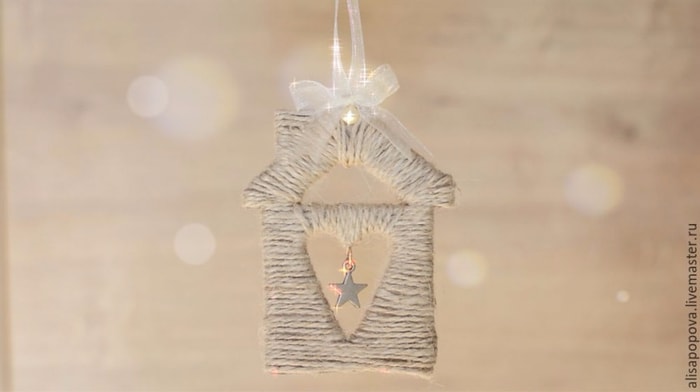
Such beautiful toys can be used not only as a decoration for the Christmas tree, but also as a small gift before the holiday.
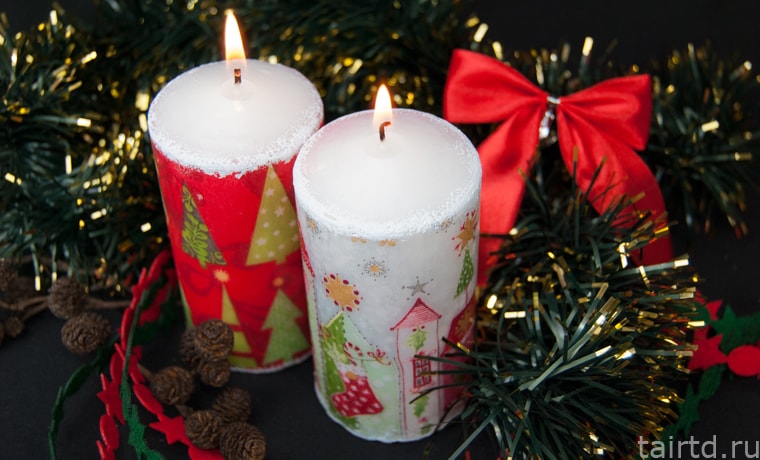
Festive candles
Perhaps it is with beautiful candles that many associate the New Year's feast. Therefore, we offer them a little decorate to add a special atmosphere of celebration and home comfort.
To draw them in decoupage technique, you will need:
- white candles;
- beautiful napkins;
- paint for painting;
- metal spoon;
- foam sponge;
- small candle;
- scissors;
- lighter.

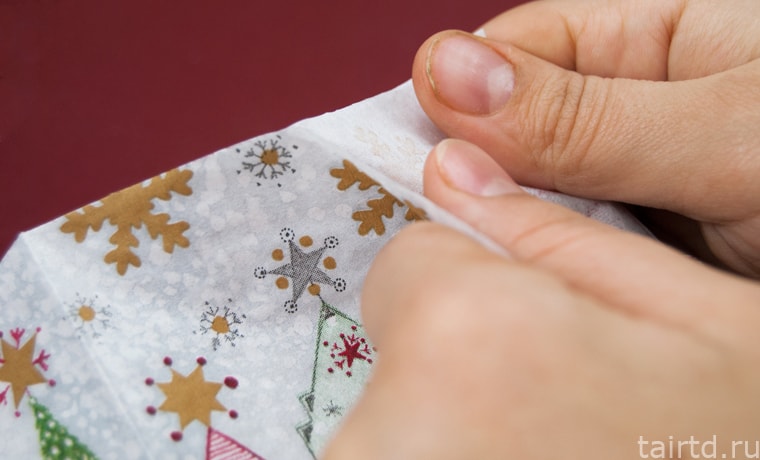
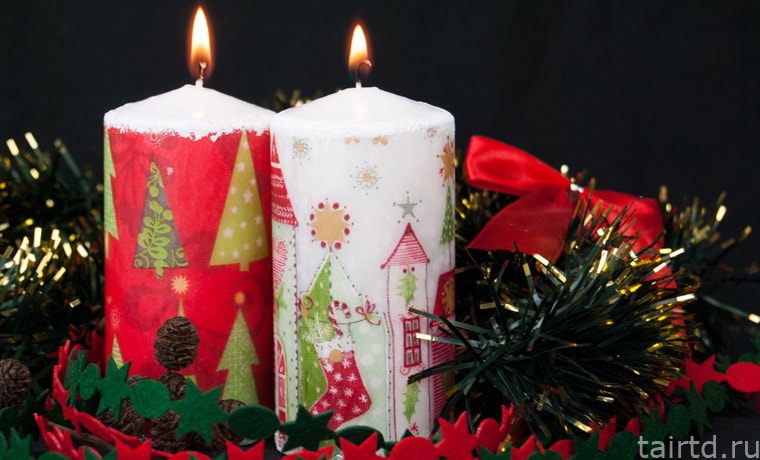
Choose a napkin with a festive pattern. Cut a part of this size so that the napkin covers the surface of the candle. We reserve stock so that the junction looks aesthetically pleasing.

Separate the napkin layers, leaving only the uppermost one with a pattern.

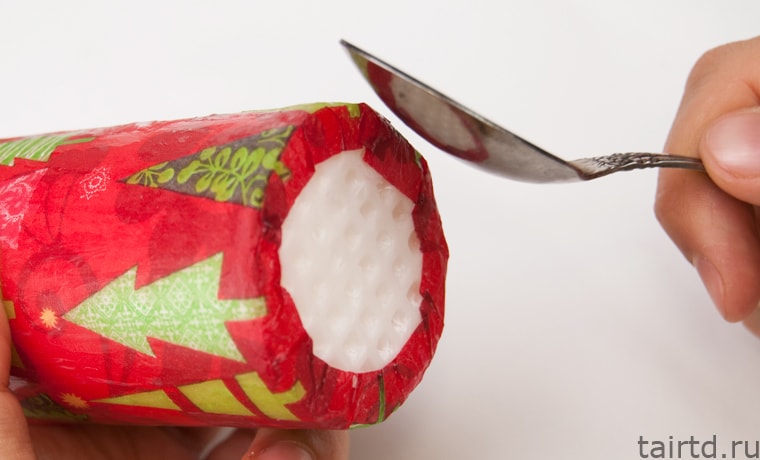
Heat a metal spoon over a small candle or lighter.

Put the napkin to the candle and quickly smooth it with a spoon, starting from the center to the edges.
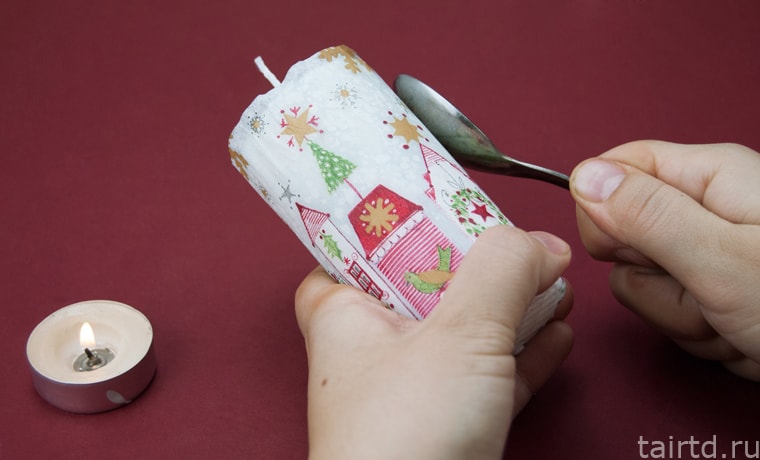
Repeat these steps until the napkin is covered with paraffin.
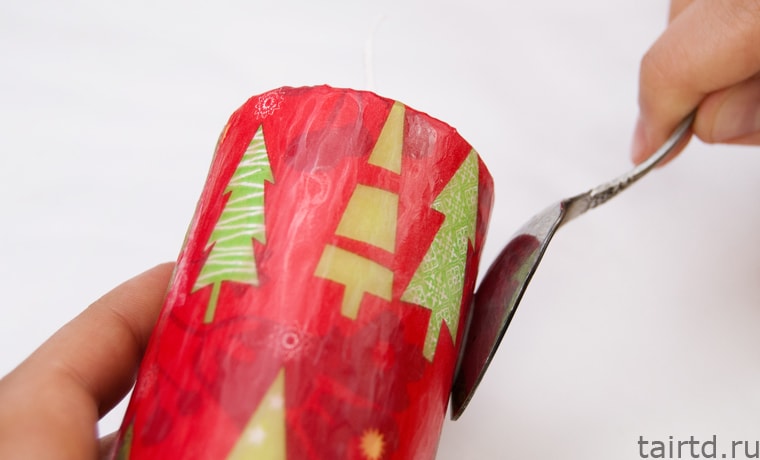
Excess wipes are cut off, and bend them to the bottom from the bottom. Then smooth with a heated spoon.
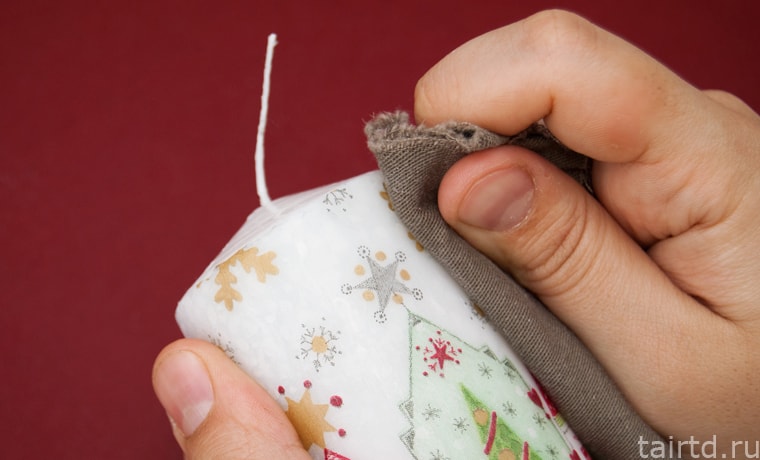
Leave the candle to dry, then polish with foam sponge or cloth.
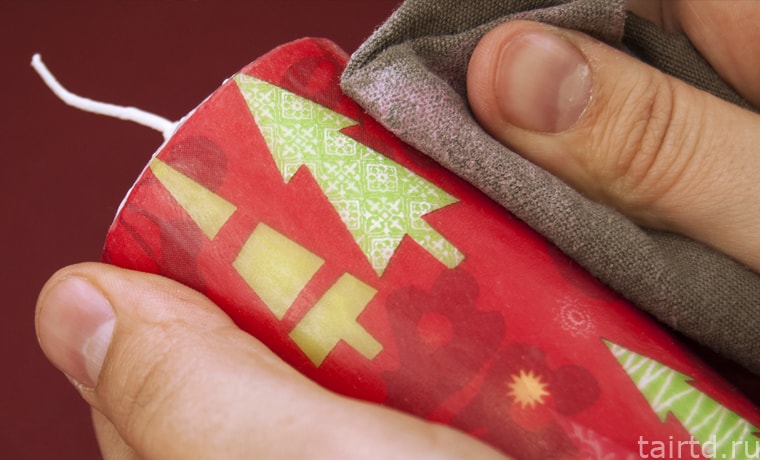
Apply paint for painting on the upper and lower edges of the napkin with slightly pressing movements. Due to this, you can hide its cut.

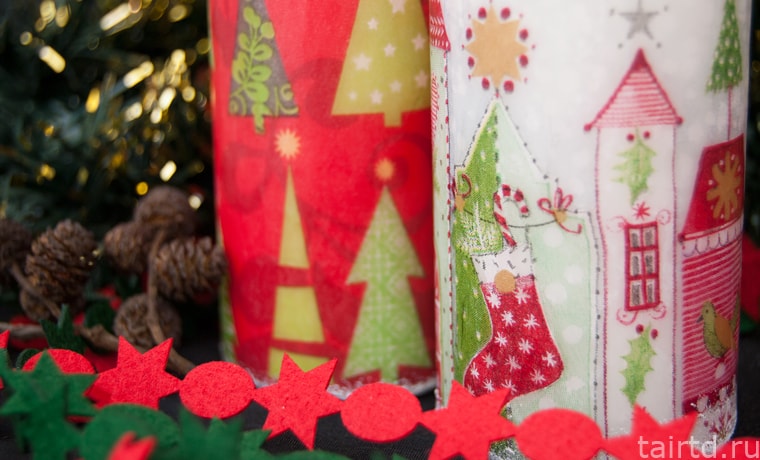
A beautiful, festive candle is ready! If desired, you can make several more of the same, but with a different pattern.
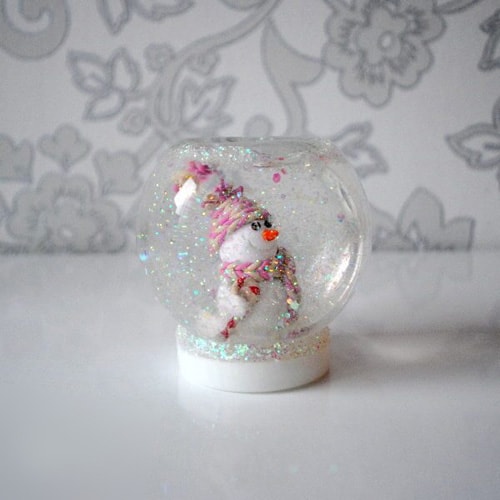
Snowball
Probably every person in childhood loved to play with a snow globe.Thanks to it, a feeling of celebration and real magic is created. Therefore, we offer to make it with your own hands and to please your loved ones with such a gift.
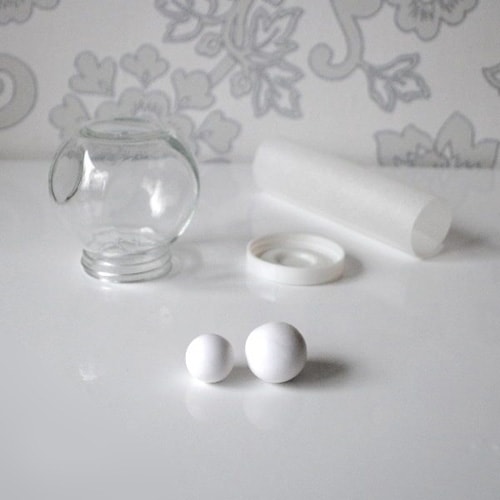
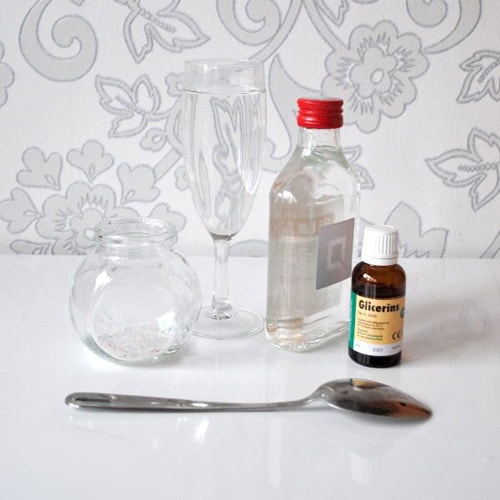
You will need the following materials:
- glass jar or prepared round shape;
- cooled boiled water;
- glue in the gun;
- alcohol;
- glycerol;
- waterproof glue;
- pin;
- glitter;
- polymer clay;
- brush.
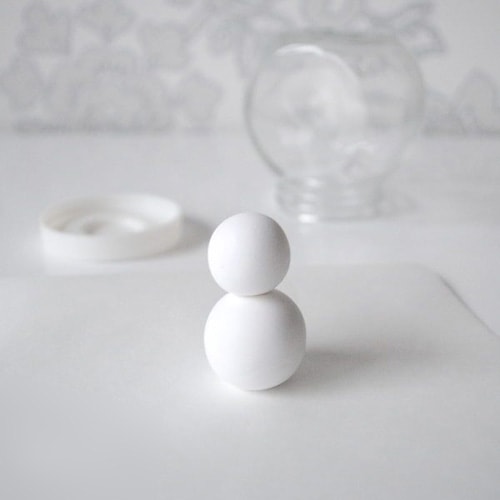
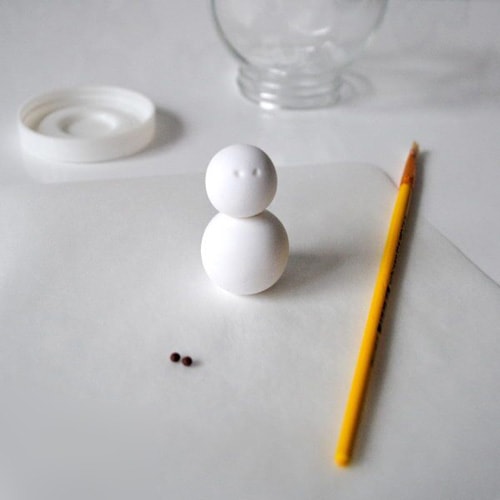
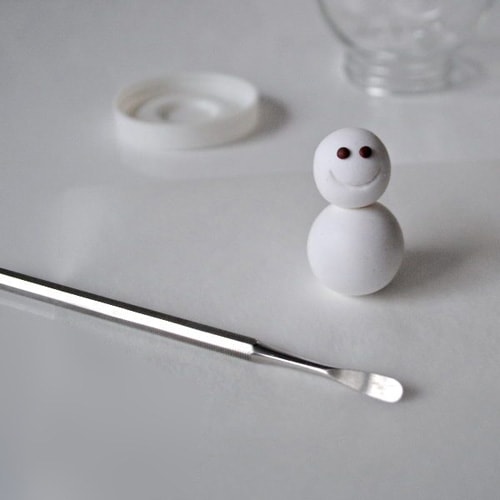
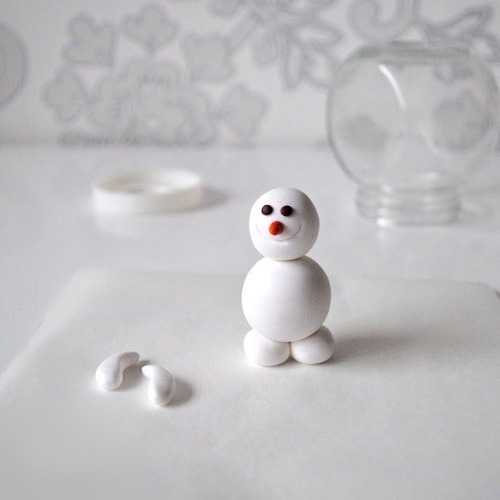
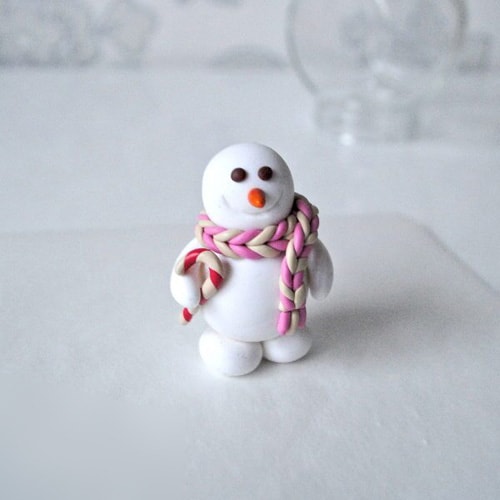
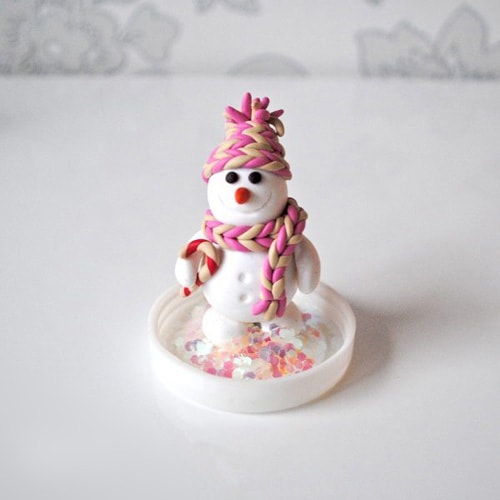
Getting to the creation of a snowman. To do this, we make three small balls of polymer clay.
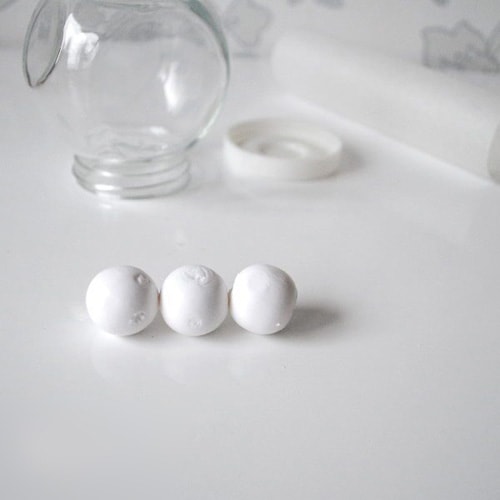
Form the head and torso, taking into account the size of the banks. After all, a snowman should not rest on her head.
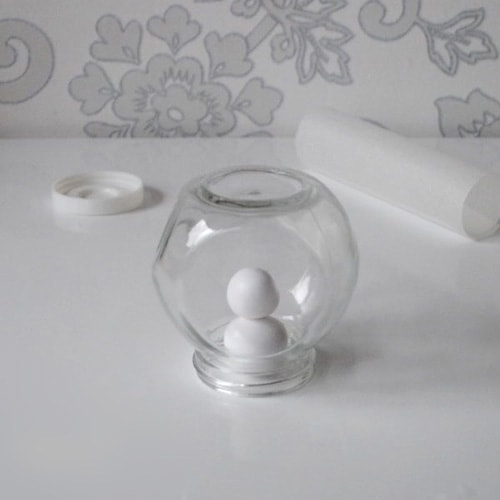
We connect them to each other with a pin, toothpick or glue gun.

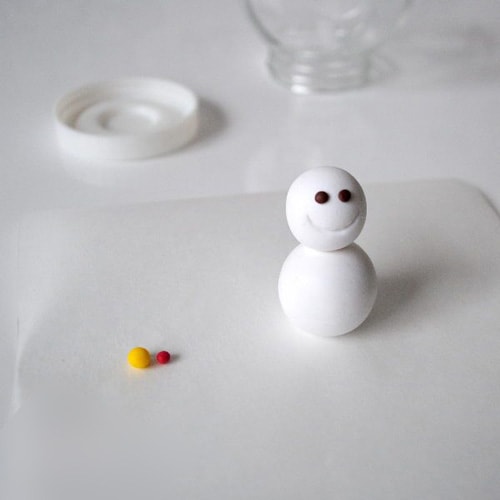
With a brush or toothpick, mark where the eyes of the snowman will be located. We put into the grooves polymeric clay balls or beads. Also note a place to smile.
Mix small pieces of red and yellow clay to make a carrot-shaped nose.

From the third ball we will make legs and hands for a snowman. We form two small balls, press them down a little and put a figure on top.
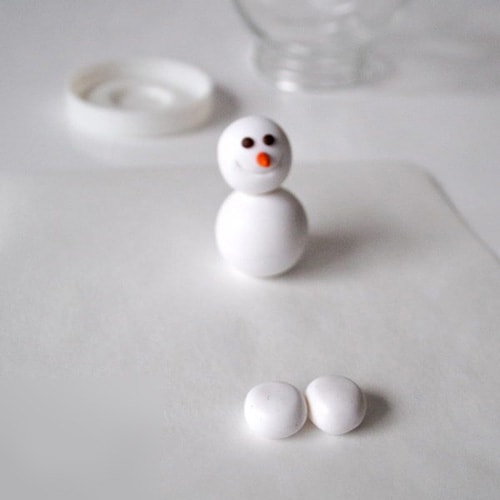
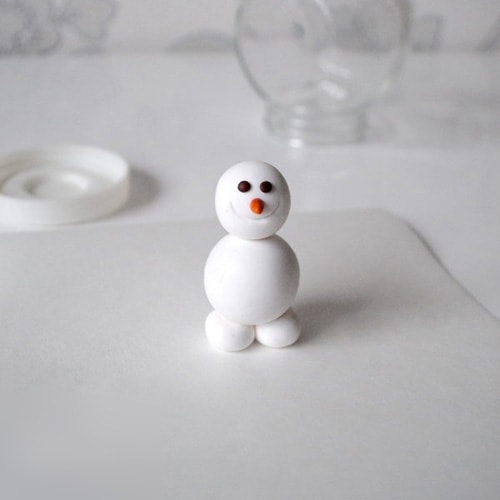
To create hands, we form oblong elements and slightly bend them.
To make the snowman look more festive, let's make candy for it. To do this, take the balls of white and red shades and form oblong elements. We bind them together and bend a little.
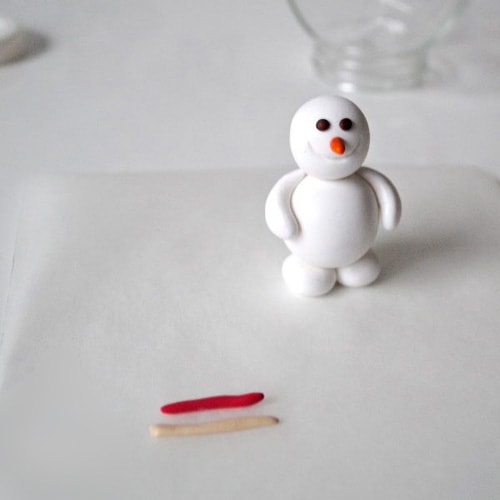
Attaching candy to a snowman.

The next thing we will do is a scarf and a cap with a pompon. To create a scarf prepare two sausages of different colors.
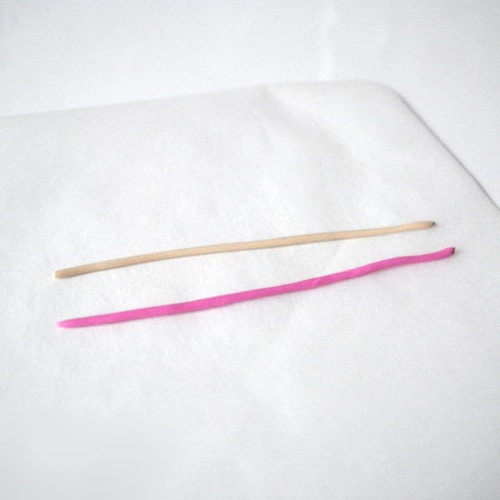
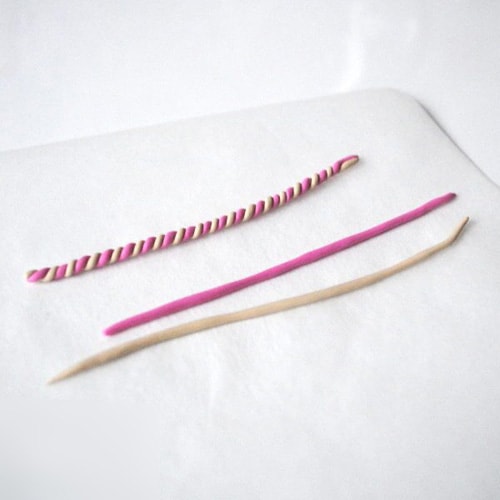
Then we bind them together in one direction. Roll out two more such elements and weave them in the other direction. At the end we carefully connect them.
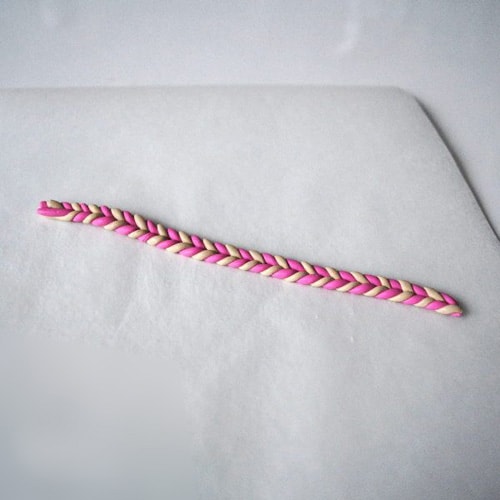
We put a scarf on a snowman and slightly trim the ends with scissors.
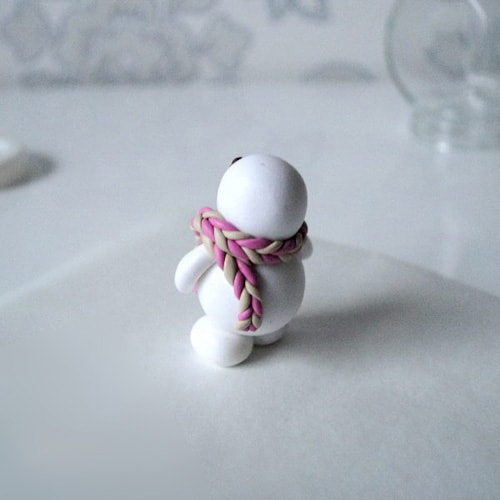
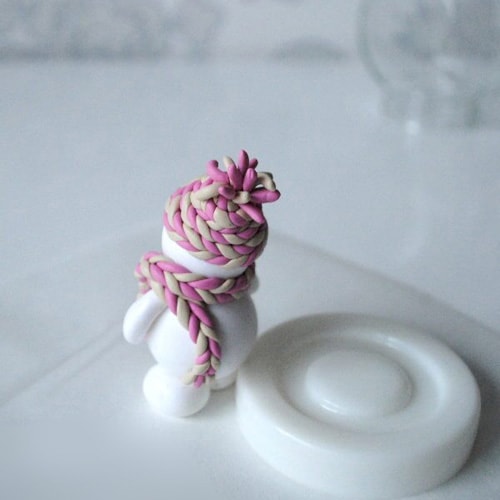
In the same way we make a hat. That is, fasten the pigtail on the back of the head and gradually we wind it.

On the body do a couple of grooves with a brush.

We cover the inside of the cover with waterproof glue and attach a snowman to it. When everything is dry, fill the space with glitter or any available sparkles.

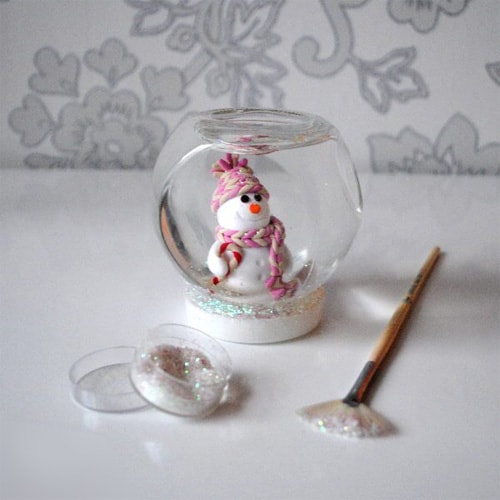
Fill the jar with another type of glitter, which will perform the function of imitation of snow.

We mix glycerin and water in equal proportions, and also add a spoon of alcohol. Fill the resulting liquid jar.
Carefully immerse in a snowman's jar and close the lid. Shake the ball a little to make sure there is no leakage. We process the cracks with a glue gun.

The original festive accessory is ready!
As you can see, you can create interesting and unusual decorations for the New Year 2018 with your own hands. You do not need to buy too expensive materials. Use what is already in the house and be sure, the result will pleasantly surprise you!


