


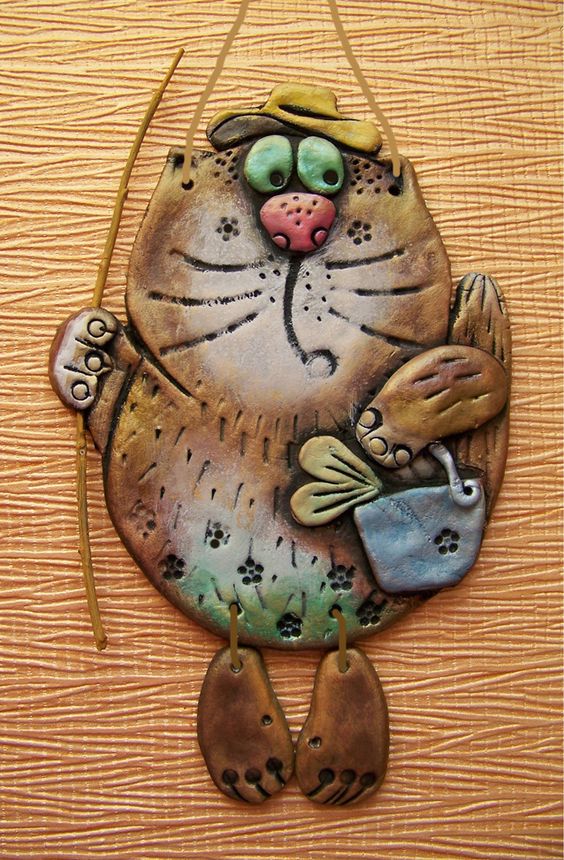
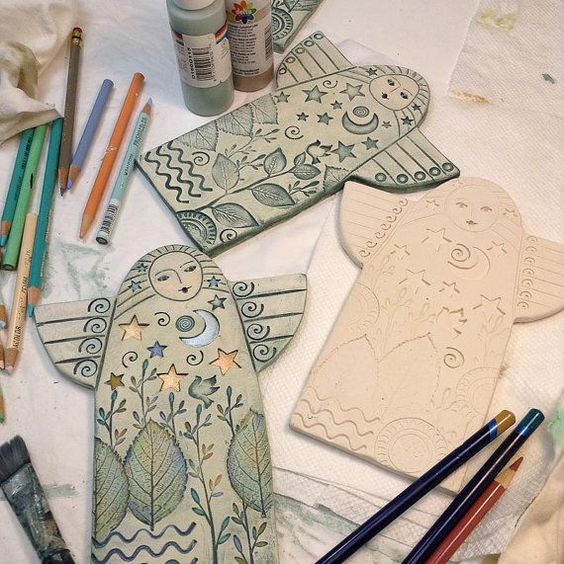
Every person should have their own hobby. After all, this is exactly the occupation that gives special joy and happiness. Of course, there are many options for what you can do. For example, cycling, embroidery, collecting, drawing, filming and much more. But if you want to find a more budget option, then we suggest that you try yourself in the modeling of salt dough. We picked up master classes of different complexity that will help you master the modeling.


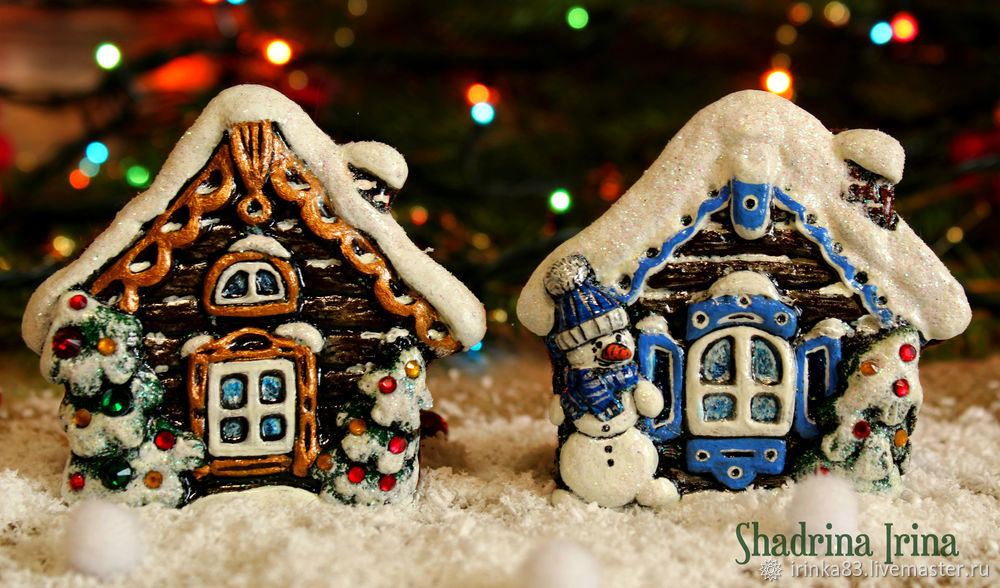
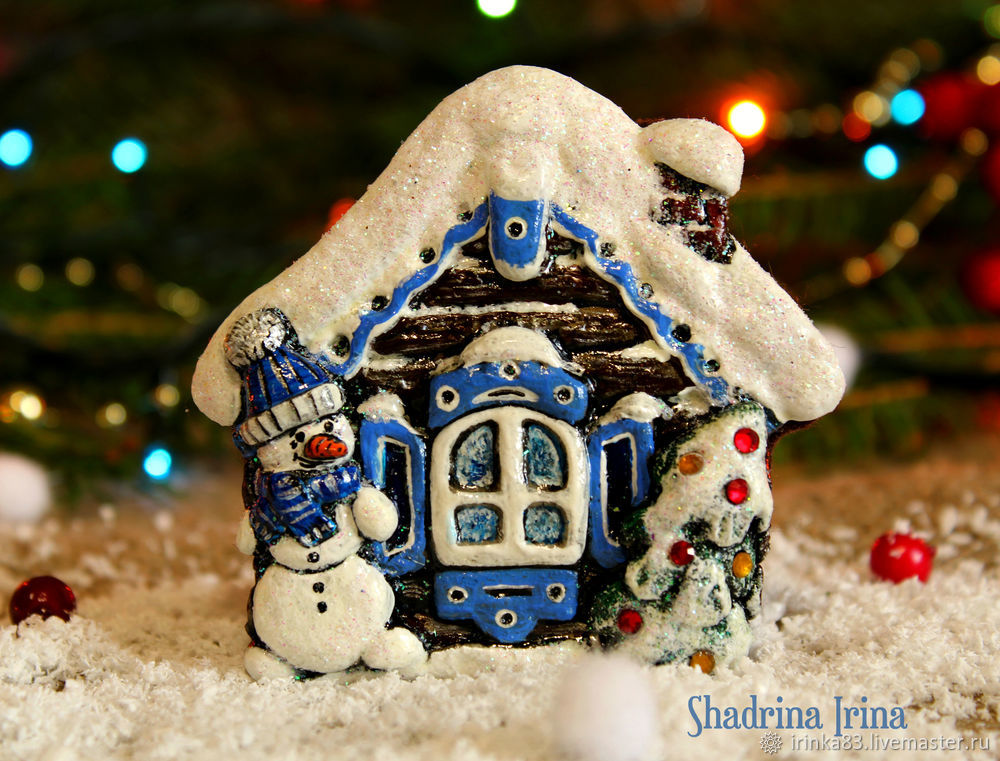
Magnets in the form of huts
Making such charming houses for a beginner can be quite difficult. But this is a great incentive to try something new and achieve good results.
To work we need:
- salty dough;
- acrylic paints;
- gouache;
- tassels;
- stationery knife;
- toothpicks or needles;
- magnets;
- board for work;
- colorless varnish;
- pencil;
- scissors;
- paper;
- felt;
- sponge;
- PVA glue;
- rhinestones;
- dots;
- white glitter (optional).
To begin with we draw or we print on a hut printer. Cut a stencil from thick paper.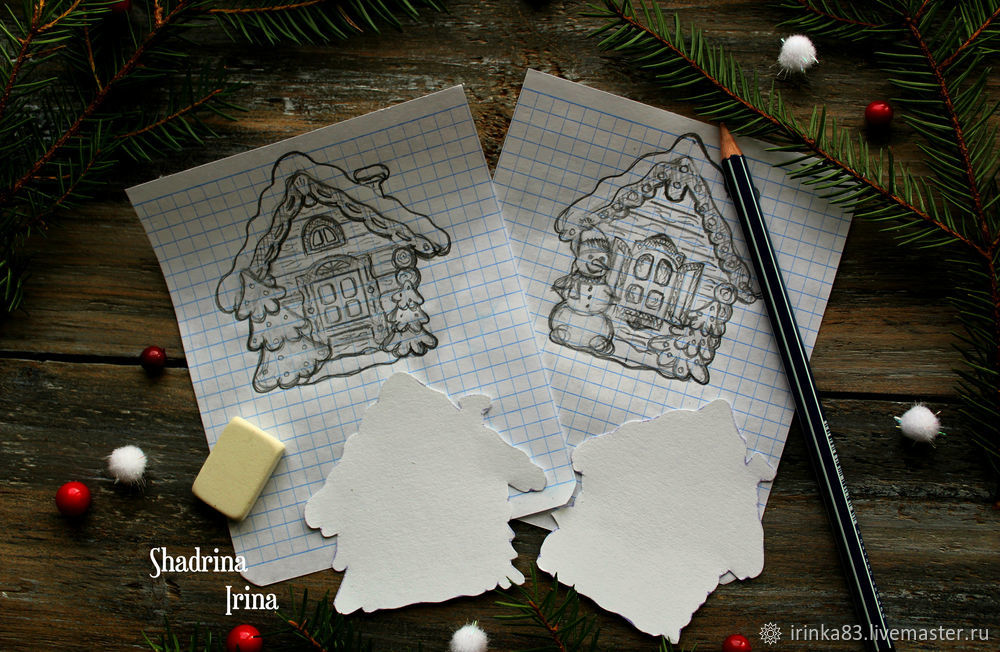
Salt dough can be purchased at the store for creativity or do it yourself. Roll out a not too thick layer of dough and put a hut template on top. We press it and cut off the excess. Roll it out and form a thin strip. Cut it into several parts and put it in the form of logs on the house.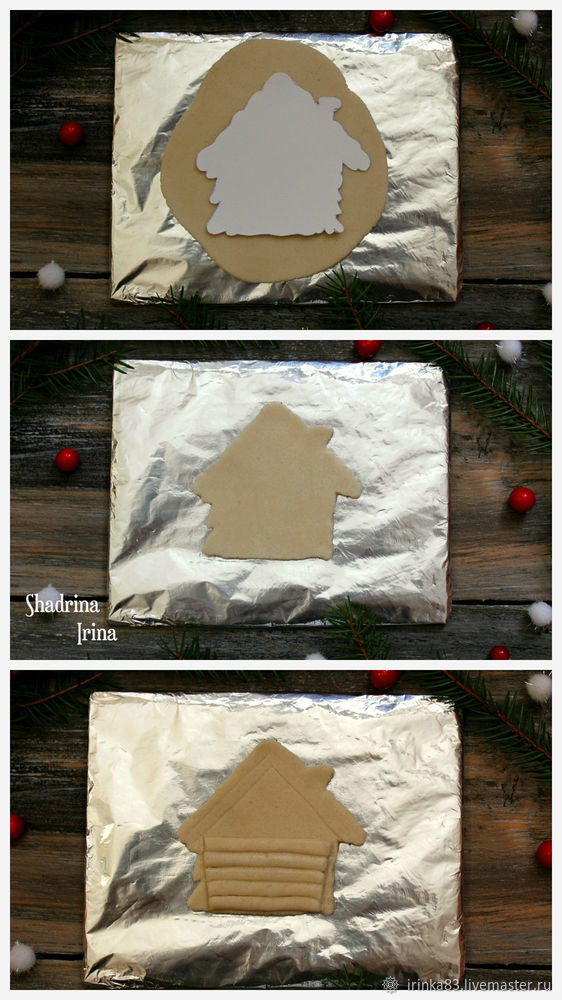
Using a needle or toothpick, we carefully draw the lines on the logs so that they look more natural. From the remnants of the test form two more strips. Lubricate with water and transfer to the hut roof. Using dots or toothpicks make small indentations, as shown in the photo. Make a small ball, flatten and cut into two parts. We attach to the house and make the recesses.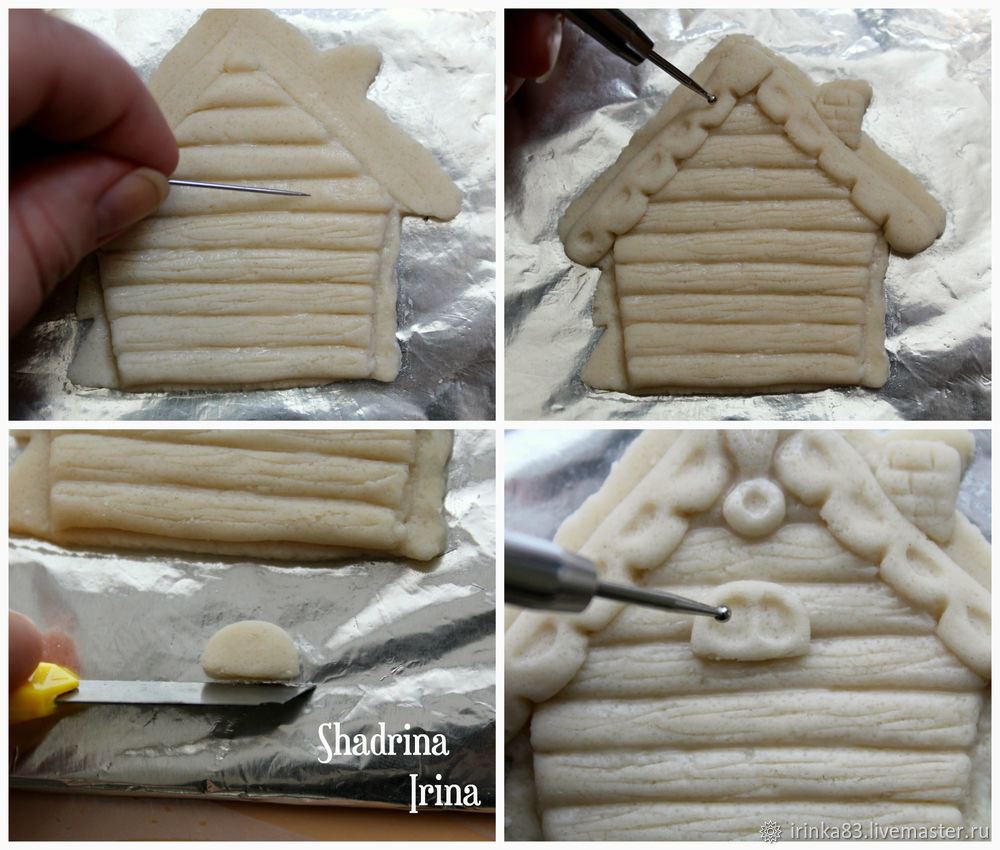
We make a very thin and small strip out of dough, lubricate it with water and attach it around the window.
We form the main window in the form of a rectangle and attach it to the house. We divide a small strip into several parts and fasten it in the form of a frame. If desired, you can make the deepening dotsom or toothpick.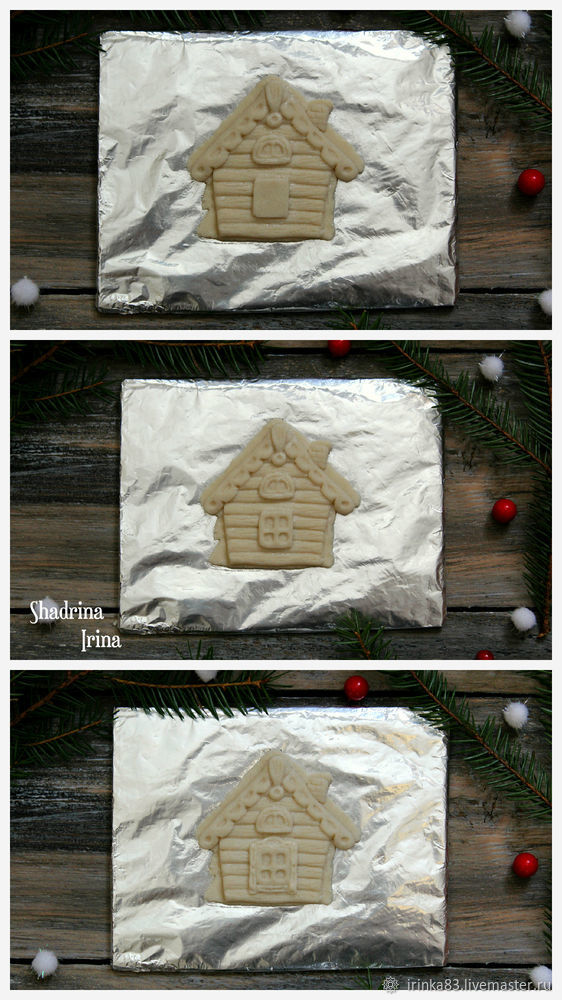
We start to create a Christmas tree. Cut three blanks of small size in the form of a trapezoid. Round out each of them and slightly cut into three parts. Using a toothpick round the edges. We form a Christmas tree on the side of the hut.

On the other side we make a little smaller tree. In each of them we make indentations, as well as snow on the windows and the roof.
We start the creation of the second version of the hut. At the beginning we repeat the same thing, but slightly change the shape of the roof and the window.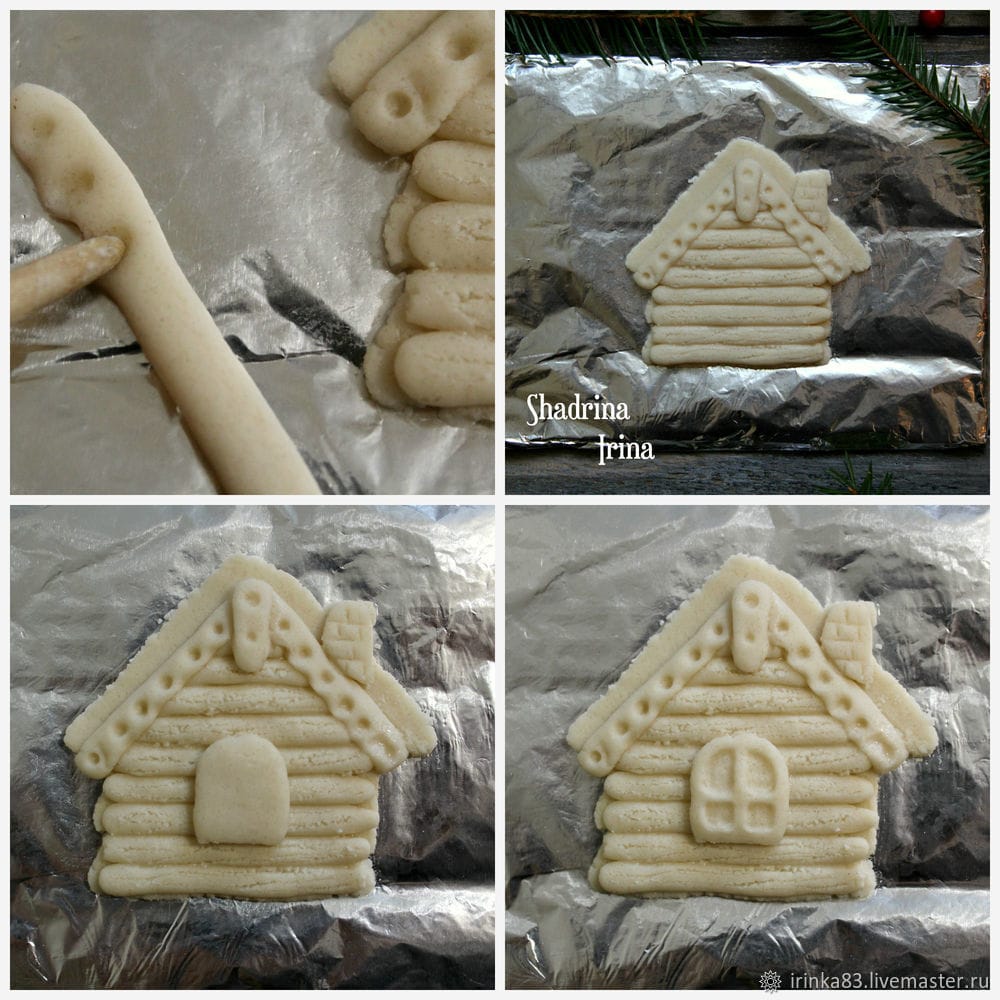
We form a thin strip of dough and put it over the window. You can slightly flatten with a knife.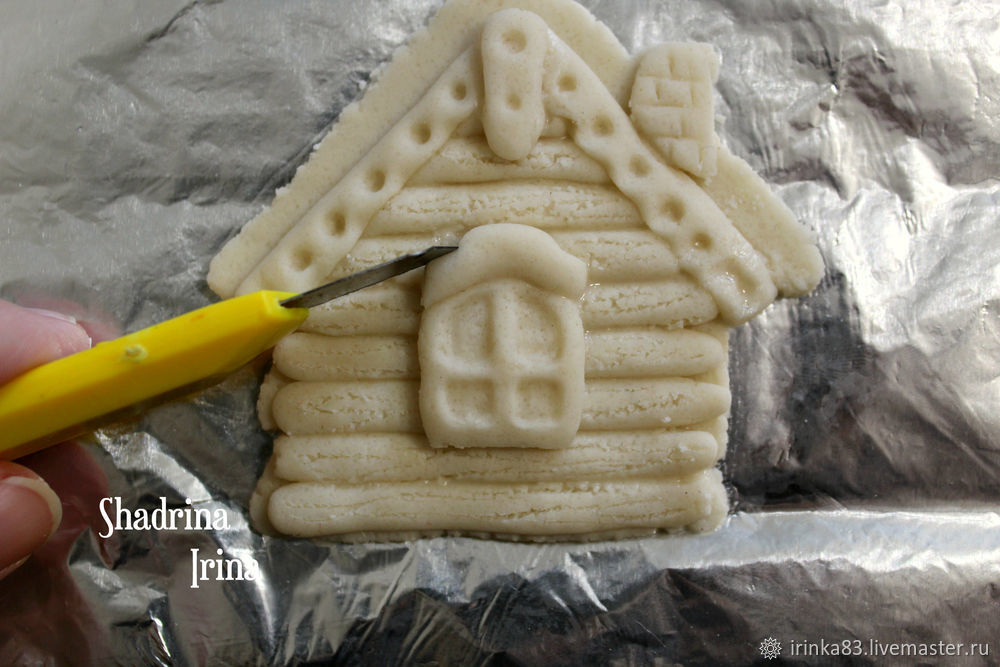
Repeat the same thing below the window. We also make shutters from dough. We form three balls of different sizes for a snowman. We flatten them and attach them to the house, as shown in the photo. Do not forget to make a hat, scarf, as well as the nose, hands and feet.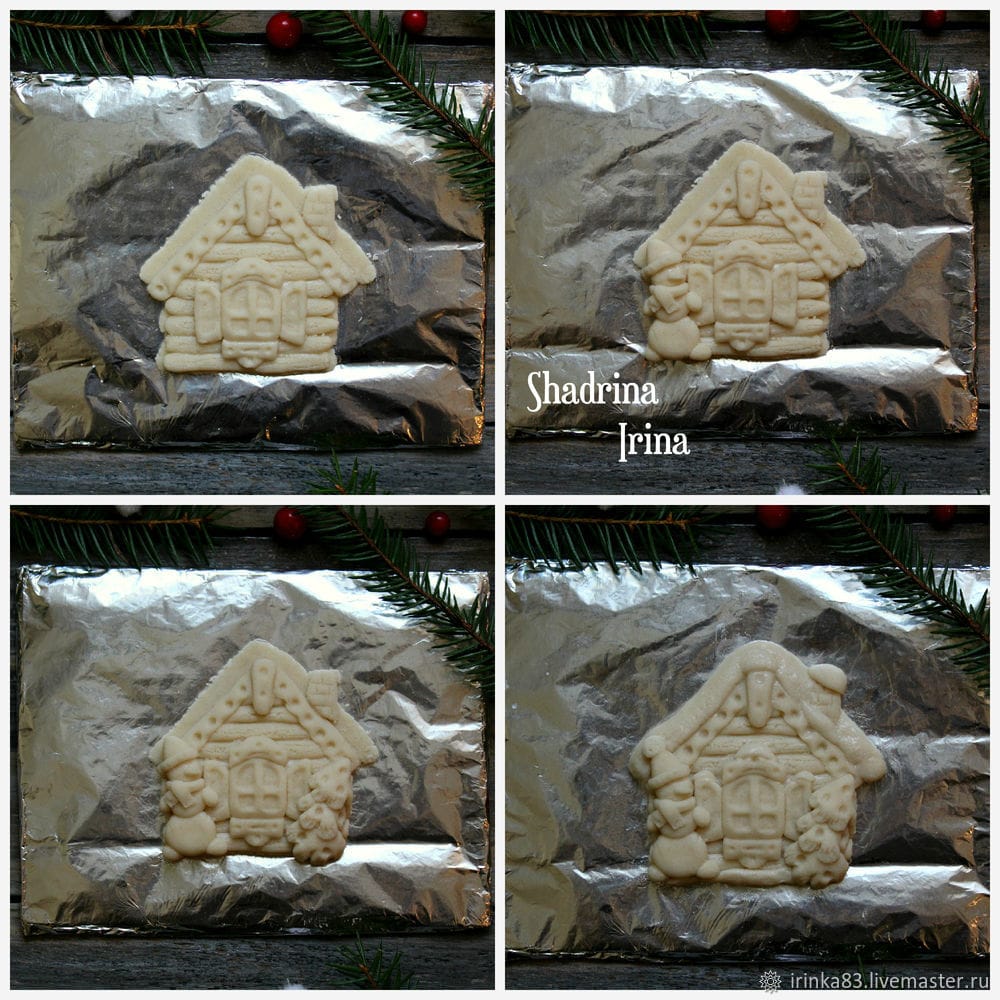
We leave preparations before full drying. Cover them with gouache in black or brown. When it is completely dry, wash it off, so that the figures are embossed. Gently paint the huts with acrylic paints.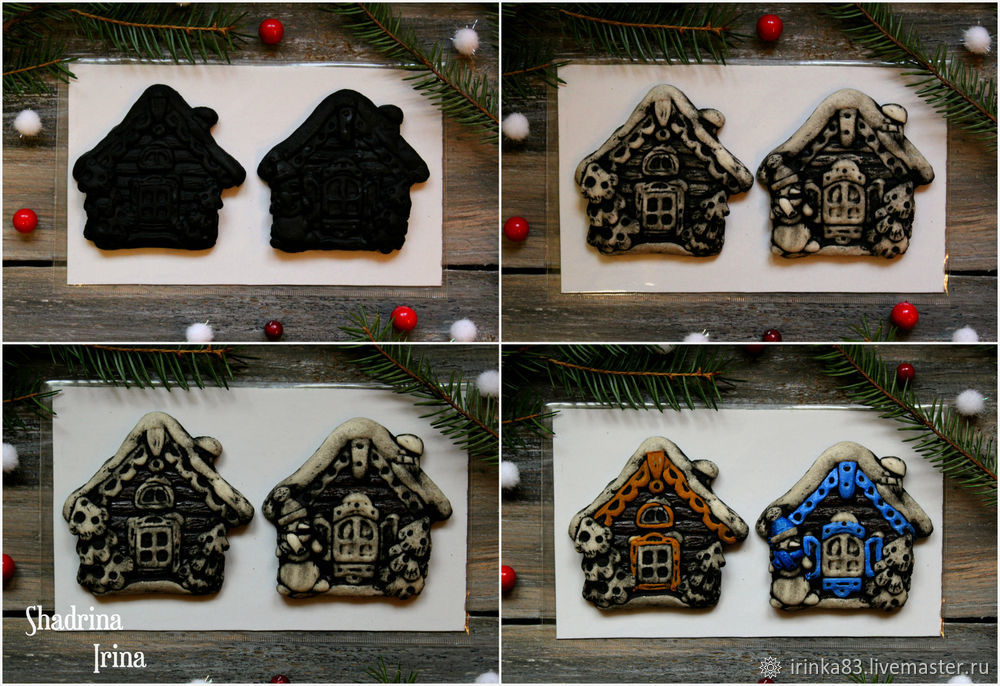

We apply a little white and blue paint on the windows, quickly mix and distribute. Color the snowman and add white paint on the Christmas trees.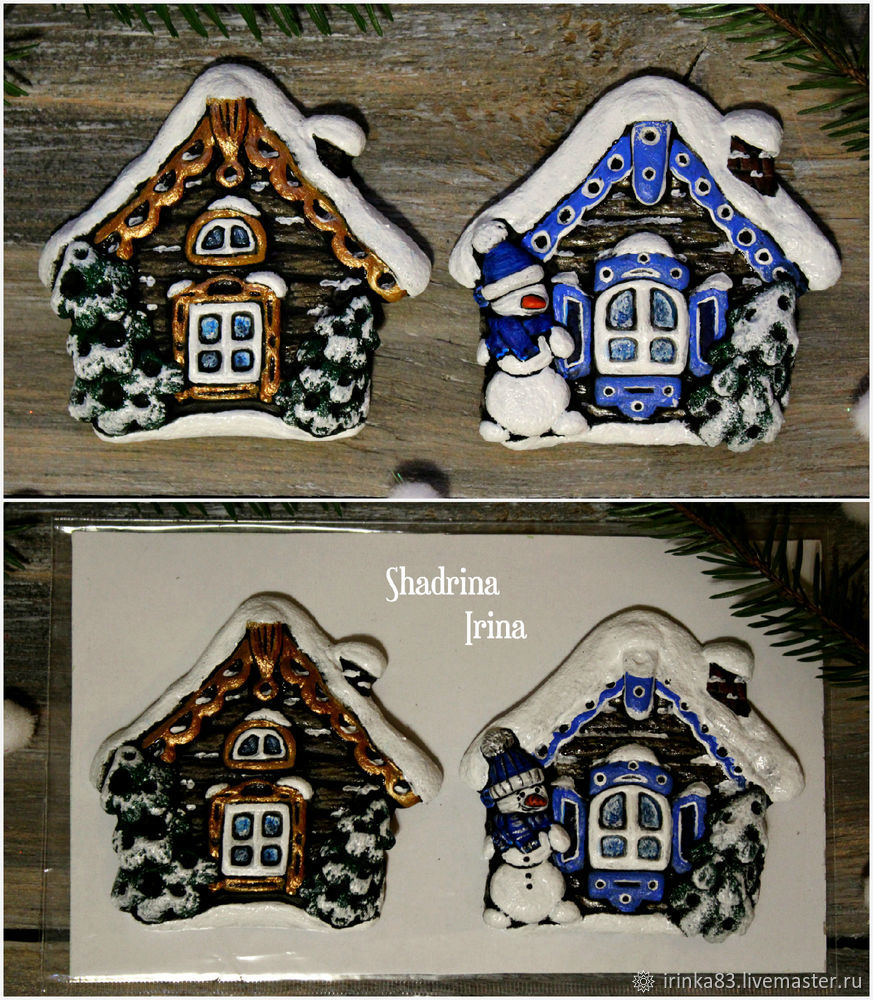
We cover the figures with transparent varnish. Cut out the felt from the felt. Where we painted the snow, apply a thin layer of glue and sprinkle with glitter. After it dries, you can add a few rhinestones.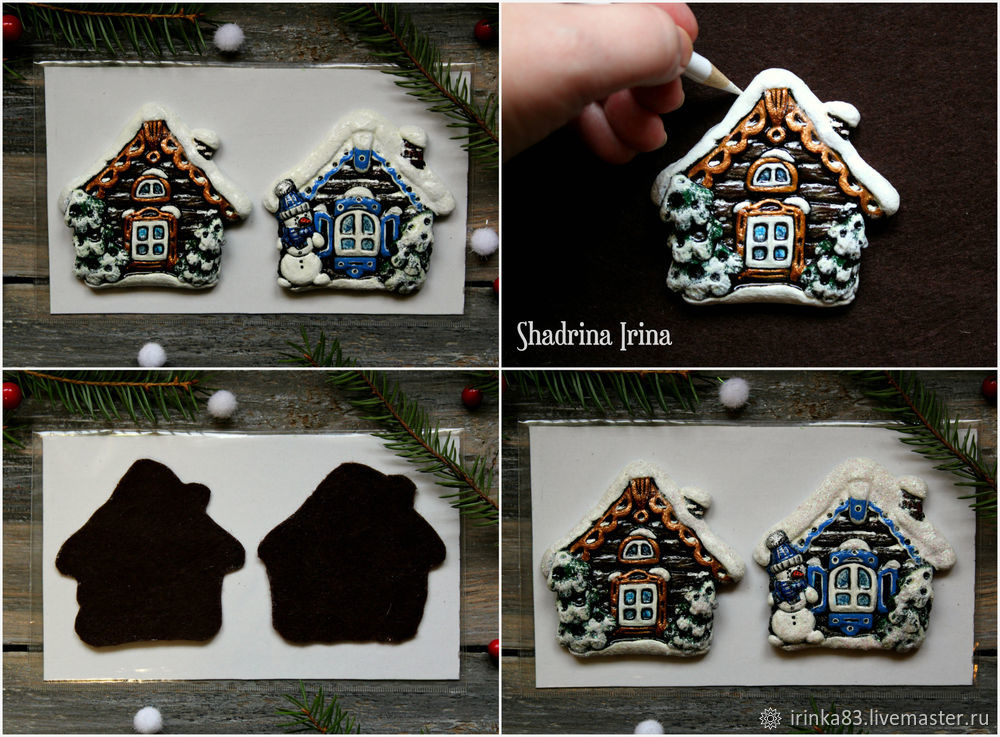
We glue to each hut a billet of felt, and on top of it a magnet.

Beautiful, original salt dough magnets are ready!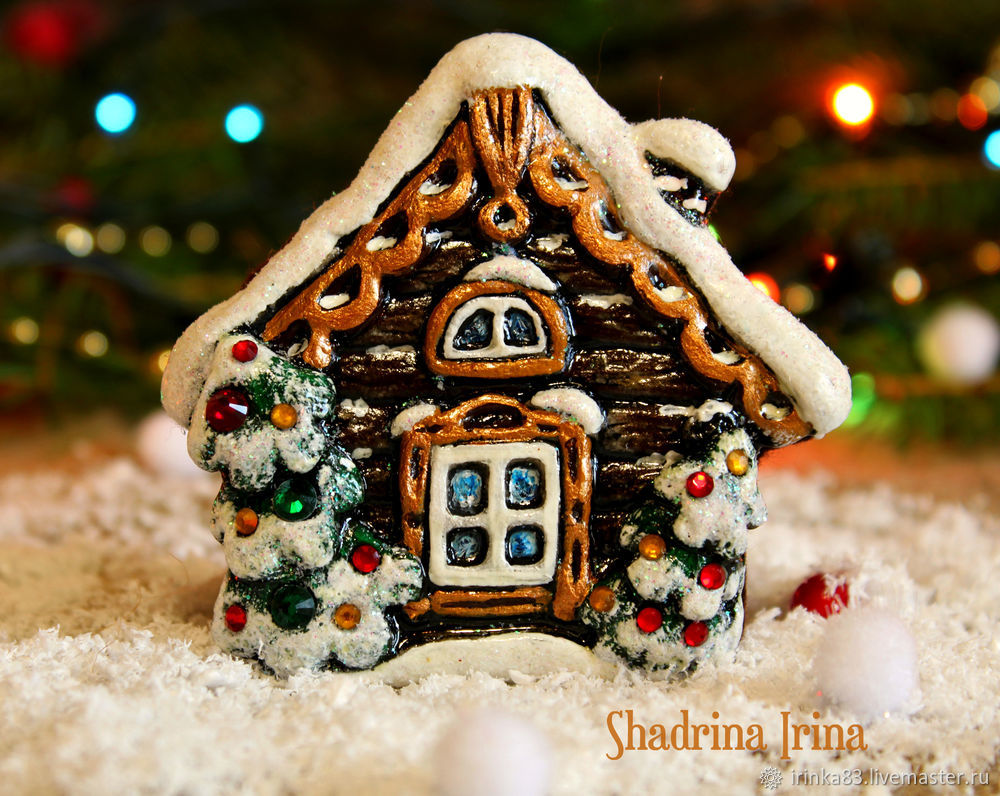
Hedgehog
Unlike the previous master class, this one can be used even for working with children.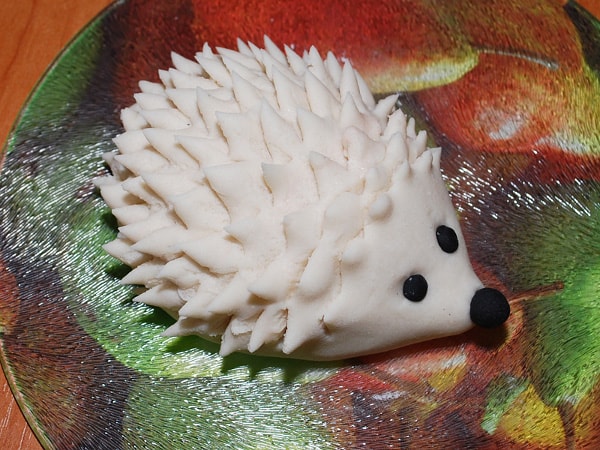
Prepare the following:
- 125 ml of water;
- a glass of flour;
- ½ cup salt;
- sieve;
- glass container;
- black paint or black pepper;
- board;
- nail scissors.
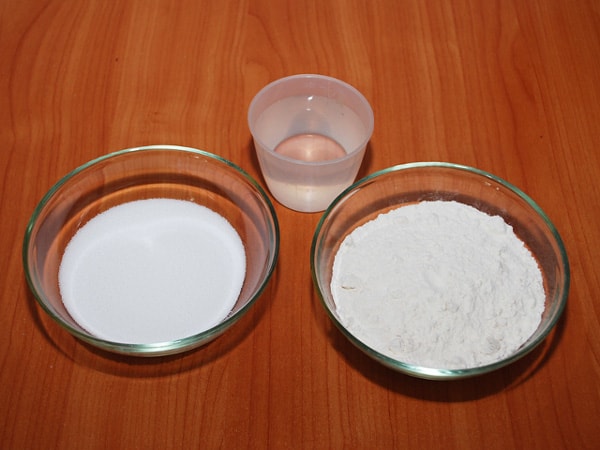
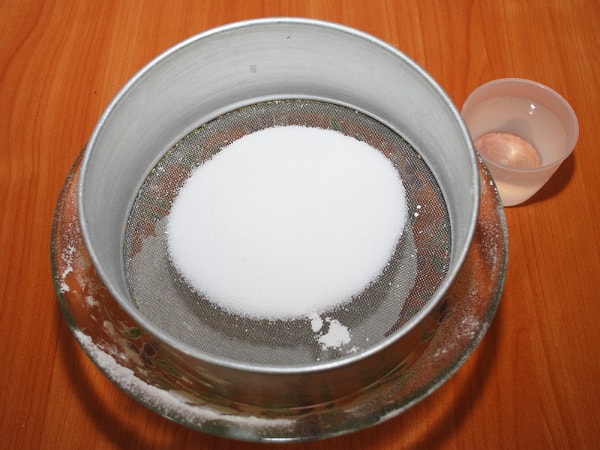
To begin, sift the flour, and then repeat the same with the fine salt.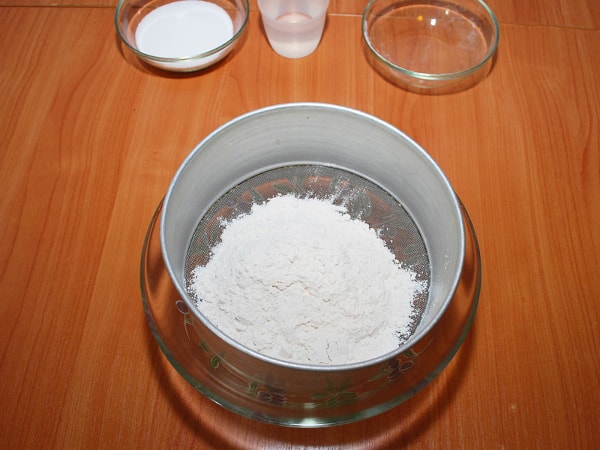
Gradually add water, constantly stirring the dough.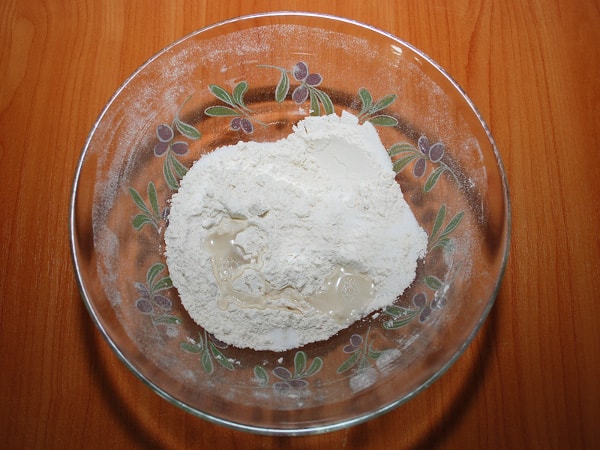
Knead dough and, if necessary, add flour or water.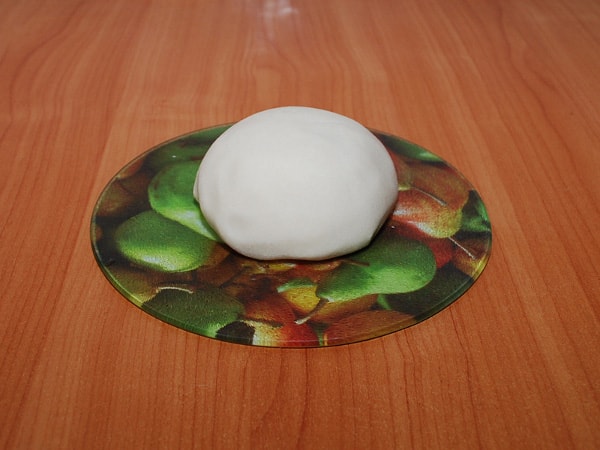
We form the body and the muzzle of the hedgehog, as shown in the photo.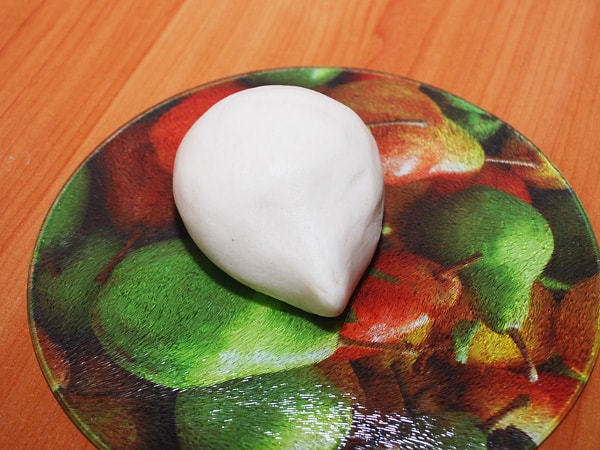
To make a black dough, add black pepper and mix well. You can also form the eyes and nose of white, attach them and then paint with black paint.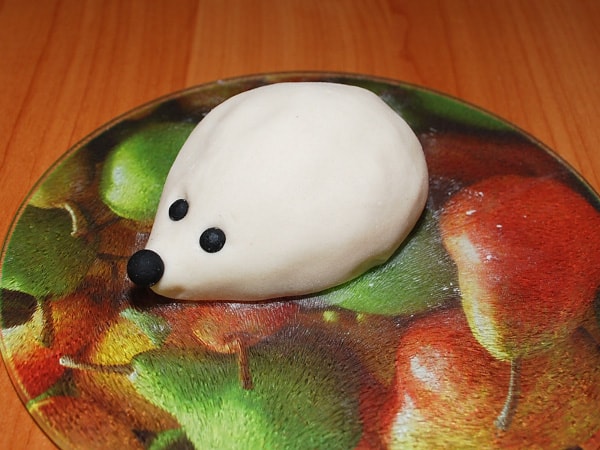
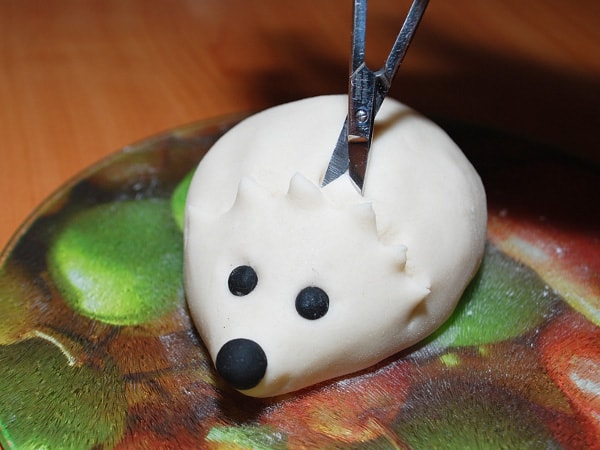
Manicure scissors gently make small cuts and lift the corners, as shown in the photo. The next row is a little shifted, so that there is a chess order.
It turns out such a cute hedgehog. If desired, you can paint it or make it shiny with varnish.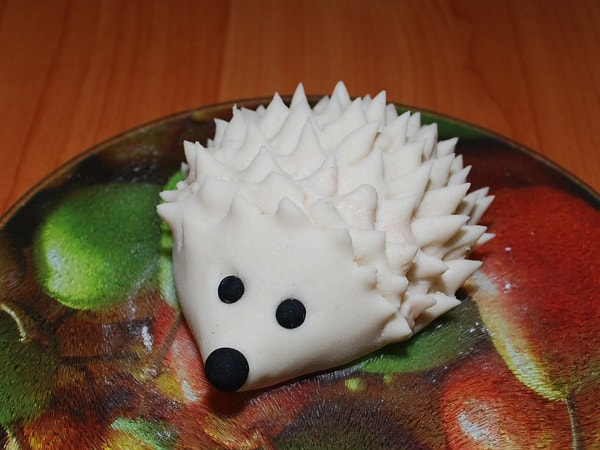
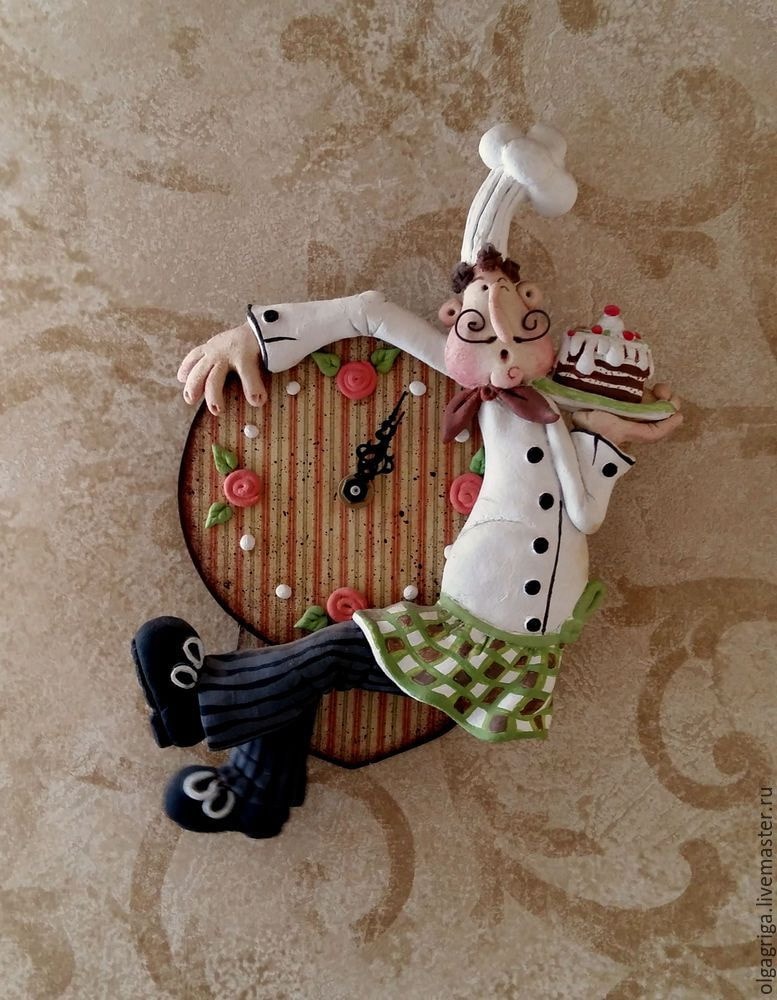
Unusual clock with puff pastry decor
We will prepare such materials:
- clock;
- paper;
- pencil;
- tracing paper;
- water;
- wallpaper glue;
- salt;
- knife;
- flour;
- wire;
- acrylic paints;
- brush;
- napkin or decoupage paper;
- scissors;
- glue.
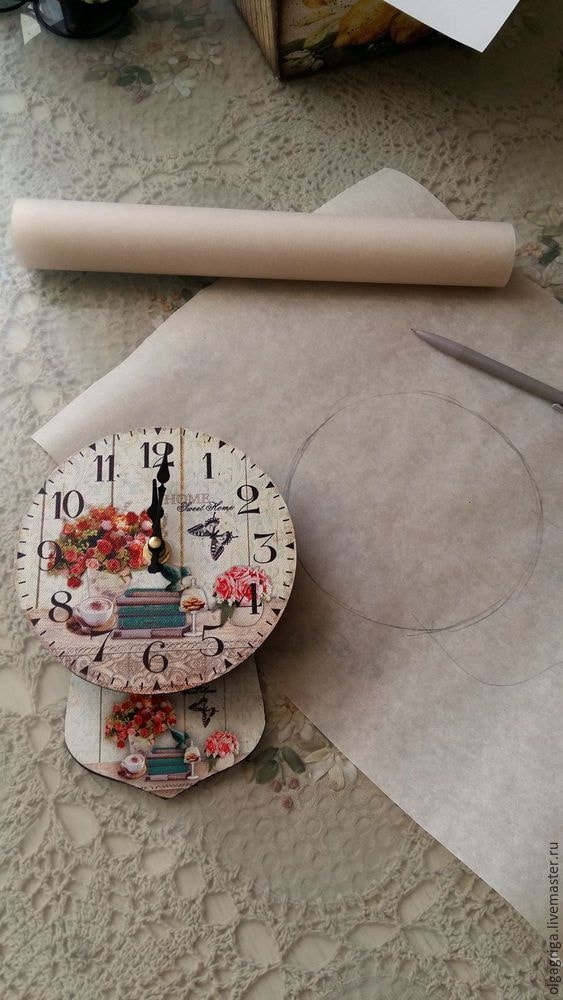
Circle the clock on paper. We draw the cook by hand or do it on the computer, and then we print it out.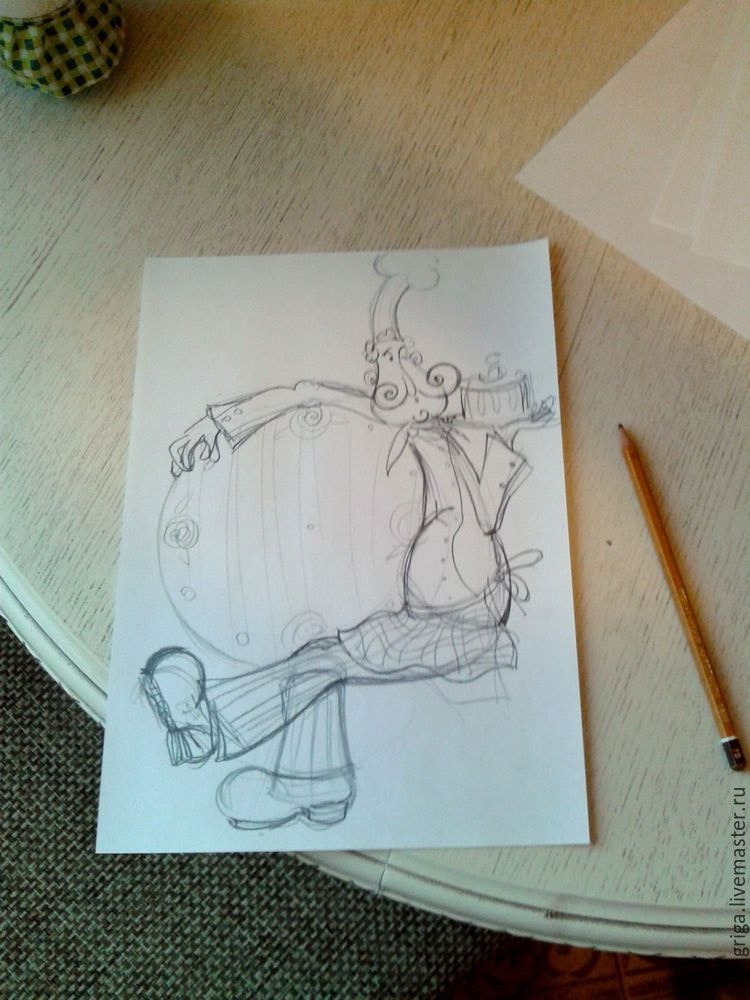
Transferring the drawing to tracing paper.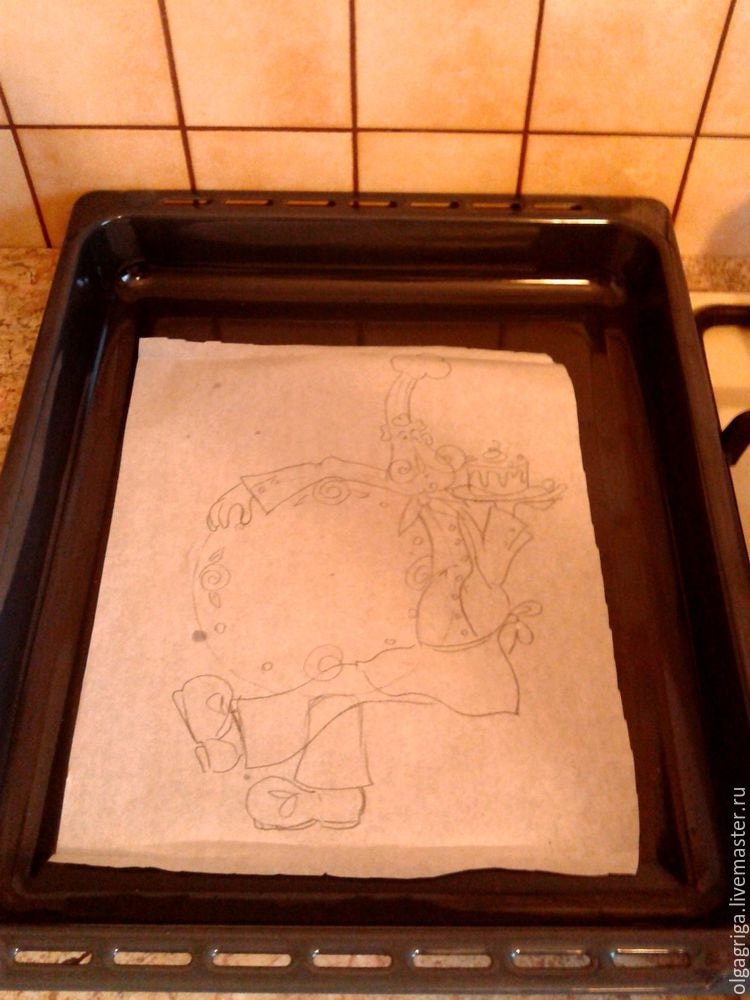
Getting to the preparation of the test. To do this, mix the salt and water in a 2: 1 ratio and add no more than one teaspoon of wallpaper glue.Knead, gradually adding flour. The dough should be in consistency, like plasticine.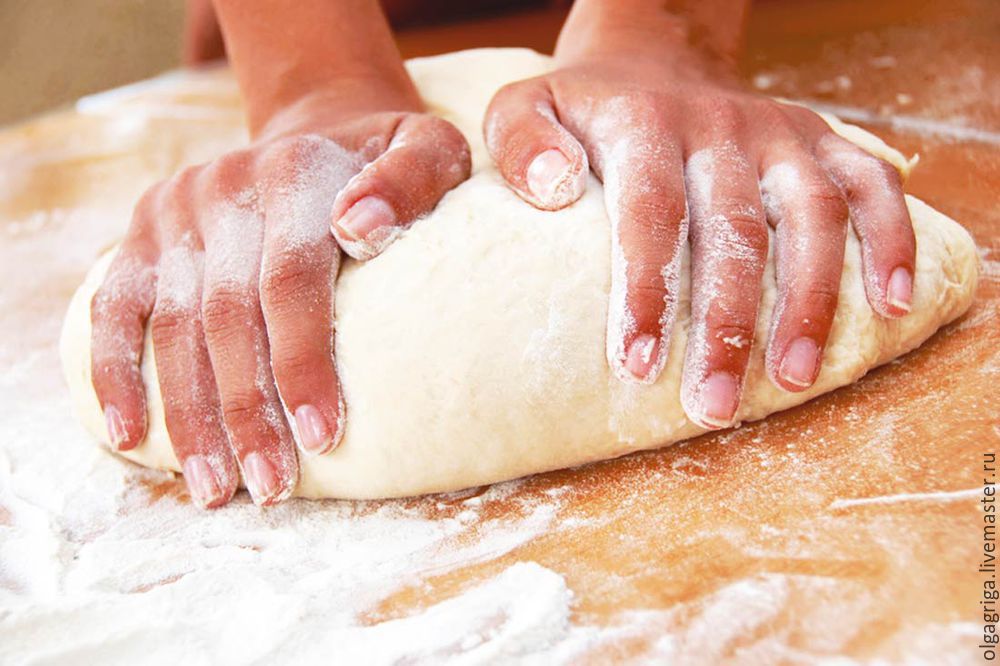
Wrap it in cellophane so that it does not dry out. Put tracing paper on a baking sheet. We moisten hands in water, pinch off a piece of dough and form the main part of the cook.
Every detail must match in size with the pattern. We make the shoe and foot, put the folds with a knife. We form the second leg, as shown in the photo.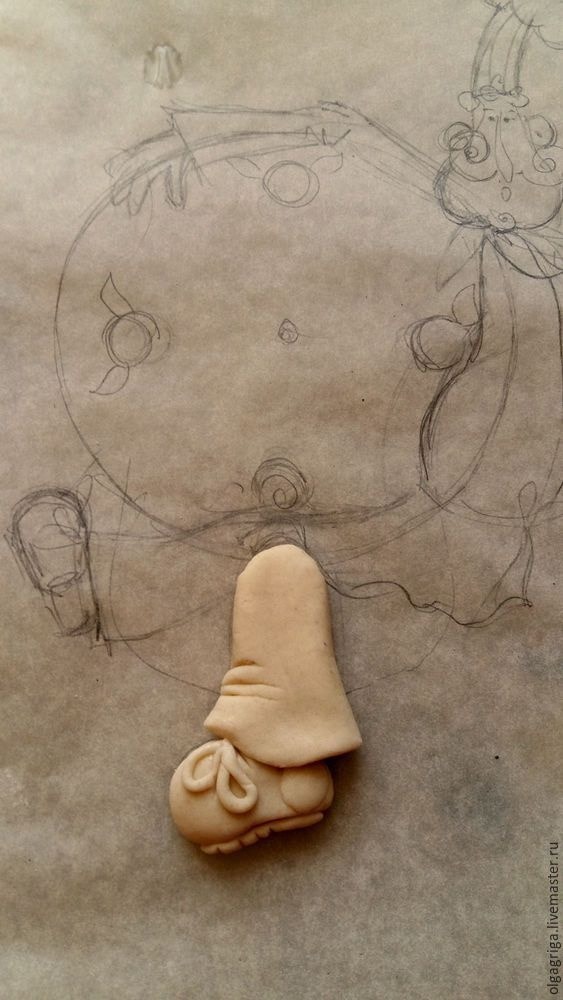
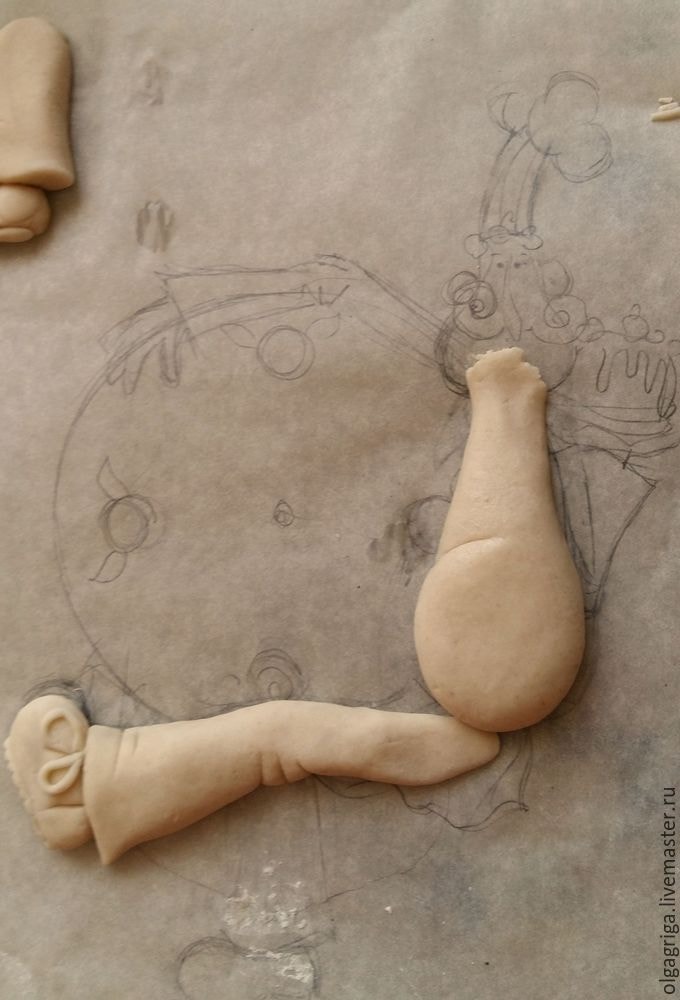
We make hands and sleeves, as well as an apron and small parts. Using wire, we make small holes for the antennae.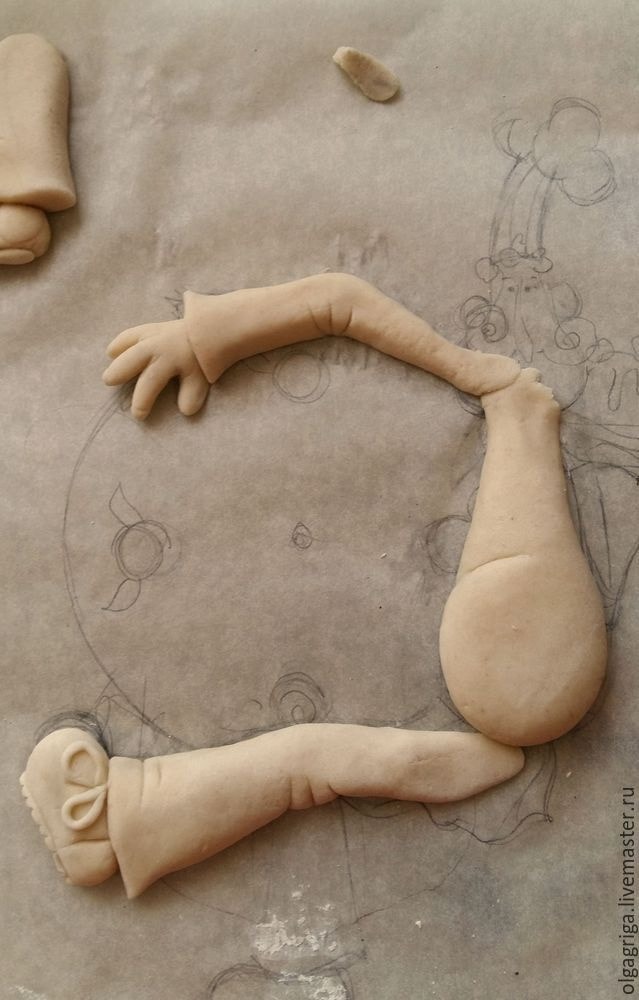
We form a cake and decorate it, as in the sketch.
Bake the figure in the oven at the minimum temperature. You can smoothly raise the temperature so that all the details are slightly browned.
When the figure is cold, we paint it with acrylic paints.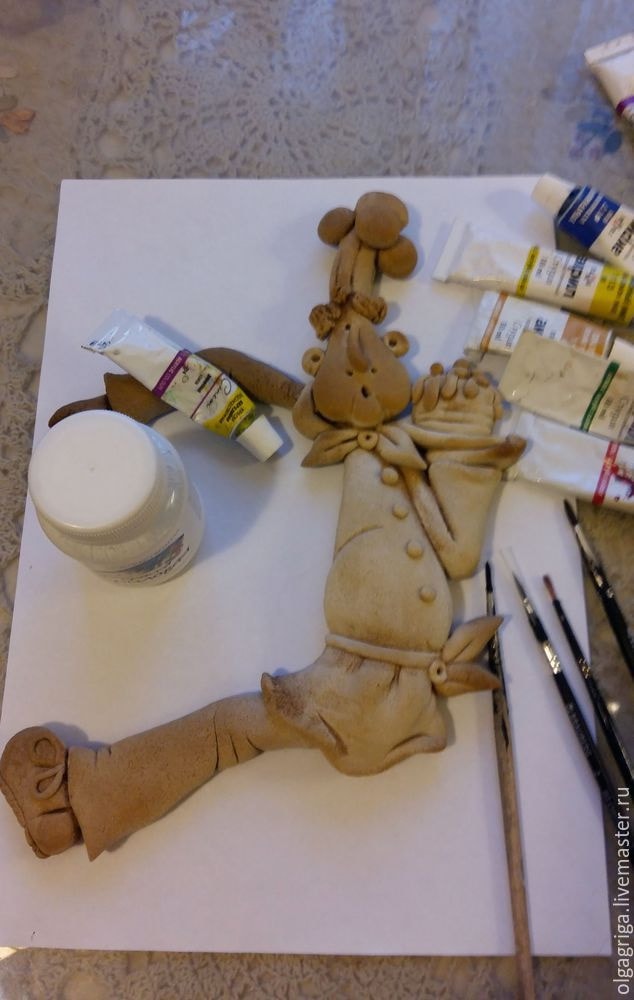
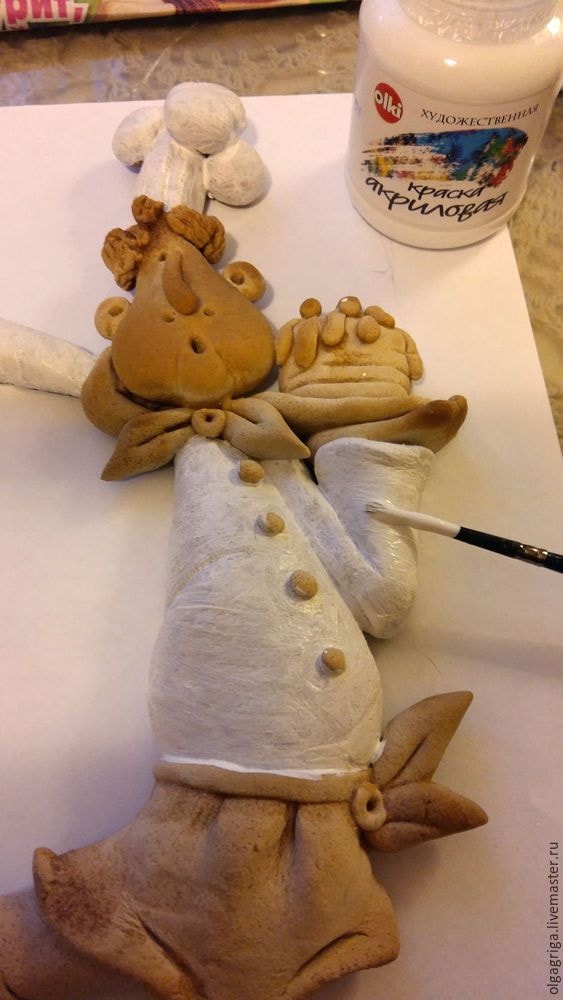
We start decorating hours. To do this, we take decoupage paper or a beautiful napkin and glue it onto the base of the watch. To make it a little old, we process it with a sponge.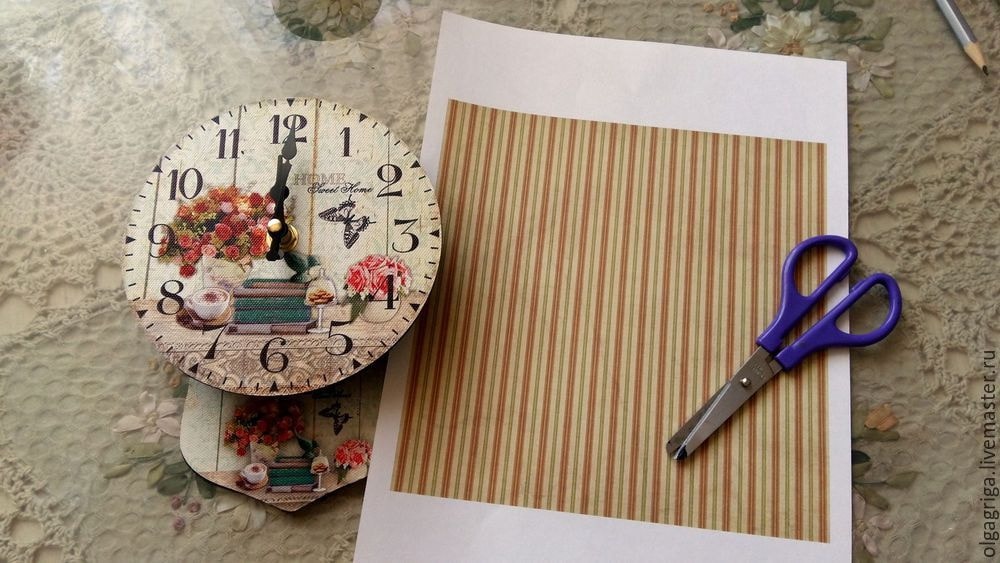
Glue the wire whiskers to the figurine of the cook, and then attach the entire composition to the dial. We place the rest of the details, as in the photo.
Cute piglets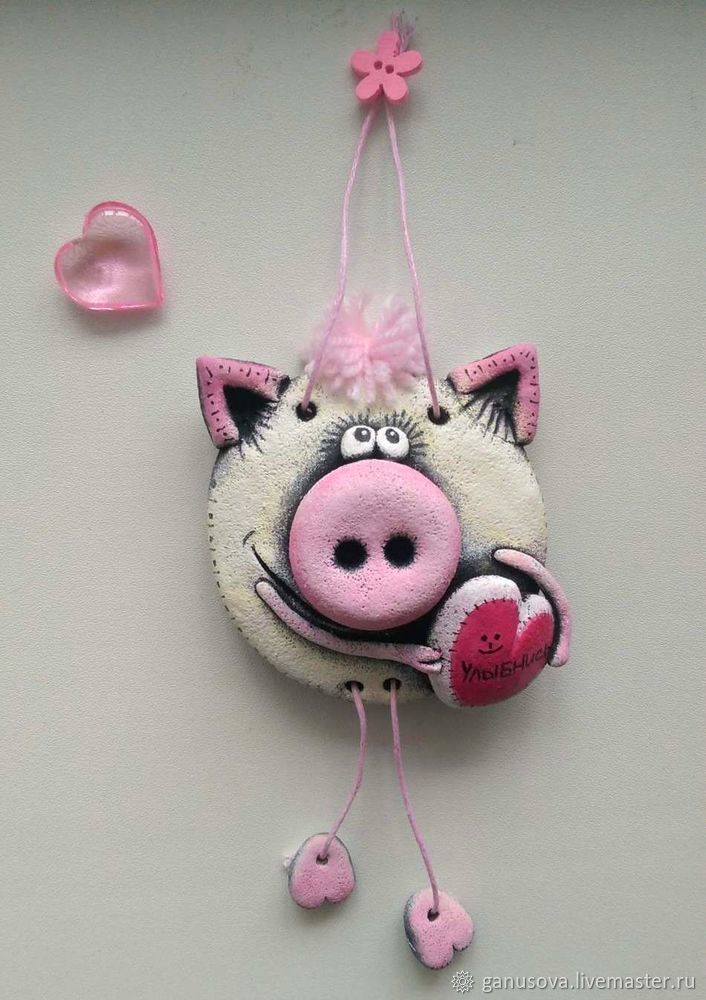
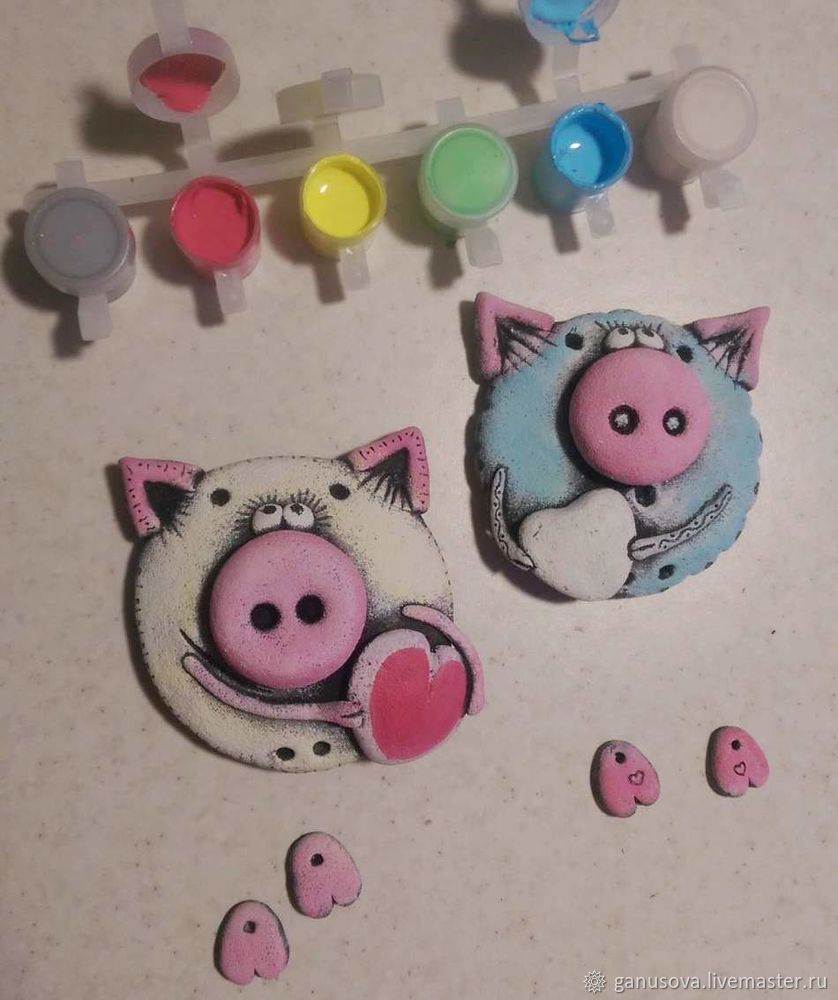
We will need:
- salty dough;
- acrylic paints;
- fine brush;
- knife;
- sponge;
- black pen;
- toothpicks or needles;
- a thread;
- decorative items.
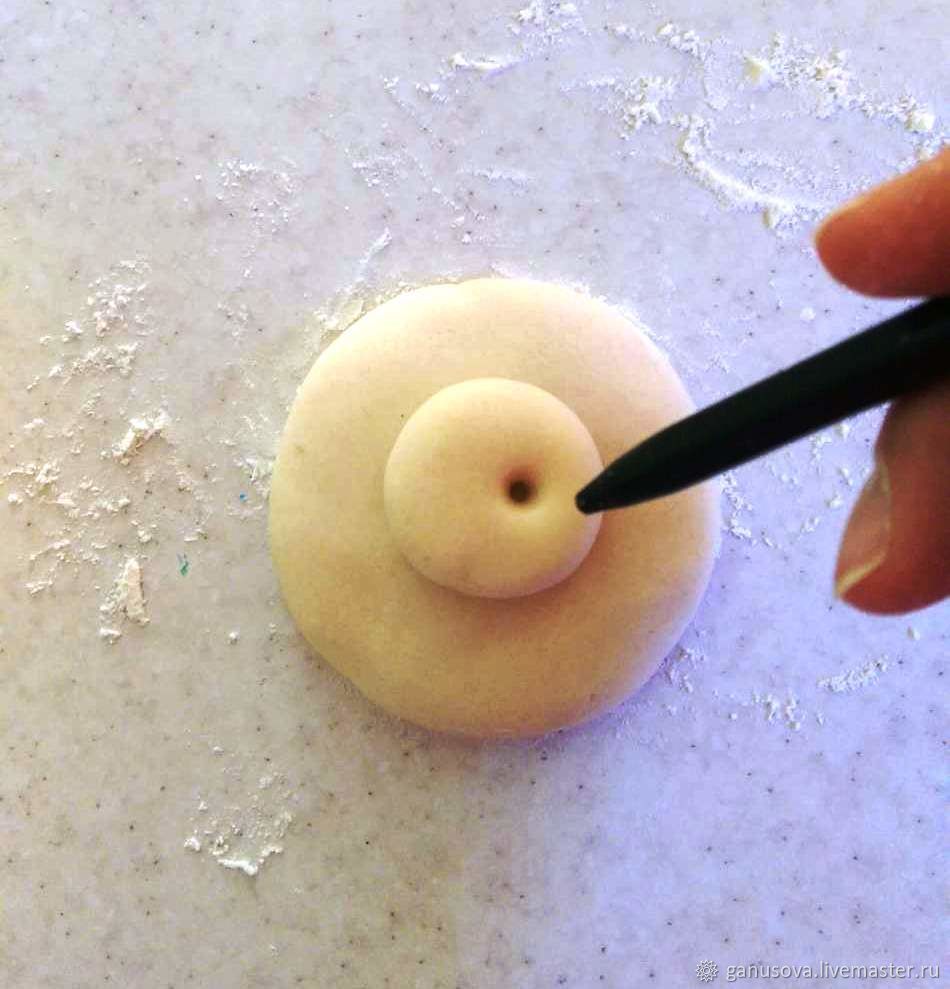
Take a small piece of dough and form a flat circle. Repeat the same with a smaller piece and place it in the center. Using a toothpick or pen make two holes, as in the photo.
We make eyes out of small pieces of dough, moisten them with water and attach them over the patch. Make ears and glue to the body. Use a knife to make small cuts where the parts are connected.
Make a small heart and glue to the workpiece.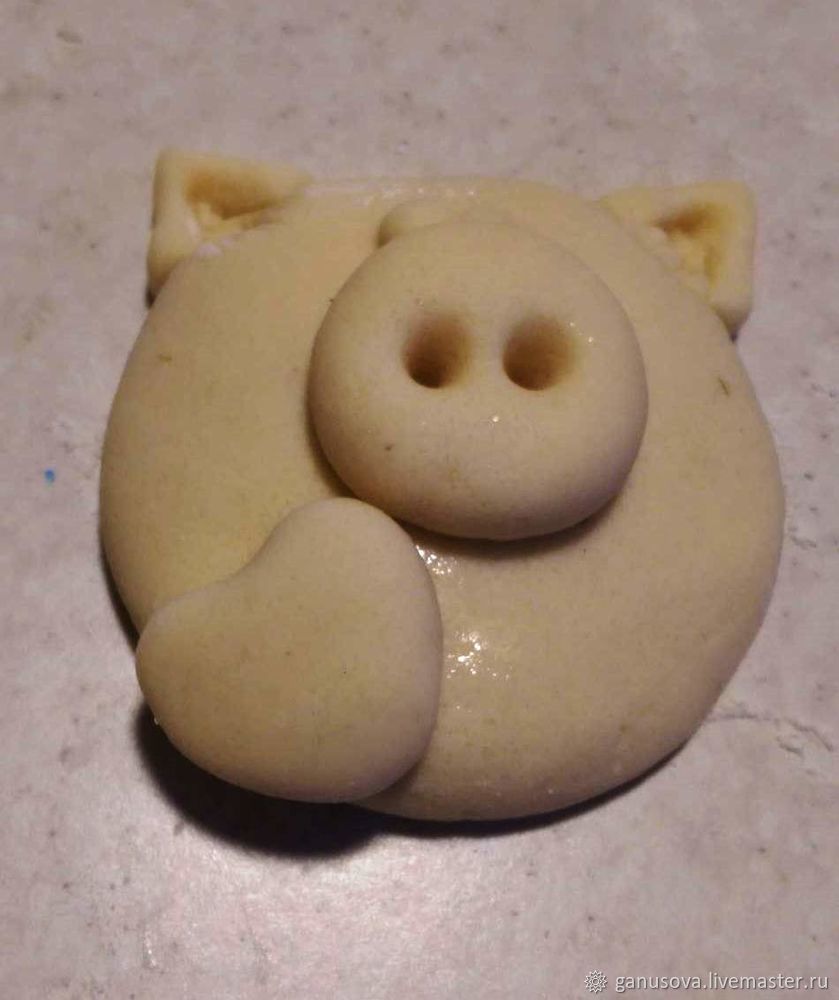
Using the back side of the knife, we make indentations around the entire edge of the workpiece.
Toothpick or handle make holes for the legs and for the suspension.
We form hands and claws of thin strips of dough. We connect the parts so that the pig keeps the heart.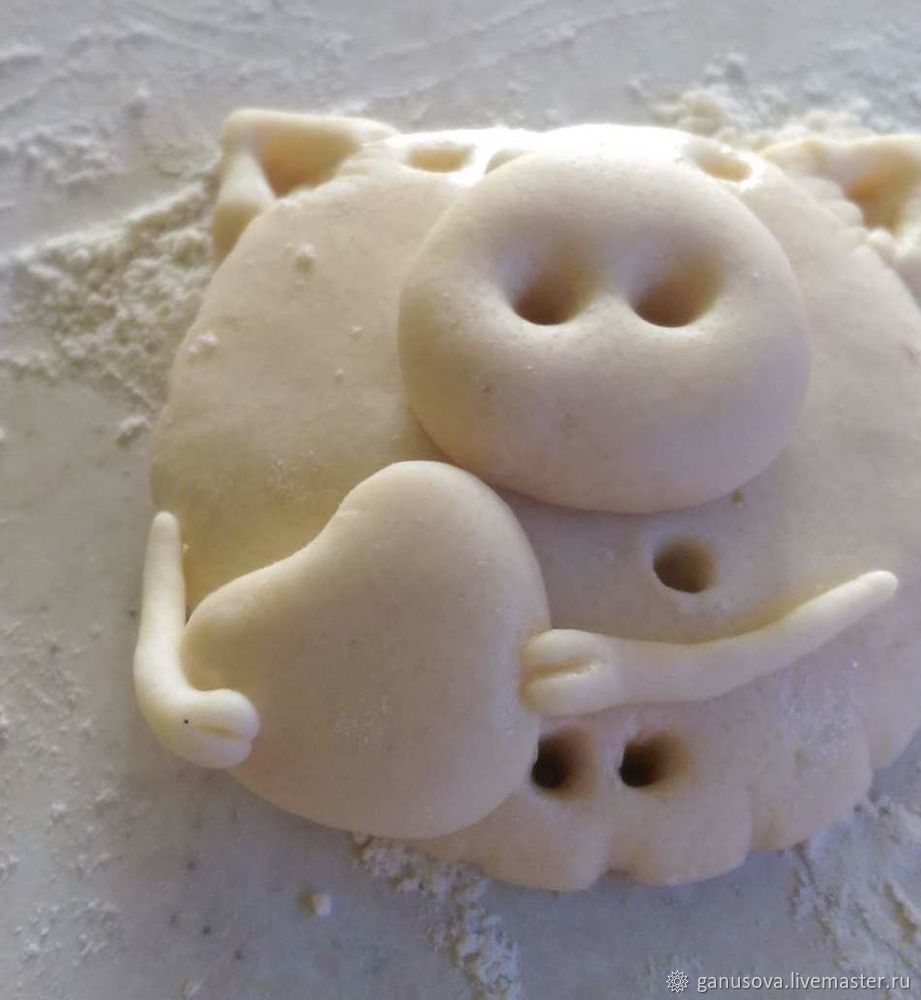
We do legs and hoofs. Using the handle make holes for hanging.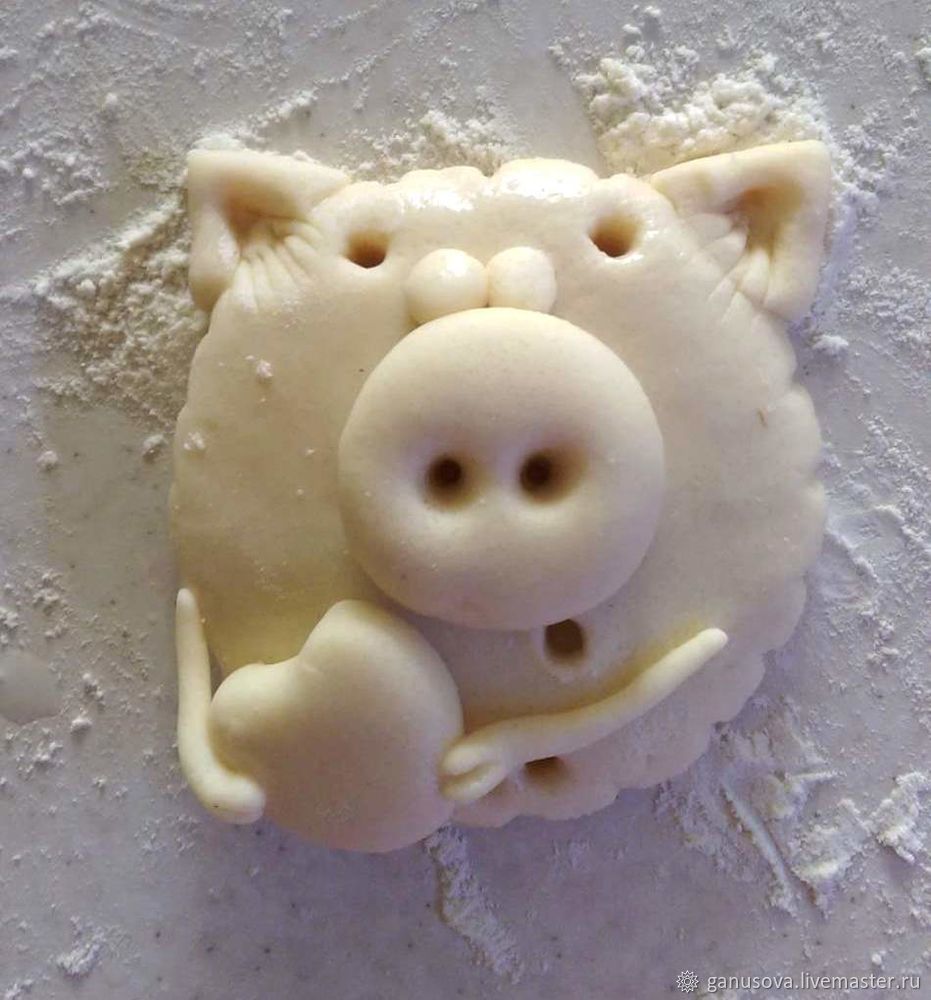
We do legs and hoofs. Using the handle make holes for hanging.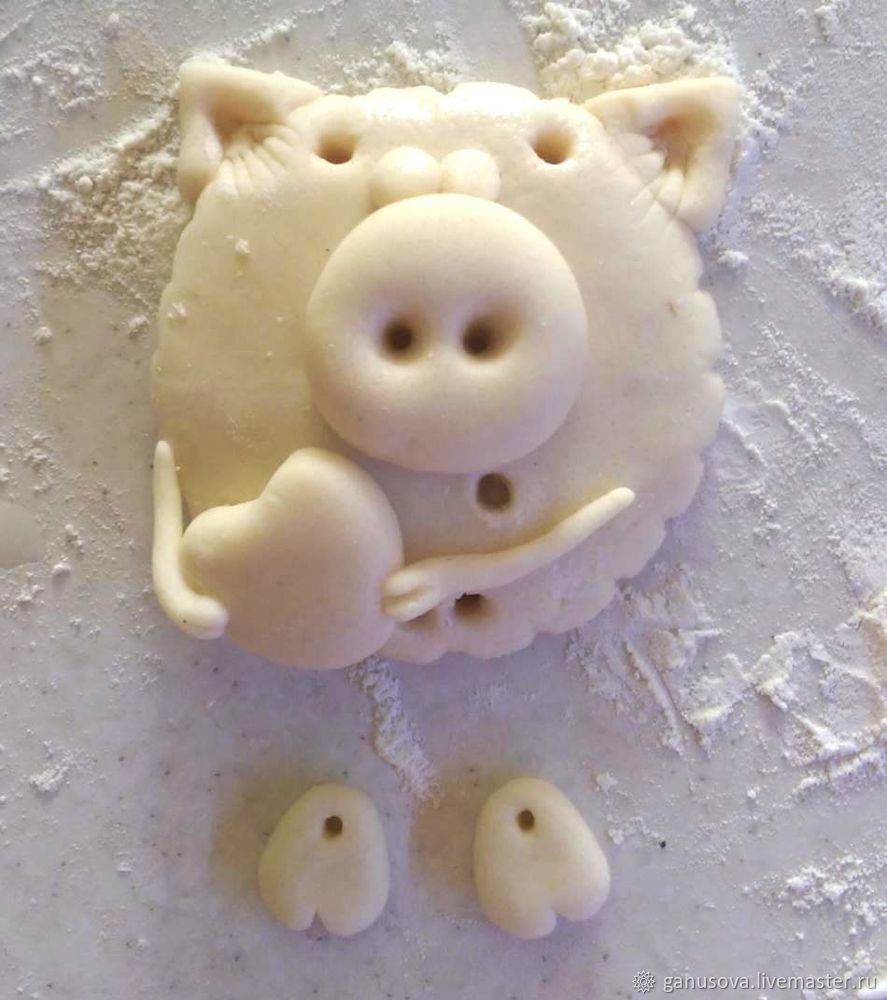
We leave preparations before full drying. To speed up the process you can place them over a hot battery.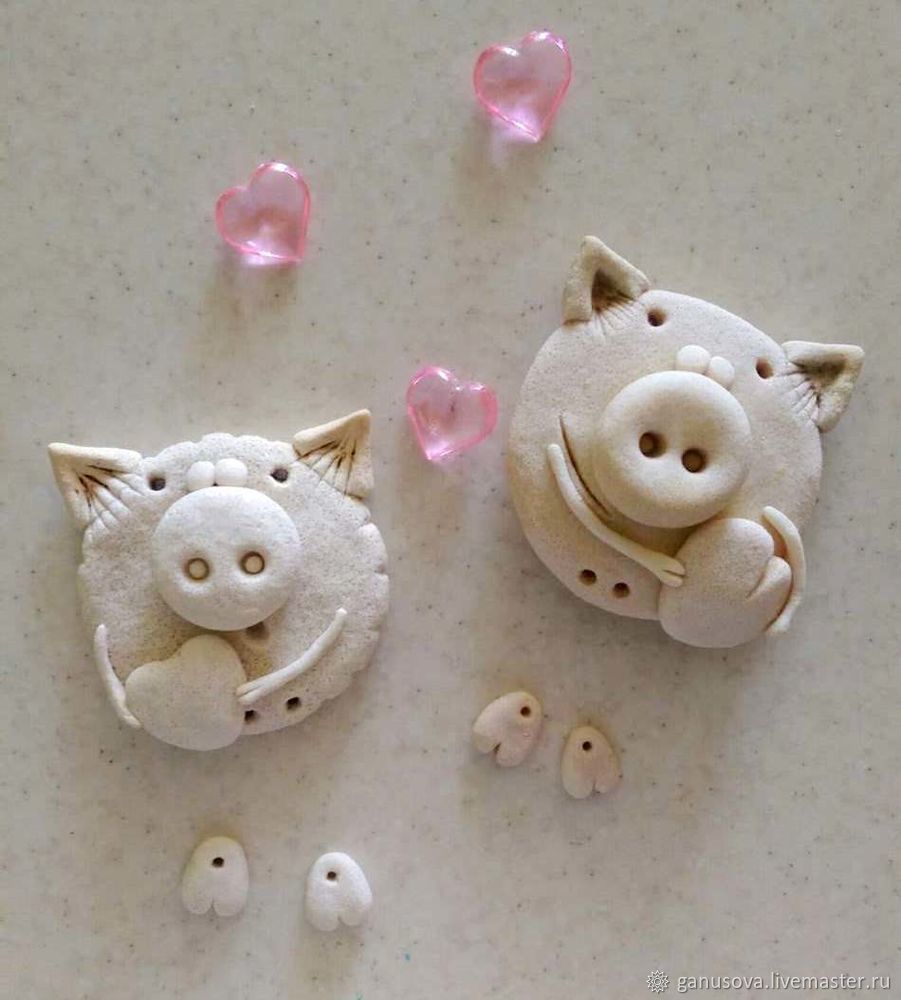
We cover the workpiece with black paint. When it dries, wash off the remnants with a sponge.
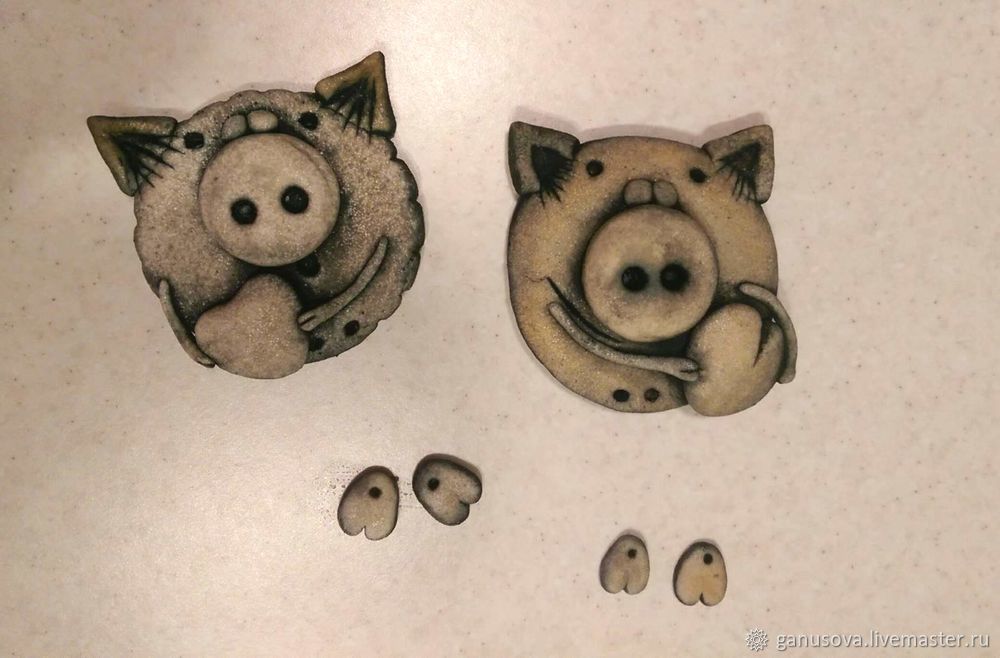
After the blanks dry, apply white paint
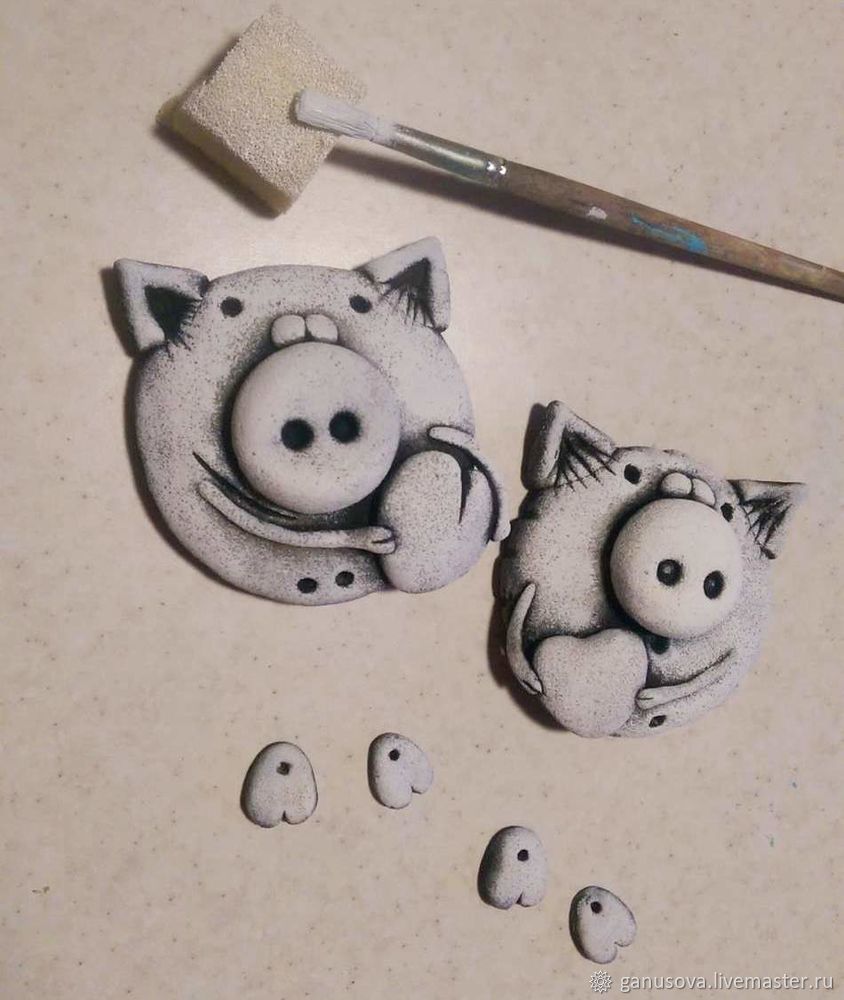
Decorate each of the blanks.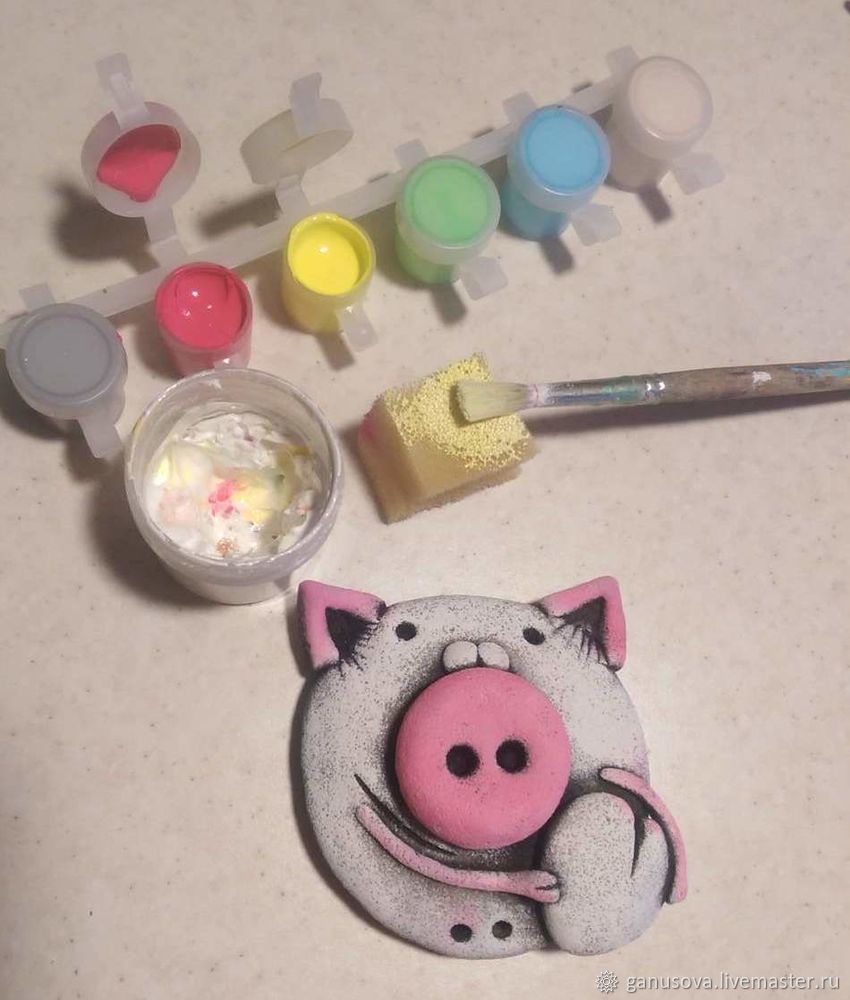
Use black pen to draw small details and inscriptions.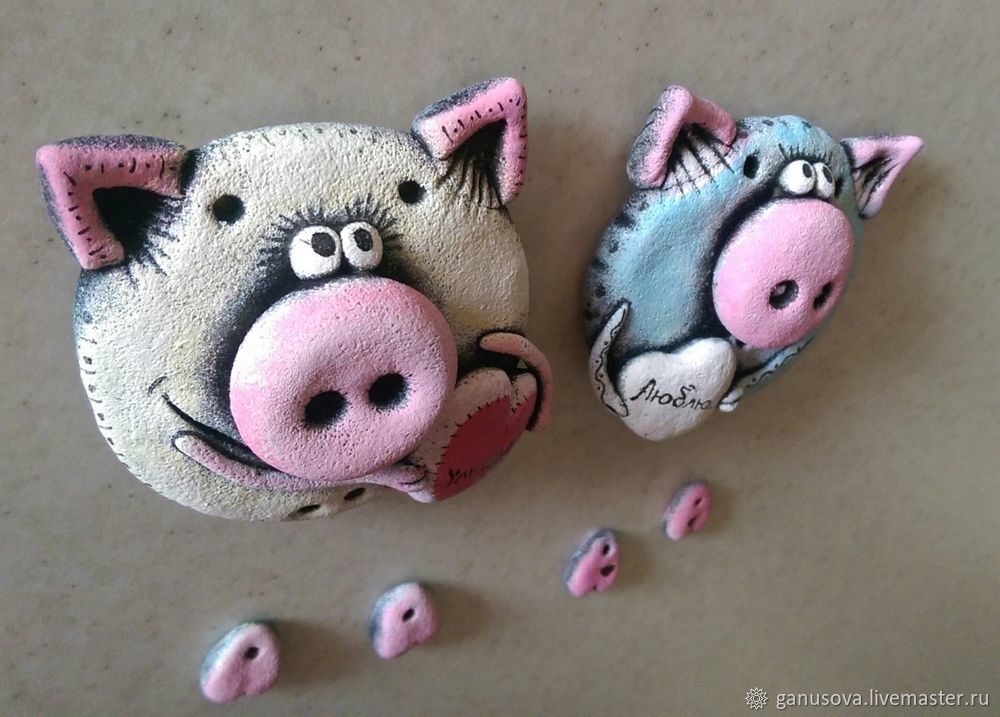
We connect details with the help of a thread. If you wish, you can add additional decor.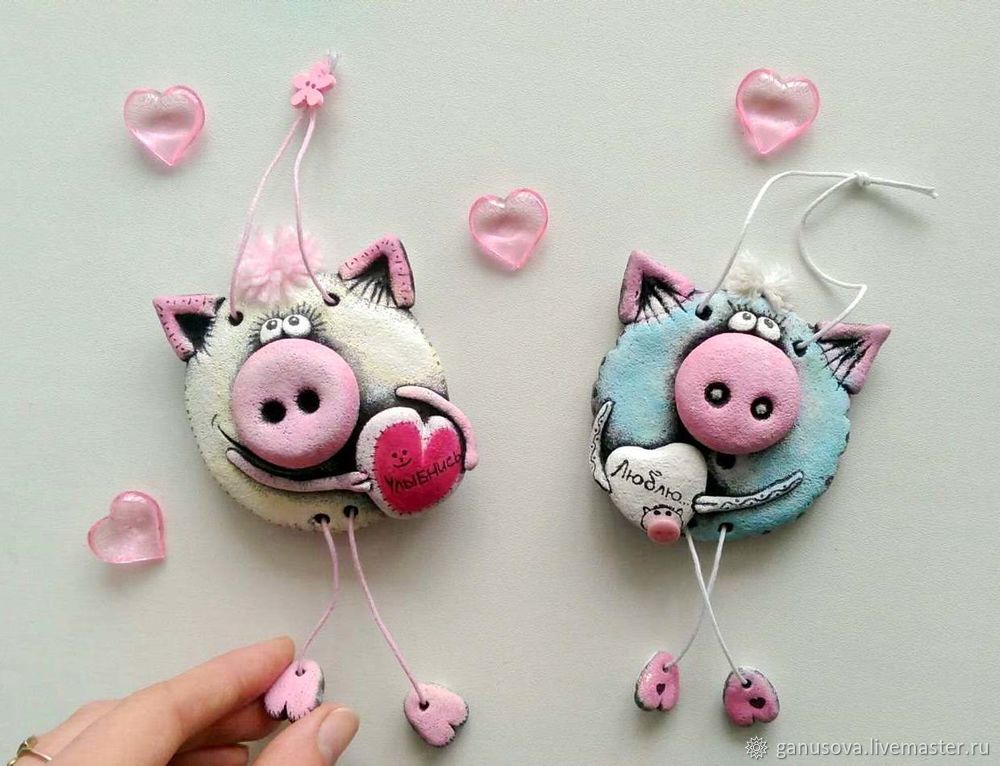
As you can see, a variety of crafts can be made from salt dough. Starting with Christmas toys and ending with fridge magnets and even caskets.


