


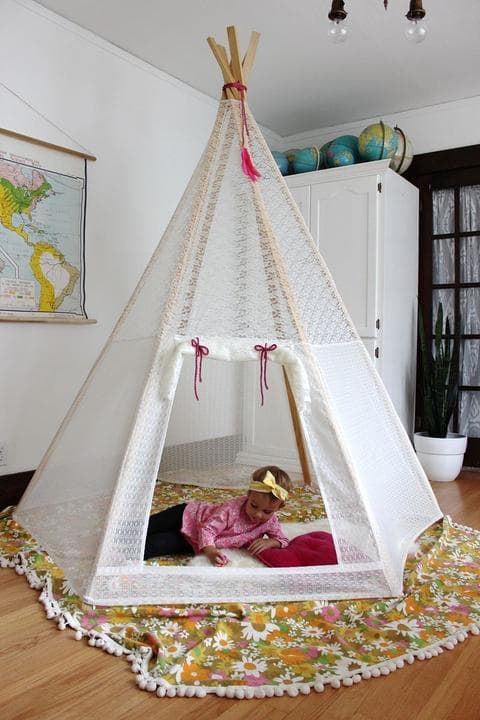
Every child loves to build different huts and shelters. After all, this is a kind of secluded place where you can play, read books or have fun with friends. Moreover, some even prefer to sleep there. In addition, this design perfectly complements the interior of the children's room and living room. Therefore, we propose to make a beautiful, original wigwam with your own hands.
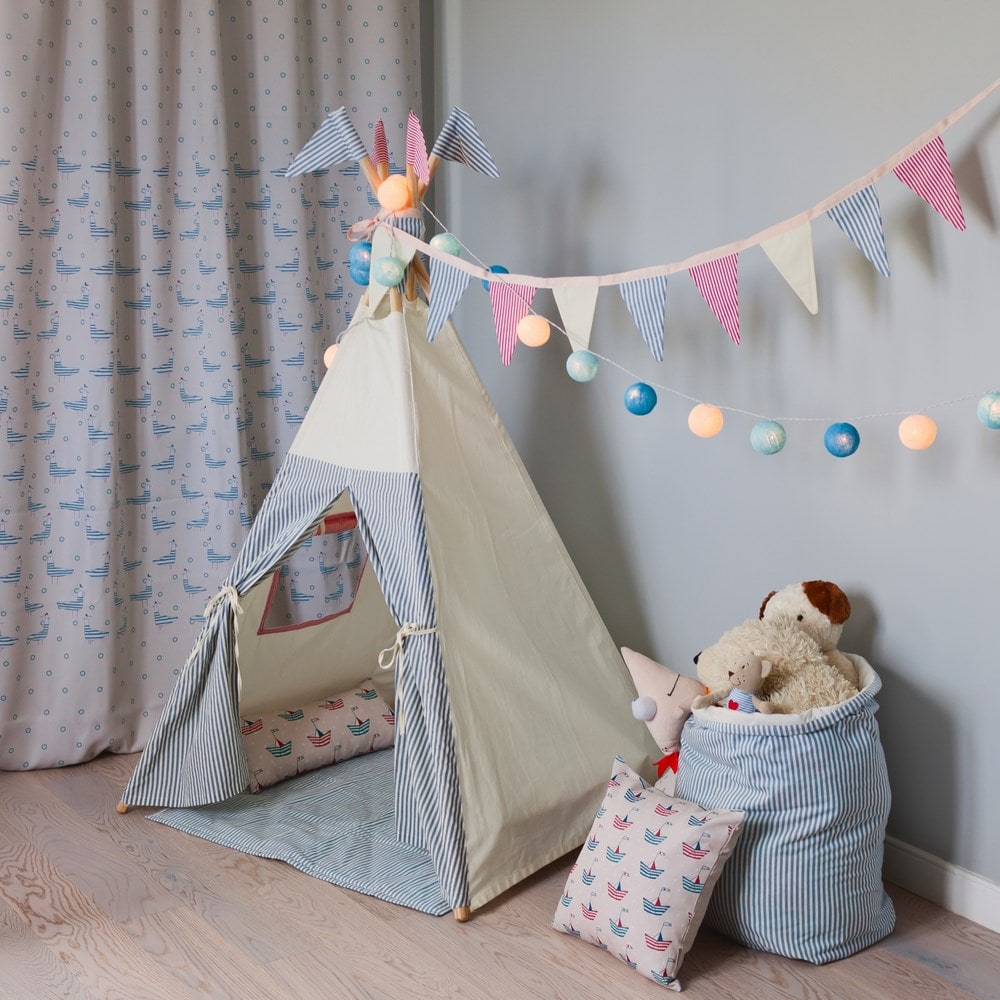

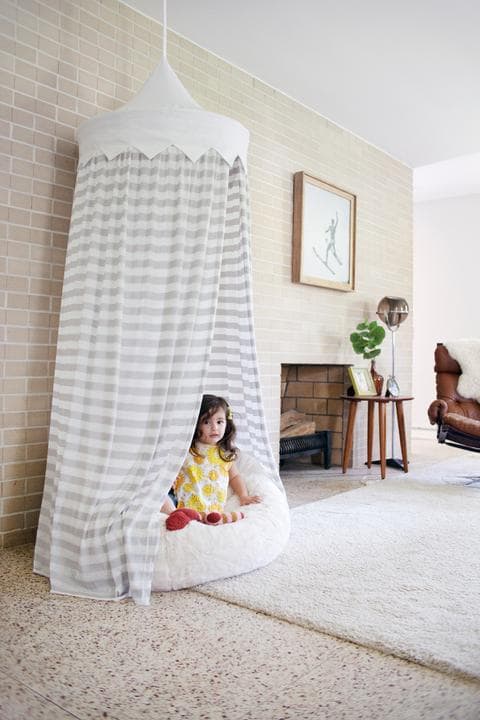
Light wigwam
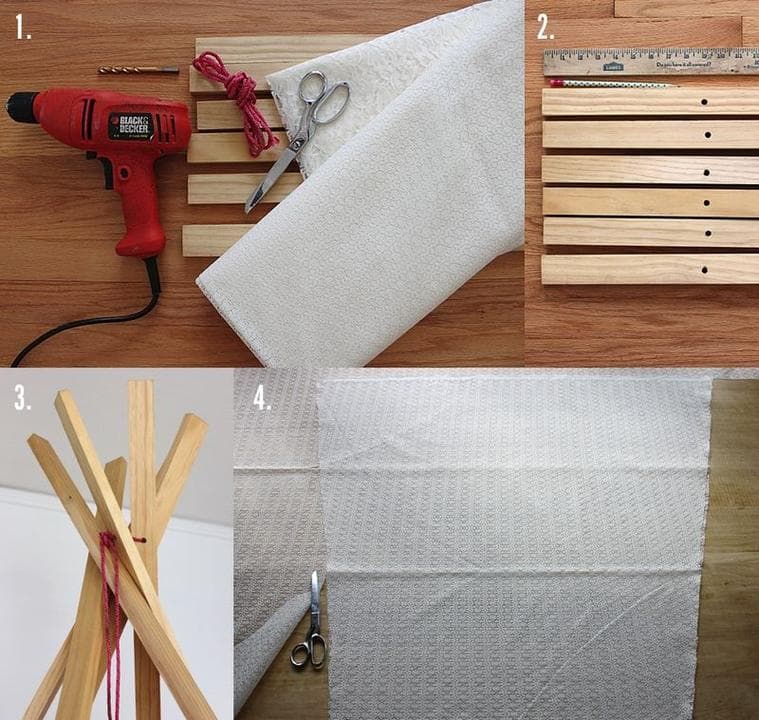
We will prepare such materials:
- wooden bars or bamboo sticks - 6 pcs .;
- roulette;
- twine;
- drill;
- thick fabric;
- pencil;
- needle;
- long ribbons or ribbons - 6 pcs .;
- a thread;
- grommets;
- lace;
- pins.
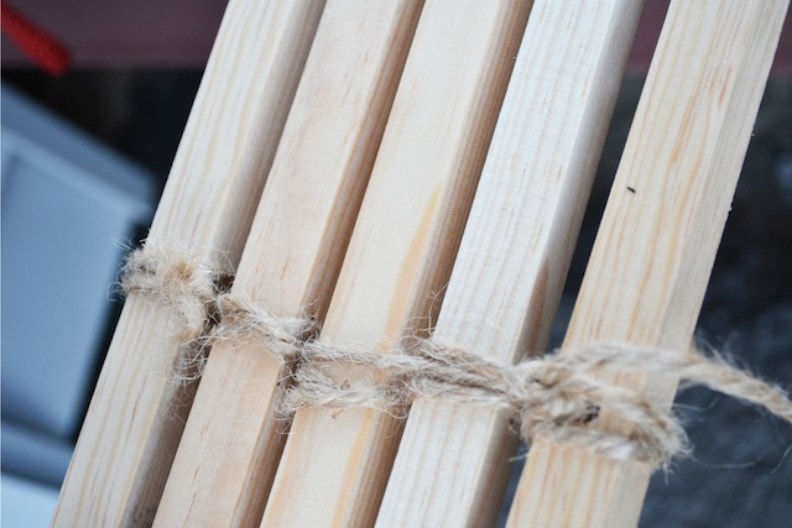
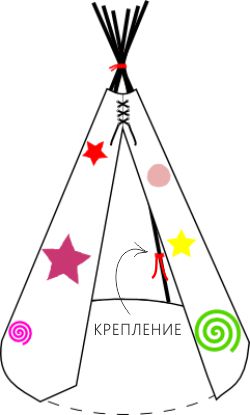
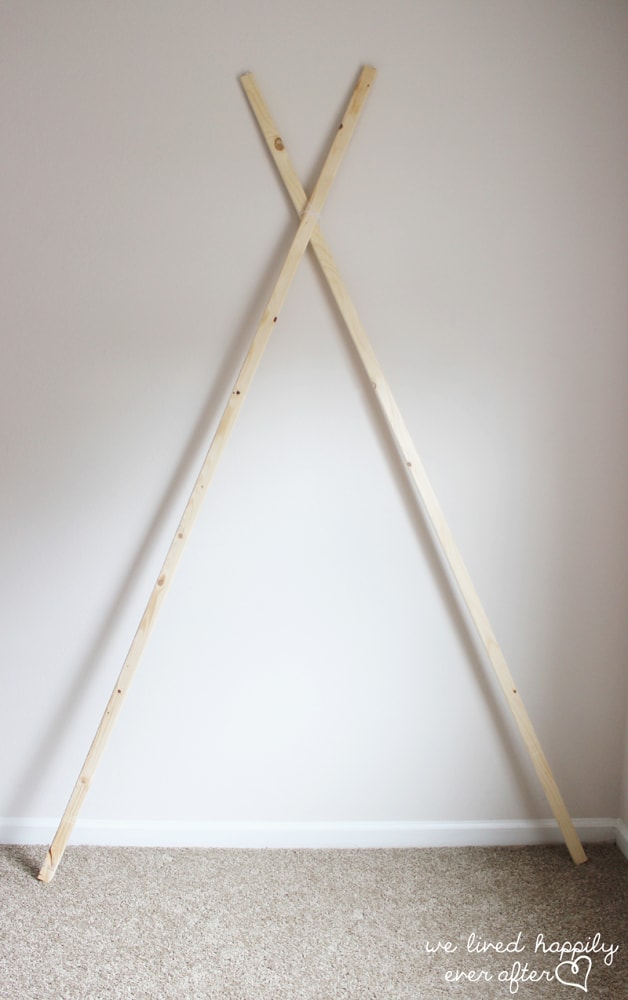
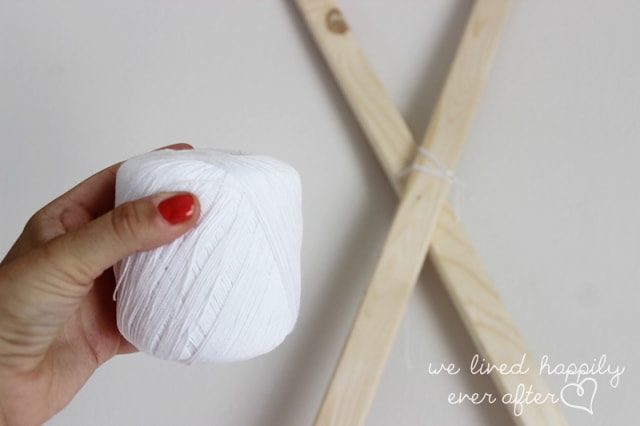
We are starting to create a wigwam frame. You can collect all the bars together and connect them, as shown in the diagram. Then you need to arrange them with the same interval. 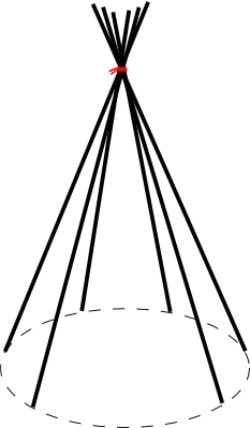
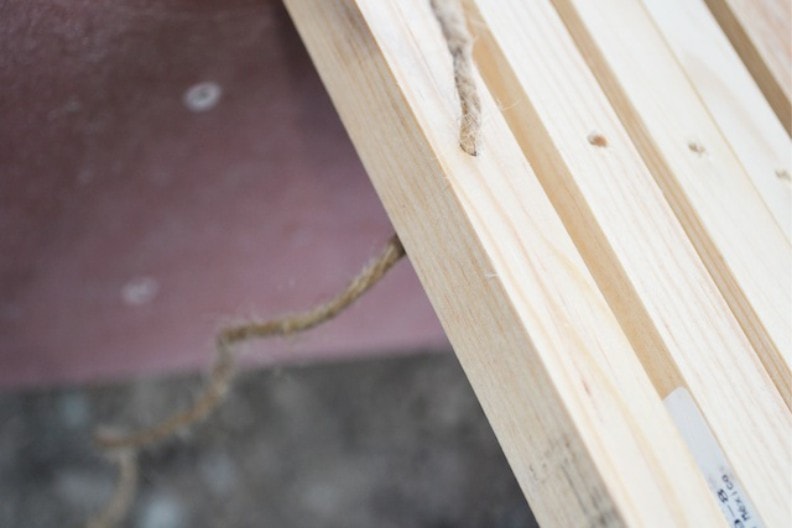
The second method is a bit more complicated, but reliable. To do this, we make a hole in each stick and link them together, as shown in the photo. 
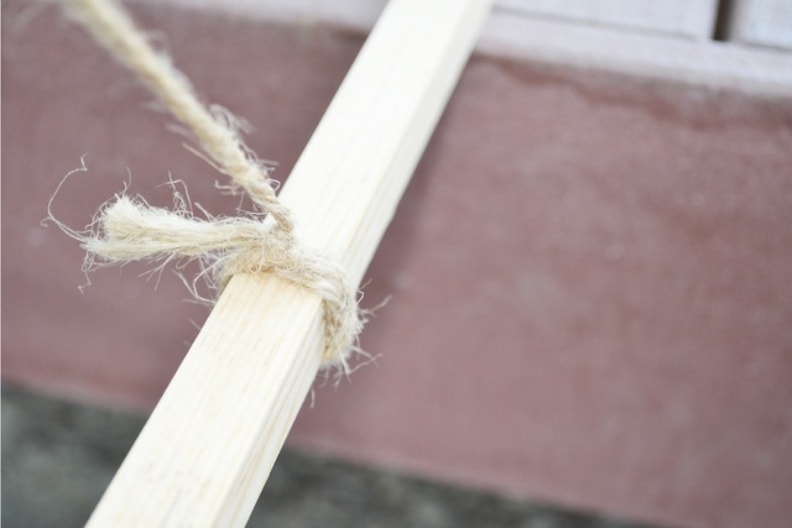
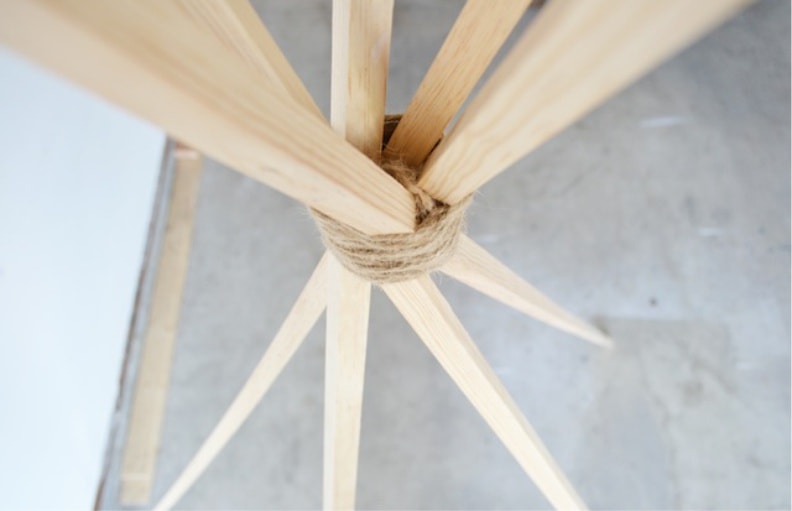
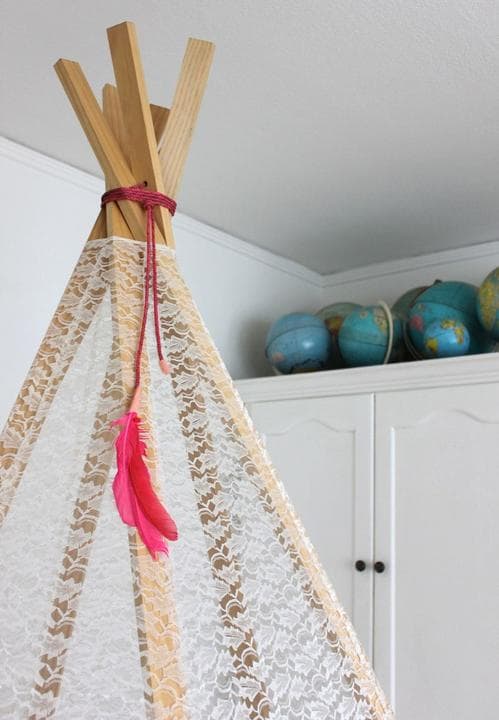
We raise bars as wide as possible, forming a cone. Several times we wind the top of the frame with a rope. 
Getting to the formation of a canopy. To do this, fold the fabric as shown in the diagram. 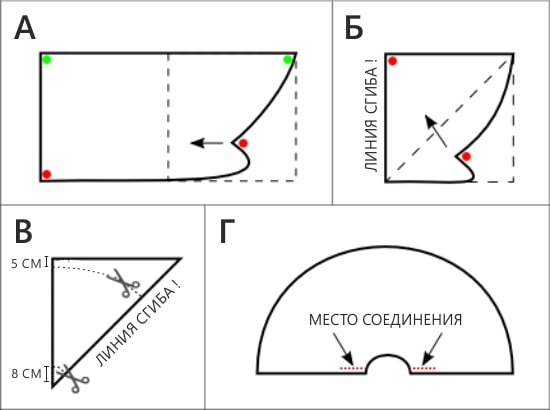
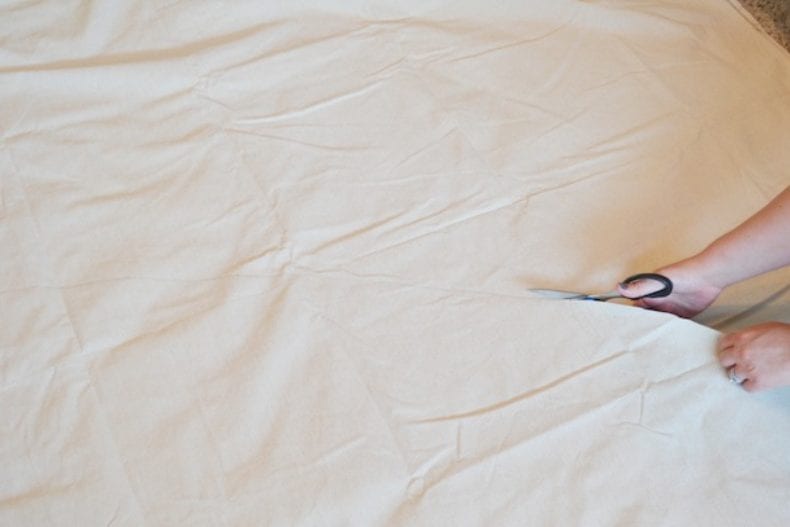
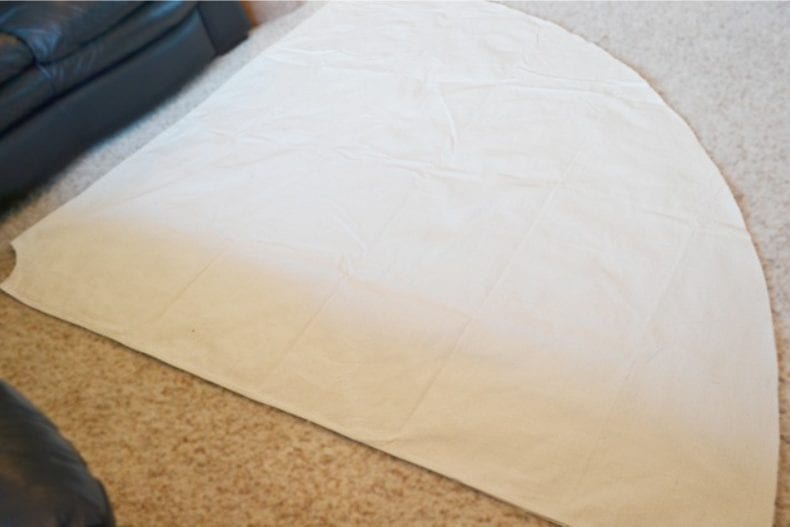
Gently cut out the fabric according to the scheme and cut off the unnecessary parts. 
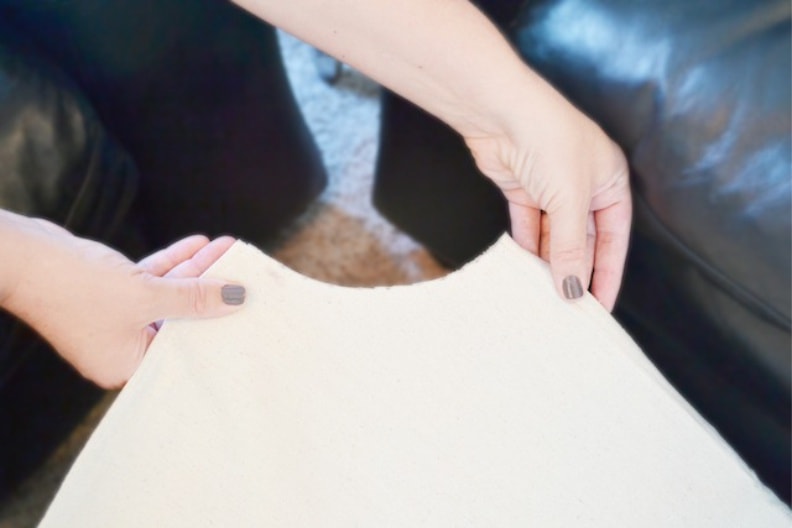
We wrap the frame with the fabric with the wrong side out. We connect the ends with pins and mark the places where the fabric comes into contact with each stick. We remove the fabric and sew ribbons or pieces of twine from the seamy side on the marks.
Getting to the processing edge. To do this, bend it twice and sew. If desired, you can iron. But you can skip this step if you want to add a touch of carelessness to the design. 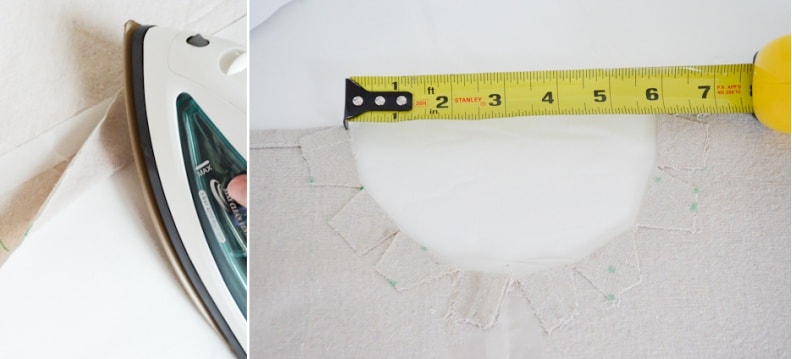
Attach the grommets along the edges of the fabric and just lace them with a tape or a long lace. 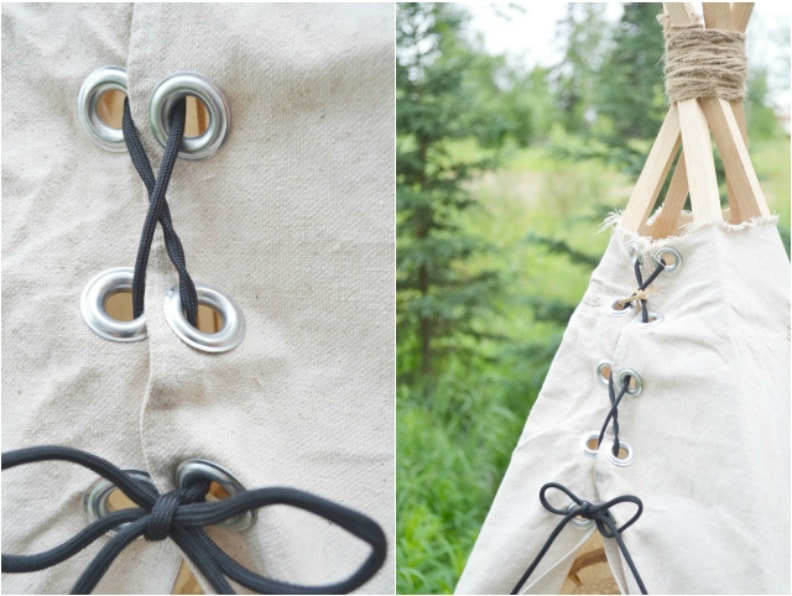
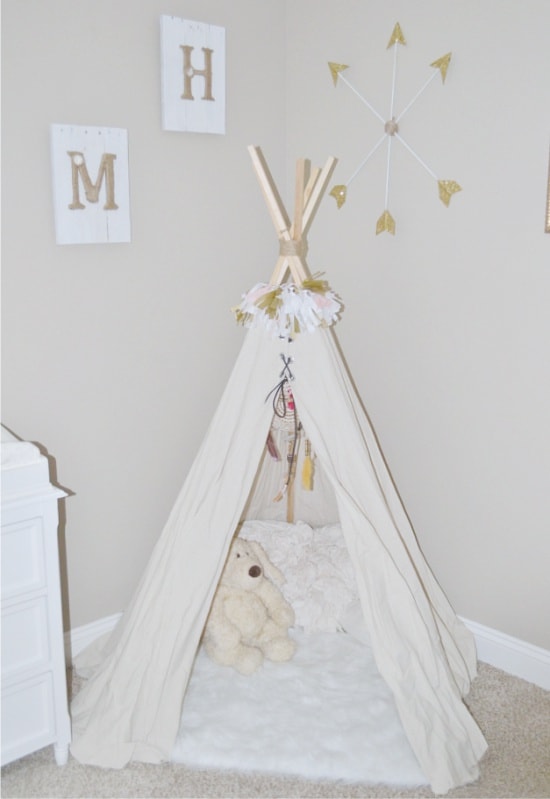
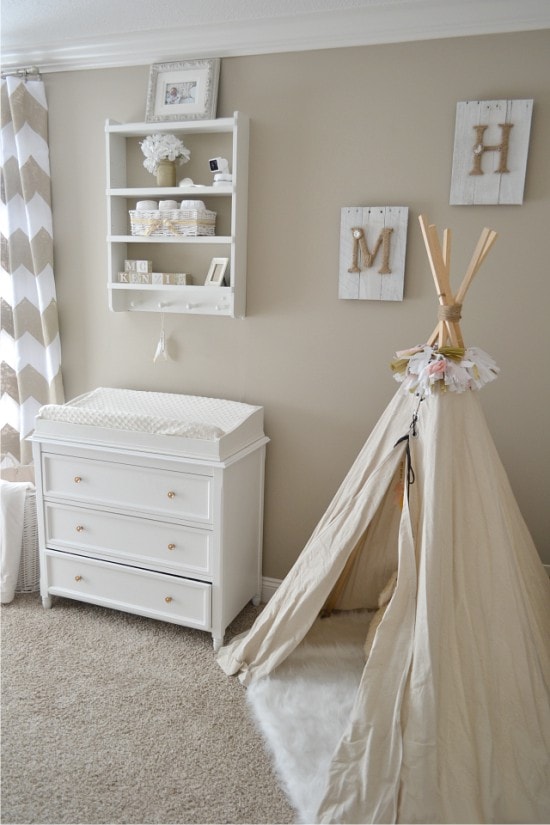
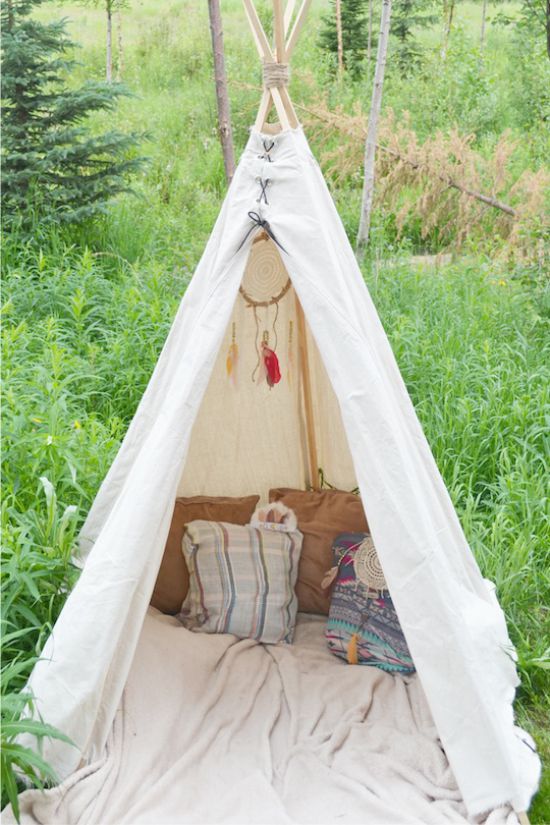
We cover the wigwam with a cloth, fasten the top and slightly fold back the fabric to make the doors. Inside we put a fluffy rug and pillows. If desired, you can add another additional decor. 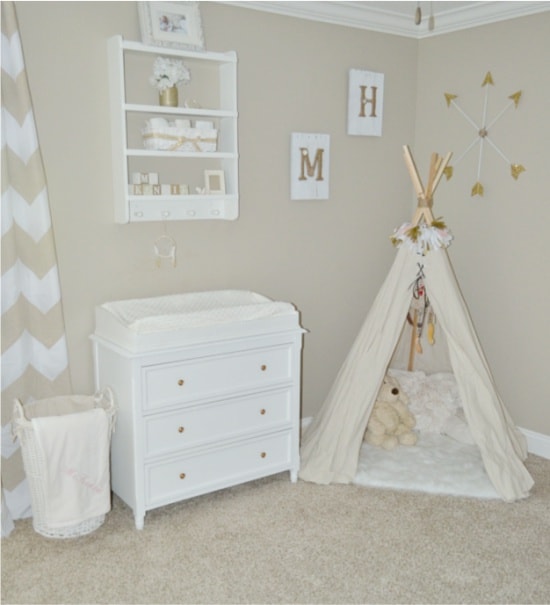
Wigwam for a girl

It will take the following:
- tulle with a small pattern for the bottom;
- tulle with large pattern for the upper part;
- wooden slats - 6 pcs .;
- elastic;
- ruler;
- scissors;
- drill with a drill;
- thick yarn or ribbon;
- rope;
- pencil;
- buttons;
- pins;
- thread.
We apply markings on each rail and make a hole. Pull the rope through them and tie a knot. Install the frame and adjust the position of each rail.
We decompose the tulle with a large pattern. Cut off a piece of triangular material with a clipped apex.
We fold the top and bottom blanks and fix them with pins. Sew them together. Repeat the same with the rest of the blanks. We fold large triangles with long sides, we connect them with pins and sew.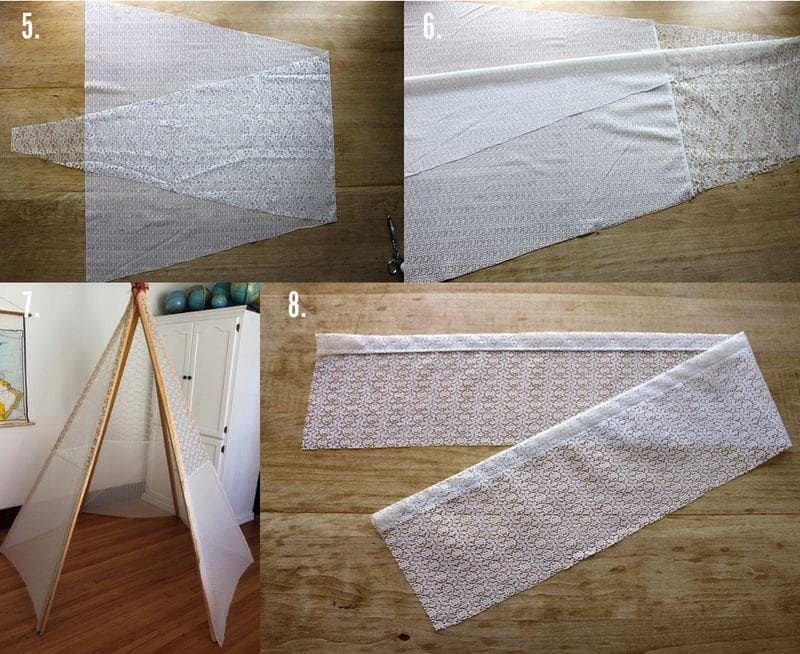
We put an awning on the frame and fix it with buttons. Cut off a small piece of tulle in height to make the wigwam threshold. One of the sides we bend and sew. We fix the threshold on the frame with the buttons.
Cut out two strips of tulle with a small pattern. Every little tuck and stitch. Fix them on the sides of the opening.
We start to create doors. To do this, we cut out a trapezium from tulle with a small pattern. Tuck each of its sides and flashing. Remove the tent and sew a trapezoid to the top of the opening.
We take six pieces of gum, form rings of them and sew to the edges of the awning. This is necessary in order to fix it on the base. Take four pieces of ribbon or yarn and sew them over the door. Two must be outside, and two inside. Due to this, it will be possible to fix the door in the open position.
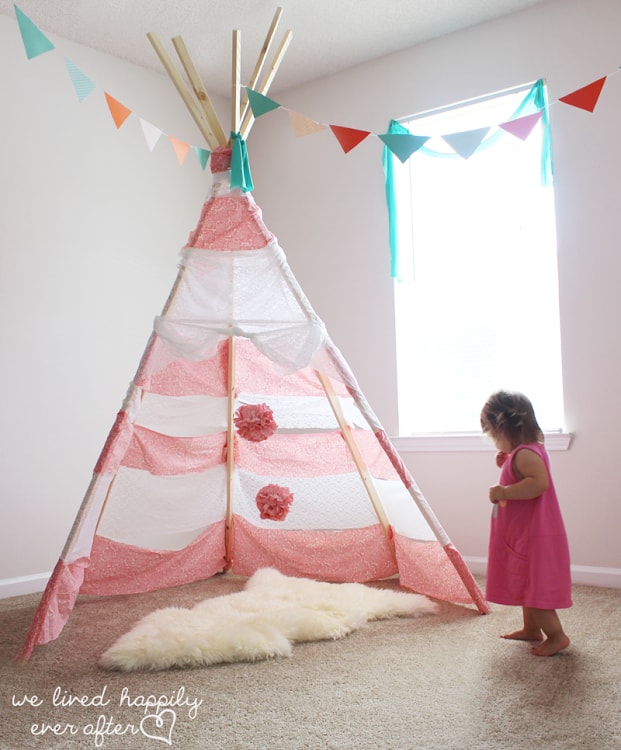
Striped wigwam
Prepare:
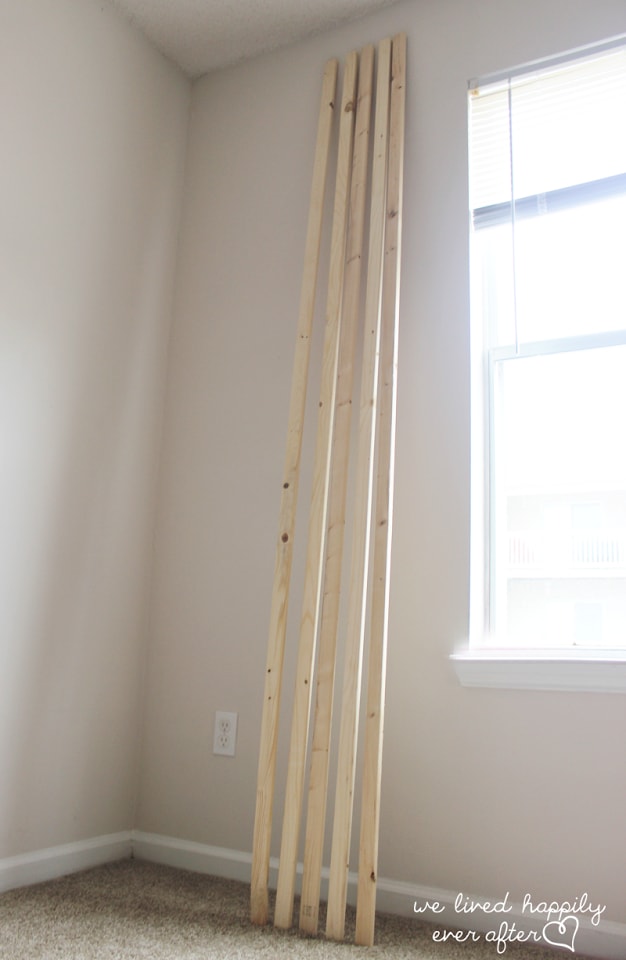
- wooden sticks - 4 pcs .;
- thick striped fabric;
- roulette;
- scissors;
- pencil;
- needle;
- threads;
- rope.
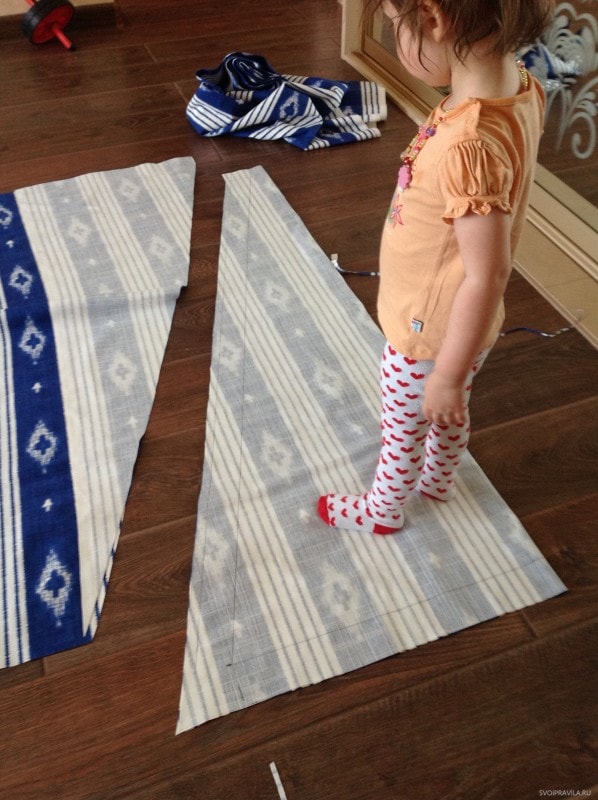
To begin with, we make a tent pattern in miniature.
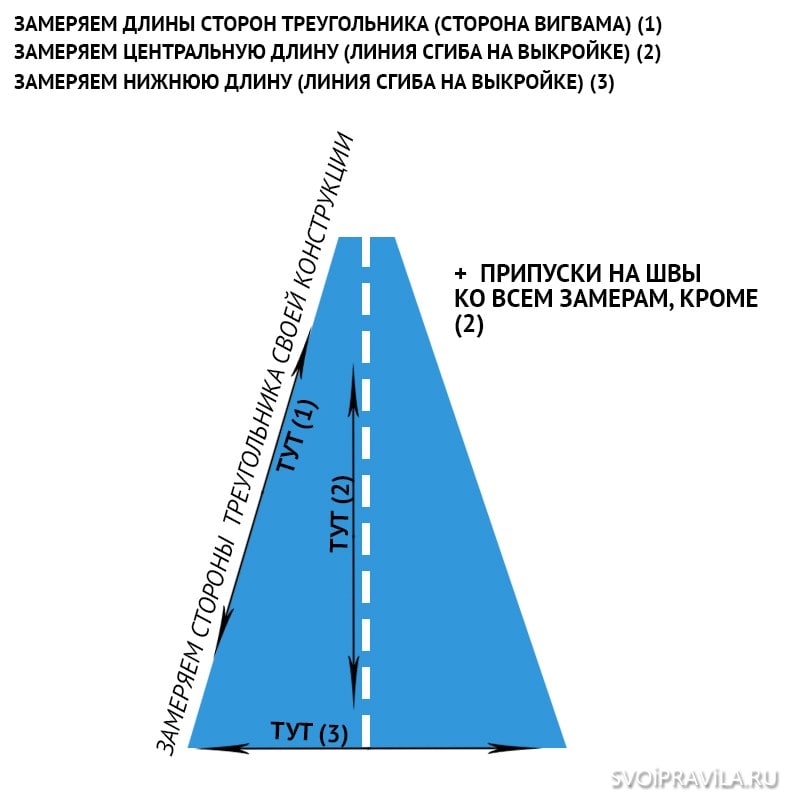
We transfer the pattern to the fabric according to the size of the wigwam. We make four identical parts and cut them. The last cut into two parts in the vertical.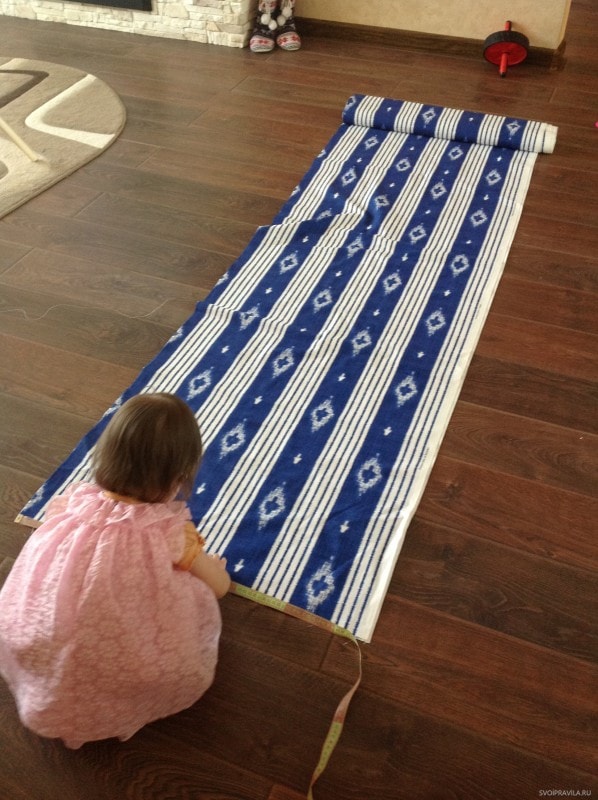
We assemble the construction of wooden sticks and fix it with a rope.
We sew the triangles together, as shown in the photo.
We stroke the tent and lay it on the floor. Draw a line along each seam, retreating five centimeters.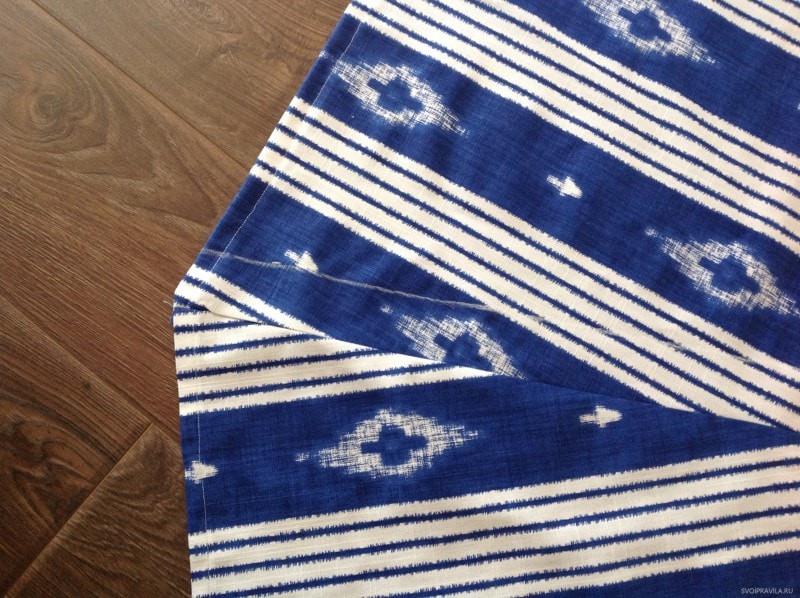
Fold the sides of the awning along the seam and sew. This is necessary in order to make a pocket for a stick.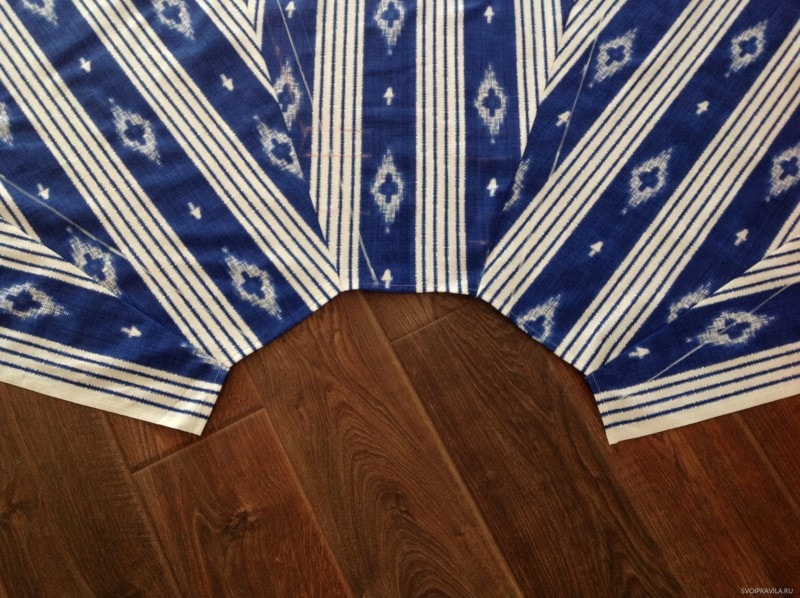
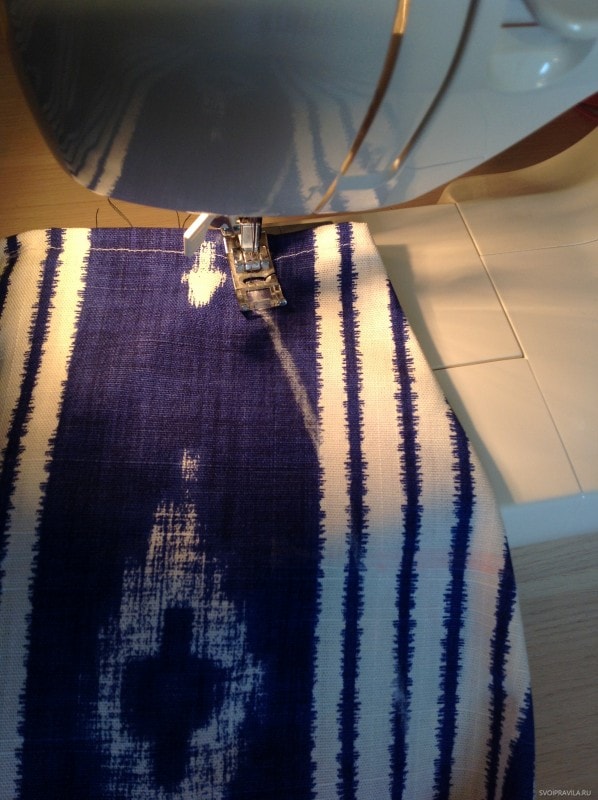
We pass each stick into the case and collect the wigwam. Top fix the rope. If desired, you can decorate it with various flags.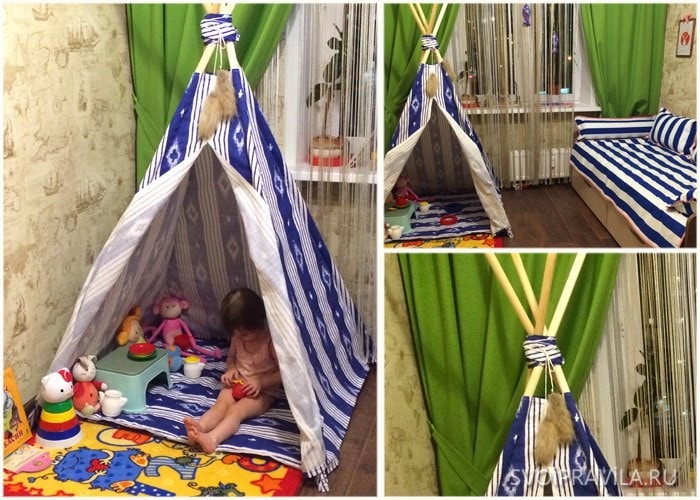
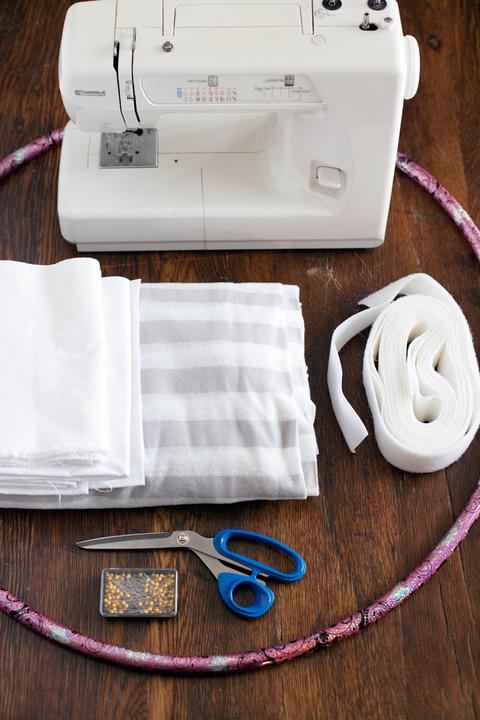
Princess tent
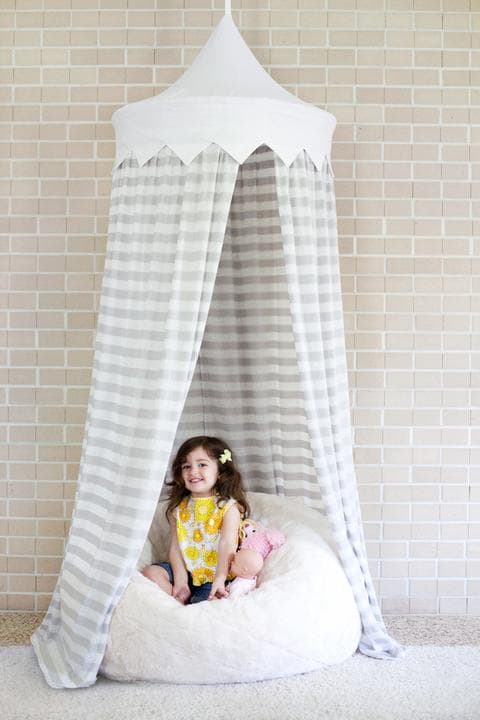
Materials to create a tent:
- Hula Hup;
- fabric for curtains and roofs;
- pins;
- hook;
- Velcro fasteners;
- marker;
- scissors;
- sewing machine.
If you use a large diameter hulahup, then you will need three strips of cloth, and if you are small, you can take two. We fold them with long sides and sew.
Cut off two strips of cloth for the roof. From paper we make a template and transfer it to the fabric, as shown in the photo. Carefully cut out the zigzag.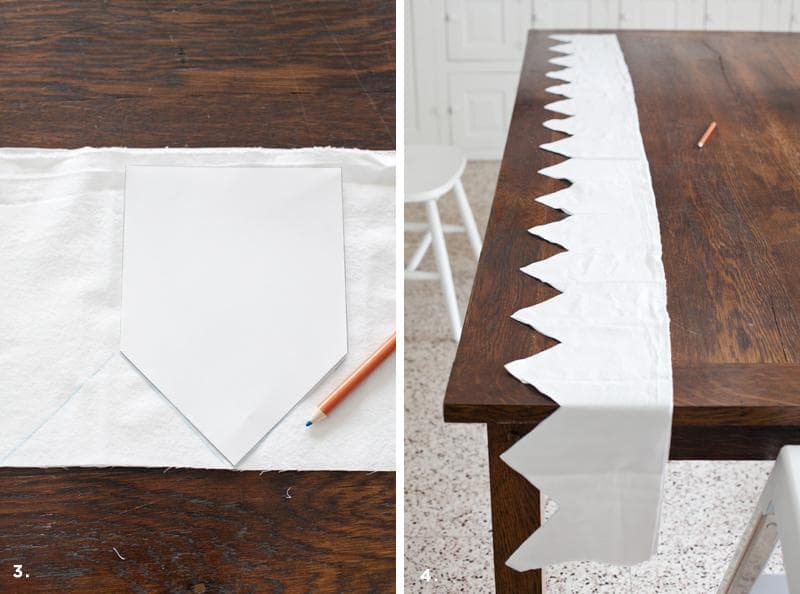
Wrap the blank around the hulahup and note how long it should be.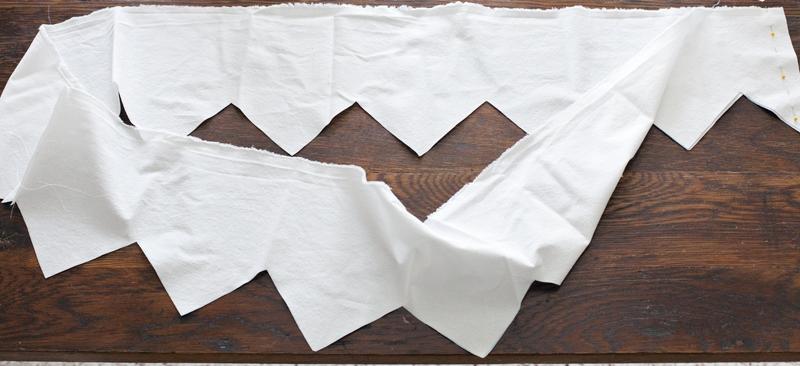
We connect pieces of fabric with pins, as shown in the photo.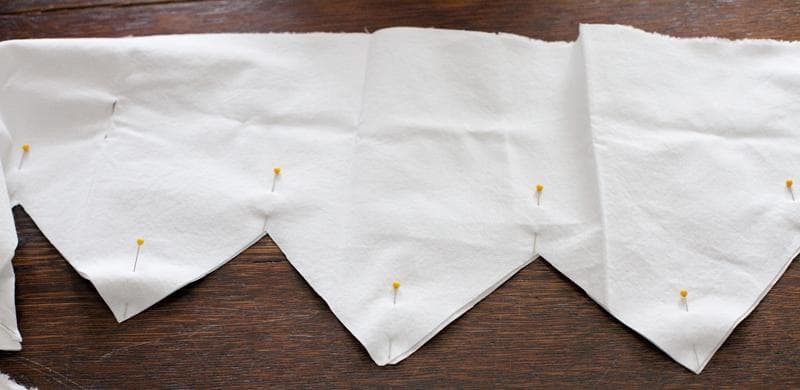
Sew edges with zigzags. Trim the tops of the triangles, and also cut the inner corners to the seam line.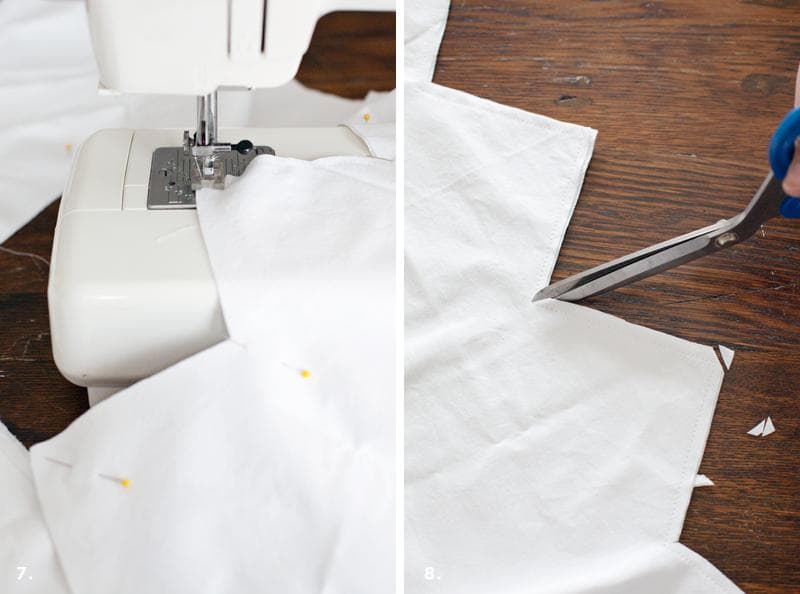
Turning the workpiece and iron it.Sew the upper part of it.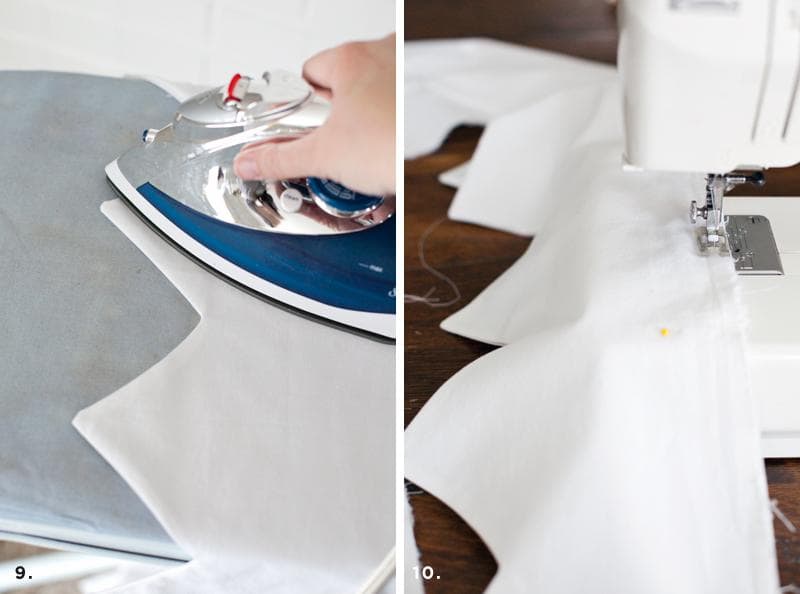
From the fabric for the roof we cut off a long strip. From it we sew a loop on which the tent will hang.
Turn it around and iron.
Cut eight triangles. We fasten four blanks together and sew them. Do the same with the rest.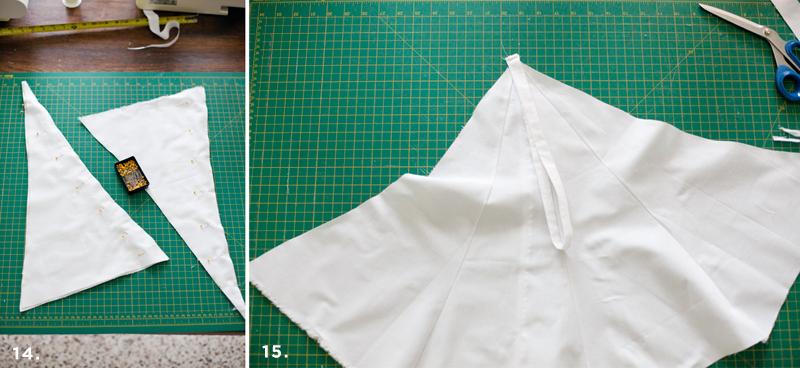
Before connecting two large blanks, fix the loop.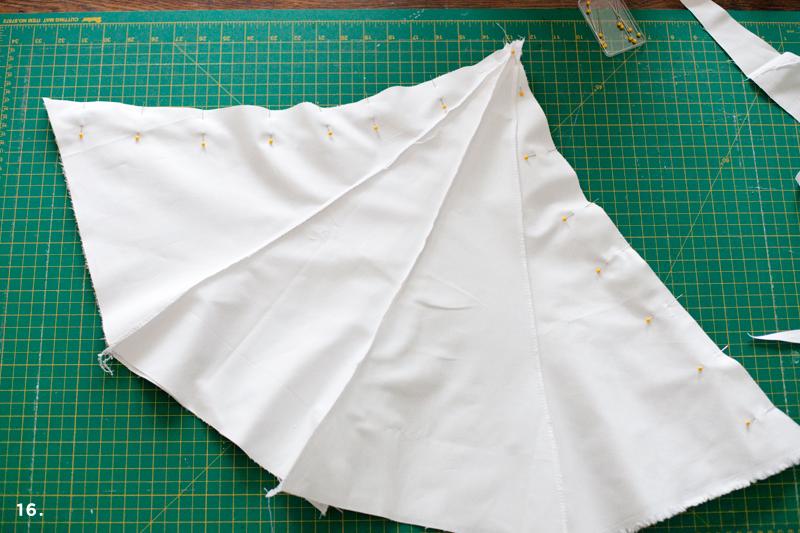
Place the hula hoop over the dome, cut off the edges.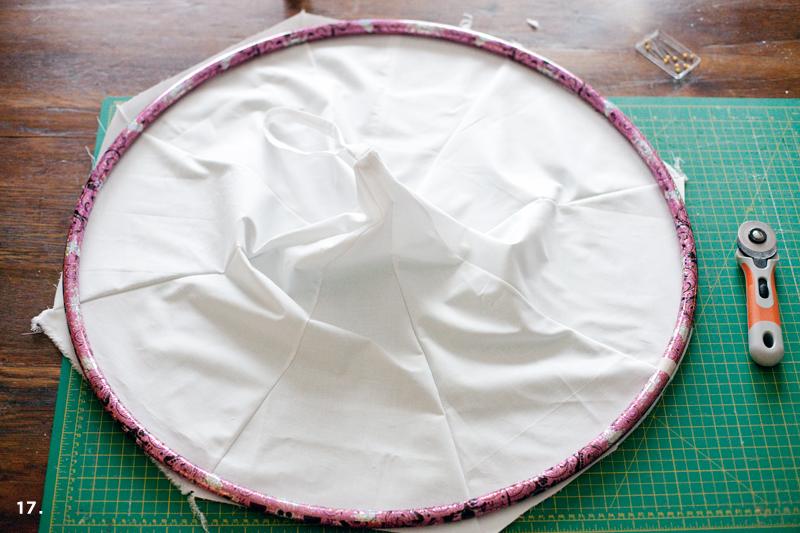
Sew a ribbon with flags to the top of the striped fabric.
On the inside at the junction of the curtains and the roof sew Velcro.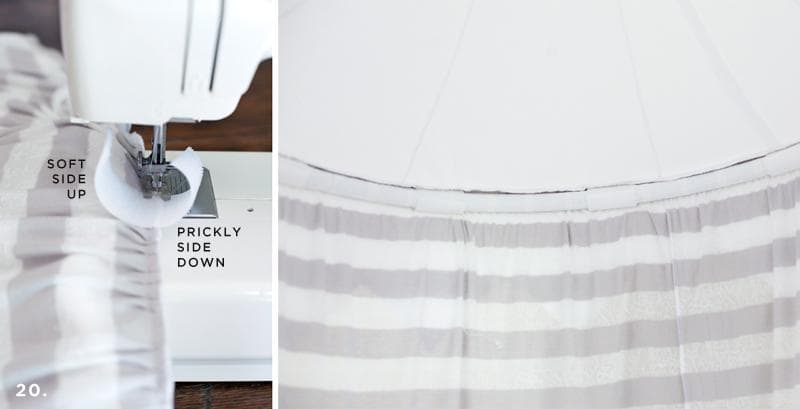
Fix the hook with a tent on the ceiling! Luxury tent for a real princess ready.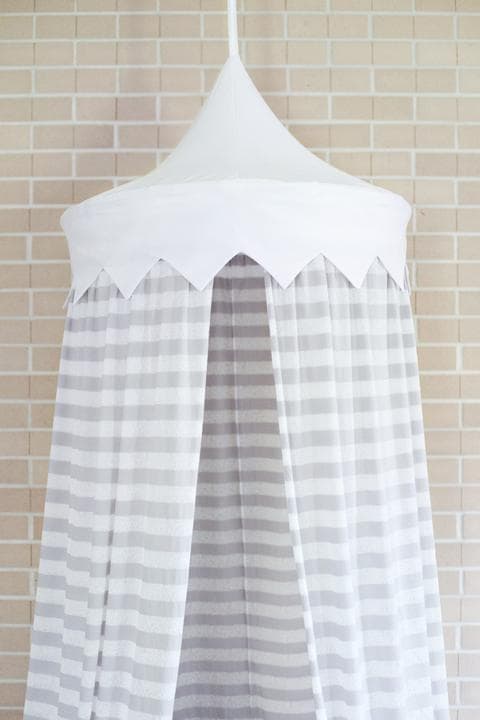
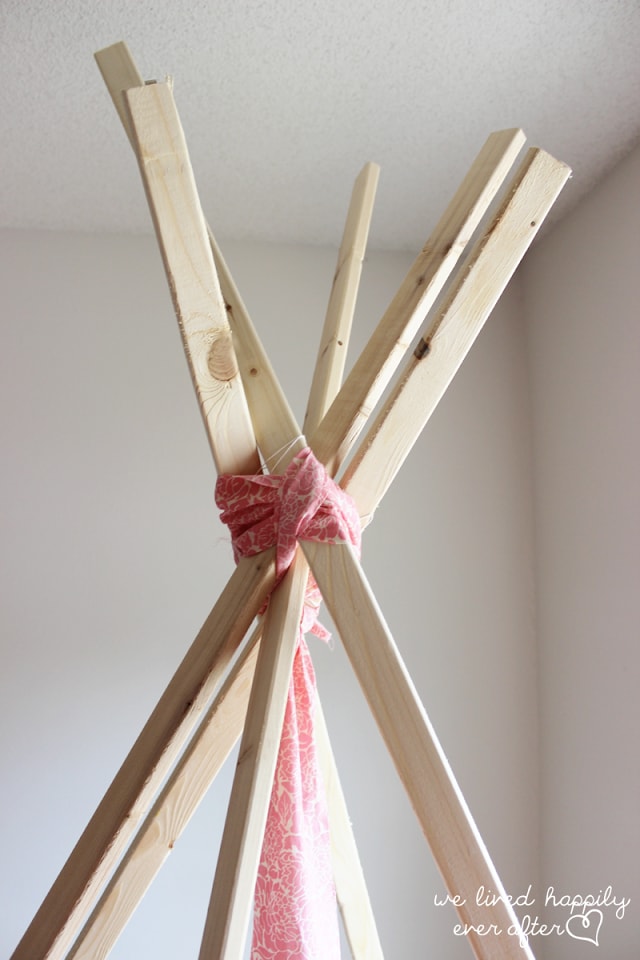
Pastel Pink Wigwam
Prepare:
- slats - 5 pcs .;
- twine;
- buttons;
- pieces of cloth;
- scissors.
 Cross two slats and fix with string.
We join two more slats, then we connect the whole structure and firmly fix it with a string. 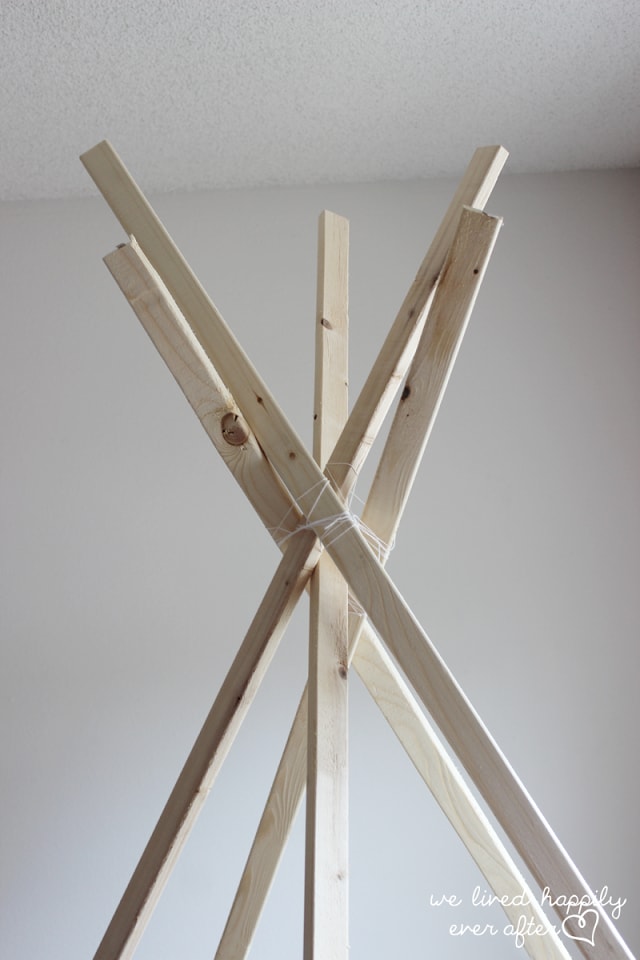
Cut off a long strip of fabric and additionally fix the base of the tepee. 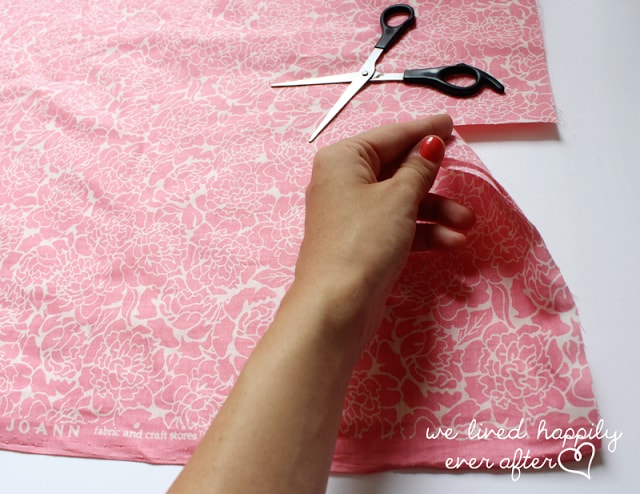

We fix a piece of cloth with the buttons. 
Alternately attach to the rails different pieces of fabric. You can alternate them to the awning looked more original. 
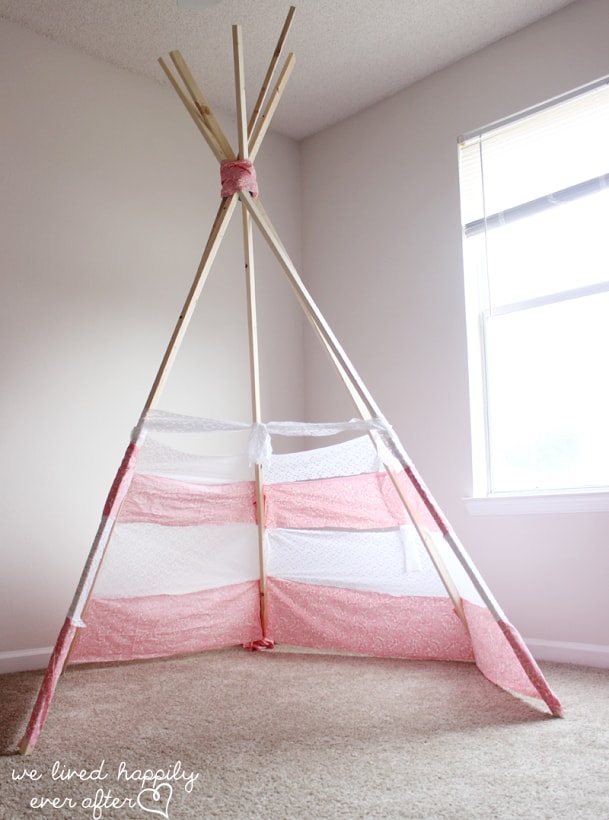
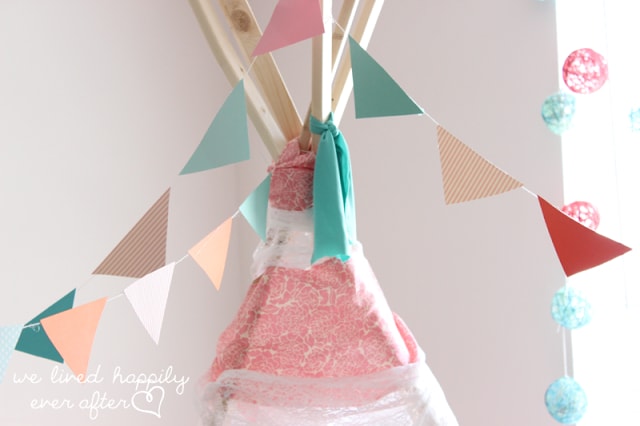
If desired, you can decorate everything from the inside by adding beautiful pillows, volumetric flowers, etc. Outside, multicolored flags will look very beautiful. 
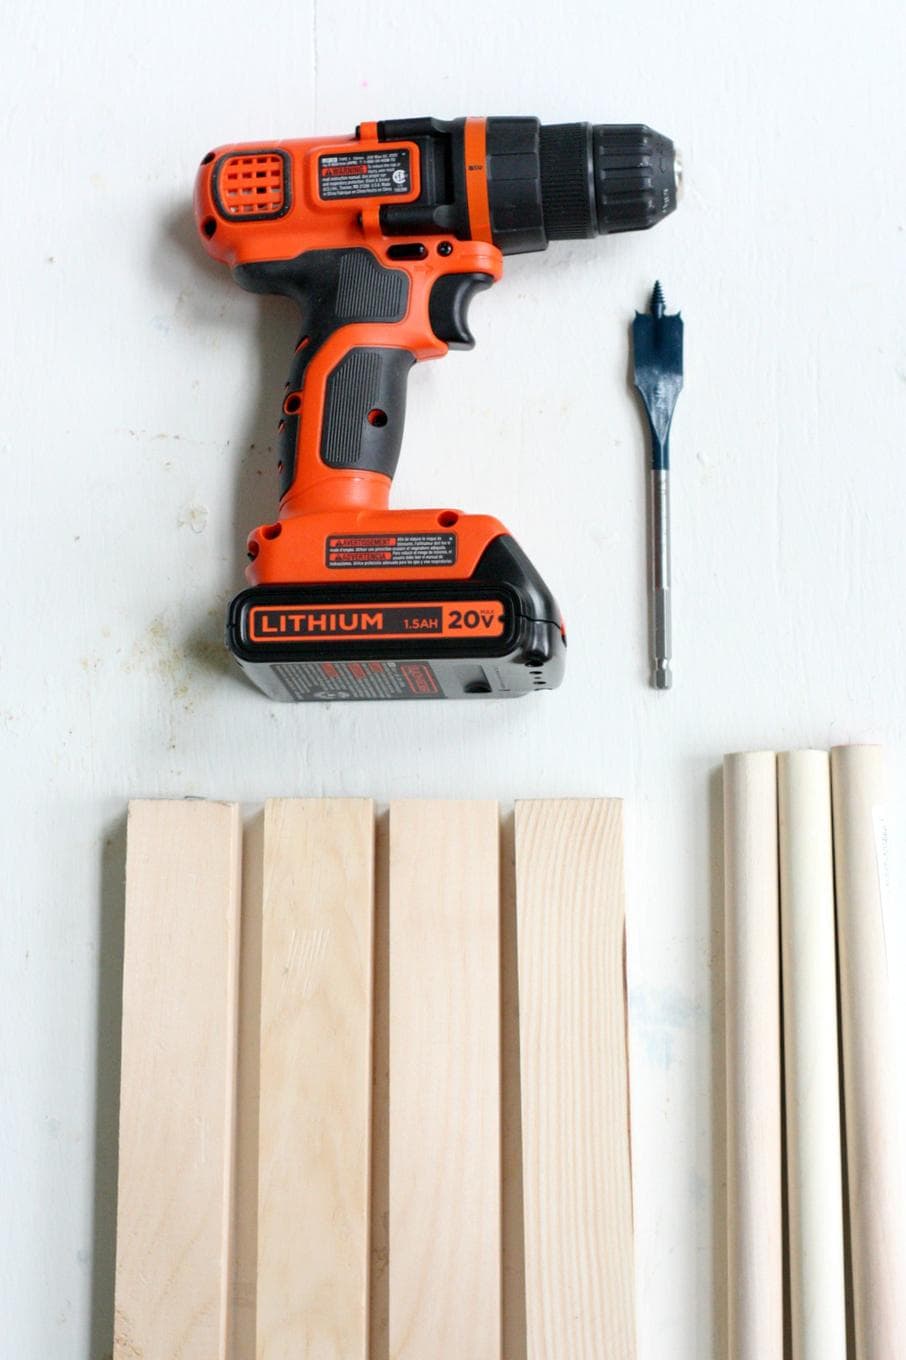
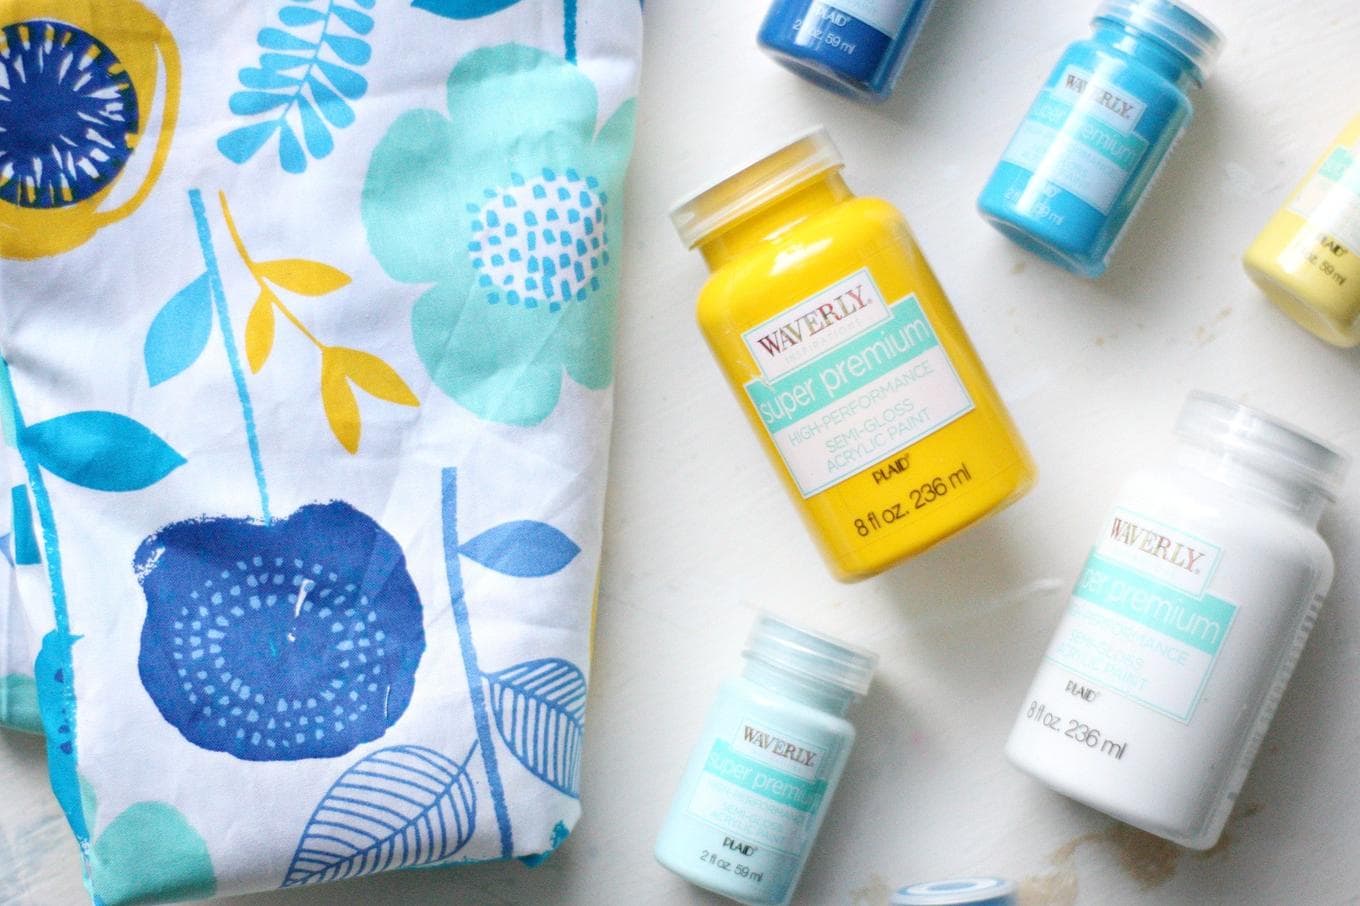
Bright tent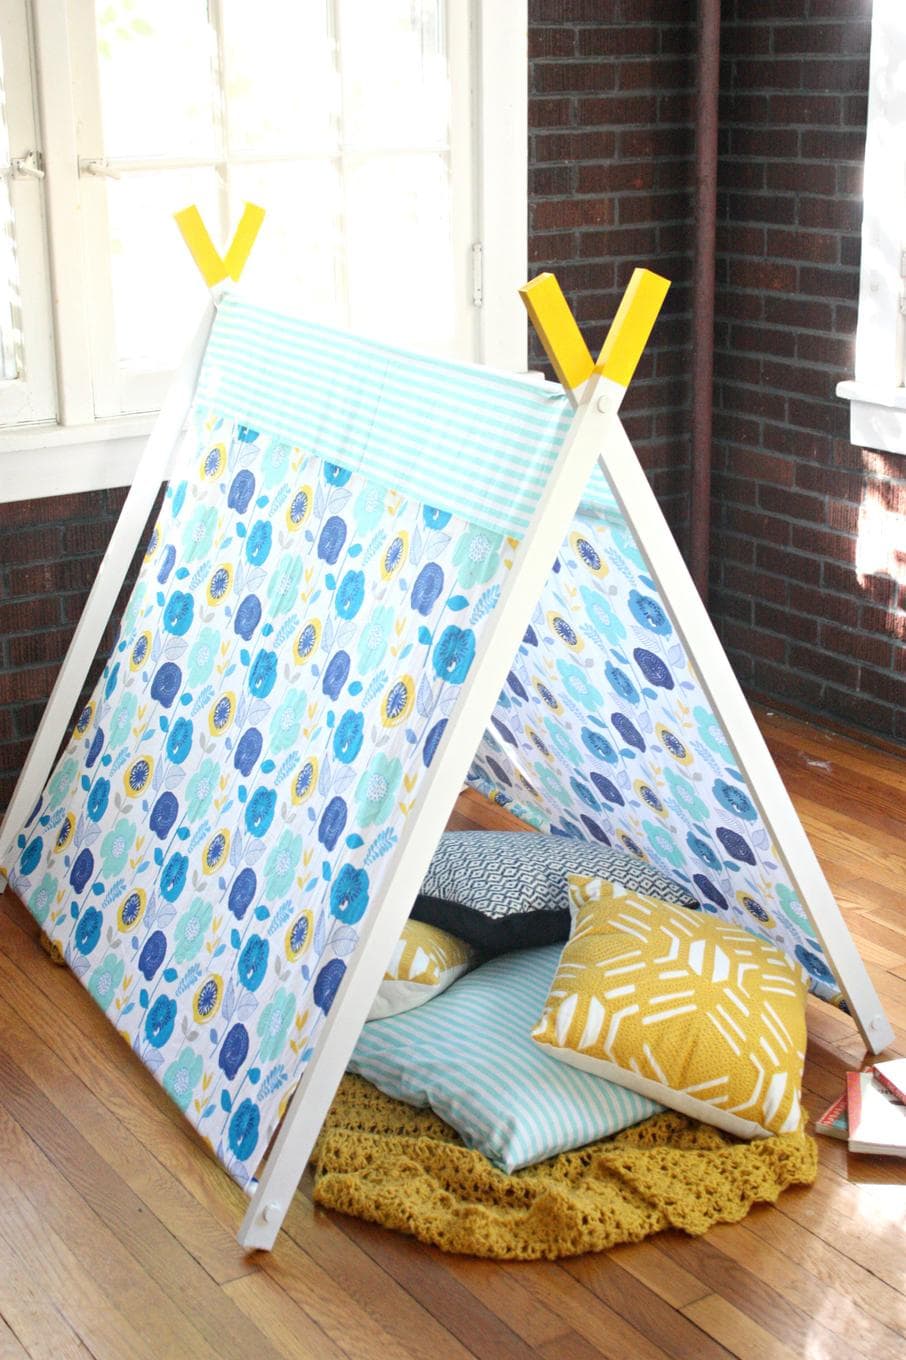
We will need:
- wooden poles - 3 pcs .;
- wooden slats - 4 pcs .;
- paint white and yellow;
- bright fabric;
- brushes;
- glue in the gun;
- drill;
- sewing machine.
On each rail make small holes on one and the other side.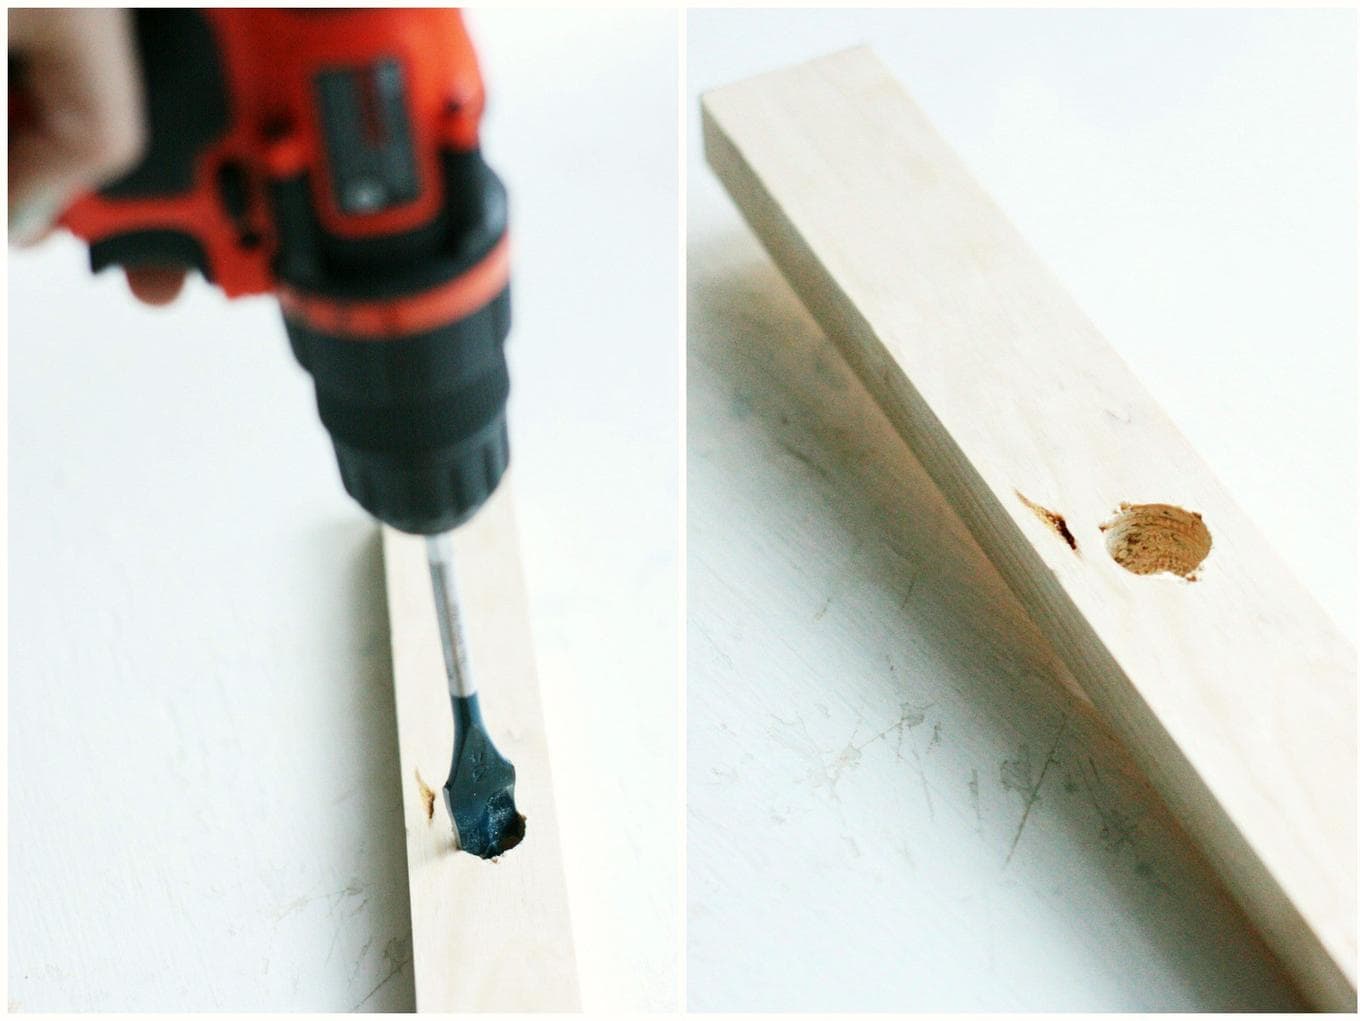
Paint the slats with white paint and leave to dry completely.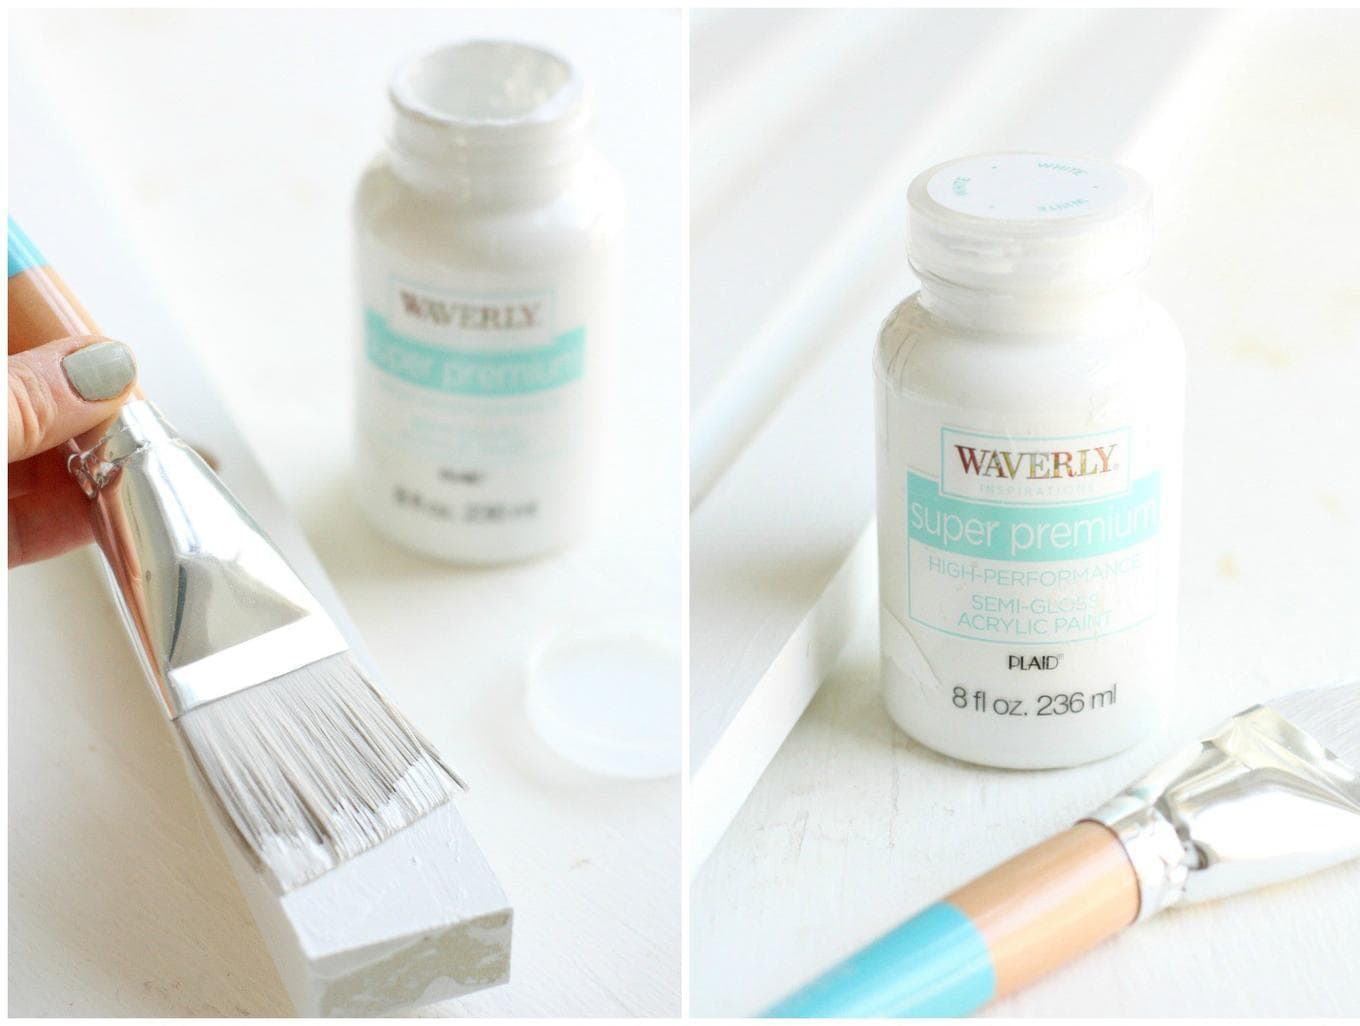
Yellow paint paint the ends of the rails.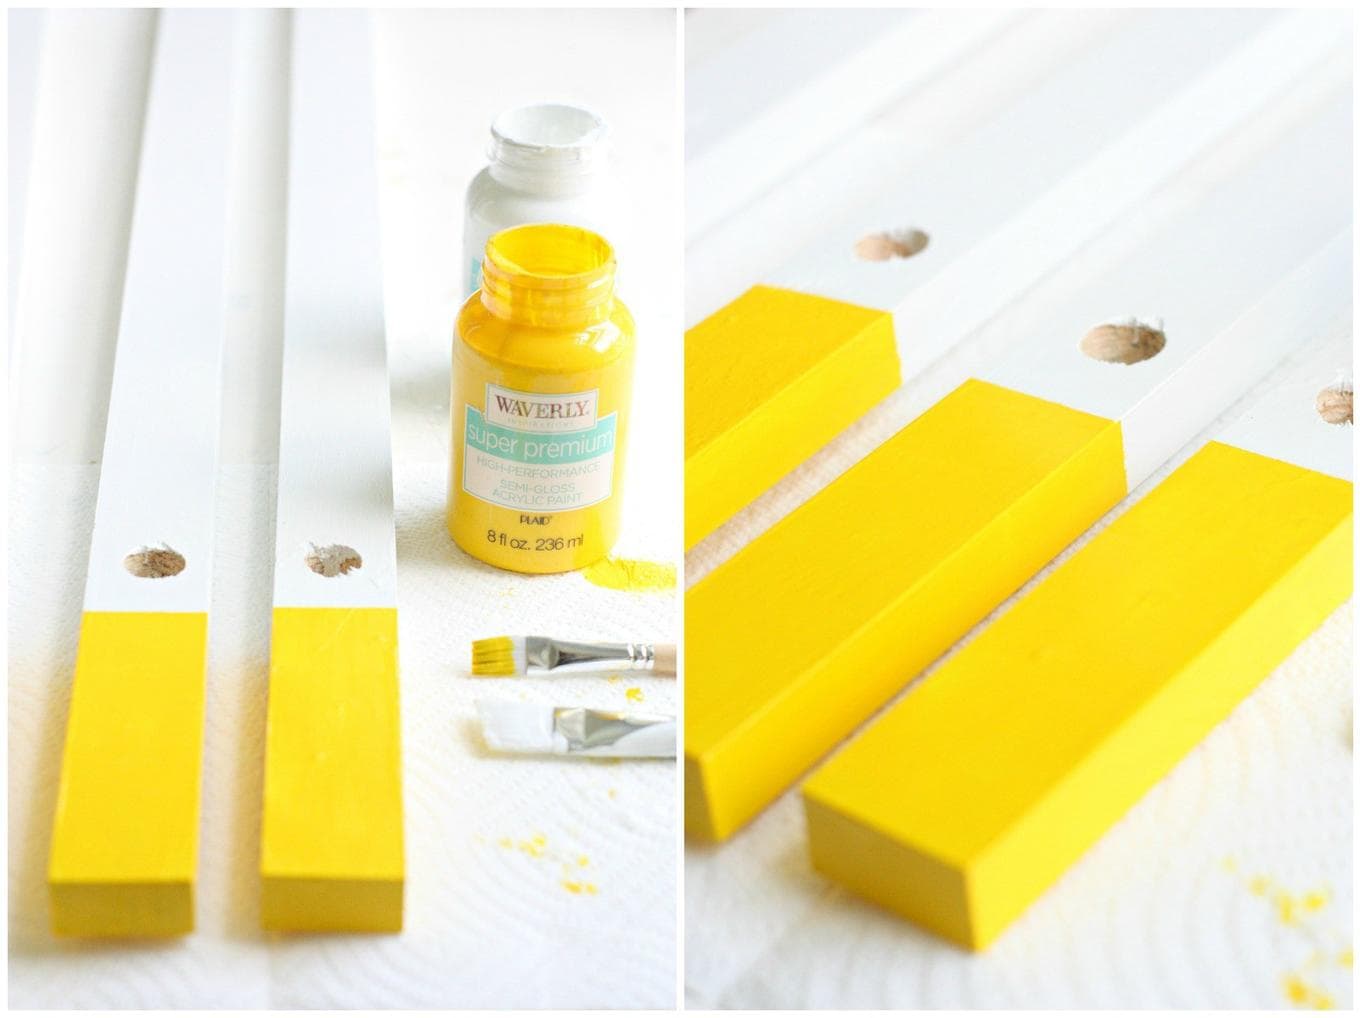 Insert one pole into the bottom holes of the rails. We glue the edges of the awning to them and fix them so that the fabric is stretched. Beautiful bright tent ready!
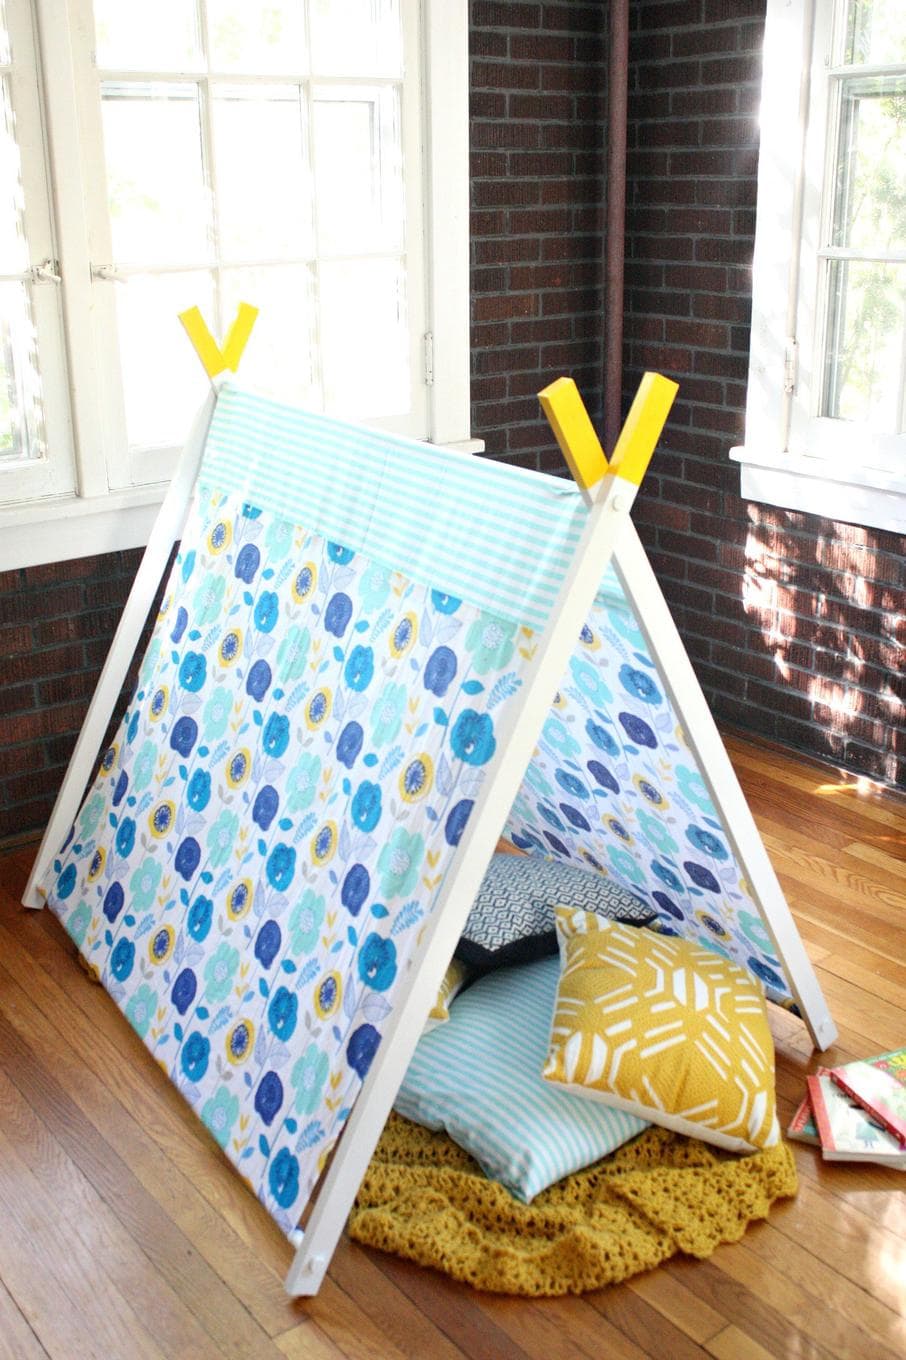
As you can see, everyone can really make a beautiful tent and a wigwam. Use any of the presented workshops, add your own details and the result will be really worthwhile.


